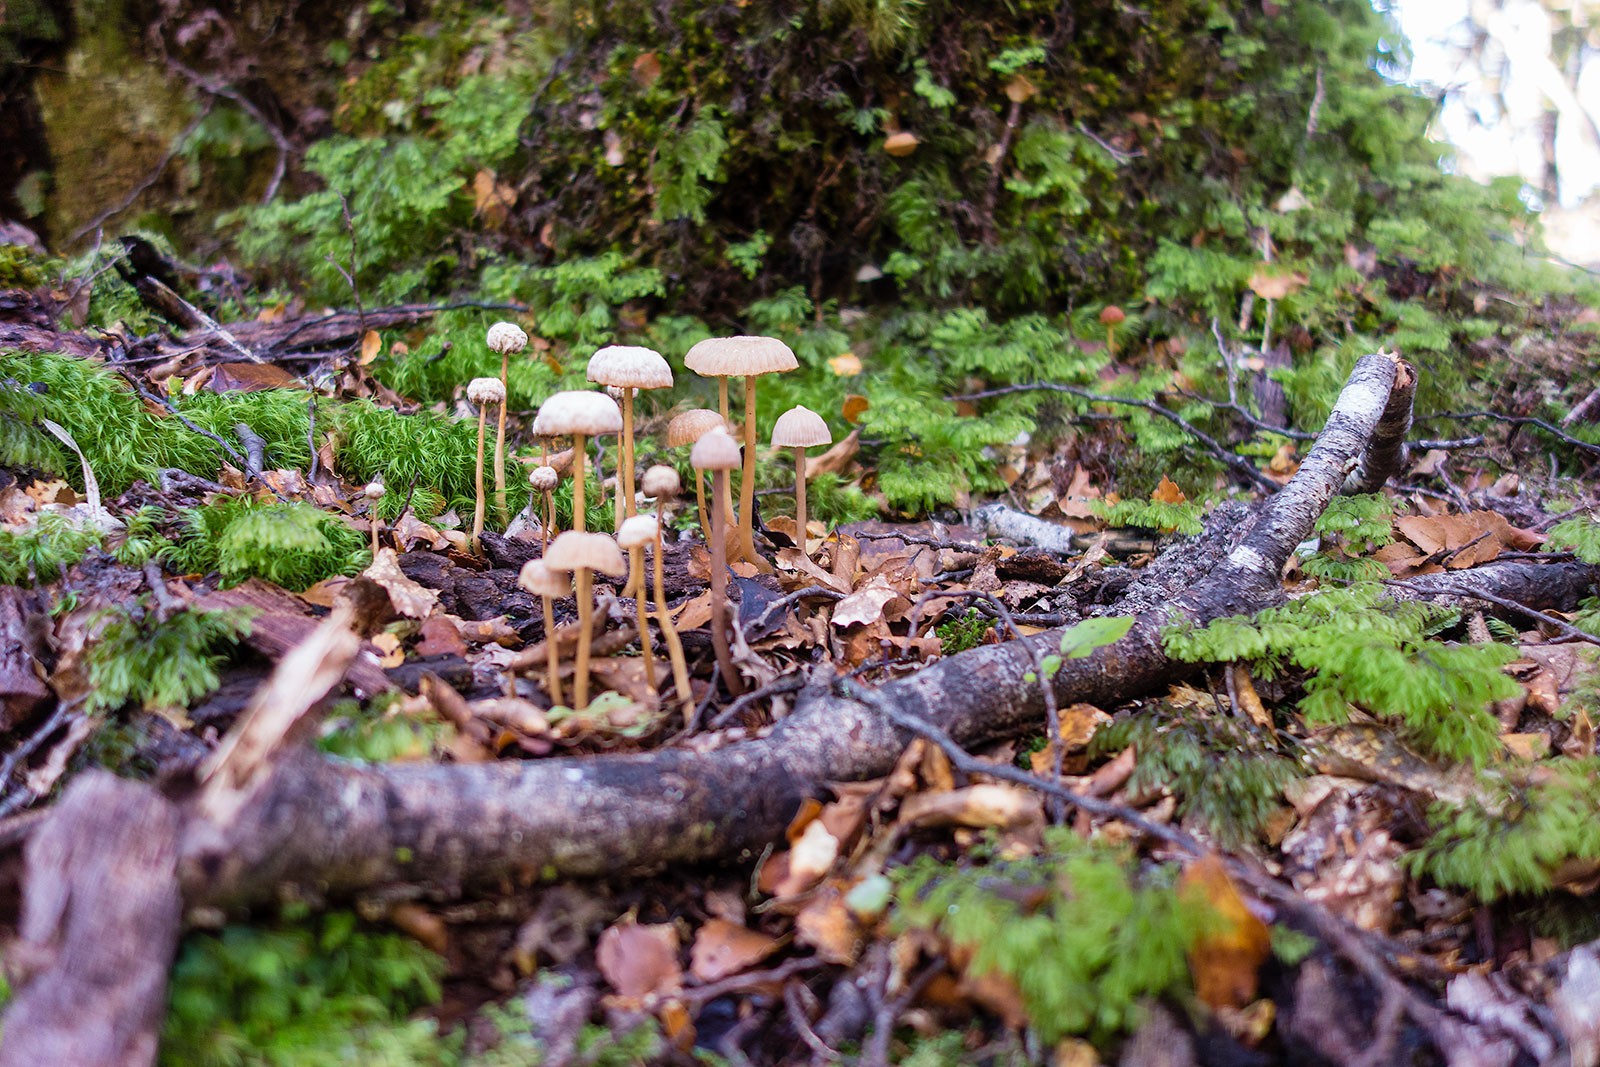
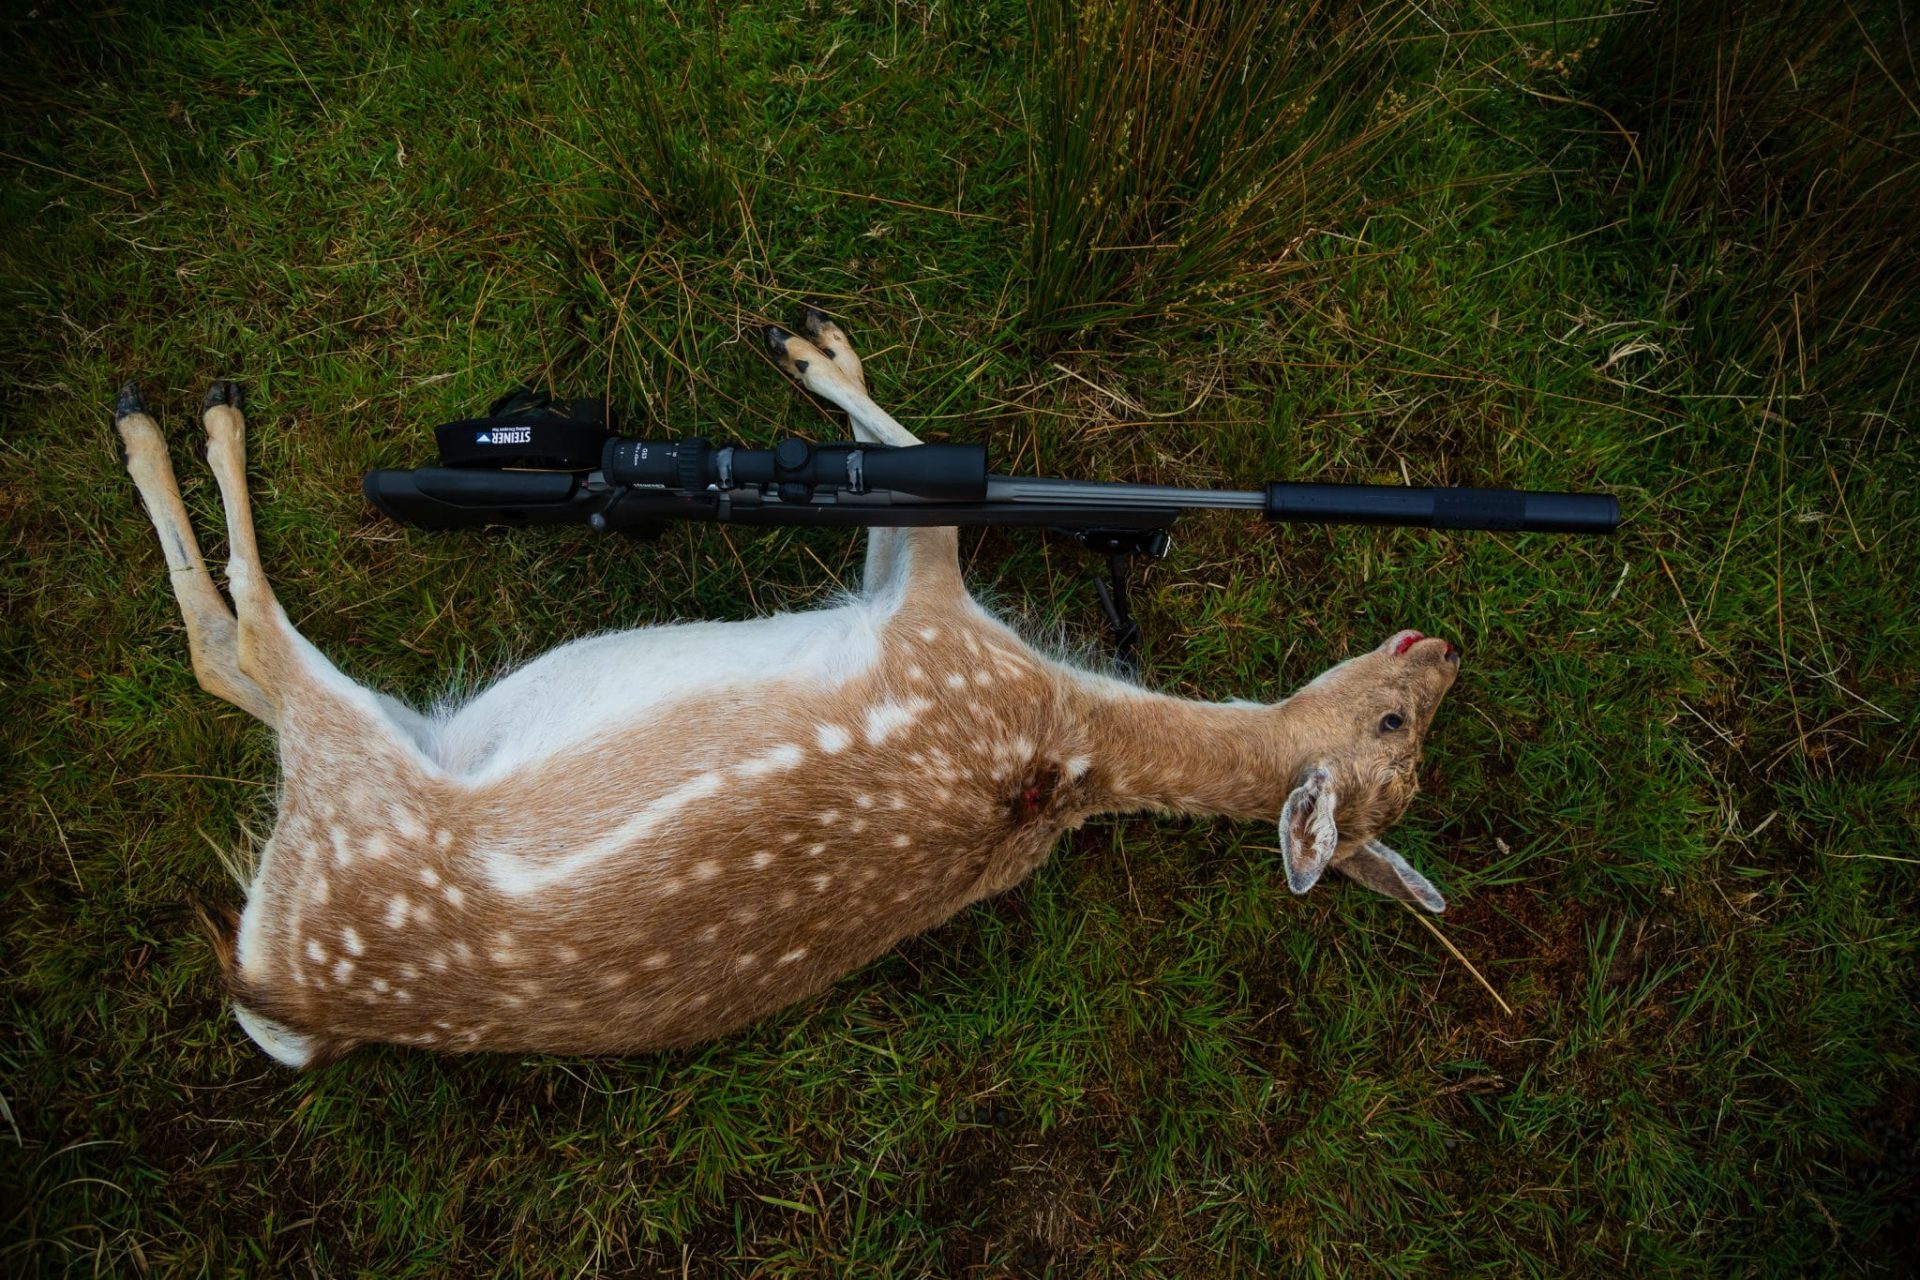
This Week
Kerry, Matt and Graeme have a chat.
Faulty scopes, new shooters, what to zero your rifle at, how to confirm, and more.
Links
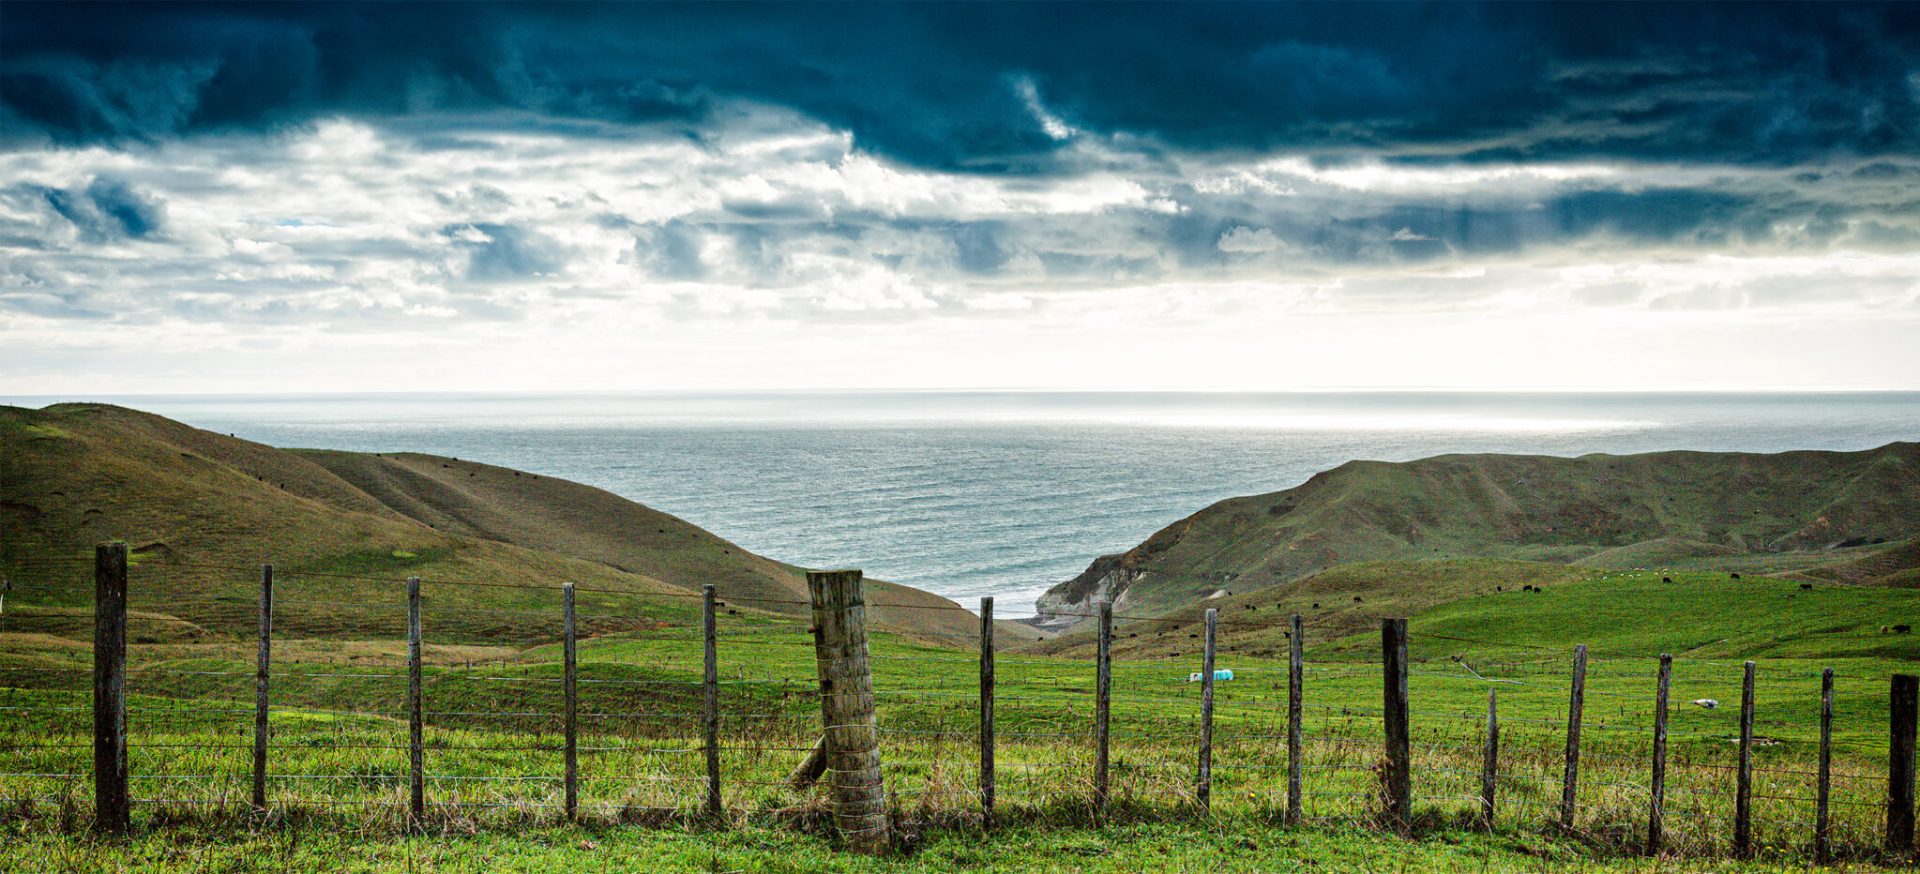
Taranaki Long Range Shooting – Graeme’s Page
[fvplayer id=”61″]
")
Kerry, Matt and Graeme have a chat.
Faulty scopes, new shooters, what to zero your rifle at, how to confirm, and more.
Taranaki Long Range Shooting – Graeme’s Page

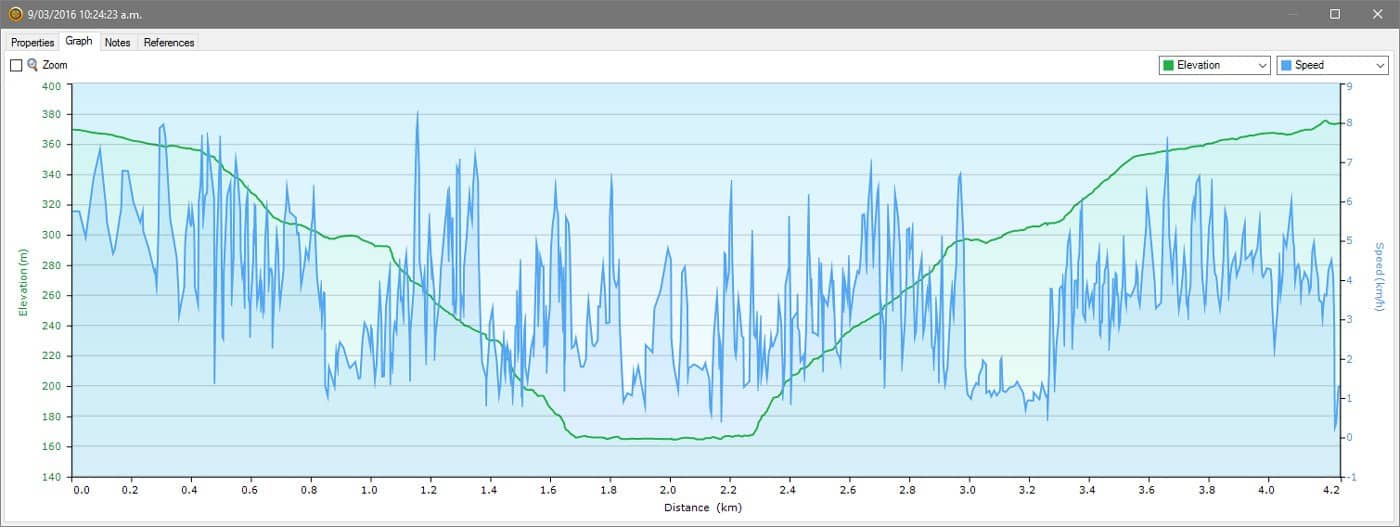
Kerry and Matt running solo.
Taranaki Long Range Shooting – Graeme’s Page
")
Kerry, Matt and Graeme talk about an insane amount of things. Long chat, full of nuggets.
Taranaki Long Range Shooting – Graeme’s Page

Everyone knows Garmin.
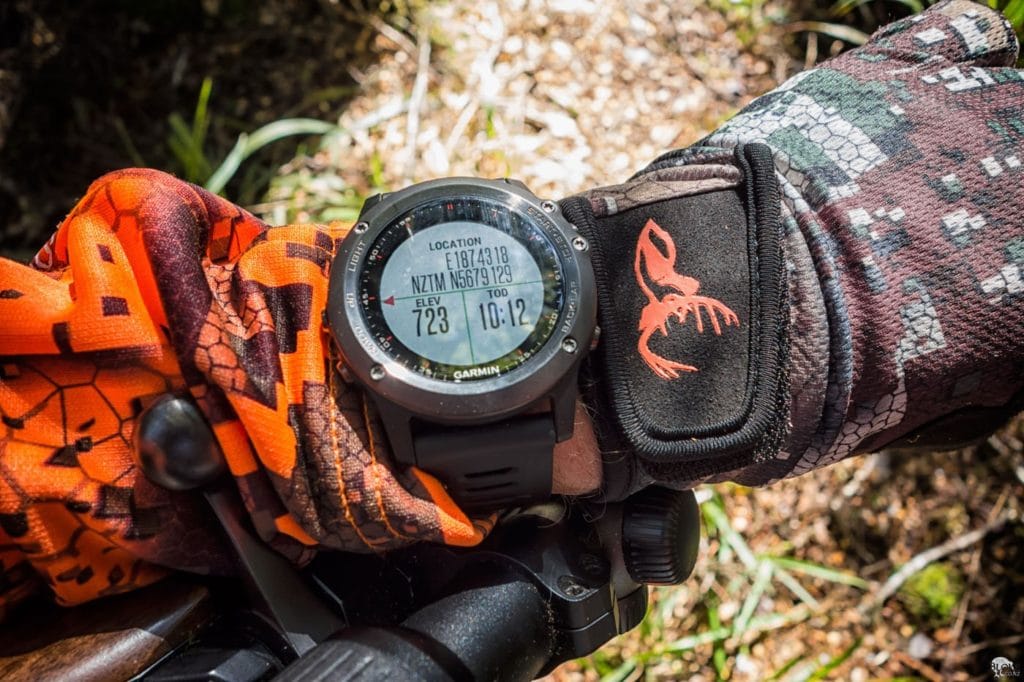


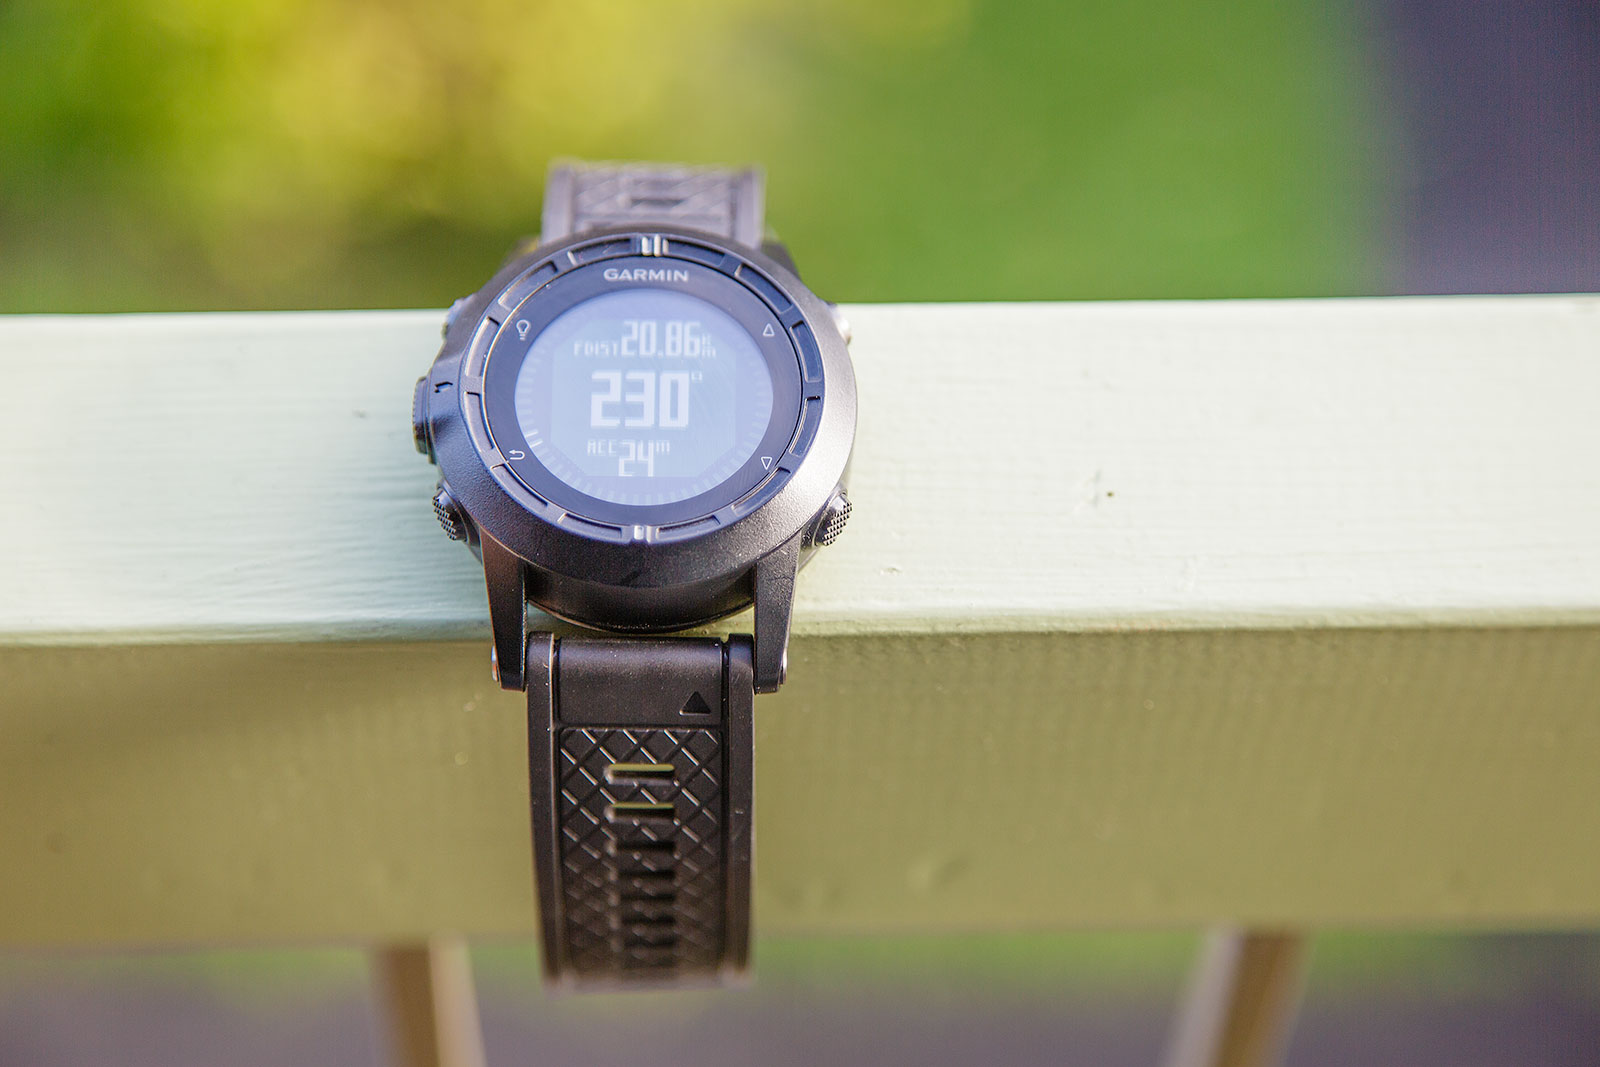
Everyone knows Garmin. Deliverables Continuing a series of articles integrating product and knowledgeRepurposing of images…
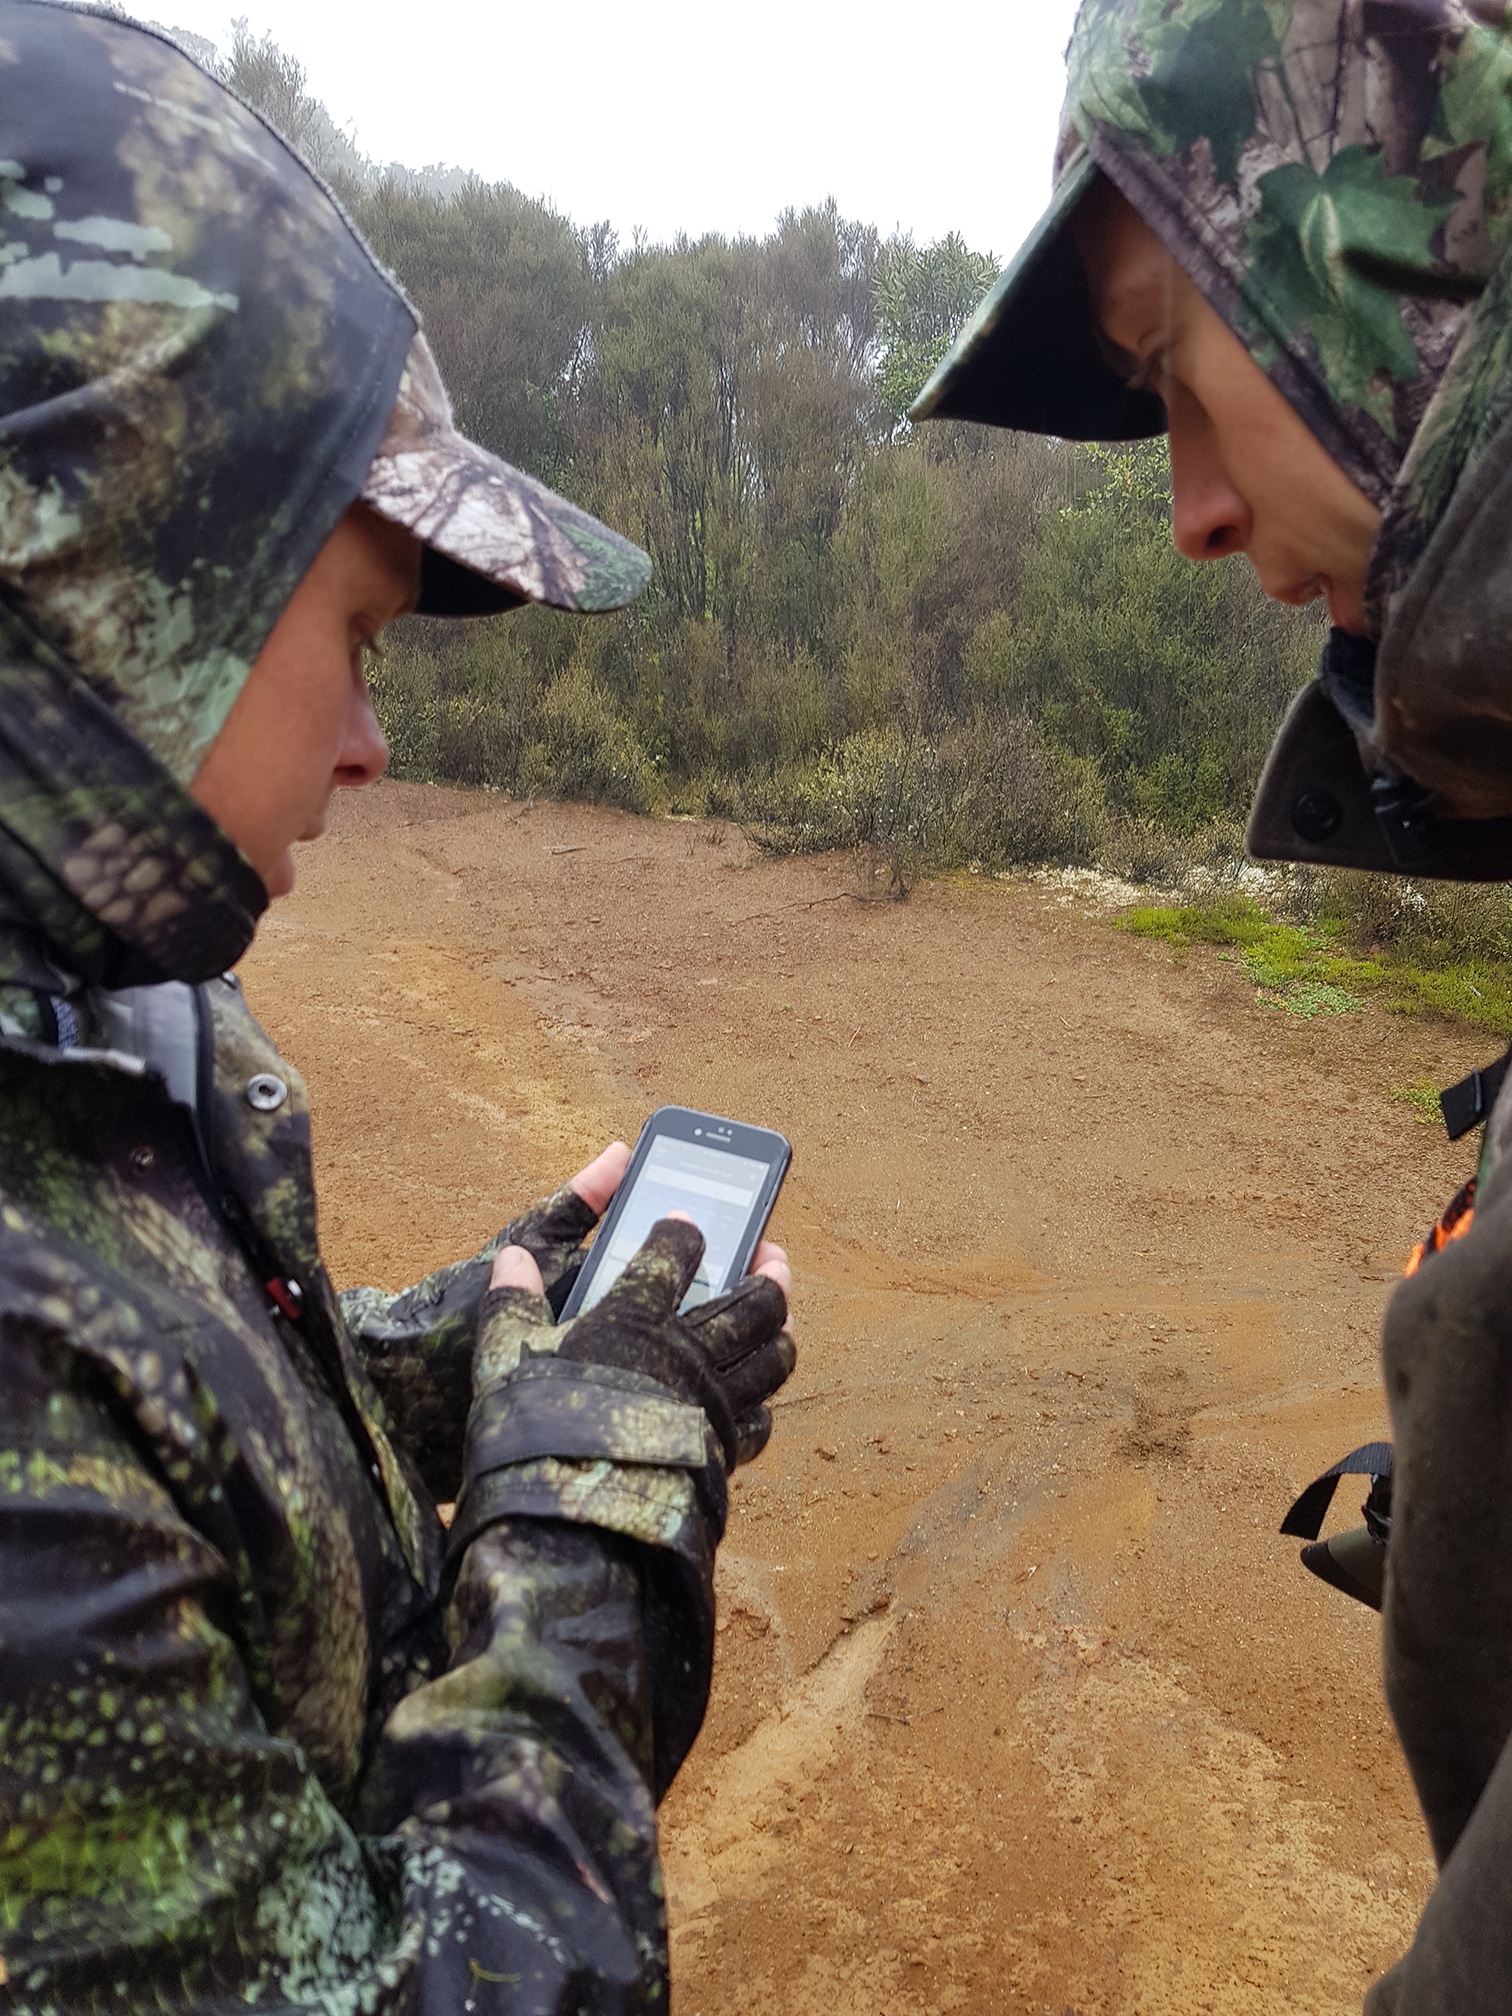
“Hey Bro, was after some advice. I’m looking at getting a GPS for trail running…
I recently spent the weekend up in the Coromandel – actually, amazingly, renting out the…


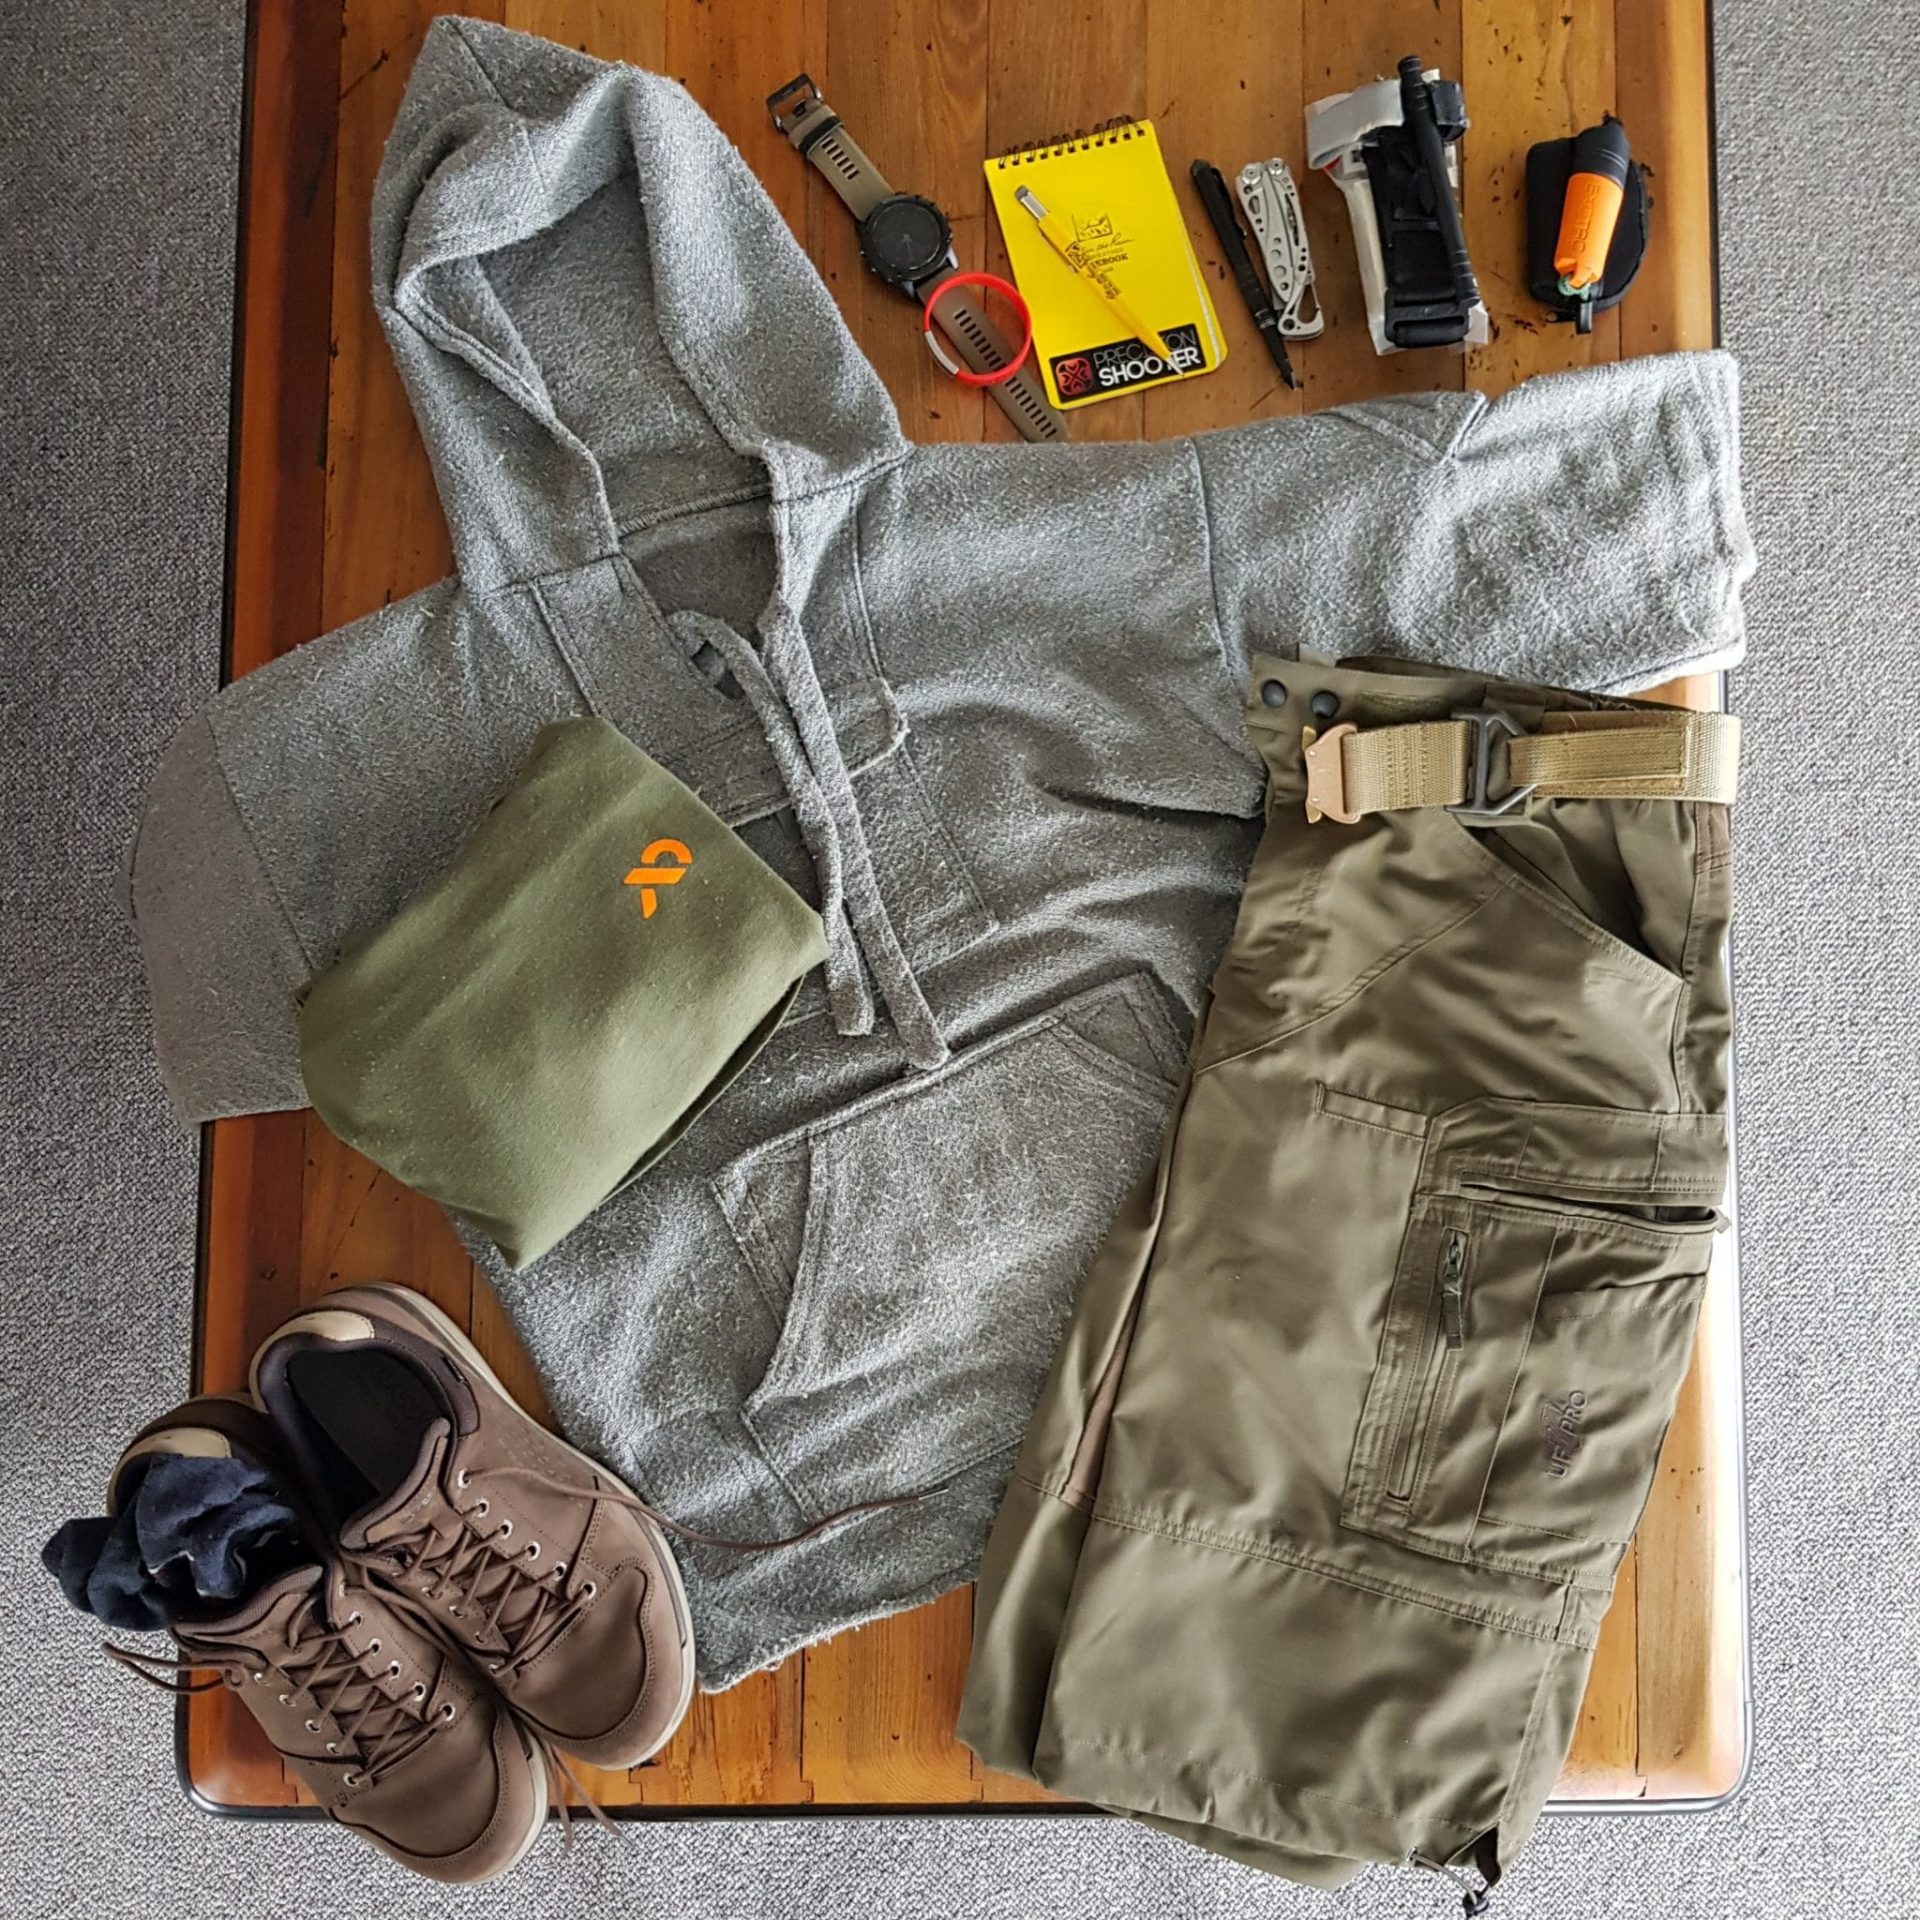
While the 1st Line is the bare necessities on your person in pockets as part of your EDC, the 2nd Line is the equipment that you want to be carrying with you nearly all the time. I carry mine in a Ribz Chest Pack.
After my experience in an MSC Bushcraft course last year, I became aware of the necessity of splitting my equipment into layers – meaning I could drop the heavier aspects of my carry when stopping to go check out lookouts, explore side paths and so on. Additionally, I had been reading about load distribution – and was keen to move some of the weight from around the back of me, onto the front.
I had stumbled upon Aarn body-packs – which addressed the distribution issue, but I essentially wanted something that easily separated from the main pack, and also came in more subdued colours.
As I often do, I ended up looking to the military, to see what system they had developed, and quickly started reading up about Assault Vests and Plate Carriers.
For it is a continuous balance between functionality and weight – I have to carry all this on me, so the notion of a fully loaded up vest, with a pack on top, not only screamed out weight overload, but also a lot of heat buildup.
Then I happened to stumble upon Ribz – what seemed like the perfect middle ground between a full-on Molle Assault vest, and a belt bag, which (for my tastes) is slightly too small.
The Ribz front pack is made of 210d water resistant ripstop nylon. The front pack weighs approx. 250 grams. All components are water resistant and have proven durability in the most extreme of conditions. With an average storage capacity of 10 litres, you can comfortably carry up to 4.5 kg in the front packs.
The use of a Ribz front pack re-positions a portion of your weight forward which reduces your overall shoulder stress and increases comfort, mobility and balance. A front pack also creates the illusion of carrying a lighter load.
Though the Ribz front pack was designed with ultralight backpacking intentions, any outdoor activity where easy access to equipment is critical is where it proves beneficial. Ribz front pack can be used alone as a vest but is primarily designed to work with your existing backpack as increased functionality.
There is already a pile of Ribz reviews online – the one that put me onto them is here –
[fvplayer src=”http://www.youtube.com/embed/DHau6LOv6jE”]
Like most people, I know I am carrying excessive amounts of equipment at the moment, but, I am sure as I become more comfortable with my level of knowledge, I will start to be able to leave some of it at home.
I wanted to know that I could happily make do for at least 72 hours with the content of my 2nd Line Carry.
While I will no doubt go more into the individual items over time – here is a quick listing, broken down into rough groupings, of the contents of my 2nd line at the moment.
Well. I decided I wanted to be prepared, regardless of what might occur. I tend to prefer to do some of the less travelled tramps, and often will be a fair way out, even just for an overnight. While I could put my faith in the mighty cell-phone – I also know they tend to run out of coverage about 5 meters from your parked vehicle once in the bush.
Also, I want to make sure I can also look after anyone with me. The reality is, many people are happy to wander out with the bare minimum – heck – its all extra weight isn’t it! So it becomes a matter of self-reliance, and also care-taking.
I have no doubt I will whittle this down over time, then add some new bits, and reduce others again – these things always seem to organically grow and shrink and you learn more and gain more experience.
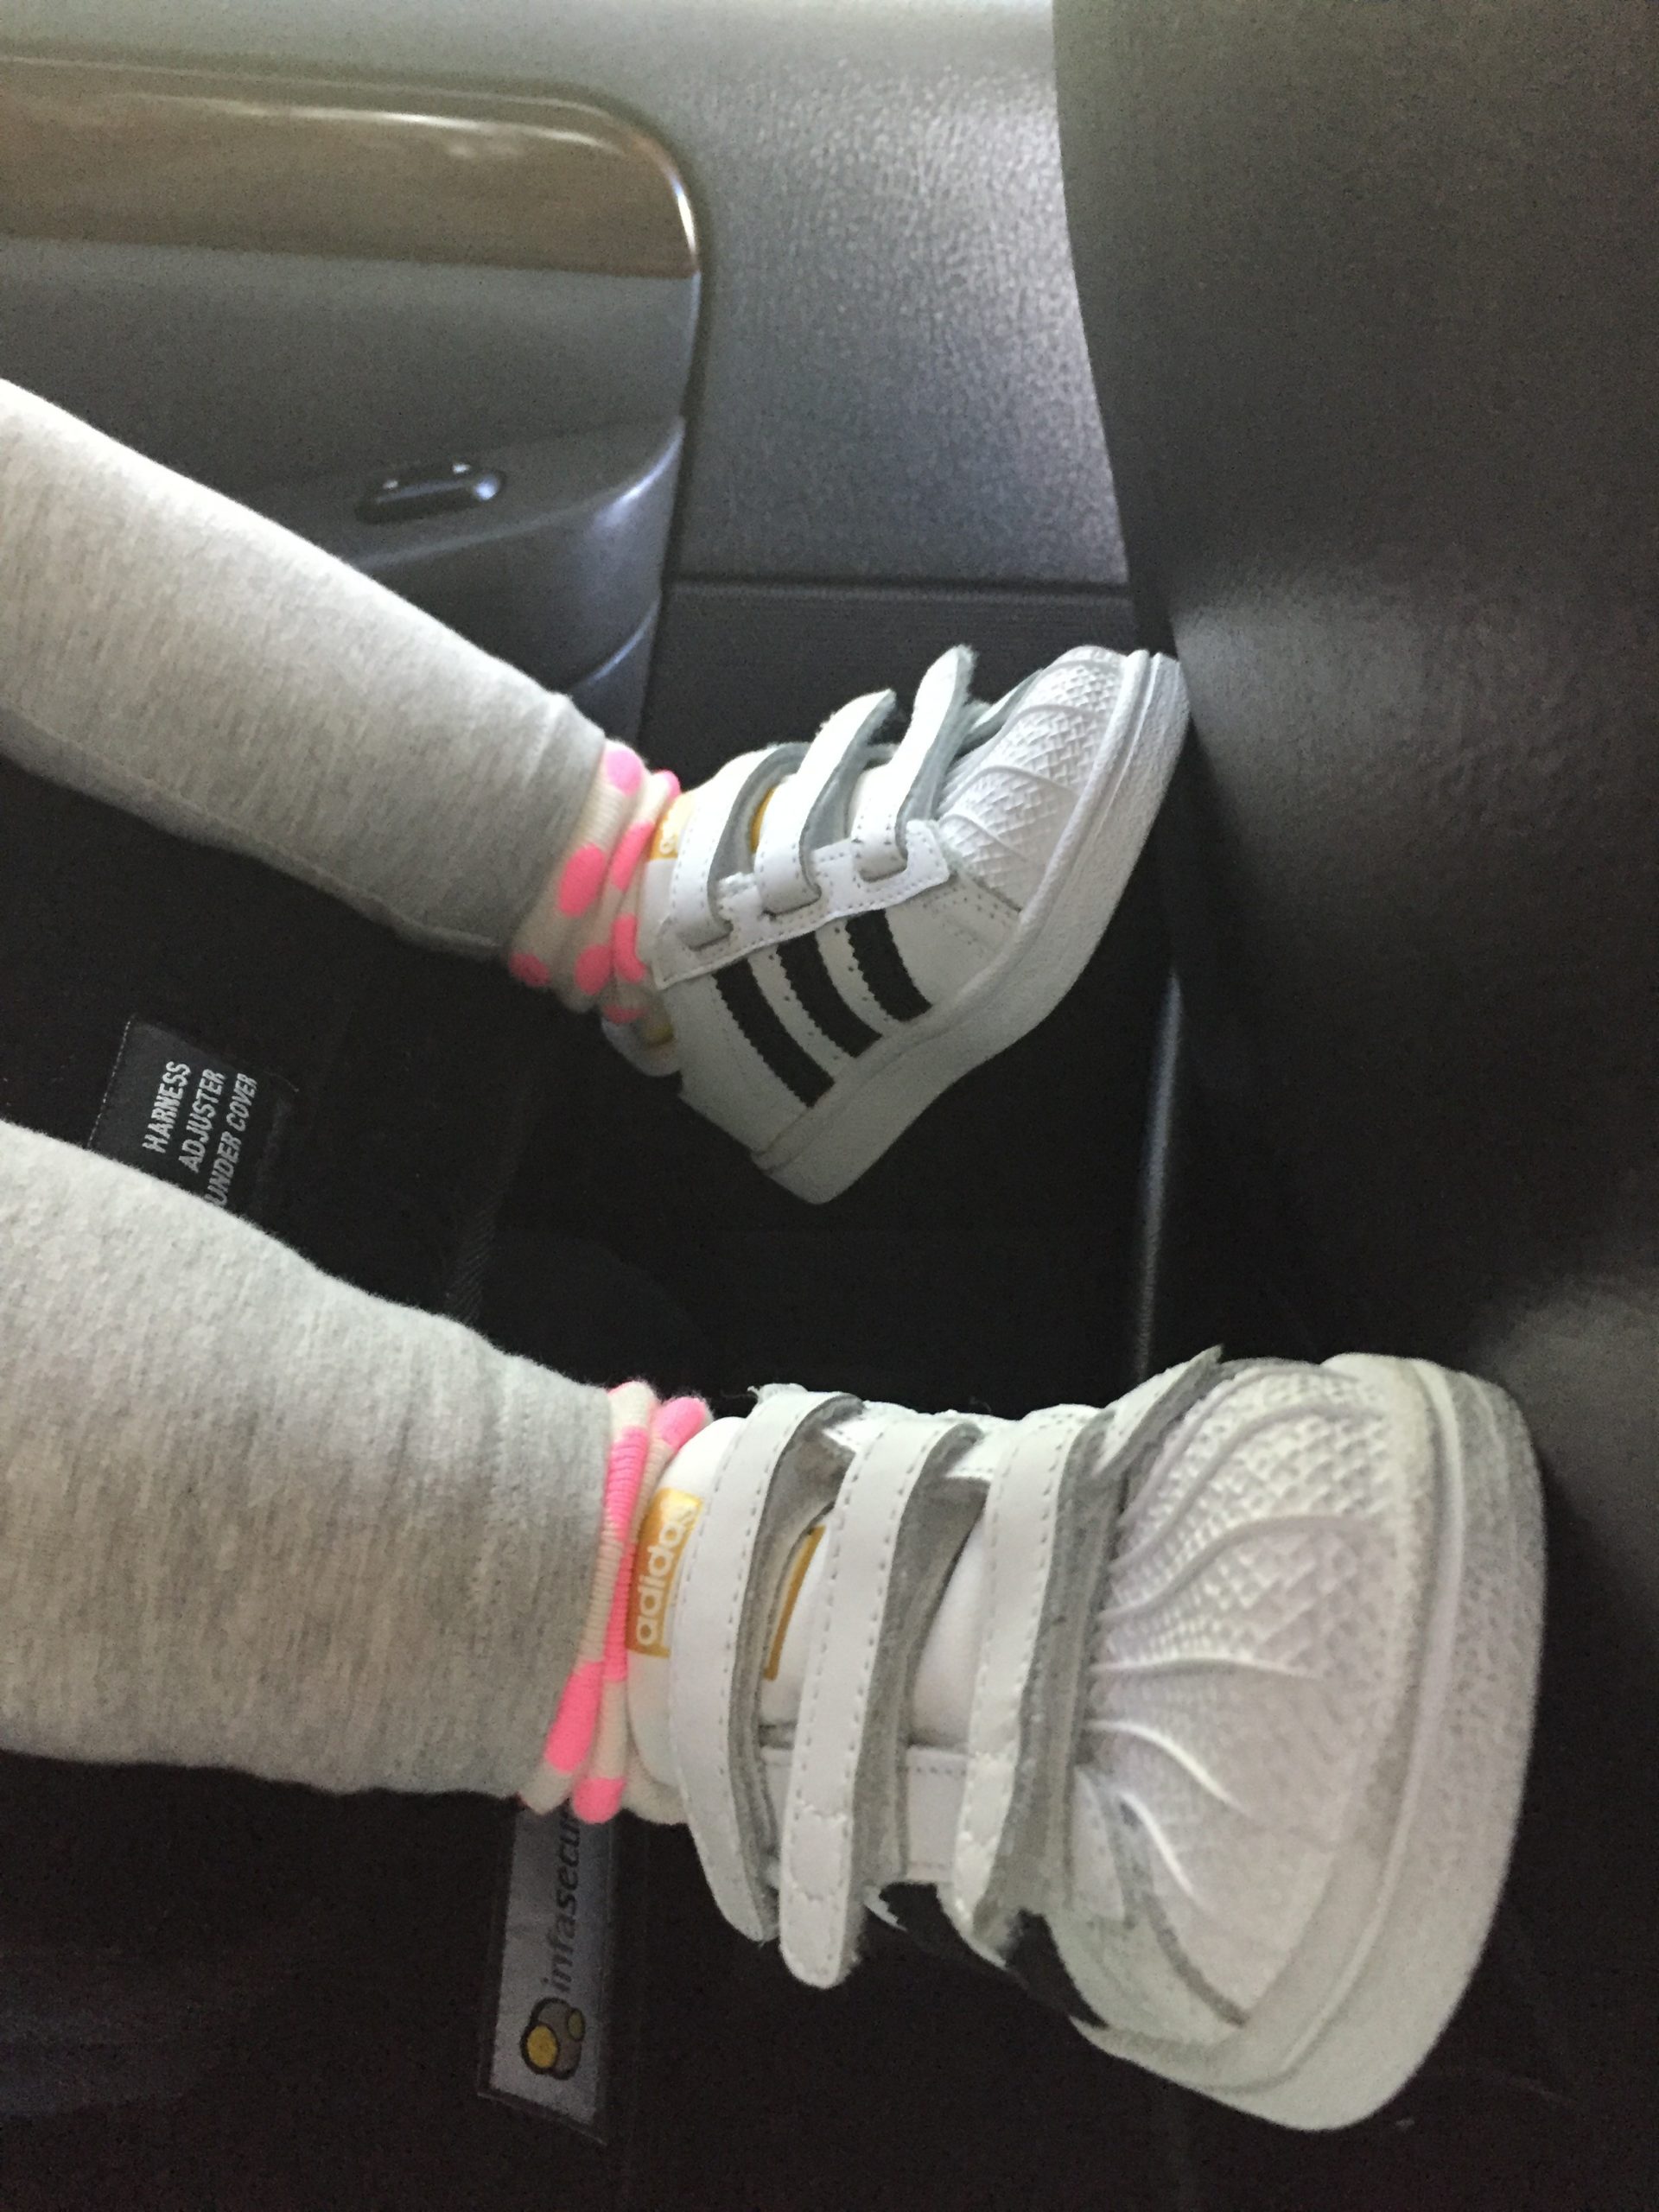
Took my little girl out for our first bush walk. We had been out before – but only around Mt Albert and Western Springs – this was the first decent walk with her in the backpack.
She is walking now – a little unsteadily, but keen to be down and self-propelling herself. I thought it would be a good opportunity to get both of us out of the house. It was also time to start getting my legs and knees back into action after far too long of a hiatus.
As most of you would know, I live in Auckland. Which means limited local hunting spots, but plenty of day walks in the ranges. I have often just headed out into one of them for quick overnight trips. Just walking down a track, then off track, until I found somewhere interesting to set up camp and spend a night.
I haven’t walked an enormous amount of the tracks available. Often heading back into the same tracks to explore new areas off them. So I thought I would pick a popular, but new spot for me. Fairy Falls.
Generally heading somewhere and starting a walk from a car park full of cars would be unappealing. But I already know that the little one loves waterfalls – so I figured it would be a good option.
So, if you know much about me or my history – I am known to pack everything including the kitchen sink for even a day way. My brief stints with the MSC and LandSAR trained me to carry enough to cover any eventuality – even on a day walk. A day walk with my little girl? Even more to pack! I managed to pare everything down to reasonable levels. You know, weighing up the likelihood I was going to be stuck out in the bush for a week with her. I managed to get things down to a reasonable level, packed up the Macpac Vamoose and headed out.
Heading out mid-week means that there aren’t as many people about as there would be otherwise. Which meant there was only the one coach sitting in the carpark as I arrived.
I hopped out of the truck, got the pack out and realised that the little one was already asleep in the back. She must have only just dozed off. So as I opened the door, she awoke and realised she was off on an adventure.
While she is walking some, I wasn’t going to set her off straight away down a track. So I popped her into a pack and headed off.
It’s not a long trip – if you are planning to head down to the falls and back up from the main carpark end. I am now used to hunters tracks or off track navigation. So it was easy going – however, there is still the little matter of the steps.
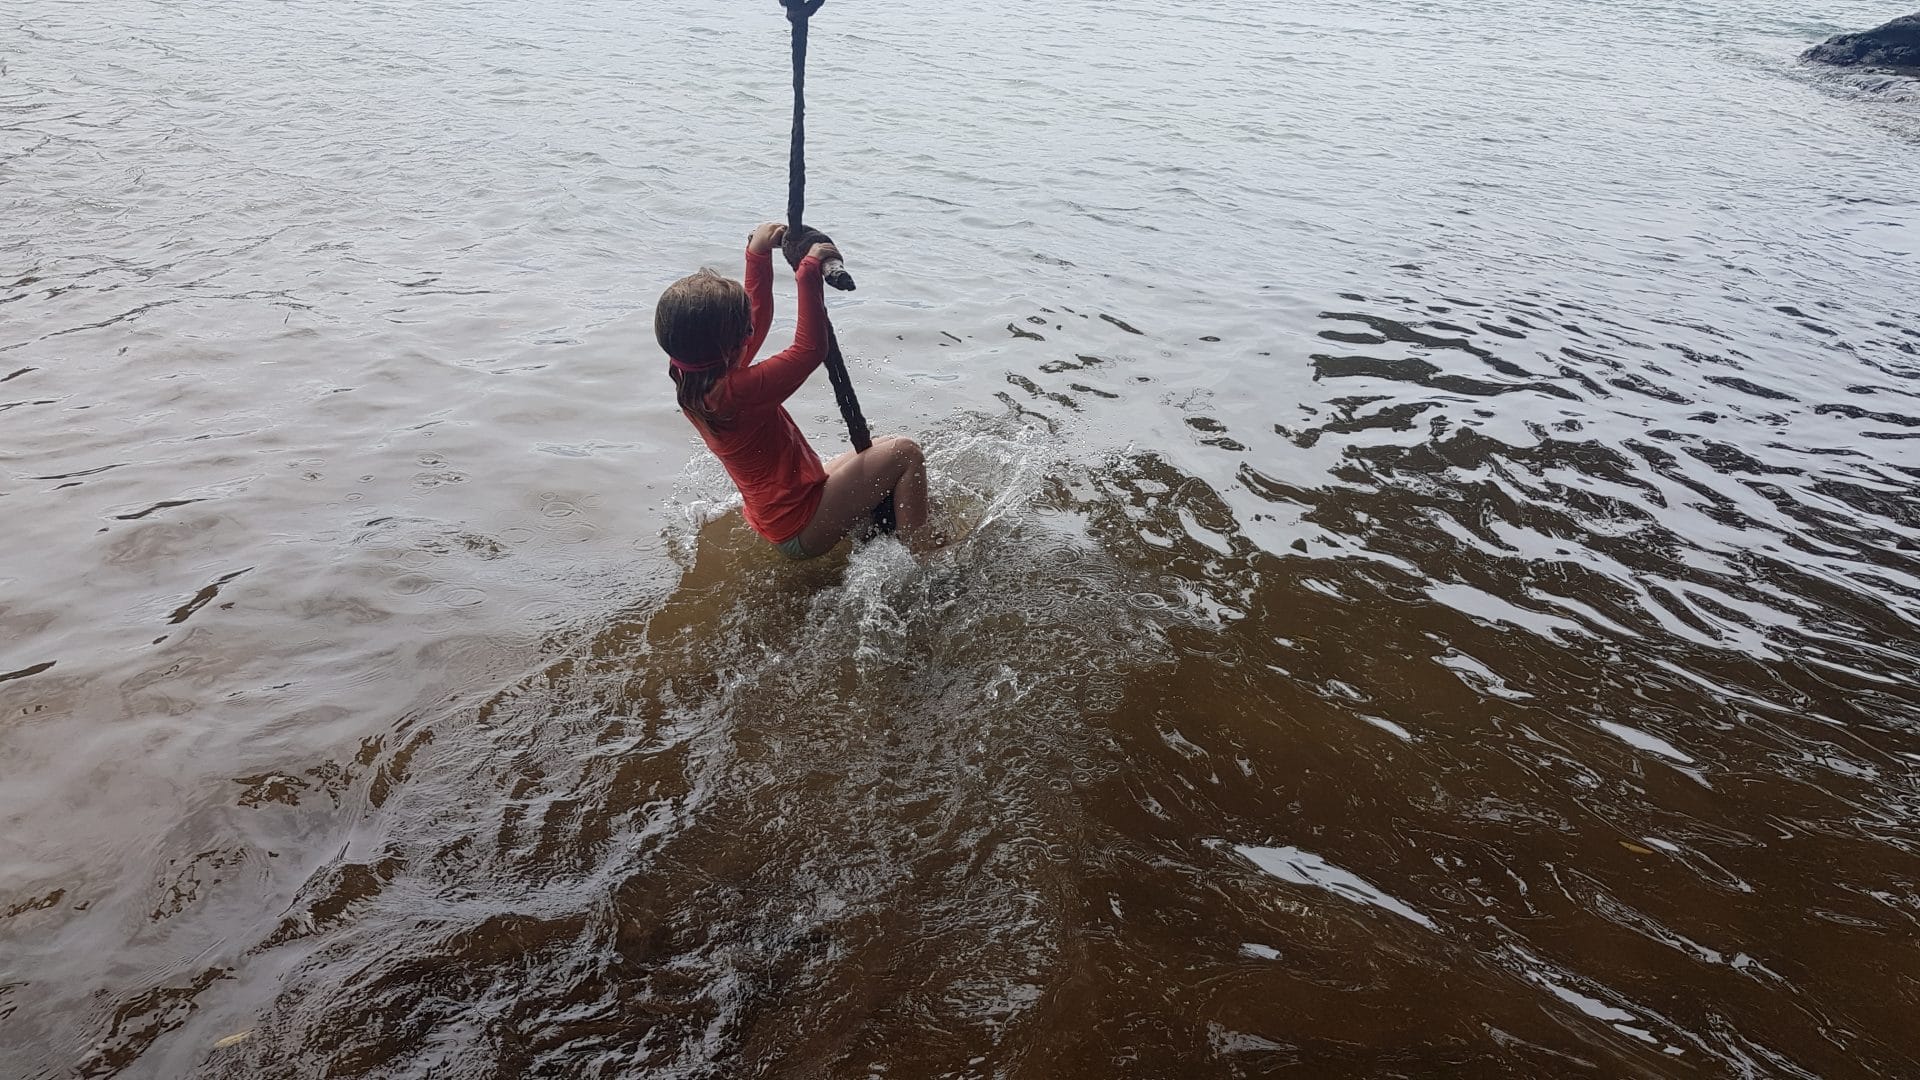
Getting to the top of the falls, the little one saw her first proper waterfall. Enough that there was more than one cry (scream?) of complaint as we headed away down further. Thankfully – distraction! We were on our way again. Snacks were had at the bottom and a little play in the water then we headed back up.
The little girl is at the age where she is mimicking things. So I found it rather amusing when she started panting and grunting along with me as I climbed back up the stairs. I swear she started giggling at me at one point as well.
I am not in shape. I haven’t been doing a huge amount of anything for the last year. With a little one and another one the way – multi-day trips became quite rare, and even the gym fell by the wayside. Some steps with 18-month-old girl on your back was a bit of a wakeup. Good, though.
It was a simple, quick trip. Got a little bit of work into the legs and the little girl loved it. So, it has become a goal of mine to tick at least one walk into the bush off per month. Doesn’t have to be long, just needs to be out there, surrounded by trees and bush and birds. And dirt – she just loves the dirt.
Heading back home – it occurred to me that I should pop into the visitor centre at Arataki and try to get a ‘park map’ that we can mark off together. Next time.
This was my first proper trip out with the little one in the pack. Walking up and around Mt Albert had already convinced me that the pack was going to work well. This was the first time I had her and a daypack worth of extra clothing, food and baby essentials. It handled it admirably.
I had dropped the child carrier seat down a rung before heading out. We started putting her into it when she was around one. As she has grown taller, her weight has moved upwards. So dropping the seat back down dropped her weight down my back. It meant that her movements were less likely to tip me around as she now had less leverage working on my centre of gravity. Sure – the couple of times she leant out to grab a branch still threw me a little bit. But not enough to shift my step or cause concern.
While the frame isn’t on pair with my Mystery Ranch Nice Frame – it is fine for the expected weight on it. I didn’t get sore shoulders or hips. Though will reserve final judgement until I have spent a full day with her and the pack. Though by the time we are ready to do that, she will weigh even more, but likely be walking more as well.
I will be adding a water bottle holder to the hip pads. I already have an MR solution. It means I will be able to have a drink of water without taking the pack off to get at the bottle holders.
This is a great pack. I look forward to using it more.
Boots really.
All my tramping/hiking/outdoors shoes have become hunting boots over the last couple of years. Either that or my IPSC Pistol Shoes – the Salomon Speedcross 3’s which are a little aggressive for a trail shoe (though will likely get some use).
I thought I would grab myself a general use ‘outdoors’ shoe and found the Adidas AX2 online. Popped into a store, they fitted well and purchased them (yes, I also got the little girl a pair of Adidas shoes as well – sucker for a classic).
Like most modern synthetic shoes – the break in was minimal. I have the tongue of the left-hand side pushing a little into my shin. But have had it before and know they will settle with a little use.
Closer to a sneaker than a boot, I slipped them over some Icebreaker Tramp Socks (a little heavy for the day) laced them up and headed off.
Didn’t notice much at all on the way down (in a good way). Upon reaching the waterfall and rocks at the bottom, I was a little hesitant to step out onto the mossy/slippery rocks. I have had a bad experience with some rather high-end trail running shoes that were just flat out dangerous on rocks. So I was taking it slowly, especially because I had the little one strapped onto my back.
The AX2s performed admirably. After some more testing, I was comfortable walking out over the slimly rocks that took the water from the waterfall on its way.
Heading up I decided to have a bit of play with the lacing. The boots were a little tight around the top. I pulled the laces out a couple of eyelets and put a surgeon knot in there to keep the bottom half tight and let me loosen off the tops. Works well, but is a little bit of a pain because I have to lace the boots, not just speed lace like I can in some of my others.
Overall, though – again, very impressed. Will let you know how I feel about them after a few more trips.
Oh. Also. The camera on the iphone6 is shit. Still have to carry a proper one it seems.
")
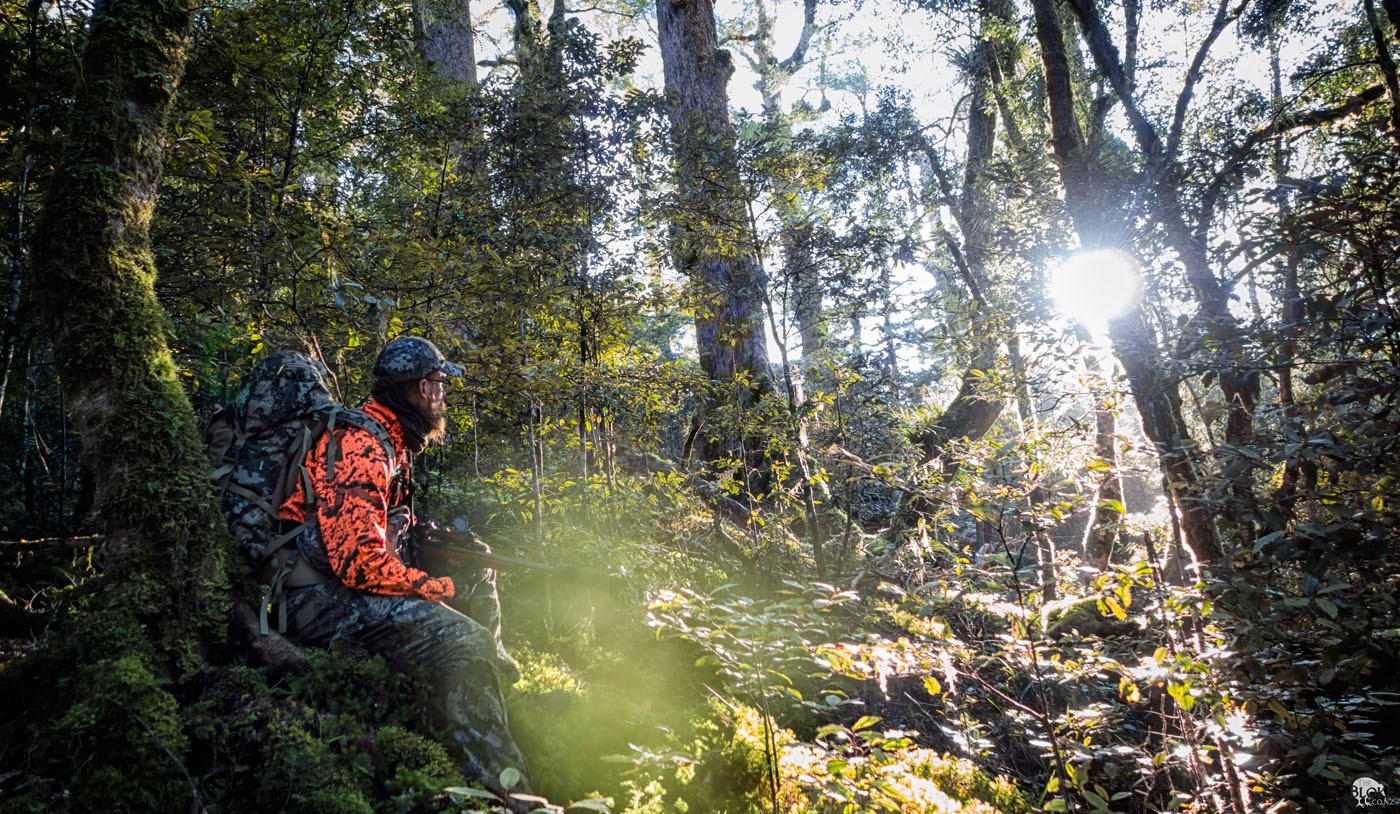
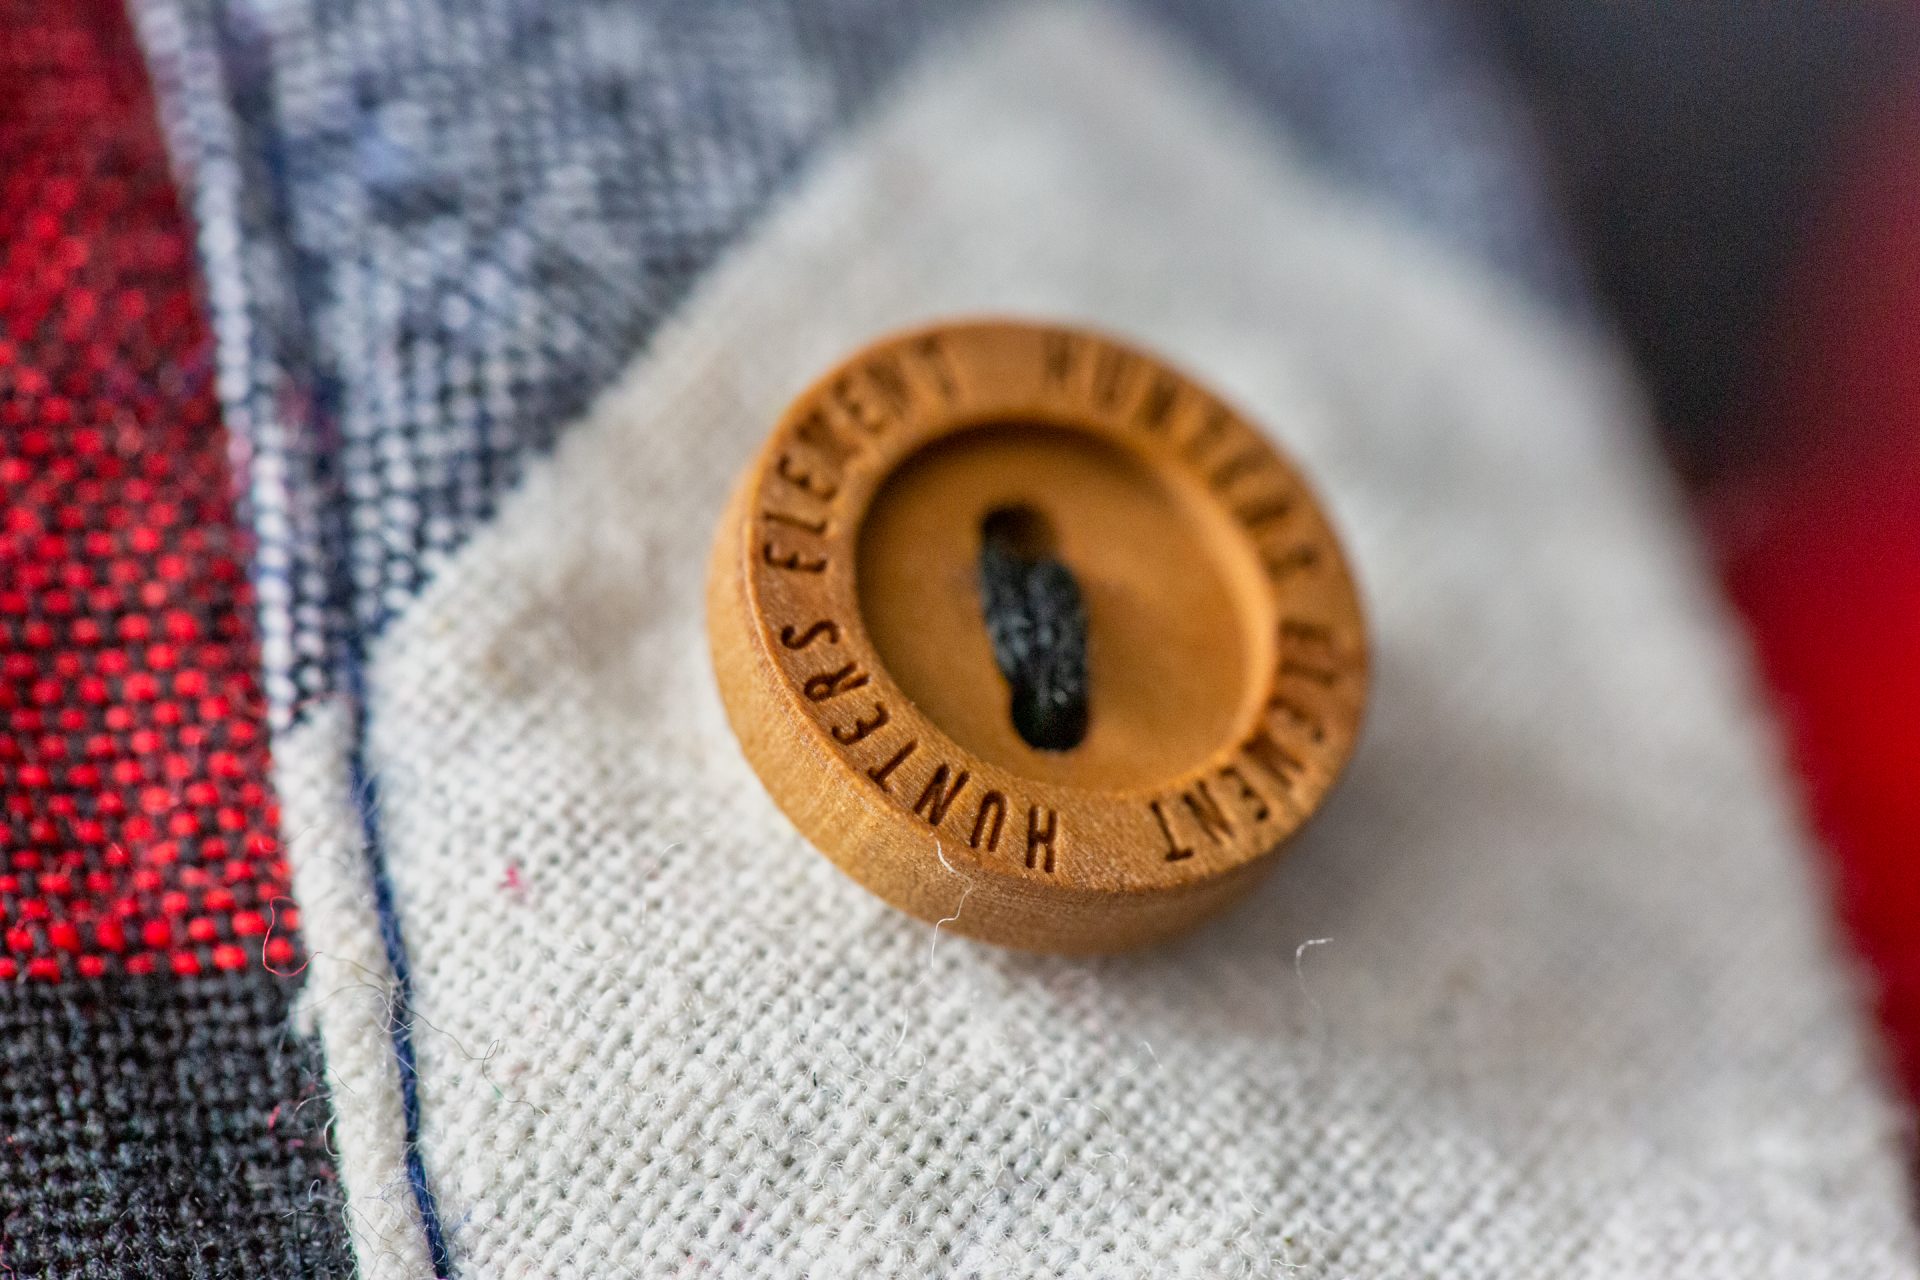
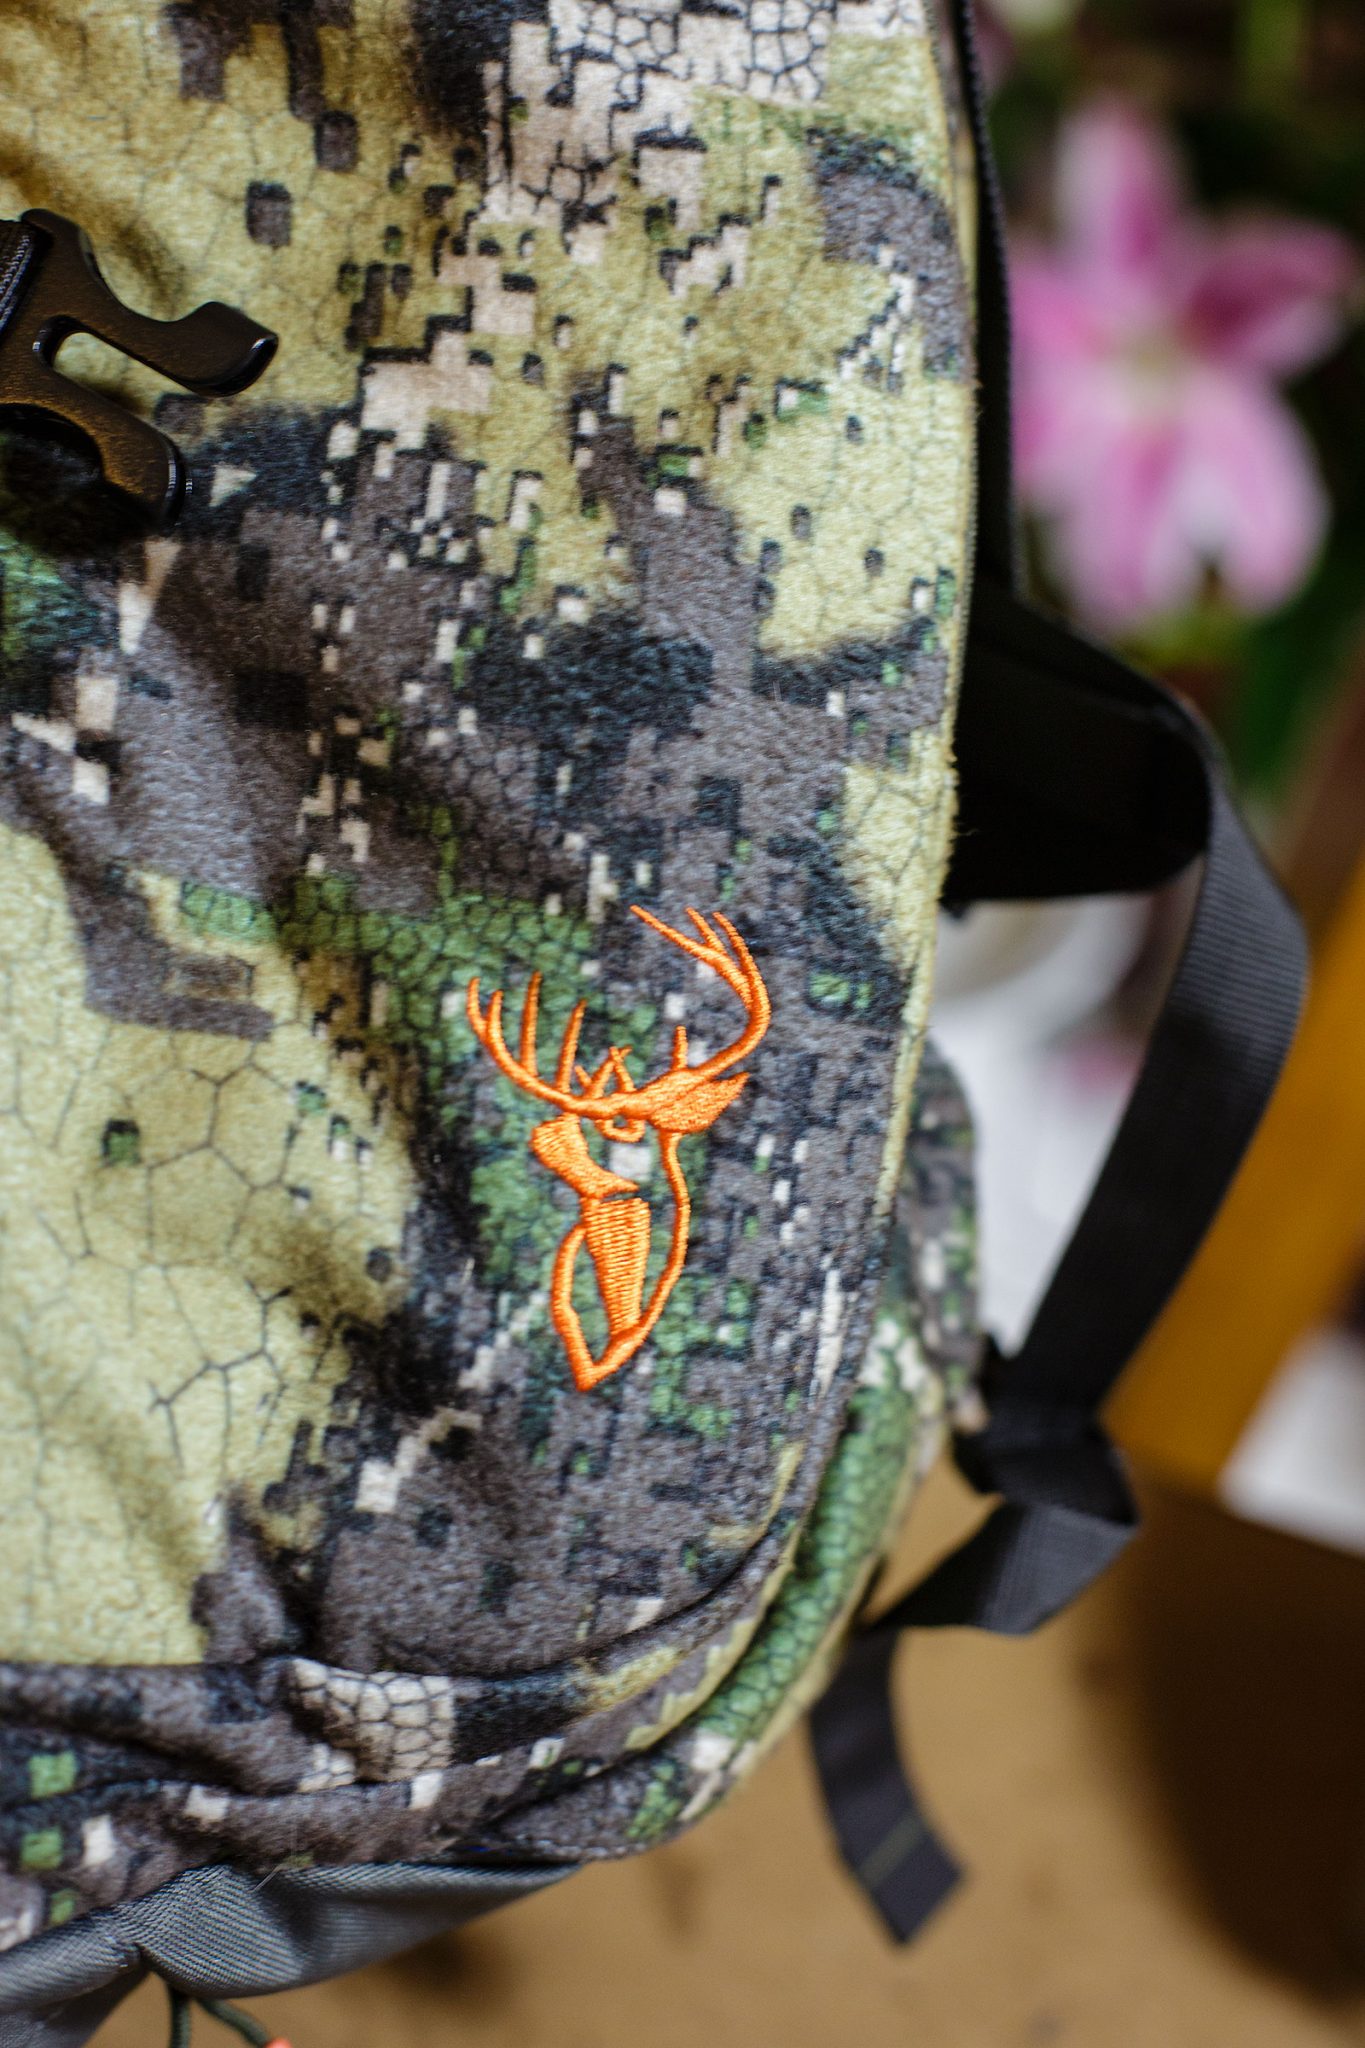
Hunters Element made the first pair of hunting trousers that actually fit me like a pair of trousers. Alex Broad was the first local person I interviewed for the ongoing Triggernometry Video Series.
I watch the brand just go from strength to strength thanks to deft promotional management by Rob and the team. They introduced Digital Camo to New Zealand.
Down is something I always get a little nervous before washing – in fact, it’s…

Hunters Element made the first pair of hunting trousers that actually fit me like a…
Hi Kerry. I’m looking to update my hunting clothing as it is about 15 years…

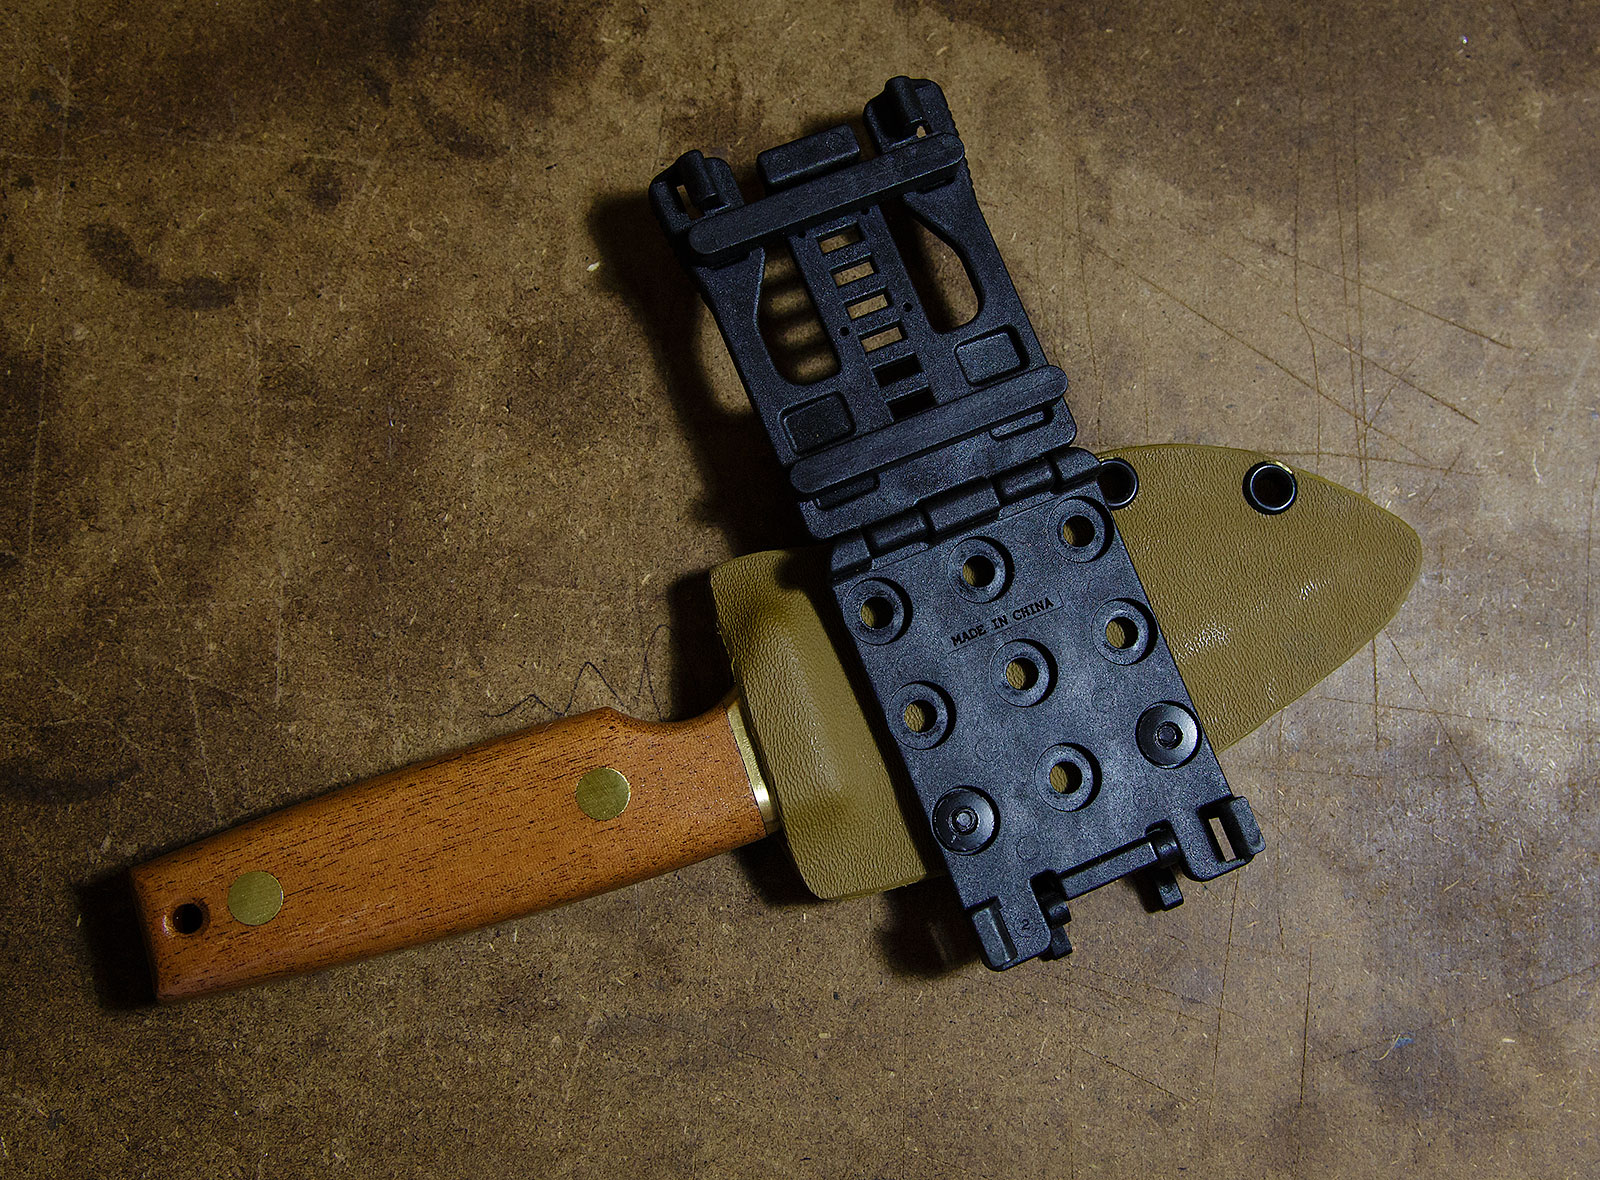
I recently picked up a SVORD 350B to check and test out. While I really like Brians handiwork – check out my review of his 370BB – I have never been a fan of leather sheaths. Couple that with the fact that it is made for a right handed person and I am a leftie and I figured it was time to make a Kydex sheath for it.
I had already made a Kydex knife sheath for the 370BB, so knew the process – but this time wanted something a bit smaller, in keeping with the knife.
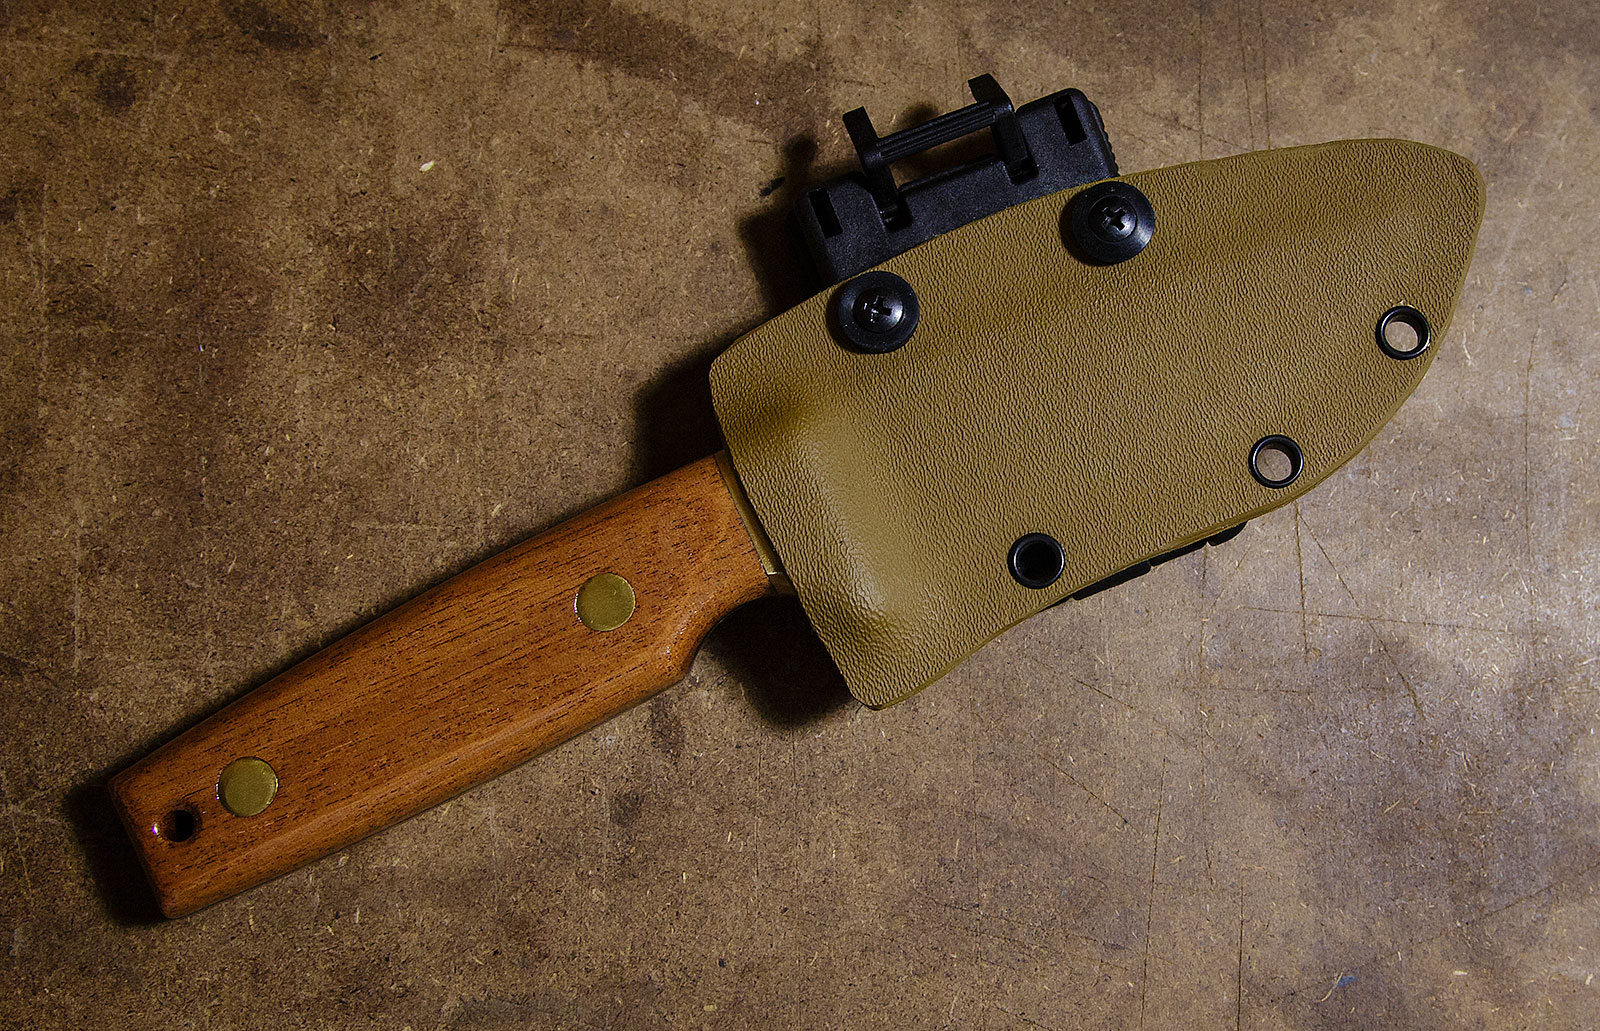
There is already a pile of good kydex knife sheath forming videos out there – so I won’t repeat it all again. Heat the kydex, form with a foam press, trim and shape to your hearts content.
A couple of things I did want to note:
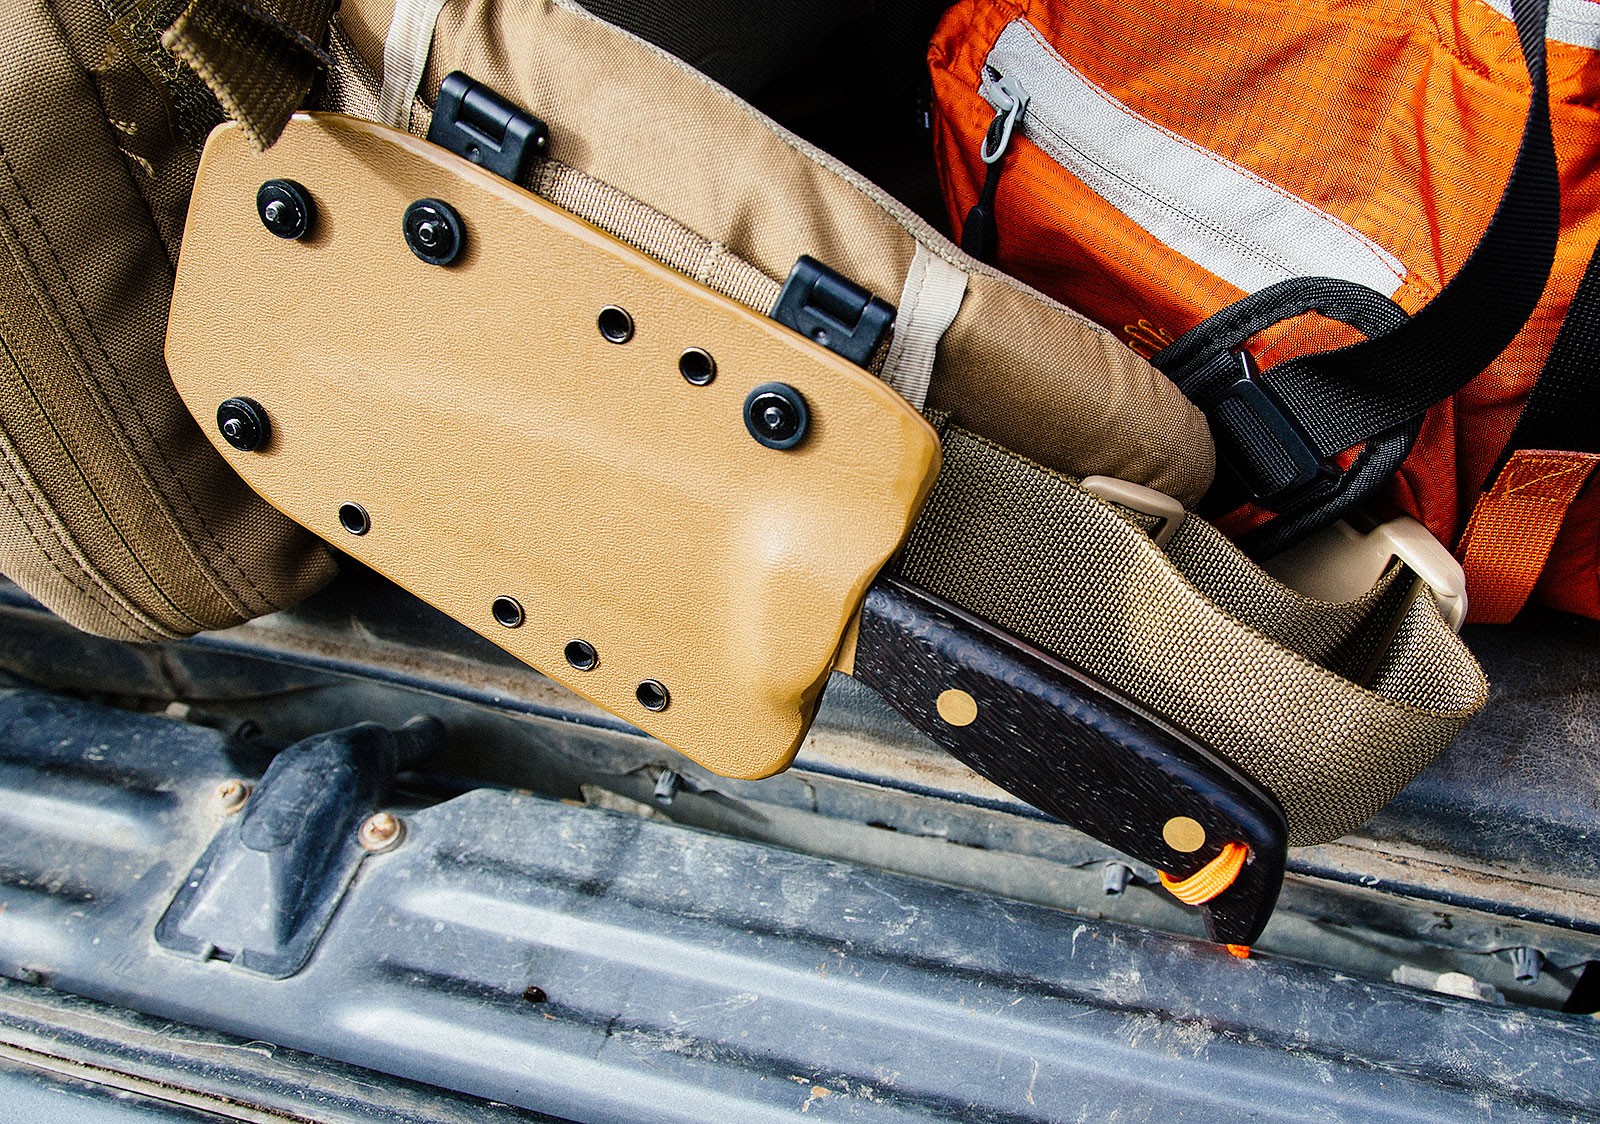
I decided to use the Tek-Lok Belt Clip I still had hanging around. It’s fairly large – but will allow me to clip it onto my belt easily. I like wearing my knives ‘ranger style’ – but the holes are the same distance if I decide to turn it around and wear the kydex knife sheath more traditionally.
Here is the thing though – I imagine most of the time, this knife is going to be living in the pack. Why?
Well – I am not planning on sneaking around in the bush with knife in hand trying to take out a deer in knife-to-throat combat. By the time I need to use a skinning knife, I probably am also going to be able to take my time. However, should I want to – I can clip it onto the belt, pack strap or whatever else I have handy and be ready to go.
So yes, Kydex – great little project – this took me about an hour all up. I have more sheets here – so whenever I need a nice easy way of carrying something – I will be making more. Maybe I should try making one for the Shadow?


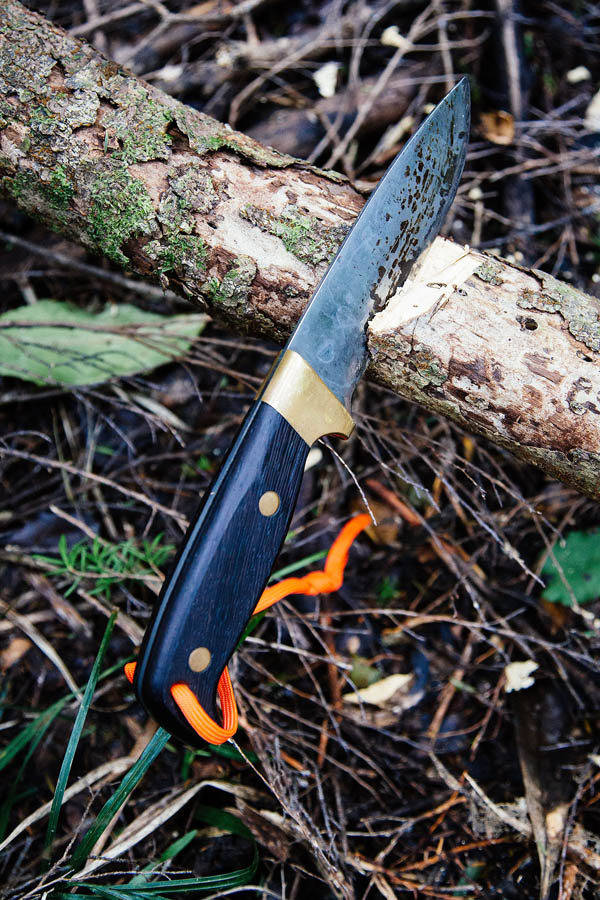
A while ago, as I started getting back into the outdoors I decided I wanted to get a good bush knife. Always on the lookout for New Zealand Craftsman, I soon came across Bryan Baker and the Svord range of blades.
Brian got into making knives in 1983. Over 30 years ago he started making blades in a shed out the back of his parent’s farm. Now, though still on that farm, his business has grown significantly in size.
In the modern age of mass production, it’s nice to hold something that had been handcrafted and hand finished by someone who knows his craft inside out.
Talking to Bryan I (spontaneously) decided I would also like one of his Goloks (to be reviewed separately). He came back to me and said that he could make me a matching pair. The handles were made out of African Wenge Wood. I jumped at the offer and a short time later headed out to the shop to pick them up.
I also picked up a couple of his Peasant knives at the same time – again – another review shortly!
Knife steel is one of the subjects like Fords vs. Holdens – the owners are going to defend whatever it is they have to the bitter end. Also, simplifying it down to High Carbon vs. Stainless Steel can be very misleading – there are different grades within those names, different tempering methods and different knife profiles that all lead to variations on how hard things are to sharpen, how long they keep that edge and how easy it is to dull them again. All that’s before we start talking about laminates!
Go online and you will find people telling you the High Carbon or Stainless is harder and a pile of conflicting information. I have found High Carbon to be easier to sharpen, though once Stainless is sharp, it can stay sharper longer. Regardless, if you are carrying a decent knife into the bush, you should also at a minimum be carrying a small stone or steel rod to keep the blade sharp after extended use.
Bryan uses Carbon Steel for the simple fact that he believes it to be the best. As he would point out, the traditional Samurai Sword, Woodworking Tools, Sashimi Knives, all use Carbon Steel. It gives the best edge and is easiest to sharpen.
He also adds Nickel in order to give the knife a high impact resistance. This is why the knives may turn a little blue if washed under hot water.
The Rockwell C scale is the method used for determining hardness. The test involves forcing a diamond-tipped rod into a blade and recording the resistance met. Plain high-carbon knives are usually Rockwell C51 to C53; stainless-steel knives are often C56 to C58 and sometimes higher. As noted, this is only part of the equation though – as it doesn’t describe things like brittleness, toughness or resiliency.
Bryan uses a High Carbon Steel on all of his blades. One thing that Carbon Steel is going to do is Patina.
Patina is the covering that can happen on metals, it’s what makes Copper turn green. This happens as the surface of the metal oxidises; normally as a result of exposure to air and moisture. In the case of carbon steel, this patina is black staining that appears on the surface. It’s a form of surface rust – but one that actually works to protect the metal from further rusting once in place.
If you want a highly polished, clean looking knife, then carbon steel isn’t for you. You can clean them up, but really half the fun of these knives is letting them develop a unique signature patina. In fact, the patina can even speed up by applying a variety of products (orange juice, tomato sauce, a potato) to the knife directly.
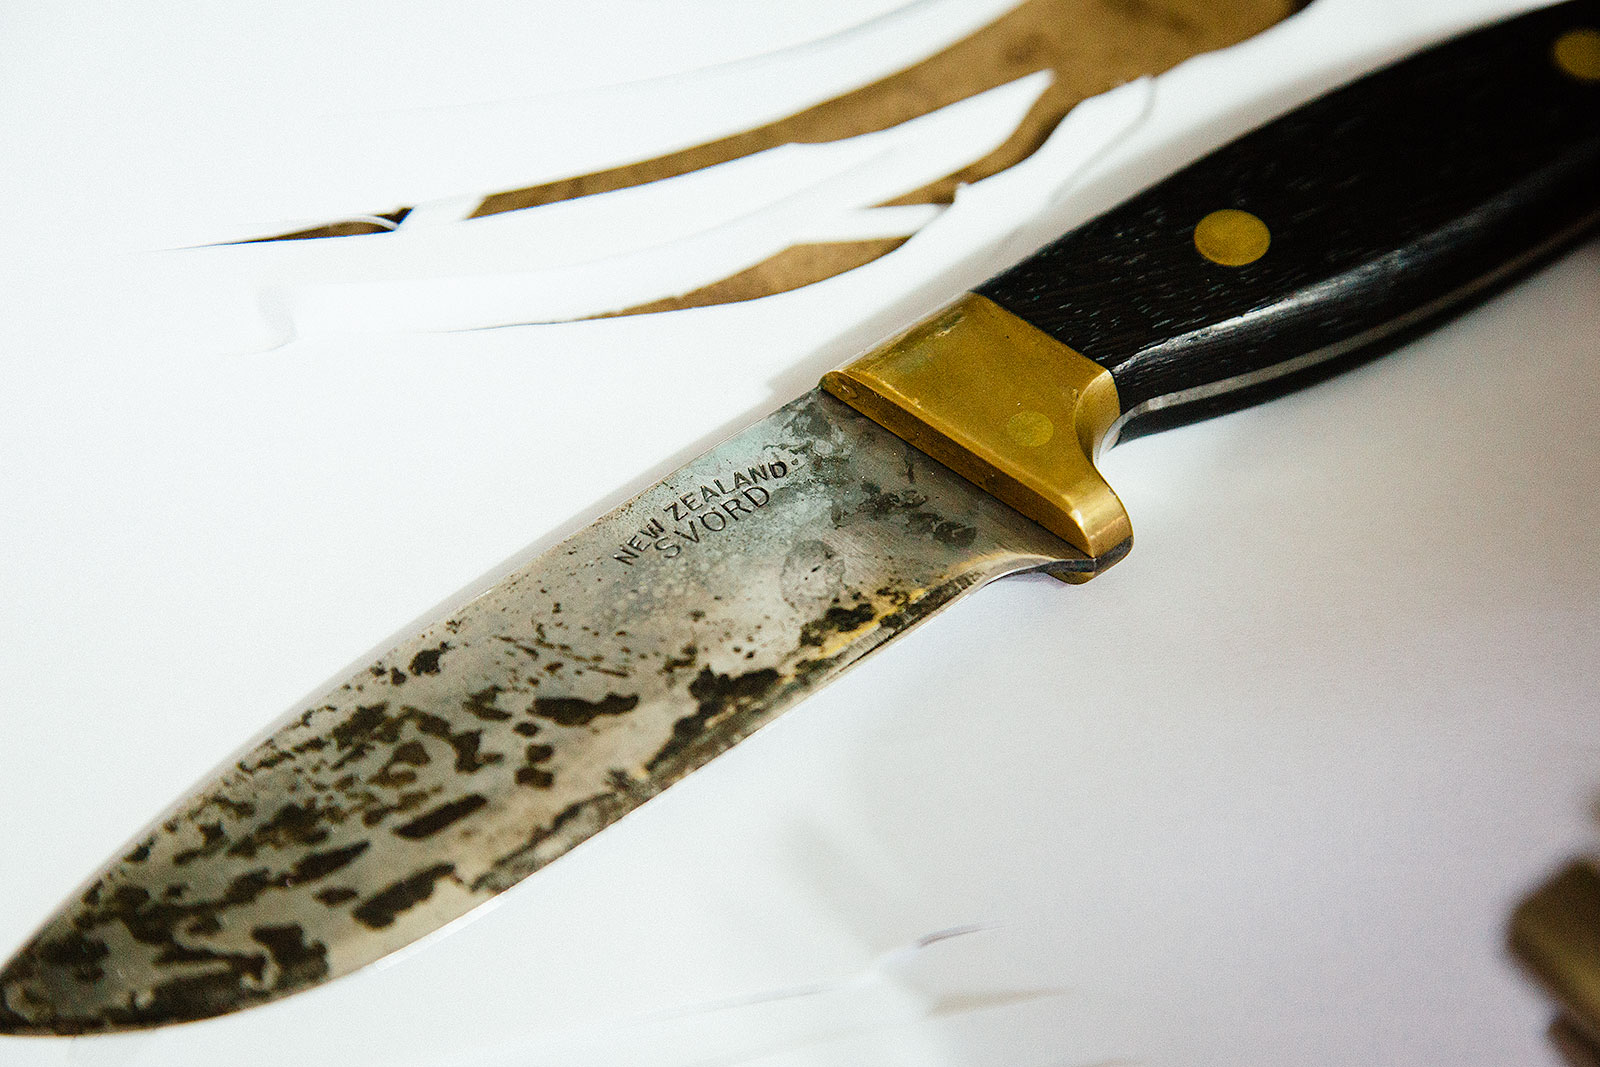
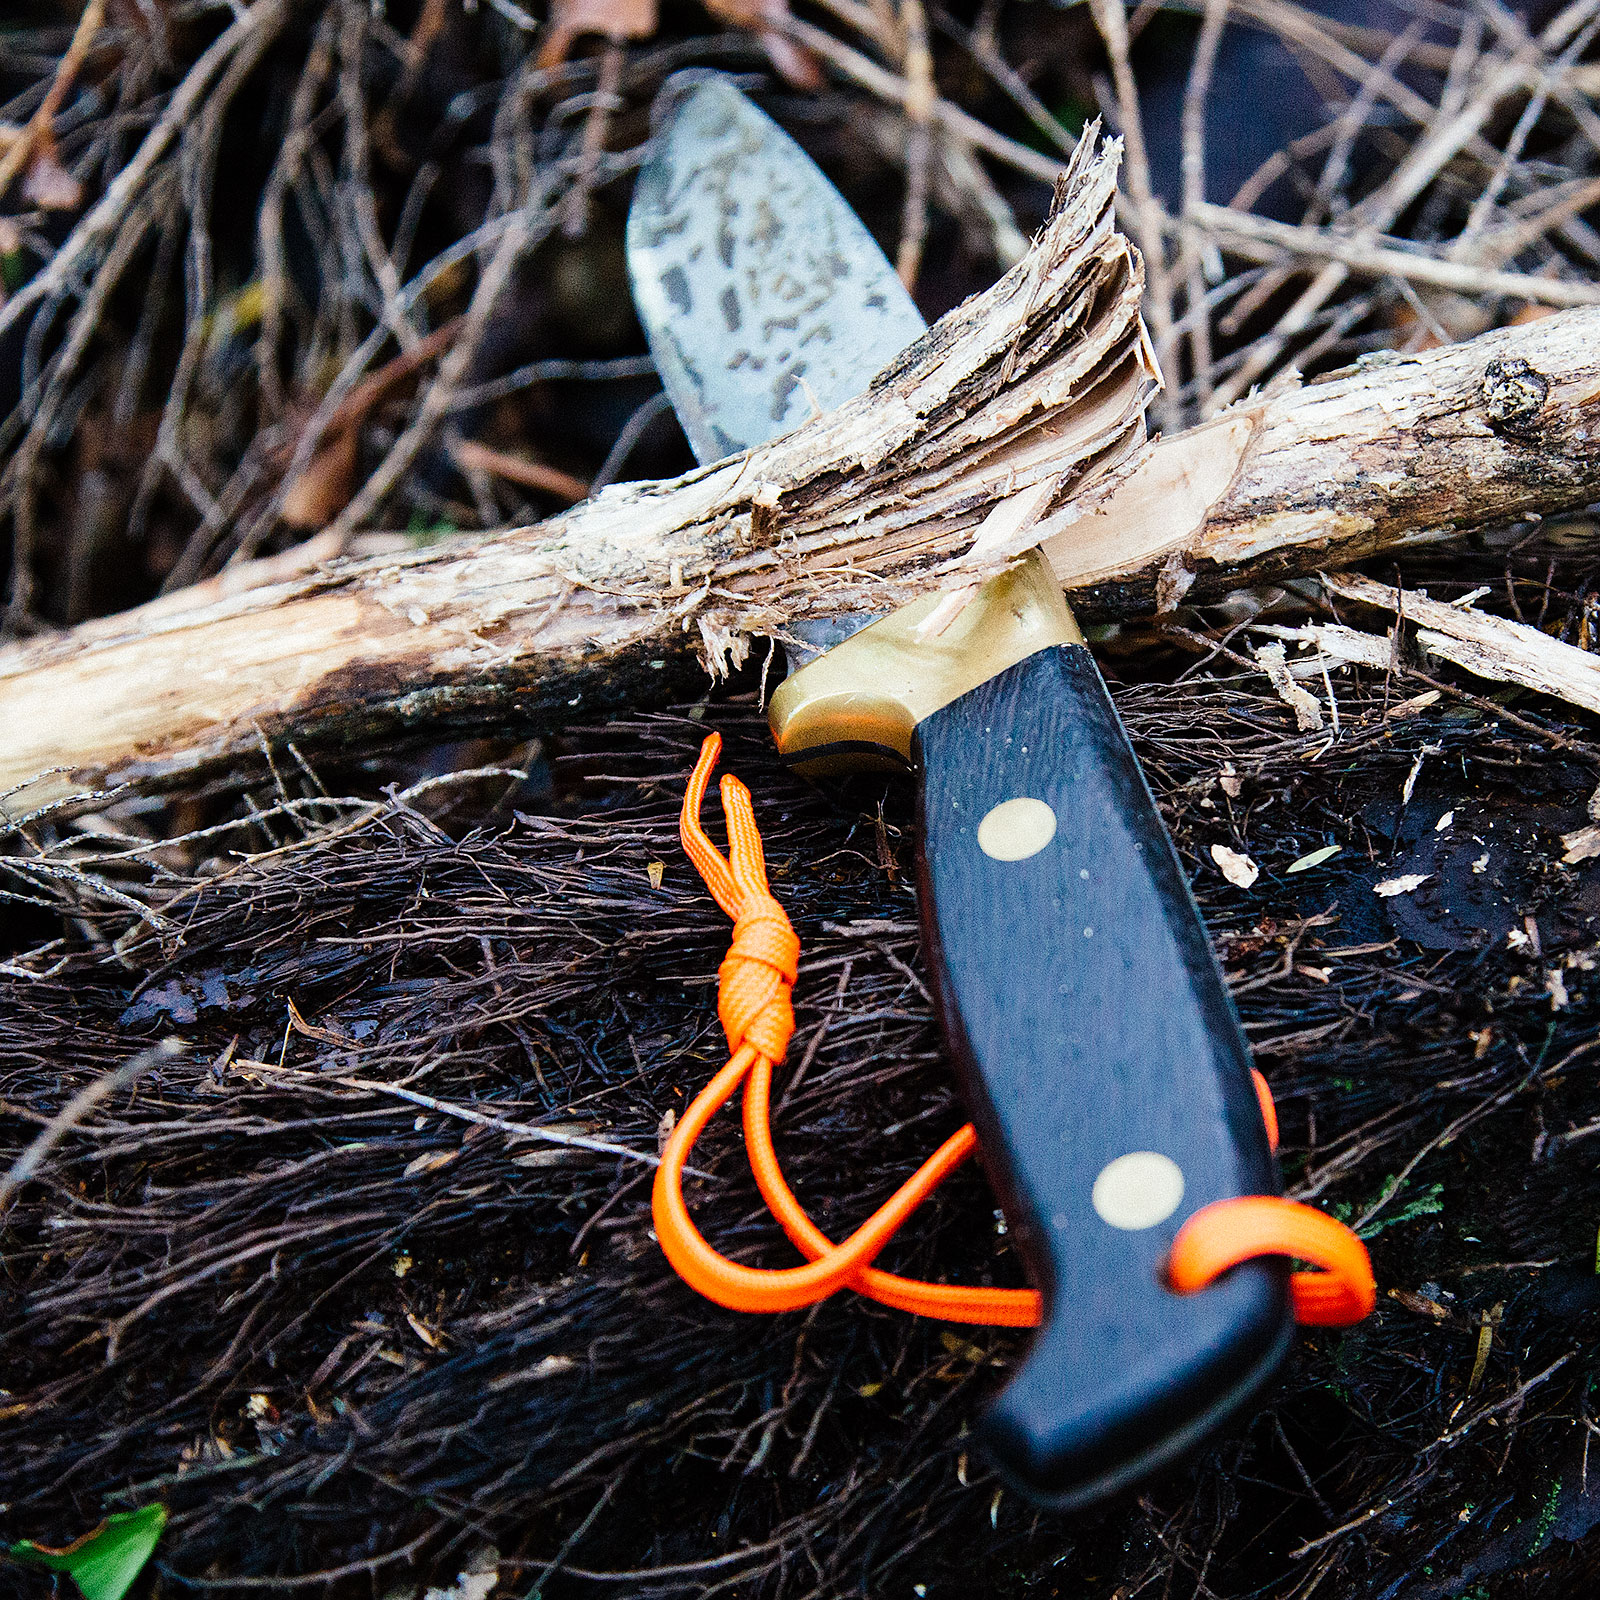
The picture above is my 370B – the patina is the result of a night during a survival exercise where we had to build a debris shelter. That patina was caused by Punga juice! The blade isn’t damaged – it’s still razor sharp (people like to cut paper – so that is also my cut paper photo).

While the Svord 370B does come with a nice leather sheath, I am left-handed, so it made it a little useless for me.
I decided to make myself up a Kydex Sheath. Imported the required materials in, spend a couple of hours making it up and done! Hip-mounted ‘Ranger Style’ sheath. I just mounted it using a couple of quick release Molle Straps and was away.
The Svord 370BB is a full tang drop point 124mm blade. Overall the knife is just under 250mm long. Brass rivets and guard with an African Hardwood (custom) Handle. I have added the paracord lanyard (blaze is good in the bush). 178 grams in weight.
Bryan hand sharpens his deluxe blades into a convex edge. This essentially means the blade edge (and bevel) is rounded to the point.
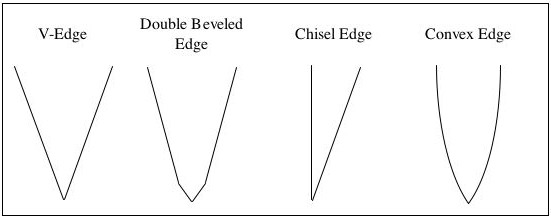
It is said (and again, everyone has their own opinion) that the convex blade creates a stronger and longer lasting blade. It also means you need to be a little more careful sharpening them, but Bryan delivers them honed to a razor’s edge, so you normally only need to strop them to keep them sharp. Read up on sharpening with sandpaper and a mousepad if you want a pile more info on one way of converting a bevelled edge to convex.
All of this is fairly irrelevant if the thing can’t cut. However, cutting certainly isn’t an issue for the 370BB. Brain’s edge is razor-like. I don’t know if there is a standard set of cuts you are meant to do for a review – but I thought I would wander out into the bush and get a couple of nice shots and cut some things up at the same time.
You really shouldn’t be using your knife as an axe. Because that’s what an axe is for. However, if you need to, the Svord 370B can certainly be used to hack away at a tree or a branch. It could take a long time, but the knife will do it. Size-wise, this isn’t the same as a Golok or Gurkha knife – so it’s not really designed for the job. But it will happily do it.
Feathersticks? Sure. Don’t really know why you would ever need to make one in the NZ bush – there is generally plenty of small tinder available anyhow – but yes, it will do it.
Batoning? Yeah. Guess so. Again. We are in NZ, look around, plenty of smaller wood to burn. But if you really want to take to the back of your knife with a hammer go ahead. It’s spine maybe not as wide as it could be for the task – but then, carry an axe if that’s really what you are into.
Oh yeah, now we are into the fun stuff.
We recently got adopted by a cat. Second time it’s happened.
Instead of feeding it dry biscuits and mystery meats, I decided to get hold of some gravy-beef and do what my parent’s used to do – cut up and feed the cat meat.
As an added benefit – it’s a great chance to try different knives for cutting, skinning and de-silvering meat.
The Svord 370BB handles the job well – especially the cutting. Remember – this is the same knife I have just bashed around in the bush – and it cut through the meat with no issues.
It was a little bit big in the hand for the job – compared to the smaller Wusthof knife I have, but certainly would be up to the task of skinning out an animal. I generally carry a smaller pocket-knife on me anyhow – so the combination would cover most things.
Halfway through cutting up the Beef I thought I would give it a quick strop – a couple of runs on a denim strop with some green compound on it – back to razor blade sharpness! It’s an easy knife to keep sharp – provided you give it a bit of regular TLC.
Is the Svord 370BB The ultimate bush knife? I don’t know. Haven’t tried them all. Feel free to send me yours to compare. However, it does set a very high standard.
Beautiful looks, razor edge, patina’s in the most wonderful way. This, paired with a smaller pocket knife is going to cover 95% of all tasks you might need in the bush. Take a saw to cut through some bones and you are complete. It’s a knife I have now had for a few years, and it’s one that will be handed on as well.

The Santoku1 style knife has become rather popular in the last few years – it’s almost safe to say it is the hipster hunter knife of choice. 😉
So, what is the Santoku knife, what benefit (if any) does it provide, and why should you consider picking up one of the phenomenal Svord made ones?
The Japanese know to make knives. In fact, when they put their mind to it, there seems to be something in the Japanese psyche that leans itself towards mastery of whatever the focus is.
What is interesting to observe is how different cultures, over time, have developed their own way of doing things – shaped by their specific needs and environment. Knife design is no different.
Japanese design actually has multiple knife shapes – the Gyutou being the equivalent of the ‘standard’ chefs knife we are likely most familiar with. The Santoku is still considered a ‘multipurpose’ style knife – but is has a few significant design differences compared to what you might be used to.
A Santoku knife is generally has a taller profile and flatter belly than a traditional European style knife – and will often feature more of a rounded tip than the point found on many chef’s knives. Like many Japanese knife designs, there is no ‘tang’ where the blade goes into the handle, and they normally feature a single bevel blade – that is ‘ it is only ‘sharpened’ on one side. Yes, I realise it’s still got two sides to the edge, but I am sure you know what I mean.


In addition, the Santoku knife, like many Japanese knives has a much thinner width than a typical European chefs knife. This, combined with the single bevel results in a sharper cutting angle, and generally, a sharper edge. The design also lends itself more to a chopping motion, straight up and down, rather than the rock you would do with a blade with more of a curve along its belly (bottom edge).
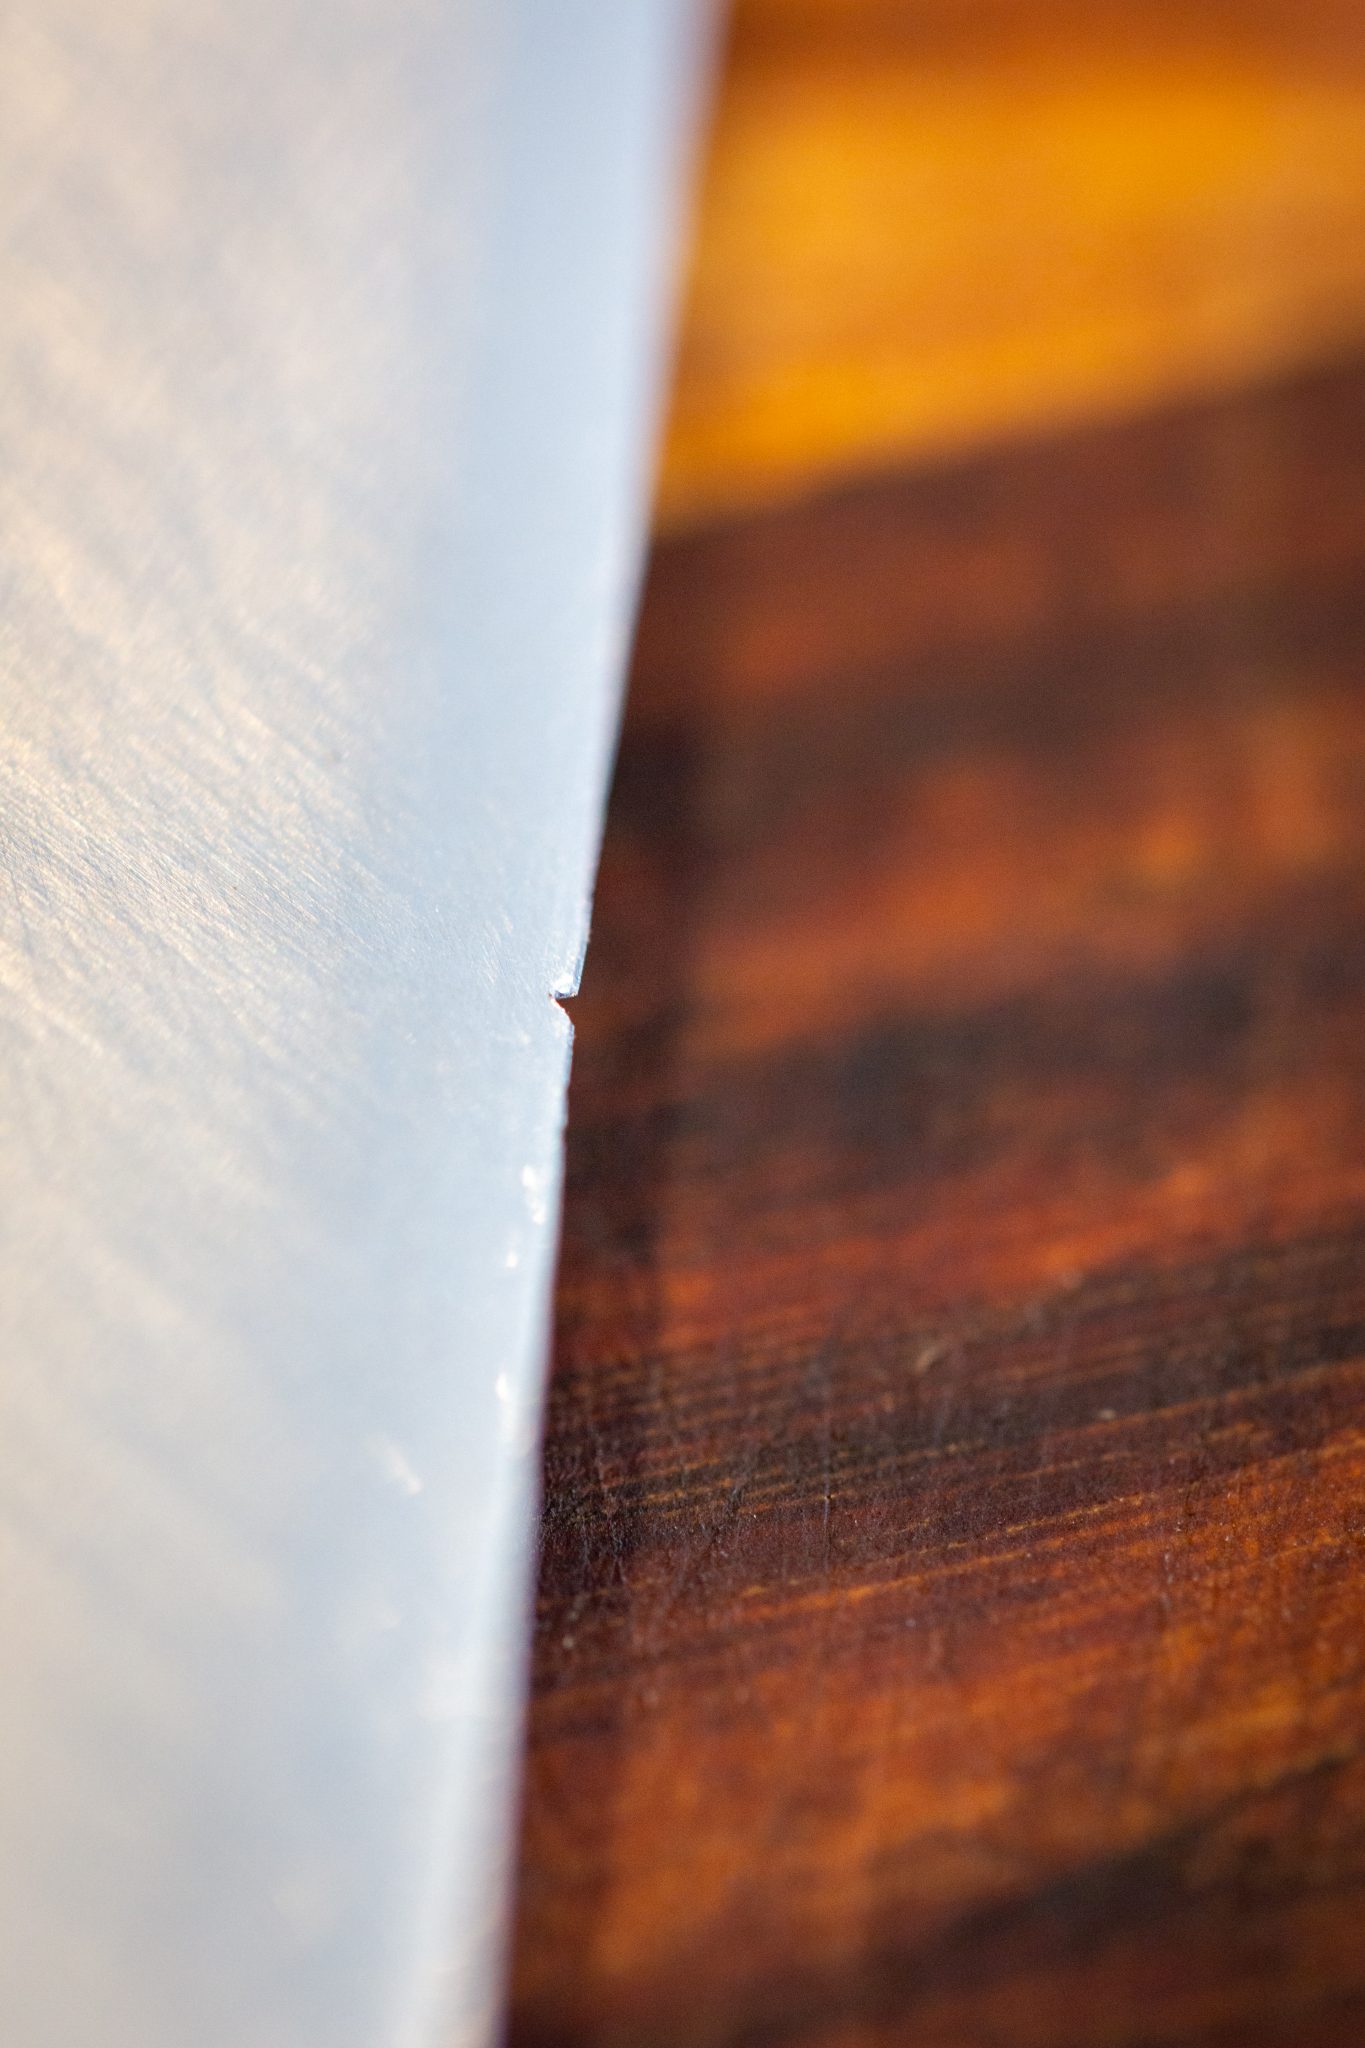
On the flip side though – the thinner, finer edge is a little more delicate. Look – to be blunt, I don’t really look after my knives well – so this isn’t too much of a supprise – but – I have managed to put a nick in the SS edge. It does effect the function of the knie, at all, and the photo makes it look way bigger than it actually is, but, some of you might be triggered by this.
The Svord offering features a Stainless Steel or Carbon Steel option, and a variety of handle materials. Though stock options are normally polypropylene in a variety of colours.
My wooden handled one is actually a ‘custom’ made – which Brian was kind enough to put together out a bit of Wenge wood he still had – that matches a couple of other knives of his I own – a 370BB and a Golok.
I originally got the SS wooden handled version, and recently added a second Carbon version as well.
By my understanding, the two metals you can get the Svord Santoku in are 12C272 (stainless) and 15N203 (high-carbon).
Now, I won’t be going too far into the realms of various steel compositions and their characteristics – as the tempering, treatments and so many more things come into play to result in the final outcome. Some generalisations though. based on the two examples I have in my personal possession.


The Stainless, rather obviously, stains less. For most people – this is probably the biggest perceived advantage. They ‘seem’ cleaner and easier to look after. My personal preference though, for many years – has been the higher carbon steel knives and the ‘work patina’ they develop. Sure. Leave them on the bench without wiping them down after cutting a tomato or something else acidic (fruit, for example) and you will have brown stains develop on them fairly quickly. A quick brush with steel wool fixes this though – and really – I prefer the look anyhow.
To me, the carbon steel also seems to sharpen, or more correctly, hone easier – I always thought it was because of ‘softer’ steel – but recent reading indicates that might be the case. Regardless – to me – the carbon version gets an edge better – and keeps it better.
The Santoku, is Stainless or Carbon Steel – is considered part of the Kiwi Kitchen Knives range. By my understanding, while the steel is the same as what is in his high end ‘bespoke’ knives – the fit and finish on these Kiwi knives is a bit quicker, a bit rougher.
In the case of mine – this meant a little bit of sanding on my part went a long way. There were a few ‘burs’ left over by the absence of hand finishing – a labour and therefore cost-saving choice on Svord’s part. Which is why the price of these things is remarkably low.

Now, one thing about a one edged blade design, is they tend to push unevenly through the food. This means, in theory, there are left and right-handed versions of these things. I am left-handed, and I cut left-handed, and while, yes, I do notice the blade does push over to one side (a little) it’s not something that has ever been an issue for me. The idea is that the edge pushes the material being cut away from the edge – so I suppose if I was cutting a lot of very fine, rather sticky material, it could be useful – but seriously – not been a problem for me.
The Santoku, and generally, thin blades overall are most usefull for slicing and chopping – fine work. I use it for nearly everything in the kitchen, but, would go to a differn’t knife for skinning and boning out and animal, for example.
However – meat, from steaks to fish, vegetables, fruit, herbs – it all deals with easily.
Basically despite (or maybe because of) the design idiosyncrasies, the Svord Santokus I have quickly become my go-to chefs’ knives in the kitchen. they are a little too big for smaller delicate work – but as general-purpose options, they are pretty hard to fault. A regular hone on the chefs’ steel keeps them razor-sharp, a quick wipe after use keeps them clean. They are a pleasure to use – and considering their price – I would suggest everyone head out and grab one immediately! (I paid retail for both of mine).
For over a decade I have been sharing my passion for learning and educating. Helping good blokes by being the best one I can be myself.
© 2024 The Bloke Ltd. All Rights Reserved.