Home Blog Page 43

A (not so) Precision Rifle build…

0

Hey guys, you may have noticed we have been very busy at Precision Shooter lately. With Kerry “retiring” to spend more time on the page, and the competitions and courses in the works, you could be forgiven for thinking we wouldn’t have much time to do anything else! Well, that hasn’t quite been the case. I recently saw a post from Geoff Phillips from The Gun Rack that inspired me (hop over and give his page a like on facebook, or at www.gunrack.co.nz).

Now, this isn’t the sort of rifle you’d perhaps expect from us, as “Precision” is our mantra. This isn’t going to be a sub MOA, clover leaf tack driver, oh no, it is more of a “hit something kind of over there” type rifle. After seeing Geoff’s build, something primal triggered inside me and I decided I wanted, no NEEDED, one of my own.

I feel as though going away from the hi-tech, state of the art pinpoint accurate rifles we are used to, back to grass roots, bare bones, a cheap and FUN rifle is a welcome change of pace, and a fun plinker is the whole idea behind the build. And what better starting point for a build than a venerable old .303 SMLE. A lot of NZ shooters will have had experience with an old LE at some point, many still remember the wince of pain received from the boot of the brass butt plate on their young shoulder from Grandad’s old rifle at an early age. Or for many it may have been the first rifle, with the cheap price point making it easily affordable to a beginner shooter, making it the perfect starting point for a back to basics build.

I can almost hear the Lee Enfield purists grumbling and scrolling on, however, bear with me on this one. A trip to my local gun shop was in order in search of a rifle to begin building from. After asking for a sporterized “three oh” (no butchering of all original pieces of history will be happening here thank you very much!), a nice example for $400 was brought out to me. This rifle was as flawless as a hacked up LE could be, however, this is not what I was after.

With the idea of the sacrilege that would be occurring fresh in my mind,

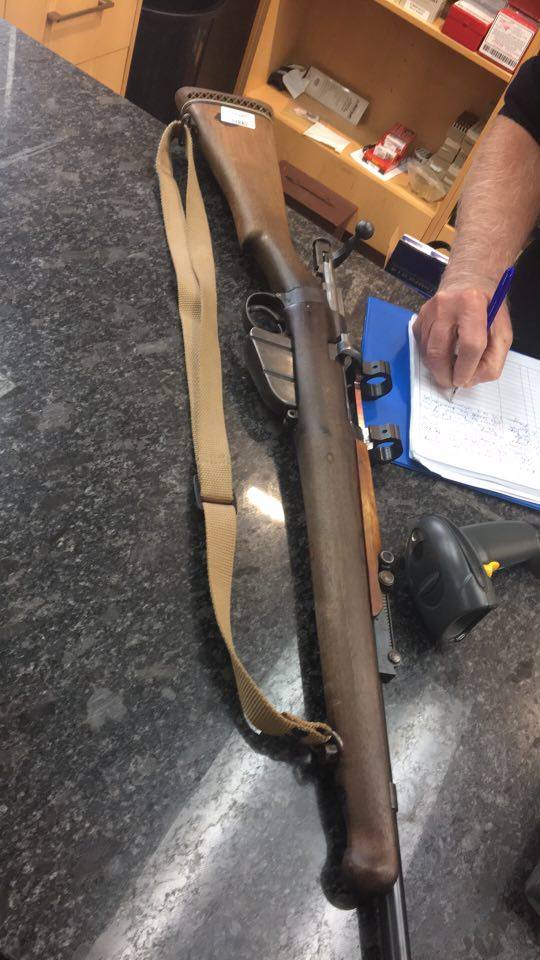
I asked the clerk, “Do you have anything shit, I mean really bad, rusty, cut up and most importantly cheap”. Another trip out the back resulted in this $150 nugget that looked as though half of its life was spent underwater, and for the other half, it had been dragged behind a truck. Perfect! The bore is surprisingly bright and has no pitting, and the price was right, so I left the not so proud owner, of possibly the rattiest example I have ever seen.

First on the list was to strip it down and remove the hideous furniture, which I’m sure at some point had been used as a dog’s chew toy. This revealed, unsurprisingly, more rust.

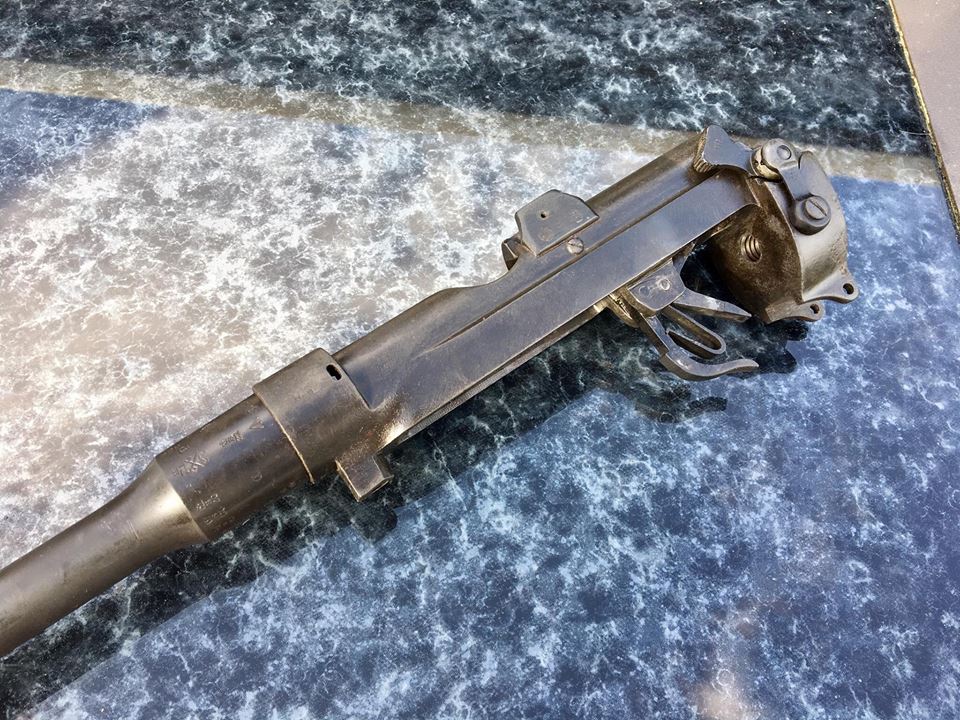
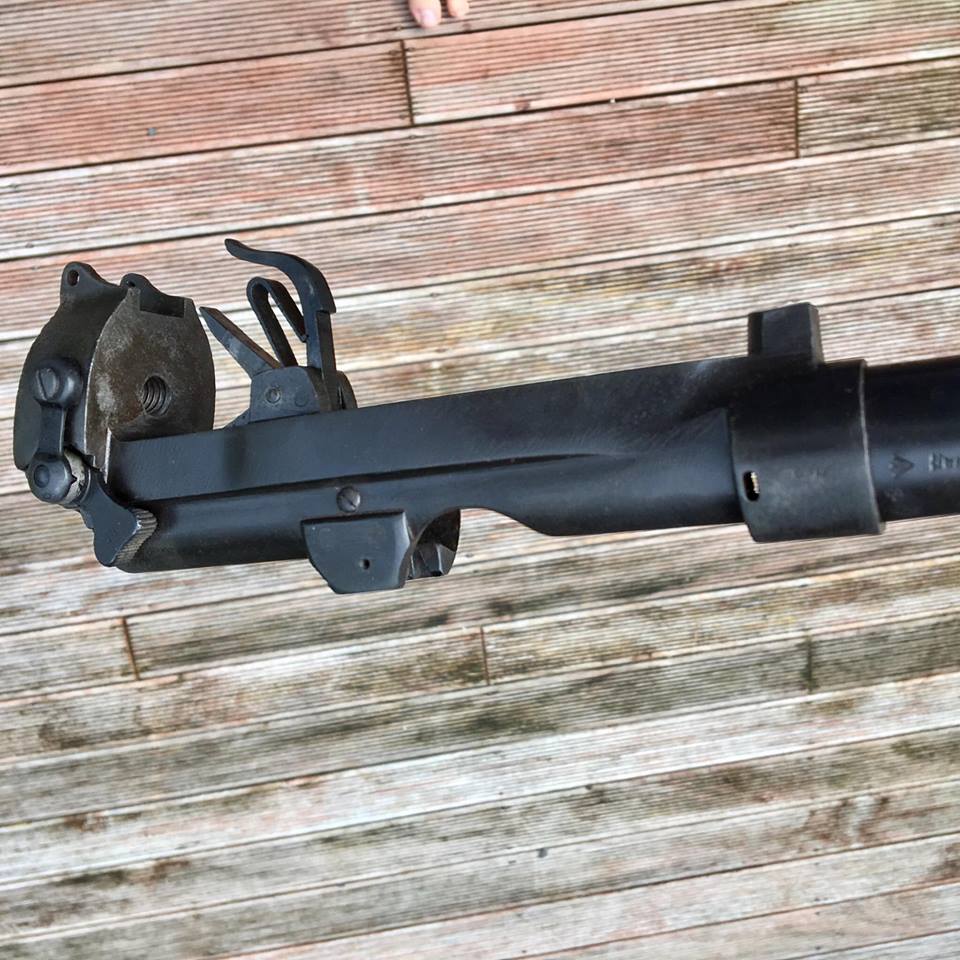
The rifle was completely stripped, cleaned and then taken to a good friend, Henry at Auckland Cams, for a swim in his parkerizing baths. I’m more than happy with the results, with all the blued surfaces coming out great, with the exception of the pitting in the steel from the previous rust, however, this is kind of to be expected of a 102-year-old rifle that hasn’t exactly been a safe queen.

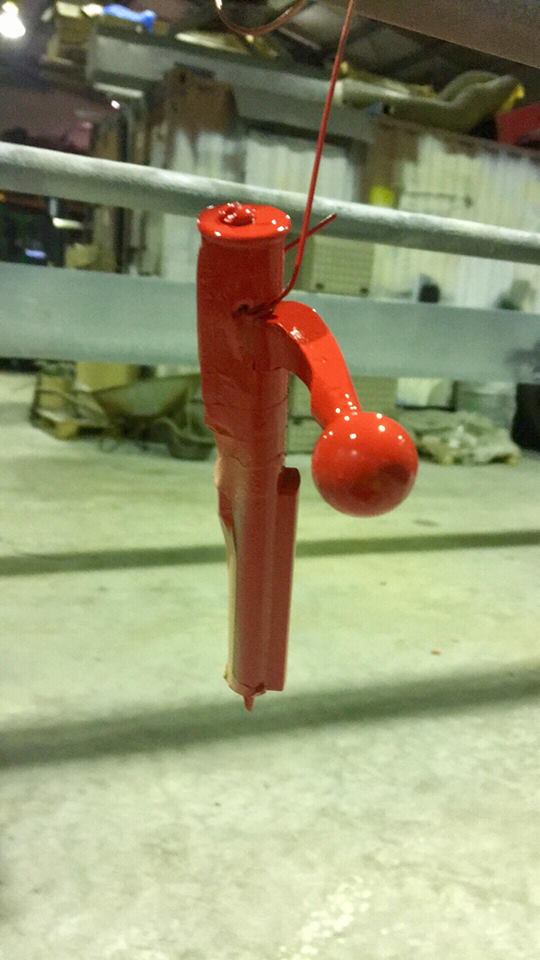
Geoff’s rifle is resplendently coated in “zombie green”, and as amazing as it looks, I didn’t want to build an exact copy so I chose red for the colour scheme, and proceeded to coat the selected parts such as the trigger, mag etc in a good coat of 2 pac, bright red epoxy, ensuring not to paint any of the mating surfaces that require the tolerances to remain the same.

After dry firing, the rifle it was safe the say the trigger was as refined as dragging your finger through a pile of scoria. Now I’ll be the first to admit I am a trigger elitist and love a beautiful, crisp two stage aftermarket trigger.

Whilst there are aftermarket options available for the SMLE platform, in the philosophy of “cheap”, I decided to have an attempt at sprucing it up myself. I light sand with some sand paper were required to remove some of the pitting in the trigger and sear faces, being careful not to remove material from the sear edge.

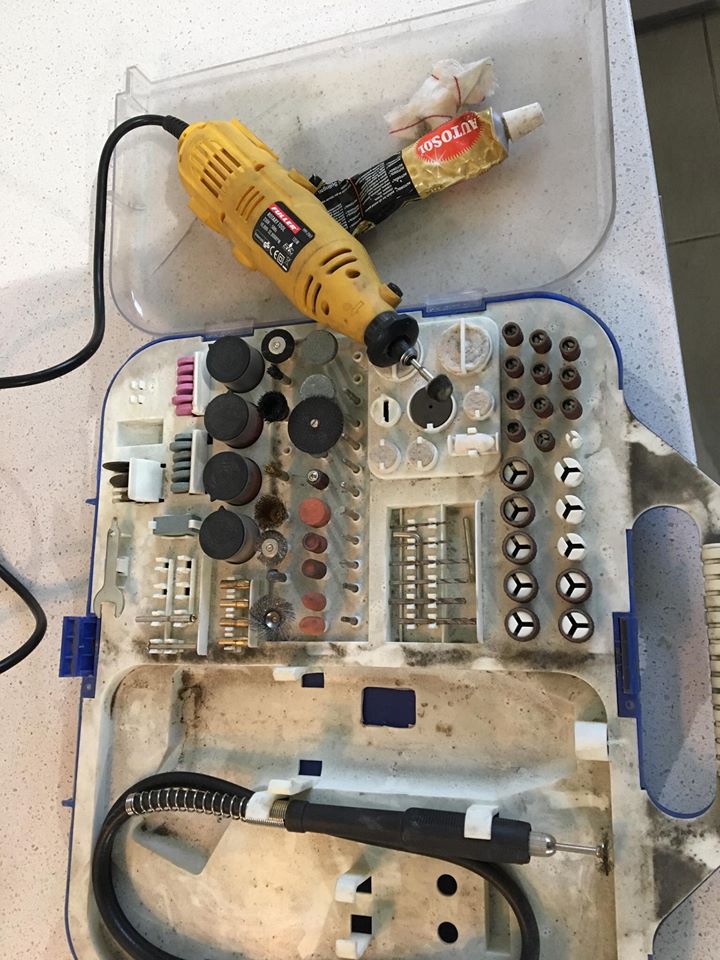
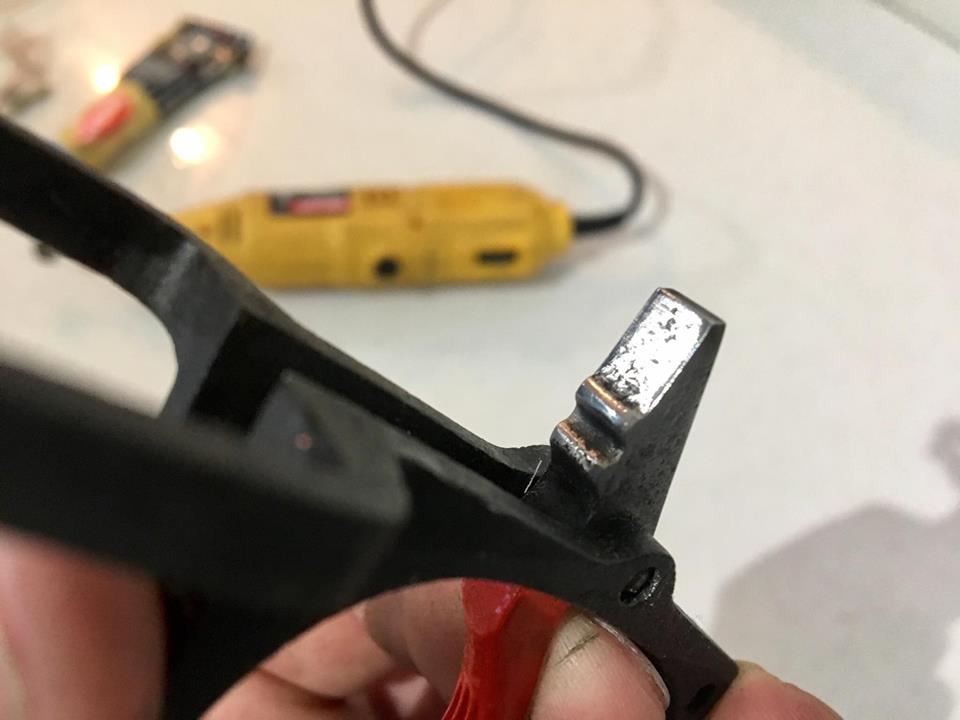
Then a quick session with a Dremel and some Autosol resulted in surfaces with an almost mirror finish. The result? Well, it’s no Timney. The trigger is definitely smoother and feels cleaner, but it is still a trigger group manufactured in 1915….

More soon!

Binoculars for Bush Stalking? The Zeiss Terra 8×32

0

[fvplayer src=”https://vimeo.com/255485615″ splash=”https://i.vimeocdn.com/video/682905488_1280x720.jpg?r=pad” caption=”Zeiss Terra ED Review”]

Seeing the forest for the trees.

Until recently, I would never have considered binoculars of any use while bush stalking. Why would you need something to view into trees, at max, only 50 meters away?

However, that’s not to say spotting animals in the dense bush is any kind of easy – in fact, with so much ‘noise’ going on – it’s very hard to differentiate between a tree trunk, branch, or deer head at many times. More than once I have been staring into a patch of bush, only to suddenly realise that there is a pair of eyes staring back at me. It just makes we wonder how many times I have totally missed an animal standing there, checking me out.

Many years ago, while out training on an MSC Outdoor Leadership Course, one of the military guys took us through an exercise where we stood and looked at the bush, scanning. However, he instructed us to also envision a gallery – where the pictures are hanging down on long runs or wire, offset in distance from right up in front of you, to further away in the distance – this breaks what you are looking at into sections – and allows your brain to switch it’s focus points, from in front of the trees, to points within to trees, to as far as you can see. It’s a simple, but useful mental trick to help you scan a dense forest area.

It’s not the only ‘trick’ I have been taught – but they all have a common theme – breaking the wall of foliage down into manageable chunks to really look into.

You know what else can help you do that? A pair of bino’s!

Focus, focus, focus

A pair of low power bino’s, it turns out, is the perfect way to break the noise in front of you down into manageable chunks for the brain. Letting you evaluate section by section, instead of ‘blindly’ looking for an animal within everything in front of us.

By methodically moving through areas of interest, stopping, looking, moving on, you have less information coming into the brain to deal with, so can focus on looking for the characteristics of the animal you are seeking. This also slows you down. Helping combat Buck Fever building as you furtively look through the bush for animals.

In addition, a little bit of magnification allows you to really differentiate what it is you are seeing – as often, even though you are in bush, you may be looking across from one ridge to another, or peering out, into and over clearings – looking for animals that are feeding, or hanging around the edges of the bush.

For this, you don’t need a massive amount of magnification.

Good class (and good coatings) can also assist in the contrast and light gathering – actually making it easier to see in the bush that you can with your naked eye. But more on that down below.

All this was prompted by spending a lot of time with Richard from Balnagown Hunting – he would constantly be on his binos – on the tops, in the bush, and through discussions with him, I slowly came to the realisation a lightweight pair of bino’s could be a good investment, even for a bush hunter.

The Terra ED 8×32

As it turned out, I was chatting to the rep from Outdoor Sports, the Zeiss importer – likely about one of our upcoming PSNZ22 shoots, or something else gun related (Natali is a crack shot) – and she mentioned there were some great deals to be had on the new Terra ED 8×32.

This interested me for two main reasons – one, for Zeiss, they were cheap. Now, this also potentially meant that they could have been ‘cheap’ in construction as well, but it was a way of getting into the Zeiss name at a price that wasn’t going to kill me. Secondly, this was the special edition Under Armour version, that came with the bino harness. Something that would work very, very well in the setting I wanted them for.

I grabbed a pair to try and trundled off to Balnagown to give them a test.

Zeiss – I am sure you know the name.

I would have to assume there is little chance, if you have ever picked up a rifle, you don’t know the name Zeiss.

In 1846 Carl Zeiss opened up his workshop in Jena, Germany. In 1904, after years making telescopes and spotting scopes, the first rifle scope was made – 2x magnification!

Now, Zeiss produces a massive range of medical, sporting and recreational equipment – of course – we generally know them through the spotting scopes, rifle scopes and of course, binoculars.

Glass and Coatings

  • 8x magnification
  • 32mm objectives
  • Schmidt-Pechan roof prisms
  • Zeiss MC anti-reflective fully multicoated optics
  • SCHOTT extra-low-dispersion ED glass

Now, the number one question for me, was how did a company like Zeiss make a bino at this price point, while still trying to maintain the quality traditionally associated with the name?

Was this a cheap pair of bino’s that had just been plastered with the name as a marketing effort to address the lower end of the market, or, was this a pair of quality Zeiss Binos, that they had managed to get to market for less?

Well, they didn’t skimp on the glass. SCHOTT is the same manufacturer for the entire range of Zeiss Glass – and the glass in the Terra HD 8×32 is true ED (meaning Extra-Low Dispersion) glass – which results in a clean, crisp image, with minimal Chromatic Aberration and natural, accurate colours.

Sure, they are not the same as a pair of bino’s worth three times the price. Which, you know, is to be expected. However, though falling off a little on the extra edges, the centre of the bino’s is razor sharp and the image clear and crisp.

Clarity & Brightness

Well, better than the naked eye!

Thanks to the coatings on the glass, the image through the binos (to me, and others that have looked through them) is better, meaning sharper and crisper, than looking without them. This is because the coatings help improve contrast, which means edges resolve a little better. In addition, it appears brighter looking through them – so makes looking into the dark trees a little easier as the light gathering on them works so well.

Robustness / Wear

These are not built cheaply.

The rubberised coating on the outside is perfect for my intended use – they happily sit on the outside of my jacket (the harness really works well) and I can just grab and use them as needed. I have crawled up to a shooting position with them between me and the dirt, walked around in the rain (put the top lens cap on to stop water landing on the lens, obviously), and generally given them a good workout. Richard from Balanagown, who, after trying mine immediatly got himself a pair, has given them even more of a beating. With no issues.

Actually, at this point, several more people have looked through them, put them down and basically said ‘yup – get me a pair’.

Value for Money

Great, basically. Sure, it’s a step up if you are used to spending nothing on binoculars – but – they also cost less than say, a new rifle – and you are potentially going to have these binos for longer!

Without going into the money of a Swarovski – who, sure, for 3.5k is likely going to be better (really not sure if they would be over three times better though) the Zeiss is the perfect choice for your first pair of ‘serious’ binoculars.

Alternatives

If you think you might want a bit more stretch in the binos – they also have a 10x model – as well as both an 8x and 10x in a bigger, more light gathering 42mm objective version – but – for my intended use – the 8×32 has proved excellent. If I need a little more magnification, I normally have my rifle scope next to me anyhow. I don’t recommend glassing through a rifle scope – ever – but if you need a little confirmation before pulling the trigger – no worries. If you regularly find yourself wanting more magnification in the binoculars – then you are probably on the tops anyhow – and want a more powerful pair.   😉

Other brands wise – well, there are always plenty, and sadly, you are going to have a challenge trying them all. If you can though – maybe compare to the Vortex Viper HD 8 x42 – little more money, little more weight – but – if you find yourself really working towards the dark end of twilight – that extra bit of objective size might just be a help.

Video Review

Not the specific model – but a good example of how the harness that comes with the binoculars works.

[fvplayer src=”https://www.youtube.com/watch?v=HIdQcPQqM5w” splash=”https://i.ytimg.com/vi/HIdQcPQqM5w/hqdefault.jpg” caption=”Zeiss Terra ED 10×32 Under Armour Edition”]


Interview with Matt & Steve from Twin Needle

0

[fvplayer src=”https://vimeo.com/180015911″ splash=”https://i.vimeocdn.com/video/588125085_1280x720.jpg?r=pad” caption=”Twin Needle Render”]

In a world of planned obsolescence and disposable products, the notion of repairing products may seem foreign to some. However, once you have invested in high quality, long term equipment, repairs and maintenance start to make a lot more sense than just dumping and replacing.  In the long run, this attitude can actually cost less, and there is no argument that it’s a lot better for the planet.

Matt and Steve have over 30 years of experience in the outdoors repair and manufacture industry. So your gear is in good hands.

In addition, they have developed their own range of packs and equipment – drawing on experience in the Regular Force of the Royal New Zealand Infantry and Reconnaissance Platoons.

Video up above – audio podcast below.

[powerpress]

An interview with Alex Broad – product designer for Hunters Element

0

[fvplayer src=”https://vimeo.com/177511563″ splash=”https://i.vimeocdn.com/video/584944670_1280x720.jpg?r=pad” caption=”Alex Broad Render”]

Hunters Element is a well-known brand in NZ hunting circles – the first to introduce digital camo locally and constantly coming out with functional, well fitting1 hunting kit.

In the first of our interviews – we had a chat with Alex about the brand, design process and upcoming kit.

Video up above – audio podcast below.

[powerpress]


  1. shock, horror!