Home Blog Page 25

Why do we hang meat?

0

Glycogen, Lactic Acid, Rigour Mortis & You. Aging Meat. Hang Meat.

You have found your prey, put it down and are ready to start processing it. What happens next is going to directly affect the end product – the taste, the tenderness, the quality of the meat. Are you doing the most to maximise it? You hang meat.

The treatment and timing of working with a fresh kill is yet another subject that sparks many varying opinions and ultimately disagreements. I guess it’s similar in the way that some people still believe that the majority of game meat is always going to be strong flavoured and tough. It certainly doesn’t have to be.

The first venison I was given I totally ruined in the preparation and cooking – more correctly, I took it home and cooked it within ten hours of the animal being killed – it was tough. However,  a quick look online revealed I had really just committed a basic but common mistake – I had cooked it bang in the middle of the process of rigour Mortis. When the meat is probably at it’s toughest. But what exactly is rigour mortis, what causes it and how do we manage it to ensure we get the best out of our meat?

In it’s simplest form, we can consider oxygen to be responsible for muscles being able to relax. Specifically, Oxygen is required for the production of  Adenosine triphosphate, which causes the myosin (thick filament) to release the actin (thin filament) of a muscle, allowing the muscles to separate and ‘relax’ or expand. No Oxygen (as in, no longer breathing) means the chain of events required to allow a muscle to relax disappear and the muscles start to bind and stiffen. The time it takes the body to lose the last of it’s oxygen stores is the time it take for rigour mortis to set in. Once set in, it requires another chemical reaction to take place to release again.

At the same time a chemical process is causing the body to stiffen, a secondary process is underway.

Glucose in the muscle starts turning into lactic acid. This results in a change in internal pH levels and in turn affects the speed of tissue breakdown. The speed of this process directly affects the resulting meat. Too much lactic acid (generally caused by a high stress death – for example a long chase or a long track after a wound) and you can end up with pale, soft meat, too much and you get darkened, firm and dry meat (long term stress – i.e. poor condition animals).

The goal then, from both a moral and quality standpoint? A quick, unexpected death. This results in a controlled and gradual breakdown.

The breakdown is also what ultimately ‘releases’ rigour mortis. The myosin starts getting broken down in turn releasing its grip on the actin and therefore letting the muscles expand again, ‘relaxing’ the muscles. They key then, is to find the point where the muscles have relaxed, but the decomposition of the body isn’t at the point where health or taste concerns kick in.

It’s all about timing.

In a deer, dependant on temperature (warmer can speed up the process), size and general condition of the animal, rigour mortis is expected to set in with six to twelve hours – and will be gone within twenty four.

Everyone has their own rules on this one – but one seems fairly constant – butchering your animal while it is in the process of rigor mortis will result in tougher meat. It’s generally considered better to wait until after – also known as letting the animal ‘set’.

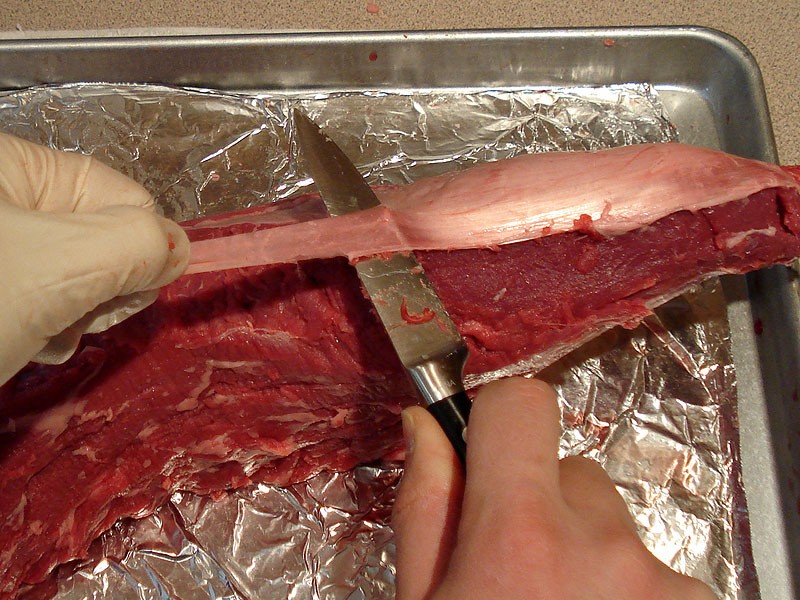
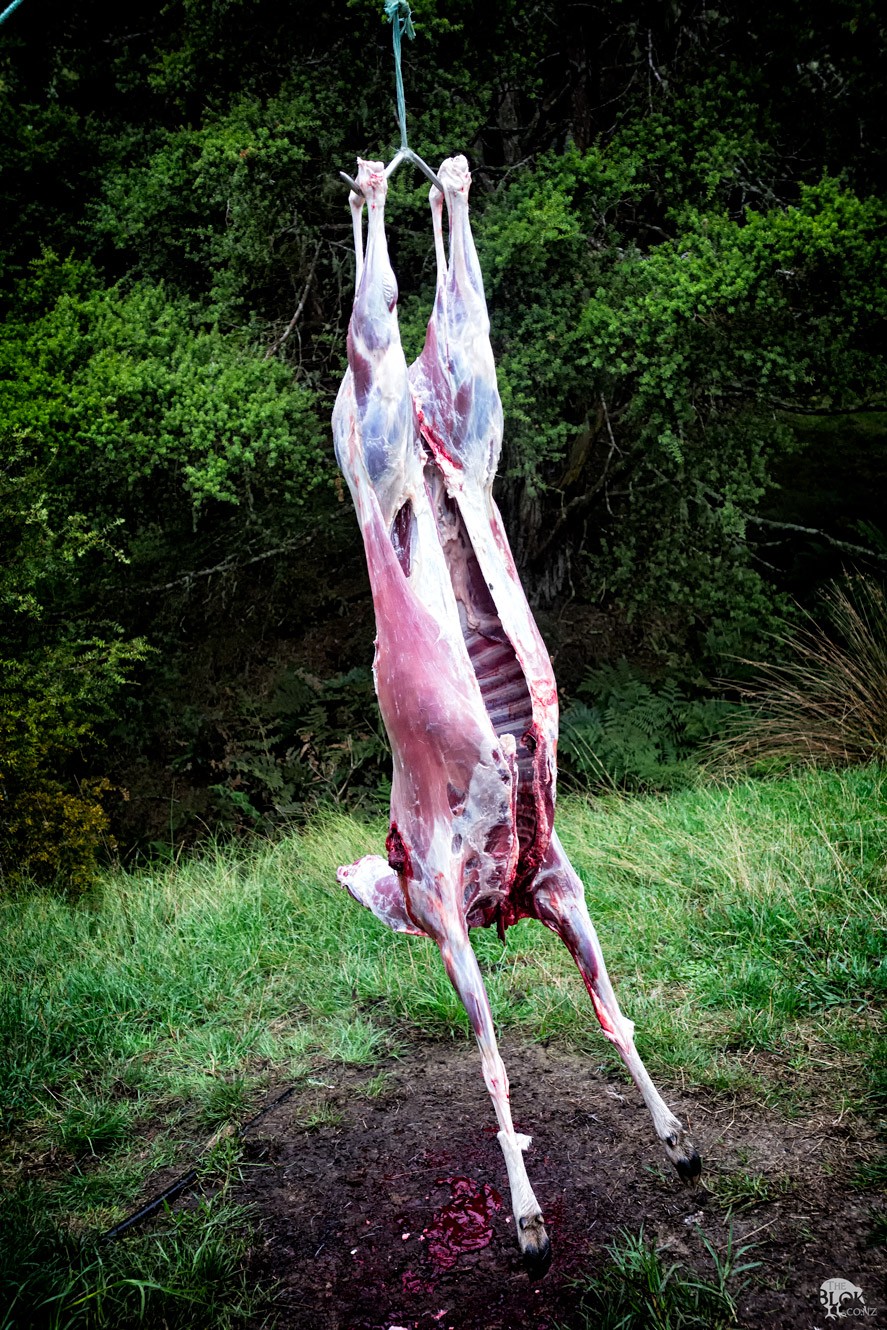
The ideal situation would be to field dress the animal immediately, removing the internal organs and starting the process of cooling the meat down. This is because, as above – temperature effects decomposition rates – the warmer the faster – and we don’t want the animal starting to decompose in a negative way, especially when only certain parts of the animal (internal) are doing so.

Then, skinning the animal before too much cooling (generally easier to do) and then hanging the animal to allow it to completely cool and set. In an ideal world – this would be in a temperature and humidity cooled chill room. Though this obviously isn’t going to be practical in the back country.

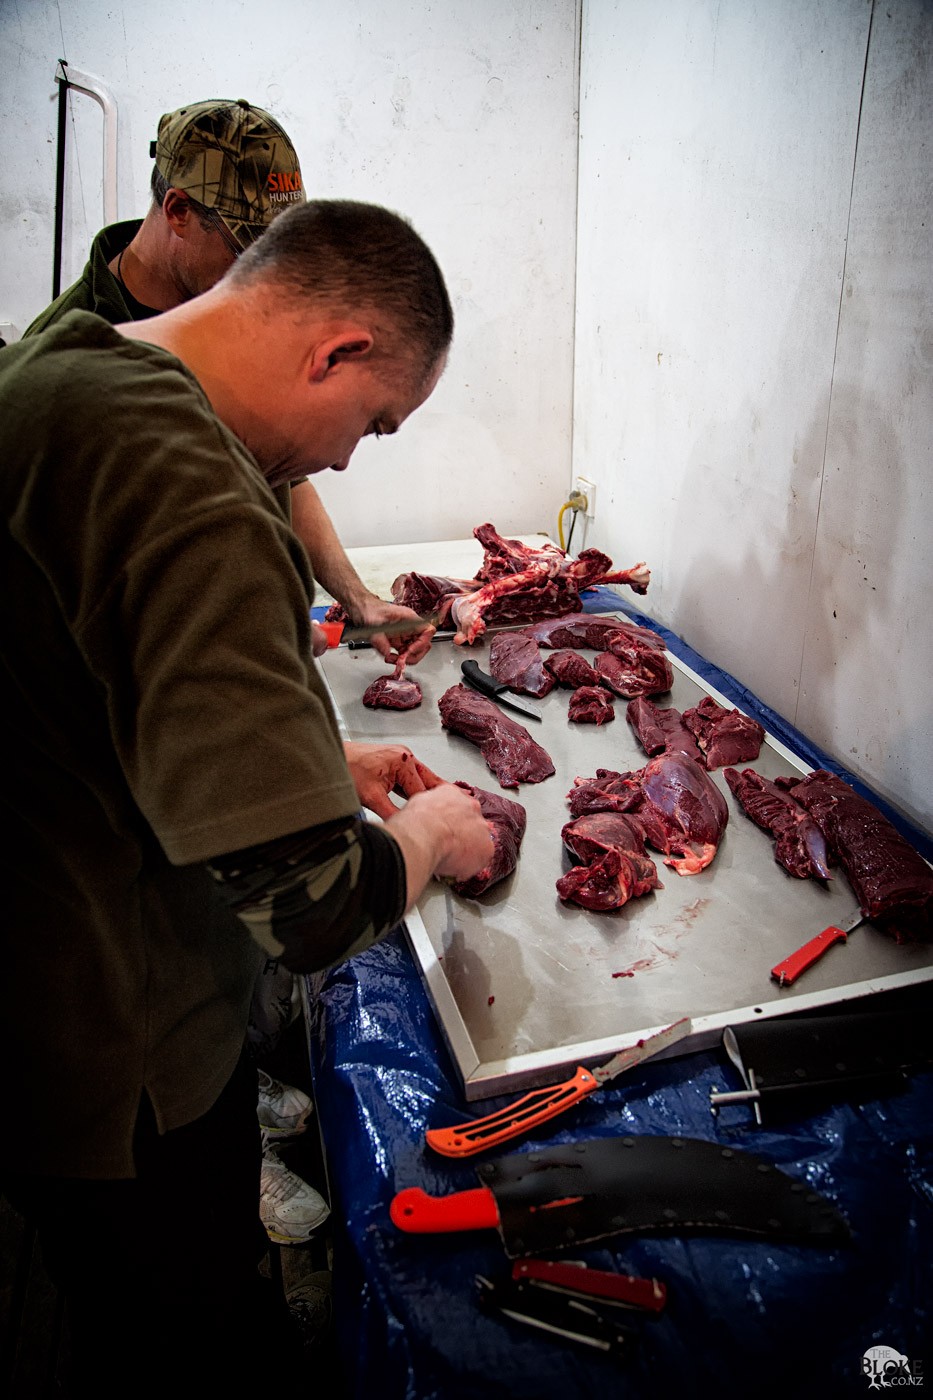
Once the meat is set – you can decide to either let the carcass hang to allow the flesh to further tenderise as the enzymes further break down the bonds within the muscle, or you can butcher and store the meat.

Hung and then packed. The wonders of using a butcher!

Hang or Freeze?

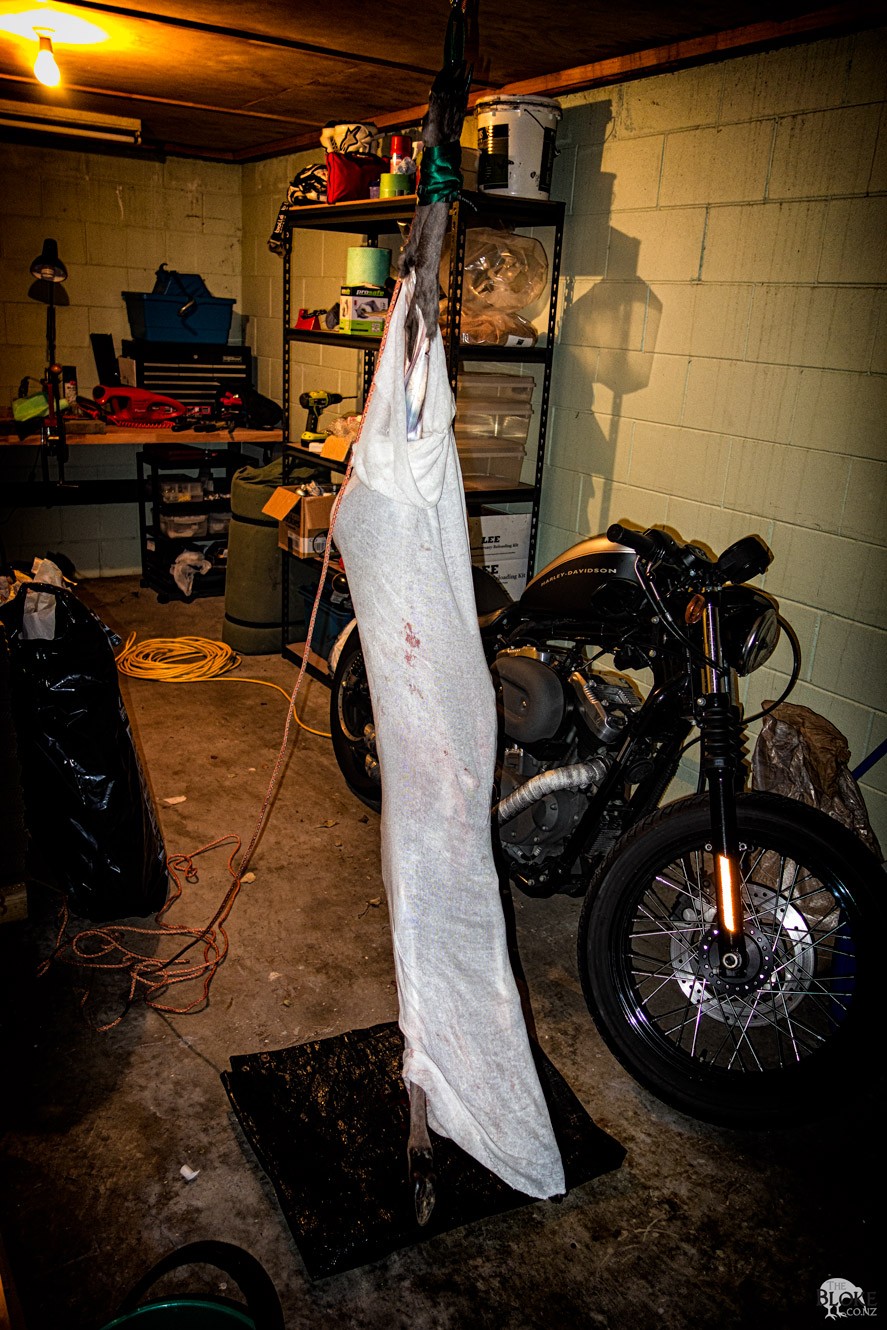
In an ideal world, we would all have chillers out the back of our places. In the real world, particularly for urban hunters like myself, we don’t have somewhere we can leave an animal hang for a couple of days.

Ideally, consensus is, would be to leave the animal hanging for around a full week before processing. The goal being to find that sweet spot between stiff and pongy. ‘Aging’ an animal this way helps with tenderness and improvement of flavour. Yes, we want our meat in an initial state of decomposition. But not what we would generally consider ‘rotting’.

However, if we don’t have the facility to hang our meat in a chiller there are still options.

Some people get themselves an older standing fridge – pull the insides out and use it as a mini-chill room. If you do this – make sure the fridge doesn’t have a ‘defrost’ mode – as this will not do the meat any favours.

Finally. If all else fails – you can resort to simply processing the meat, cutting it into steaks/roasts, and letting it age in the freezer. Yes. Meat will age in the freezer. I know of one guy who all but rotates his meat seasonally. What is in the fridge now, won’t be even looked at for at least six months.

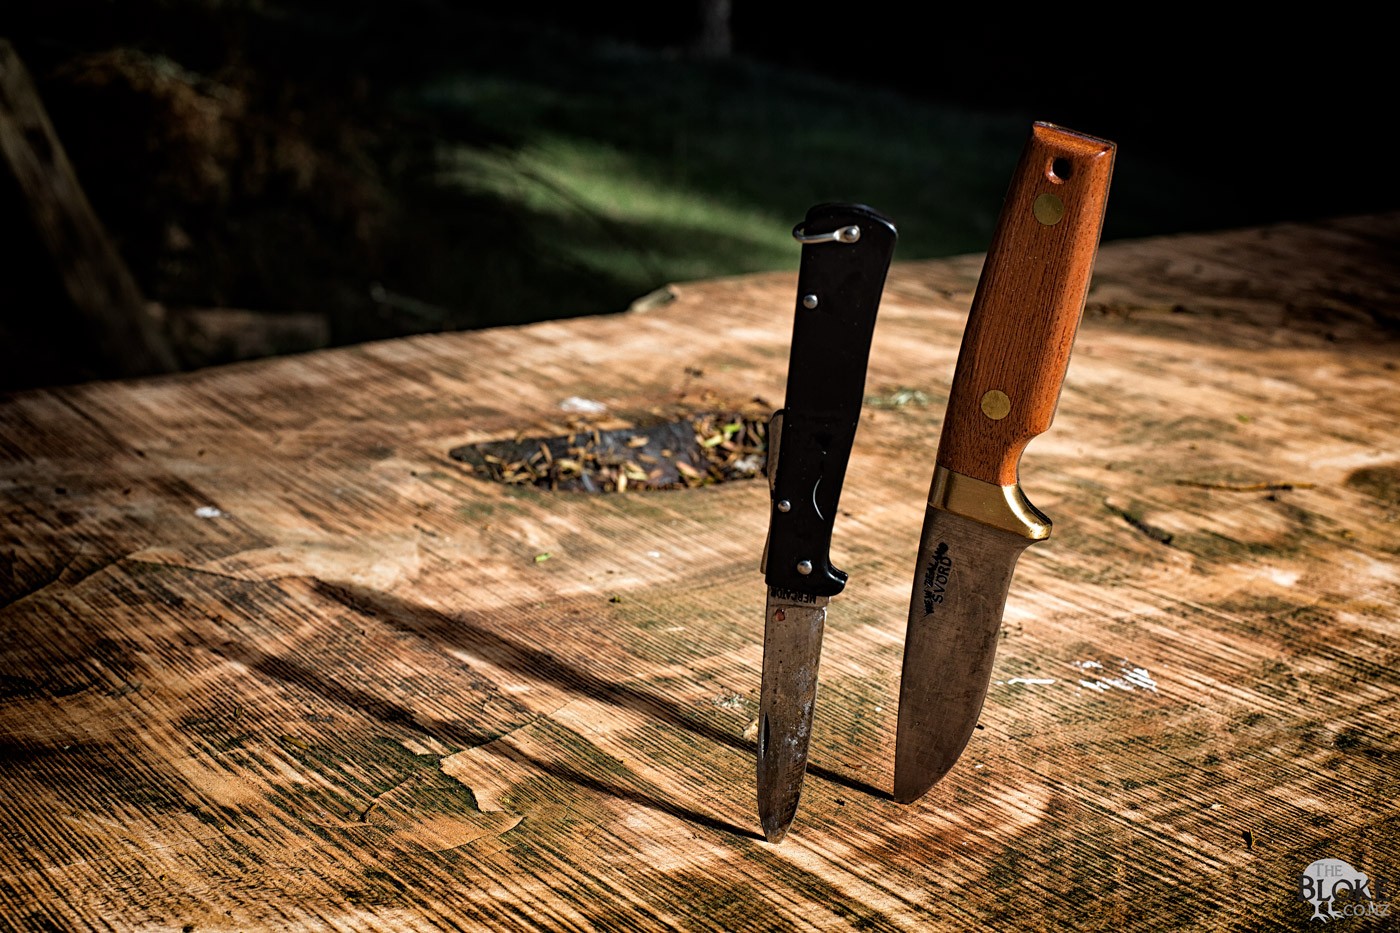
Two of my favourites.

Interestingly, this whole article came from the question –

“If I want to process the animal in the field, how much can I do without diminishing the quality of the meat?”.

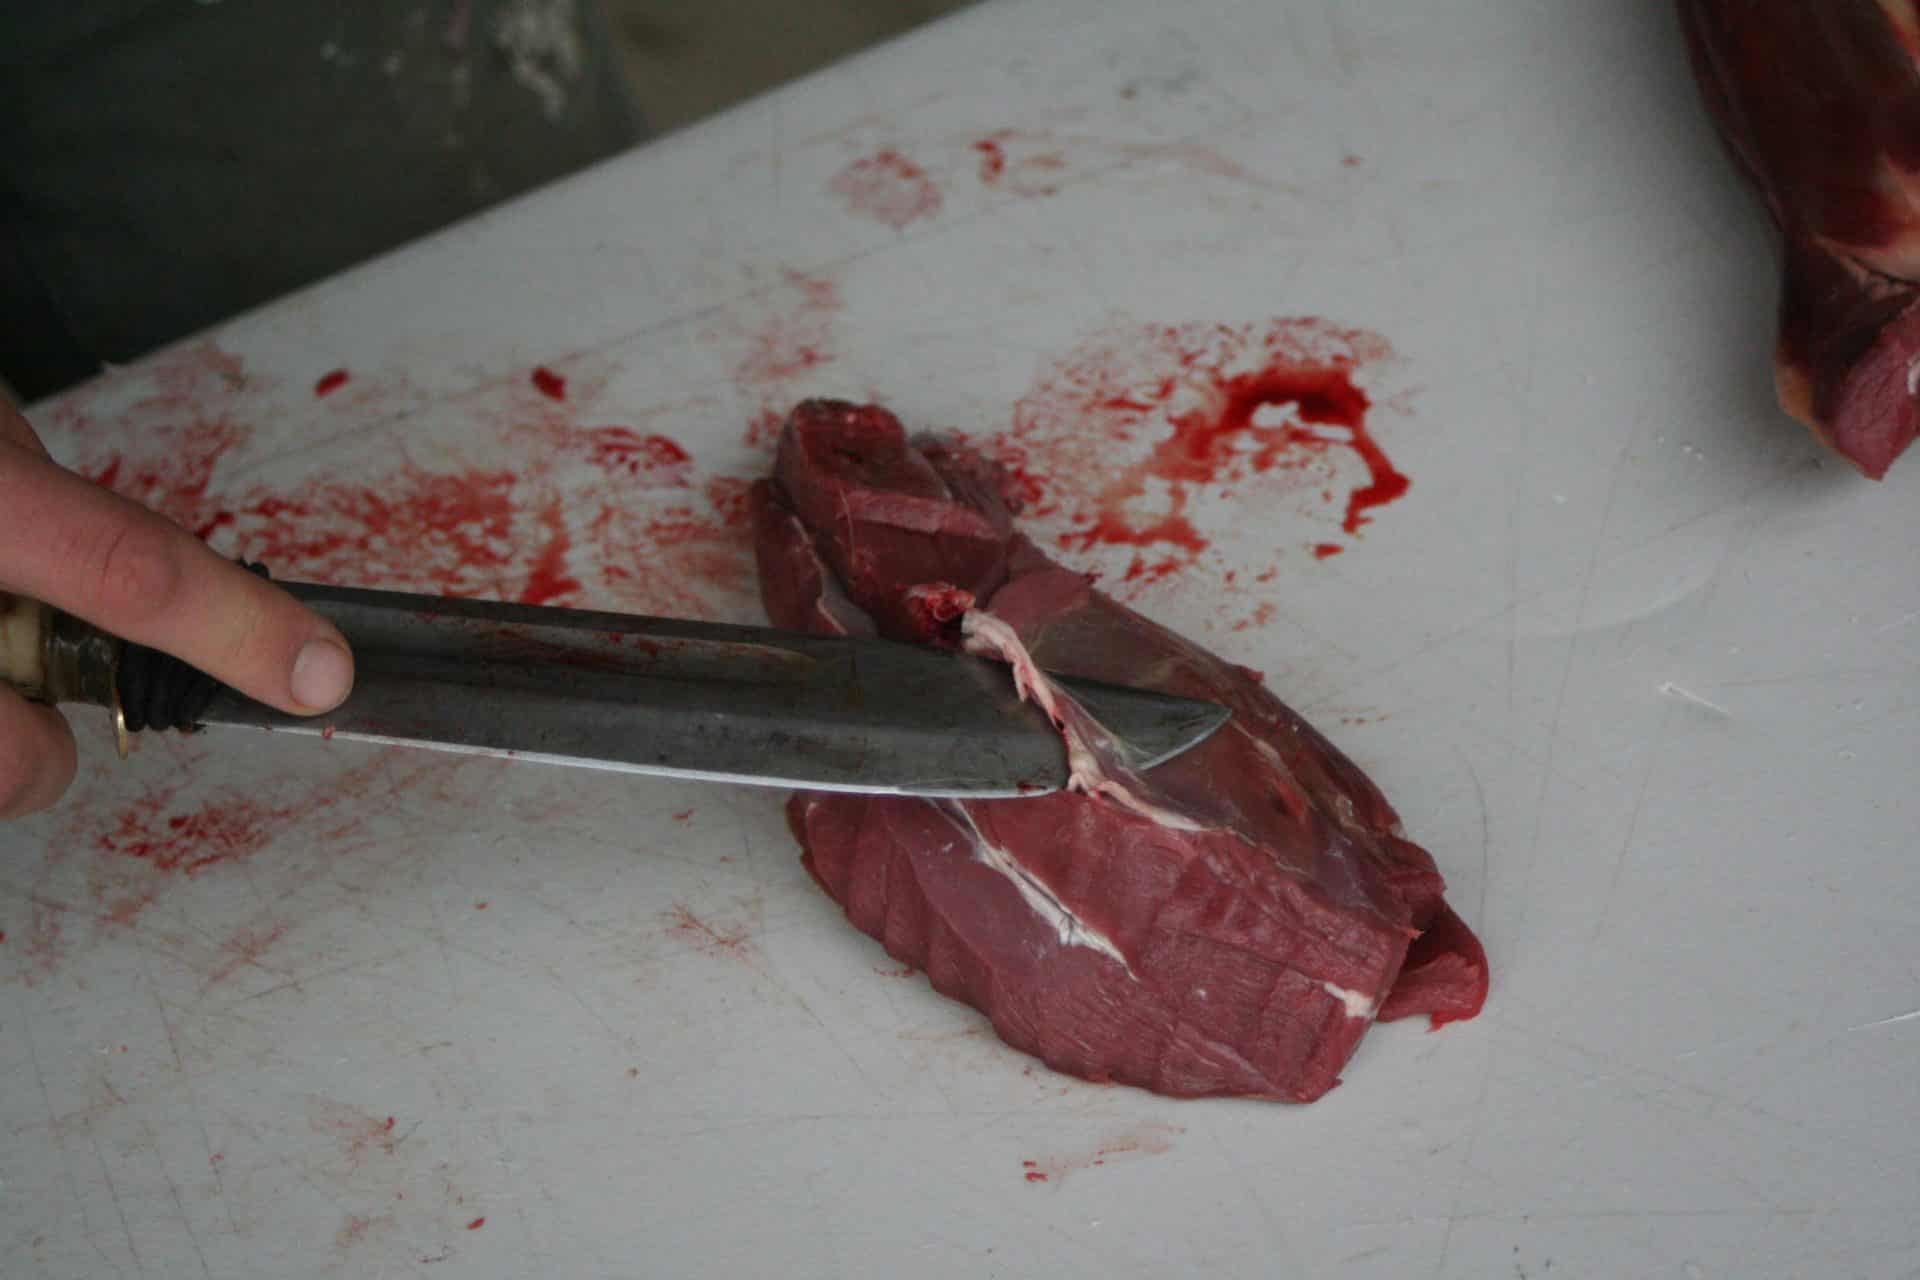
To me, the concept of carrying out a field dressed animal, bones and all, isn’t that smart. I personally am not going to use the skull, ribs, bones – so why expend energy carry it?

What my consideration was – is basically – can I kill it, gut and skin it and quarter (or even bone out) that animal before rigour mortis sets in and how will it effect the meat? Well – obviously I can. More importantly – does doing it this way loose anything in quality to hanging a carcass for a couple of days first?

Theoretically, as long as I am relatively swift, I shouldn’t experience any additional shortening – provided I do most the work before the oxygen levels drop enough to start having the meat stiffen up. It might be the case though, of only cutting into major sections – then I still have the option of dry aging some large sections. That process being another article.

Heavy and slow or light and fast? The projectile (and ammo) conundrum: Part one – Stability.

0

What first got me seriously pondering this question was a setup session recently, with a couple of similar rifle that had the same issue. The heavier Hornady ammo the client was using, didn’t shoot as well as the lower weight Sako Ammo (Sierra projectiles).

Now, the easiest solution would be to just utilise the lighter weight projectile, nearly half the average group size, and be done. But my brain doesn’t work like that.

I wondered, firstly, why. The Hornady Precision Hunter is very good ammo and shoots consistently, and for that matter, so does the Sako GameHead Pro ammo. But with these two specific guns, on this day, the Sako came out better off.

The aim of this article is to address some of the reasons why, but also explore the ballistic differences the final choice would make for the shooter.


Hi there. Want to read the rest of the article?

Cool. This one is reserved for site supporters.

Connective Tissue

0

What makes meat juicy and tender?

TLDNR Version: Slow cook tough cuts with some wine. We already know this. But are you interested to know why?

Multiple factors come into play when we try to understand what makes the meat juicy and tender. Nothing beats a piece of meat that nearly mounts in your mouth but retains that juicy, flavoursome texture. This is influenced by the cut of meat and how long it is cooked. In the case of cut choice – the more a particular part is used by the animal, the more muscular it is likely to be – which means the presence of more connective tissue.

remove_silver_skin

What is Connective Tissue?

Muscle fibres are bound together in collections of protein by connective tissue – in addition, each collection of muscle fibre is additionally covered in a sheath of connective tissue.

There is two main types of connective tissue, Collagen and Elastin.

Collagen is the white ‘silver’ that most of use know due to having to cut it off our cuts of venison. While a cut with a pile of Collagen in it may seem to be a ‘junk cut’ – in reality, it also gives us the opportunity to create some of the more silky, ‘pull-apart’ meals for a simple reason – Collagen dissolves in moist heat. Meaning, slow, moist cooking breaks Collagen down into Gelatine and Water. Both things that can go a long way to making meat seem juicy and tender.

Elastin, however, is not so easy to get rid of. Elastin, yellow in appearance, forms primarily in older animals, strongly being the reason that an old stag can be considered chewy as all hell. Unfortunately, it doesn’t break down due to cooking, so needs to be dealt with by either cutting it away or mechanically breaking it up.

img_65611

How do we break down Connective Tissue?

The goal then is to break down or reduce the connective tissue in order to make the meat more tender. More correctly, you are reducing its toughness. Pre-cooking, we have two primary ways to do it:

Chemical Methods: Marinades

Sitting meat in a marinade helps tenderise meat by letting acids and/or enzymes start the process of breaking down the connective tissue. This is most effective where the marinade is in contact with the meat – i.e. the surface, so thin cuts make more sense.

Acids – marinades containing acid – that is, lemon juice or wine.

Enzymes – fruit – marinades featuring pineapple, kiwifruit or paw paw.

Mechanical Methods: Beating the crap out of it.

There is a couple of methods available to you here – dependant on the equipment you might have. Essentially the concept is the same regardless – you are working on breaking down the connective tissue into smaller pieces, which in turn you don’t need to bite through to eat.

Hammer Time – what many people are familiar with is the heavy, toothed surface hammer that you use to physically beat the meat into tenderness.

The needler – a machine that either makes very fine cuts all over the meat or literally pincushions the meat, breaking up the less tender tissue.

Cutting it fine – simply cutting meat up into fine cubes is a time tested method of breaking up the tissue and making it more easily broken down.

RX100__MGL0043

Cooking Methods

Slow and low is the key here – and for long periods of time.

By cooking cubed meat slowly in a moist (i.e. marinade of wine and a can of tomatoes) you are creating the optimum environment to break down the connective tissue and make the meat essentially break apart.

Cooking meat this long actually can make the muscle fibres themselves tougher, but because you are turning the connective tissue into gelatin, the fibres no longer have anything to hold them together and instead have a silky smooth texture that can be pulled apart with a pair of forks (hence, pulled pork).

105F/40C – 122F/50C –Calpains begin to denature and lose activity till around 105F, cathepsins at 122F. Since enzyme activity increases up to those temperatures, slow cooking can provide a significant aging effect during cooking. Meat should however be quickly seared or blanched first to kill surface microbes.

120°F/50°C — Meat develops a white opacity as heat-sensitive myosin denatures. Coagulation produces large enough clumps to scatter light. Red meat turns pink.

Here are the early stages of juiciness in meats as the protein myosin, begins to coagulate. This lends each cell some solidity and the meat some firmness. As the myosin molecules bond to each other they begin to squeeze out water molecules that separated them. Water then collects around the solidified protein core and is squeezed out of the cell by connective tissue. At this temperature meat is considered rare and when sliced juices will break through weak spots in the connective tissue

140°F/60°C — Red myoglobin begins to denature into tan coloured hemichrome. The meat turns from pink to brown-grey colour.

140°F/60°C — Meat suddenly releases lots of juice, shrinks noticeably, and becomes chewy as a result of collagen denaturing which squeezes out liquids.

Collagen shrinks as the meat temperature rises to 140/60 more of the protein coagulates and cells become more segregated into a solid core and surrounding liquid as the meat gets progressively firmer and moister. At 140-150 the meat suddenly releases lots of juices, shrinks noticeably and becomes chewier as a result of collagen shrinkage. Meat served at this temperature is considered medium and begins to change from juicy to dry.

160°F/70°C — Connective tissue collagen begins to dissolve to gelatin. Melting of collagen starts to accelerate at 160F and continues rapidly up to 180F.

Falling apart tenderness collagen turns to gelatin at 160/70. The meat gets dryer, but at 160F the connective tissues containing collagen begins to dissolve into gelatin. With time muscle fibres that had been held tightly together begin to easily spread apart. Although the fibres are still very stiff and dry the meat appears more tender since the gelatins provide succulence.

NOTES: At 140°F changes are caused by the denaturing of collagen in the cells. Meat served at this temperature med-rare is changing from juicy to dry. At 160°F/ 70°C connective tissue collagen begins to dissolve to gelatin. This, however, is a very lengthy process. The fibres are still stiff and dry but meat seems more tender. Source: Harold McGee — On Food and Cooking

Feel the need to geek out even more?

BushBuck Bino Chest Pack – and thoughts on chest packs in general

0

I guess there isn’t a huge amount to say about this one that isn’t already included in the video!

I have been keen to try out a chest rig / bino pouch for a while and one of the other blokes was kind enough to drop his one off for a play. This is the BushBuch Bino Bro pouch.

[fvplayer id=”69″]

I will likely do another update once I have used this for a while – really still just seeing if the concept in general will work for me.

Hopefully also get the opportunity to play with a few other options that are out there.

[/membership]

Rifle Scope 101 – choosing your first scope

0

Define its use – what do you need the rifle scope to do?

The more you can define what you want to use the scope for, before heading into a store – the better set you will be when you get there, and the less you are likely to be distracted by the shiny things.

It’s easy to think that the more expensive, the better – but it’s also important to remember that scopes have become more and more specialised in their nature. Just like the diverse nature of what shooters use their firearms for, so has the features available to them.

Is this scope for hunting? For close in varmints or long-range goat hunting? Is it going on a 22LR, or a 338 Lapua? Do you plan on shooting into the twilight hours, or is it likely to never be shoot away from the bench at the range? And of course – the all-important question – what is your budget?

Buy once, cry once

I would suggest you plan to spend more on the optics than you do on your rifle.

Really you say? But the bullet comes out of the rifle? I just need something to see my target with!

Yeah. It does. But how do you know where to the rifle needs to point? If you can’t see your target, it’s hard to shoot it. Conversely, the clearer you can see it, the easier it is to hone in on the very spot you want to place the projectile.

Interesting, I have seen cases where better glass allows you to see ‘further’ than more zoom. More zoom can sometimes just mean more of something hard to see!

Consider it an investment in your shooting. Scopes, on the whole, don’t wear out. As you upgrade your rifles, replace your rifles, buy additional rifles – you can keep/move and use the scope on all of them. In fact, I am of the opinion that I would rather have one good scope that I could move from rifle to rifle, compared to multiple cheap rifles that I never need to ‘move’ but never give me the resolution and image quality that one good one would.

Features – rifle scopes – buy what you need

This article is really only intended to be an overview of the many features and options you will find in modern scope design. Drill down into the linked articles to get more information. Have a question that isn’t answered yet? Well then – just get in touch!

Fixed or Variable Zoom?

It used to be the case that a variable zoom was expensive, heavy and hard to find. Well… that was a long ago now. In fact, you would likely be hard-pressed these days to find a fixed zoom1 scope. Modern production methods (and demand) has meant that the variable zoom has become the norm.

Generally (and this article is going to have to be full of generalities) the wider the zoom range, the more the scope – alternatively, a cheap, wide zoom scope is likely going to be of dubious quality.

Field of View

Field of view is a figure that represents how far you can see from side to side while looking through the scope. This is normally represented as a measurement given in feet or meters at 100 yards (or meters). The wider the field of view, the more you can see of the surrounding environment while looking through the scope.

Because of the laws of optical physics, when you increase the eye-relief distance, you shrink the field of view.

Parallax (focus)

Shooting a 22? Then you need parallax (really basically meaning, where the target focus is) to be closer than most centerfire rifle scopes will let you.

The lower end of rifle scopes, generally have a fixed parallax of 100 yards – this is, generally fine for hunting, but of course, with a 22, most of your shooting will be much closer than that.

Higher end, target style rifle scopes may introduce a variable/adjustable parallax, but again, you need to check how close it can get.

Again, depending on your use, you might not need this level of refinement. Most animals out to 200 meters won’t care, but small target sizes, or distance, decrease the margin of error parallax can induce.

Light Gathering (objective and tube size)

Hunting? The light gathering should be really high on your priorities. Why? Well – a lot of NZ hunting is done during twilight, and, especially if bush hunting, a lot is done under the tree canopy, where you simply get less light in.

A rifle scope that lets more light in, that is, doesn’t seem and darker looking through the rifle scope than not is of great benefit here.

MILS or MOA in your rifle scopes?

It’s overly simplistic to say – but I tend to suggest people decide if they think more in decimal or fractional. Essentially, MIL turrets work in .1 clicks and MOA in .25 – what makes more sense to you?

https://goodblokes.nz/moa-minute-angle-milrad/ – a more in-depth overview of the systems

https://goodblokes.nz/hang-on-how-do-i-dial-3-72-moa/ – why, I personally, prefer MIL

Capped or Dialable Turrets

Again – define your use.

If you are planning on mainly hunting with your rifle – at distances, say, under 200 meters, and likely to head through bush and scrub – ‘set and forget’ capped dials, that won’t get bumped are your best bet.

If you are looking to stretch things out further, and want to be able to quickly dial in an exact ballistic solution, target or ‘dialable’ turrets are going to work better for you. Though, then we get into a lot more options like zero stop, lockable turrets and more. Don’t worry about them if you don’t need them.

Again, if you don’t need them, save money on features and put it all into the better glass. I have both types of rifle scopes – depending what the rifles primary purpose is.

Reticle Choice

Again, much like turrets – take the time to define what exactly you are using the rifle for. For the most common hunting done in NZ, for newer shooters, I would suggest a clean, simple PLEX (crosshairs) style reticle is the best option.

If you are target shooting, or in situations where that second shot is going to be important, the additional information in a ‘busier’ reticle could be of use for making faster follow up shots. The design of this reticle, I have found, actually can be quite a personal decision, as some people like simpler or more complex designs, thicker or thinner posts, a floating dot, crosshair or maybe nothing at all. Reticle designs vary a lot, so it pays to read up on a few, and, if the thinking seems to mesh with yours, then that’s the way to go. If you find yourself looking through a reticle and your brain is struggling to make sense of it all, then go simpler.

First Focal Plane or Second Focal Plane?

Again, to make things simple, if its a PLEX (crosshair) then it makes sense to keep it SFP if you have a reticle you plan on using to measure things with, then FFP.

In a nutshell, a Second Focal Plane Scope means the reticle inside won’t change size as you zoom in or out. If you have a First Focal Plane, then as you zoom in and out, the reticle changes and stays in the correct scale throughout. On an FFP rifle scope, 1 mil in the reticle is the same a 5x or 25x, not so with an SFP.

Again, hunting in the bush? An SFP will work fine for you. Stretching the legs, in particular with shooting comps where you are likely to be taking more than one shot? Consider an FFP.

Buy the right scope for its use

Ultimately, you need to seriously consider the primary use for the rifle, scope, the setup, and build the system accordingly. Be aware of getting sucked in by fancy features that you might never use.

Ultimately, the scope/glass/optics are what you will be making most of your shooting decisions through. It pays to have the best you can on the rifle!


  1. apart from reflex and red dots 

Mueller Hut, Aoraki / Mt Cook

0

Mueller Hut

The plan

Spend the week at Muller Hut as Volunteer DOC Hut Wardens in the Mount Cook National Park

Through a MSC tramping partner (Josh @ Wilderness Magazine) we heard about the volunteer program for Mueller Hut around September 2011. My partner and I decided that a one week stay up a mountain presented a good challenge and goal for us, so signed up, and started to work on getting fit enough to carry everything we would require for one week, up the side of a mountain.

untitled (10 of 10)

Mueller Hut sits at around 1833m above sea level, and most of the walk up there ‘seems’ to be at around a 45-degree slope. Combine that with my propensity to carry around a pile of heavy camera equipment, and it soon dawned on us, that we needed to get a bit fitter if we wanted to get up there in one piece.

However, we took it on as the challenge it was, and spend the next few months getting out whenever we could, and learning as much as we could about dehydrating foods, trying to reduce our pack weight however we could.

untitled (3 of 10)

After flying down from Auckland and spending one night in Queenstown, and then another night at Unwin Hut, a well set up ‘Base Camp’ run by the New Zealand Alpine Club, we were picked up by Anthea, a DOC Ranger. She delivered us to the Information Center in the Mt Cook Village, where we went through a thorough induction process. Our role at the hut was to welcome people, make sure they were entered into the Park Intentions System, report back to Base and clean the hut and toilets each day. Critical information, such as the appropriate use of the ‘shit stirring stick’ was passed on. Full of knowledge, we were given a radio, dropped off at the camp ground at the base of the mountains, and wished the best of luck.

untitled (2 of 10)

Climbing the first part of the track, we discovered that it was mid way through being upgraded with wooden, gravel filled steps, but at that time, sans the gravel. This turned the steps into more of a ladder climb, but we made a slow progression up to our first real stop, the Sealy Tarns.

1

We stopped here, filled up the water bottles, sterilised them with the SteriPen, had a quick bite to eat, and carried on our way.

From this point, considered around half way, the track stops being a ‘track’ as such, and become a route indicated by regular markers. It also gets steeper, harder going at this point. A combination of bolder scrambling and loose scree provides a challenge for the day walker, let alone someone carrying (as it later turned out) around 30kg on their back.

However, the final challenge presented itself as we reached the ridge, and felt the first of the alpine winds. Enough to blow you right over, these winds have been measured reaching up to 220 kmph, and due to coming straight of the Ice Glaciers, are cold.

Mueller Hut

Suddenly, the packs seems to serve an extra purpose of providing some extra ballast, so, with Icebreaker Hoodies zipped right up, we carried on. The first sighting of the Hut was extremely welcome. At this point we were both very tired, and ready for a feed and rest.

Mueller Hut itself, is a simple, but well built wooden structure – one that provides gas cookers, solar powered lights, bedding for 28 in two bunk-rooms and a separate wardens quarters. In addition it has a dual ‘long-drop’ toilet, separate from the hut.

2

Ah, the toilets. DOC has a policy of removing all solid waste from the mountain, this includes human waste. This means the two toilets are feeding into large tanks, and once full, they are helicoptered off the mountain and dumped into the local sewage treatment system. While I fully support this idea, as the notion of everyone crapping wherever they like, and quickly turning the area into a giant toilet-bowl (toilet paper and waste degrades at a much, much slow rate in alpine areas, and really doesn’t belong there in the first place), it has to be said, they stunk, especially when they are getting full. However, really, it is a small price to pay, considering the incredible environment we are trying to protect.

We soon settled into our quarters, and slept very well that first night.

While I could fill pages with things observed or experienced up there, I will restrict it to a few for this post – some highlights included –

John ‘the Viking’ Warden – during our induction, we were advised that the water tanks were getting low, and some serious conservation may be required – or at least, we might have to use snow for our water source for the week. When we were heading up, about half way up the track we met the two outgoing wardens – John and Izzie. It seems John (who was sporting one hell of a beard) spend a large part of the week shovelling snow into the tanks – resulting in us arriving with full water supplies at the hut. If you know how much snow you need to melt into a cup of water, you will appreciate exactly how much of a legend the man is.
The Storm – shortly after getting there, the winds started to kick up, eventually stopping people getting up the mountain, and resulting in us having the Hut to ourselves, and experiencing 140-160 kph winds buffeting the hut. It moves, and creaks and groans – but stays standing. Within a day though, the wind had died right down, and we really only had light breezes for the rest of the week.
Nearly stepping on an Mount Cook Flea, also known at the Alpine Weta. During one of our many daily excursions around the Mountain, Alice suddenly exclaimed ‘STOP! Look down, right by your foot’. Next to my foot – sitting in the vegetation, was a Weta. Slowly, I switched the camera over to the macro lenses, and managed to get a series of shots of the fella, which graciously sat completely still until I had finished shoving a camera in its face.

Getting continually distracted by the view – all you needed to do was look up, and half an hour later you would realise you had been staring out at the mountains. This continued right up until we left – the mountains, the glaciers, the avalanches all serving to provide continuous eye candy.

3

We were lucky to be able to experience nearly every type of weather while up at the hut – from gale force storms, to hot, windless days sunbathing on the deck, to minimal visibility due to clouds, nature served up a phenomenal experience of spending time in the mountains.

When it was time to head back down, it was with a mix of excitement and sadness. Excitement of being able to have a hot shower, flushing toilets and electricity again, but a sadness of leaving a truly wondrous place, and a simple, soul satisfying way of living for a while. We are are already planning our next trip to the area.

untitled (5 of 10)

Summary

Location: Mueller Hut, Mt Cook

Grade: Harder than indicated, especially if you are planning on taking a full pack. Not technical mountaineering, but a hard climb. Well worth the sweat though.

Distance: 8.9km (there and back)

Time: 1 Week

Party Size: 2-35 (had a couple of nights with a full hut)

untitled (1 of 10)

Overview – Ballistics ARC

0

Ballistics ARC is a ballistic solver – you put in your firearm information, and it outputs the amount you need to dial your scope up to impact at a specified distance.

I give you an overview of the app, how I use it, and some considerations.

[fvplayer id=”70″]

[/membership]

Sako 85 Laminate .270

0

Had another Sako 85 in .270 out to set up – this one had the laminate stock and was wearing a Leupold Vx5 on top.

It also had a Hardie suppressor on the end. Made the gun a lot more comfortable to shot, and, interestly (for those wondering) compared to last week’s one – only shot 5 fps slower – which, in the bigger picture is possibly also the result of a temperature difference, or just a statistical error. In other worlds – no – your suppressor potentially won’t change the speed of your gun.

I can only say it again – the Sakos are so smoooooth! This guns action, trigger, everything just comes together so nicely.

Supporter Bonus Content

Site supporters get to see the zeroing/test targets, ammo and velocity results and my thoughts on what I liked and what I would change with the rifle.

Sako 85 wooded .270

0

I am still a sucker for wood. Especially wood that looks and smells as good as this rifle did!

Clients rifle – Sako 85 (I think older deluxe model?) chambered in .270. Swarovski Z5 on top.

This was a beautiful rifle. But man did it bark! I still have the bruses on my collar bone.

Collar bone you say? Yes. Over the last couple of years my shooting position has changed, part of that being that the rifle has become more and more centered, to the point where it basically sits on my collar bone directly under my eye now (not the ‘sholderpocket’).

For most guns I shoot – either smaller cartridges, or, bigger with muzzle devices on them, this really isn’t an issue. It’s about recoil management, no macho points.

However, a .270 with nothing on the end of the barrel does kick a bit more when the recoil pad is sitting on top of that bone, and as I shot it, I found myself pushing it out further and further into that fleshy pocket, and, of course, the rifle started jumping up and across my centreline.

Additionally, the rifle stock isn’t symmetrical – the palm well and check riser are optimised for right handed shooting. It didn’t make it uncomfortable or hard to shoot – but it was noticeable.

However, it still shot sweet. Just not something I would shoot much.

Supporter Bonus Content

Site supporters get to see the zeroing/test targets, ammo and velocity results and my thoughts on what I liked and what I would change with the rifle.

Range Estimation basics for hunters and shooters

0

Shorter distances, bush hunting under 100 meters, maybe in a pinch out to 200, you can utilise systems like Maximum Point Blank Range, or Optimised Point Blank Zero allows you to ‘set and forget’ your hunting rig and simply aim centre mass in the understanding that ballistics will ensure you are no lower or higher than a determined amount from your point of aim.

Going out further, incorrect data in means incorrect data out for your firing solution – and it quickly compounds as you stretch out further.

How much does it matter?

Cal from Precision Rifle Blog has a great article on just this subject.

Hi article concludes, the ranging is one of the most important elements in a firing solution. At 700 yard, and error of 15 yards (which I have seen done with a laser rangefinder) can reduce your likelihood of a hit on at 10-inch target by 19%! Eyeballing it would likely be even more of an error.

Make sure you head over to Cal’s page, as he breaks it down in depth, and is a great resource for precision riflemen!

Eyeballing it

Some people just have a natural nack at guesstimating range. For others (like myself) the estimations are all over the place. However, this is a skill you can develop through practice.

Grab a couple of mates and go sit on a hill. Identify some points in the vista and write down your best guest on the distance to the point. Once everyone has their quest down, break a rangefinder (or google maps on the phone) and confirm actuals.

Do this for a bit and you will start to develop a bit of an understanding of how far things are actually from you. You can do a similar exercise with guessing where north is and confirming with a compass – and you are basically training your brain to align an internal sense of distance/direction and calibrating it with an external tool. Even if you don’t it bang on each time, you will quickly start to understand if you normally under or over estimate distance – and that in itself is valid information to have!

Use a known reference

A simple tip to help in your estimation is to use a known distance, that you are familiar with to help work it out. I personally have no real sense of how long a football field is, but I have heard that is a good standard. A cricket pitch, of even the 100 meter local range can also all be familiar distances that you can use as a mental model to map out the distance in front of you.

Be aware of the topography

Practice on both flat areas and hilly. Topography and rolling features do tend to trick your brain into estimating wrong.

Just thumb it

These is also an old trick utilising a handy ratio built into the human body. That is – your arms are ten times longer than the distance between your eyes. Ah-oh… here comes some triggernometry!

If we have an know reference point out there – like a target or animal width, for example – we can use some simple maths to give us a distance to target.

In order to keep things simple for a maths point of view – let’s say we spot a Red Deer broadside out at distance (average length 2.1m).

Hold your arm out at full length with your thumb up. Close one eye and line up the edge of your thumb with the edge of the target. Now switch eyes. As a multiple of the width of the known sized reference out there, how far did the edge of your thumb move?

Say it shifted over about 10 times the width of the animal out there. That would be 21m (10 x 2.1) multiply that by ten, and you have your distance! In this case, 21m x 10 is 210m.

I mean I hope you realise how un-accurate this method is going to be. The length of the known, how many to multiply it by… it is a very rough, but in a pinch, usable guesstimation!

Just use a rangefinder!

Yes. Sure. If you have one available, I would always suggest using a rangefinder. They are massively more accurate than the best estimate by eye, and realistically, also more accurate than most of our attempts with a reticle will ever be.

However, not all of us have a rangefinder (though the budget for a precision rifle really should include one), and, some competitions will actually specifically exclude their use.

Much like still understanding how to use a map and compass, even while normally using a GPS, understanding the techniques and skills without having to relying on electronics provides a solid base of knowledge that is simply speed up with modern aids. Learn it, practice it, but go ahead and use that rangefinder most the time!

If we don’t have a rangefinder to use, but want something a bit more accurate than a guess, what can we do?

Well – we can break out the calibrated ruler that normally sits just in front of our face on the rifle and use the tools we already have!

Milling – using a reticle to determine the range

The reticle – some basics

So, we want to use the reticle, but I guess it is important that we need to understand that not every reticle is actually usable.

The Plex (and ballistic plex)

Also known as a crosshair. This is what many hunters are familiar with. A simple cross-shaped reticle. Modern designs may also incorporate some additional lines below the main stadia, which are known as a Ballistic Reticle, BDC Reticle or some other similar name. While the markings will have a known measure/distance – normally, it’s not going to be easy to utilise them for our intended purpose. We need something with know, regular, and ideally numbered measures.

‘Tactical’ Milling (and MOA) reticles

Milling as a term is in itself a little confusing. While it might be easy to assume it relates to Mil, as in MilRad, it’s actually Mil, as in Mil Dot. Irrespective, it basically the process of measuring with a MIL or MOA reticle and converting to distance.

Modern, tactical/military/competition reticles have evenly spaced markings in their reticles – spaced/based in either MilRad or MOA. I am not going to much into the systems here, but essentially, either one will work, just different maths.

To actually MIL a target, we simply overlay the reticle on the subject and count the marks. It’s important here to actually understand how your reticle is setup – because each mark could be .2 MIL, .5 MIL, 1 MIL, 1 MOA, .25 MOA, many options here.

I am going to use another image of Cal’s here – because I would basically just have to make the same thing up anyhow –

In this image, with each small subtension being .2 mils, we are looking at just more than .8 mil – it’s not .9 – so maybe .85?

First, and a key component here, is we need to have a reference point in the form of a known height or width. You can find a quick reference card at the end of this article with some common NZ heights to get you going.

  • Mill the target – measuring the width or height of known sized target
  • Take the measurement and known width and calculate distance
  • Calculate firing solution and shoot!

So – a standard IPSC target is 75cm and we measured it at 8.5 MIL

Now – the maths.

Using MIL, and metric – the equation is follows –

Height of Target (cm) x 10 / MILS of target = Range in Meters

That is –

75cm x 10 / .85 = 882.35m

Using MOA?

Height of Target (inch) x 95.5 / MOA of target = Range in Yards

Now. In this case – that target was actually at 1000 yards exactly – or 914 meters. So we are 32 meters short. How much does that matter? Well… go read Cal’s article. 😉

Depending on target size, and what you are shooting it might be fine. If you are on an animal, where an honest, realistic kill shot size is around 5 inches… it probably won’t be accurate enough at distance. Good luck milling a moving animal anyhow. Or doing that maths in your head at any speed.

In use

Thomas (THLR) in his normal phenomenal way – has a great video as a primer on it. This example is set in the context of a competition stage.

In the video, Kenneth – part of the VRTBR crew and also the man behind the design on the Fusion Bipod, now Javelin Valhalla Bipod goes through the process.

You can see him using a wheel calculator that speeds up the process immeasurably as well. Can you imagine tapping away on a regular calculator on the clock?

So. Should I even bother?

Well. There is a pretty solid argument that modern rangefinders have obsoleted the skill of Milling. Even done accurately, it may not provide enough accuracy to ensure consistent hits. I am sure if you are in the military, you are going to be drilled on this skill, and, other than that, you are unlikely to see this used outside of a competition stage where the match director has a touch of nostalgia. A good skill to have, sure, practice it, sure, but don’t worry about it too much. Just get a rangefinder!

[/membership]

Supporter Bonus Content

For members, there is also ‘bonus content’ to be had. If you have found this site be useful and interesting, maybe you would consider supporting it?