Home Blog Page 42

Whio (Blue Duck) Awareness Month

0

Duck3

I was sitting down to research a short article about the Whio (“fee-o”), or Blue Duck, when I discovered that March is actually Whio Awareness Month. So it was a good time to be thinking about these things. When we were working at Welcome Flat Hut recently we were told that they could be seen frequenting the Copland River. The Whio likes fast flowing river systems and is one of only four duck species in the world to live in this environment. We had been at Welcome Flat Hut for one week when we spotted a pair feeding underneath the Copland Bridge, which is only a short two-minute walk from the hut.

Duck2

The Whio is important because it is endemic to New Zealand but it is also an indicator species and therefore their presence can be used to measure the health of river ecosystems. The Whio Awareness Month forms part of the wider Whio Forever project, which is being run by the Department of Conservation and Genesis Energy as part of their 5-year, $2.5 million business partnership. This is a joint effort that commenced in 2011 with the aim of securing the future of New Zealand’s rare and endangered Whio. However, for at least 8 years prior to this Genesis Energy had been involved in a Whio recovery program in the Tongariro area.

Quack

The last I read, there were only a few thousand pairs of Whio remaining in New Zealand. They are an endangered species and listed as Nationally Vulnerable. Due to this their recovery is actively managed and they are at particular threat from stoats.

Duck5

So March is Whio Awareness Month and at The Bloke we are playing our part by drawing attention to the plight of the Blue Duck. If you want to get involved then visit the Whio Forever Project website or facebook page to see how you can help. During March they are running competitions and there is a Whio Family Fun Day being held at Auckland Zoo. If you want to report a Whio sighting to the Department of Conservation then you can do so here.

Duck1

Outdoors Cooking Systems – The Solo Stove

0

[fvplayer src=”https://www.youtube.com/watch?v=1_VIvS0rdlc”]

Introduction – cooking in the outdoors.

Food. Love it. Certainly not something I want to have to skimp on too much when out in the bush. Food, and how you plan on cooking it, plays a large part in your outdoors philosophy. Whether you are packing a cast iron fry pan in the back of the car or living on muesli bars for the absolute minimum of weight, food is an important part of your backpacking experience. While weight is important to me, being able to cook a hot meal at the end of a long walk is a major personal boost, both in regards to nutrition and morale.

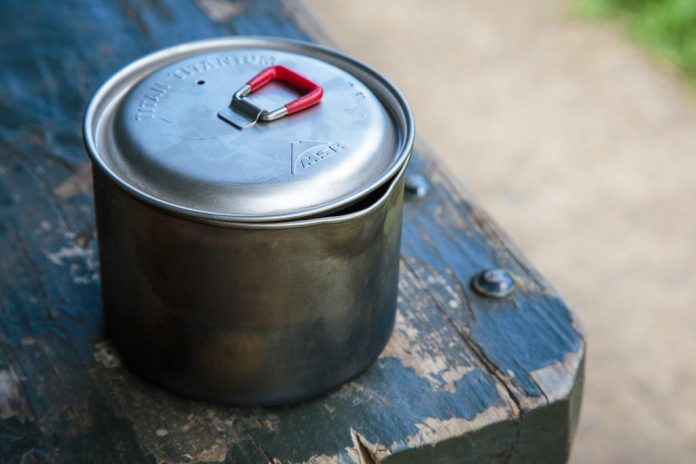
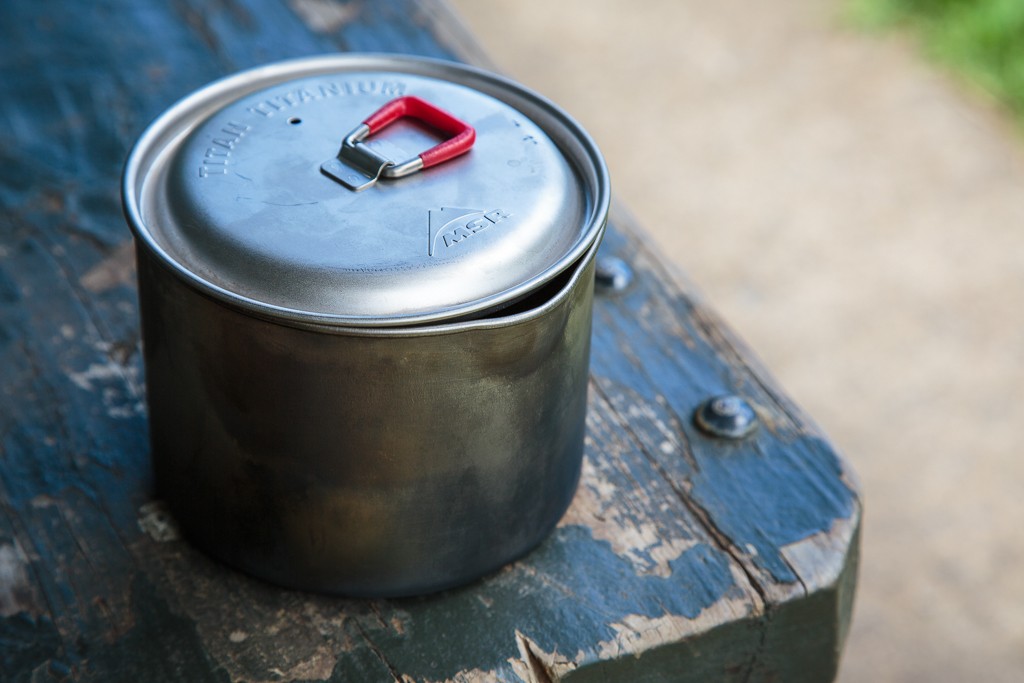
Titan-Kettle

Evolution of an outdoor cooking system.

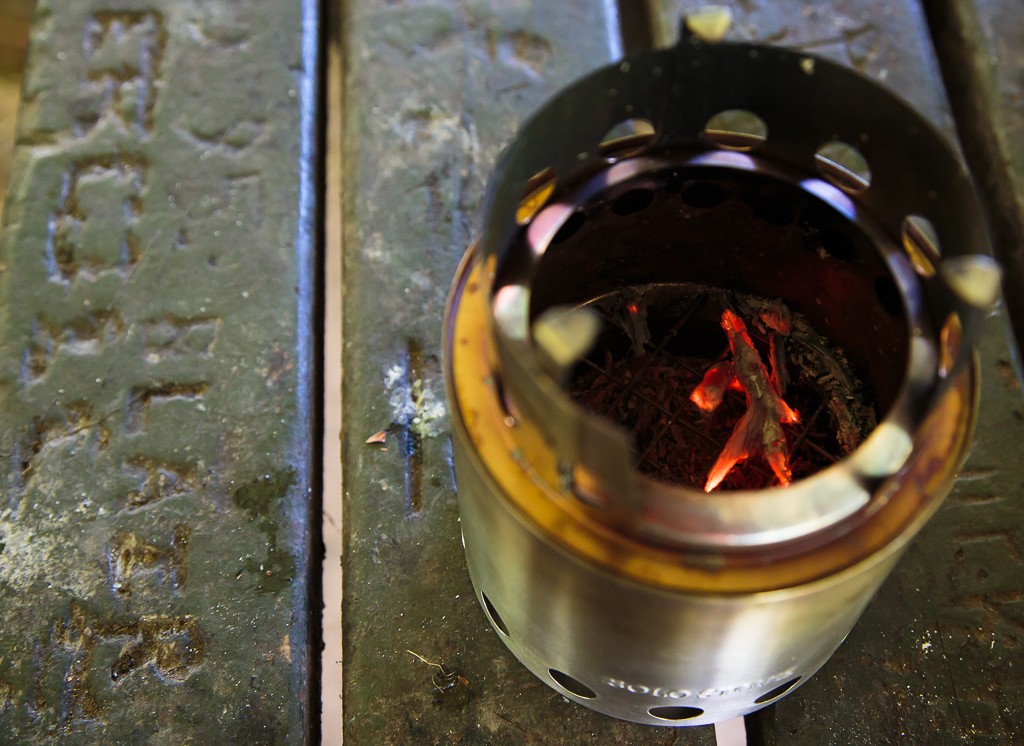
My system has previously settled on the lightweight MSR Titan Kettle and Cup, using the MSR Pocketrocket and 100g Butane Canisters. It is a relatively light system and works well. I have experimented with the alcohol stoves, starting with Military Surplus Triangia Stoves, as well as home-made versions and also the Vargo Triad. These are cool little systems, but really seem to be more suitable for the person trying to get away with the absolute minimum weight. I personally didn’t want to have to measure out exact amounts of fuel each time, and they did seem a little finicky. I didn’t really need to make any changes – but was interested in trying out another ‘family’ of cookers – the wood-burners. After a little research online I came across the Solo Stove, produced by a company in Fort Worth, Texas, the Solo Stove is a Solidly Manufactured 304 Stainless Steel ‘biomass stove’. The Solo Stove essentially is an optimised, portable camp-fire – it means you can pick up twigs and sticks along the way, and use them to heat and cook. It appealed to my ‘bushcraft’ ideals, and I ordered one. I have pottered around with it for a bit now, and will continue to do so. I love the smoke and the smell of a fire. But the reality is, that in most places in New Zealand, you can’t really just light up a camp-fire to cook on. This little unit gives you the opportunity to have a small, very well controlled camp-fire, that is also optimised for efficiency.

Solo-Stove-Top

In use

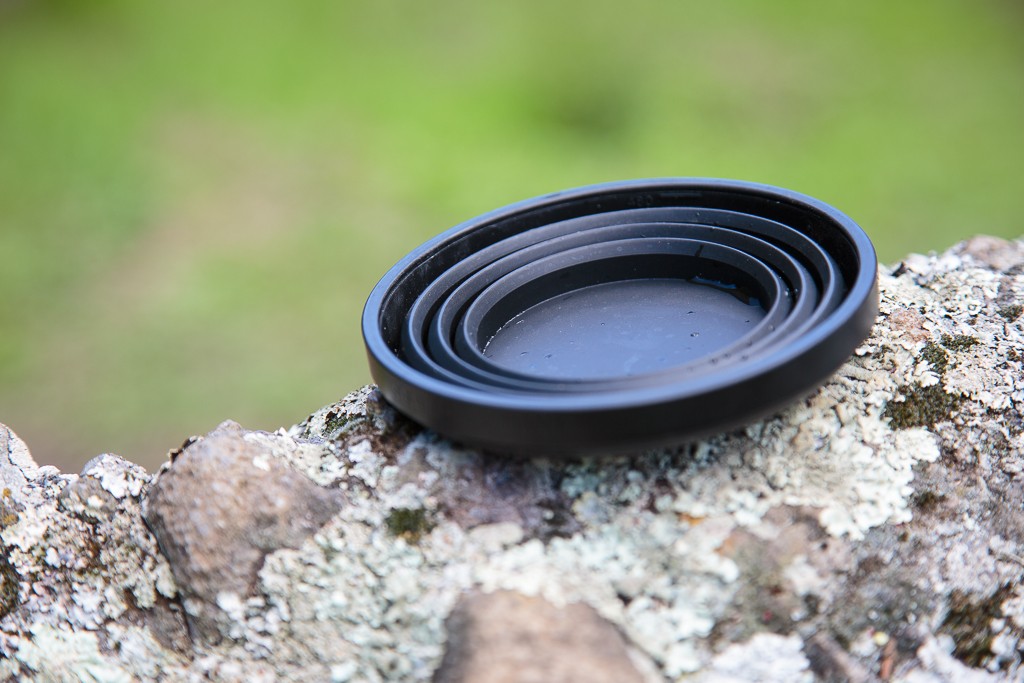
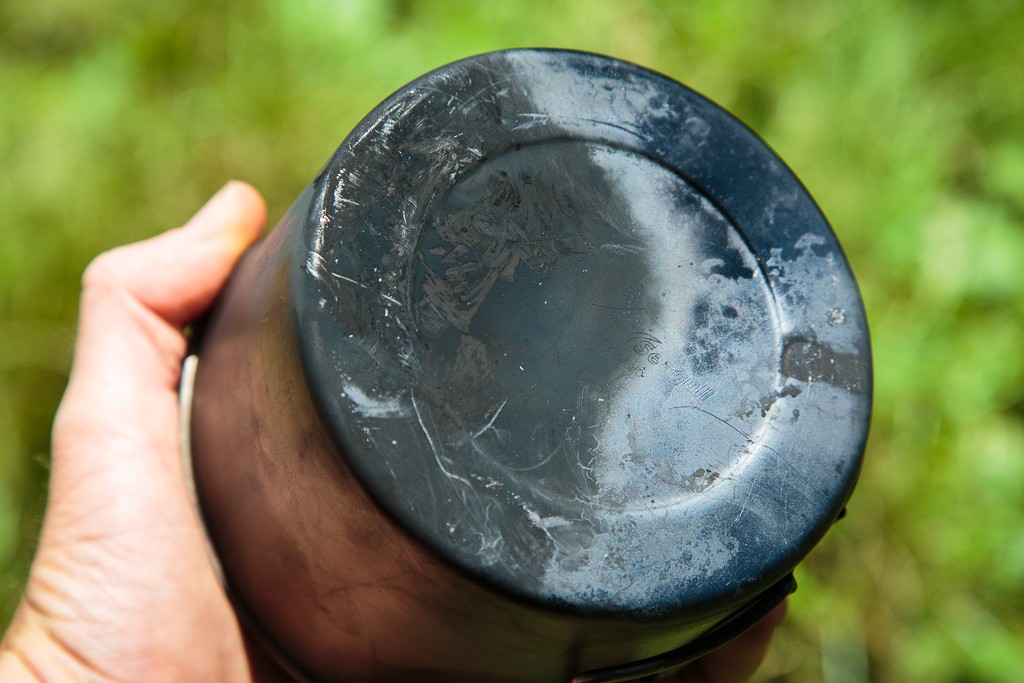
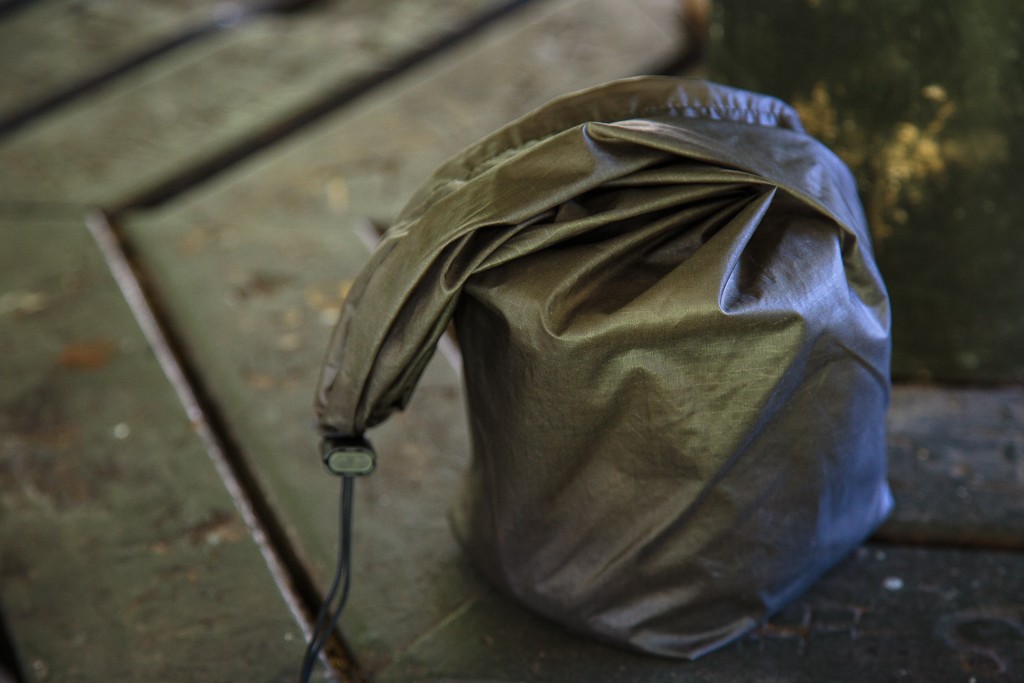
The Solo Stove is easy to get going, and boils water a lot faster than you might expect. There is really only two ‘heats’ though – flaming or just none at all. I guess you could let it burn down before putting the kettle on top of it, but then each time you added more fuel it would flare up again. In fact, overall, it’s a great system, and I really enjoy using it. The one bugbear I have with it though, but potentially one I can live with, is the amount of soot I get on my kettle when using it. Sure, I can clean it off, or just wrap and pack it and worry about it later, but every-time I accidentally brush/touch/rub against it, I wonder if it’s worth it. Because I am generally near a  stream when camping, I often just grab some rocks and gravel from the bottom of the stream bed and give it a scrub, but it’s something that I don’t need to do with the Jetboil.  I think the biggest appeal of the system is really the aesthetics of it. It is nice to be cooking off a ‘camp-fire’ when out in the bush. One other option, I haven’t tried yet, but would be interested in doing so, is the Kelly Kettle. A traditional Irish design, the Kelly Kettle is essentially a method of boiling water, where a kettle is wrapped around a chimney – there seems to be less mess involved. Check out the linked site.  The current system does pack together nicely. I needed to replace my Titan Mug with a Sea to Summit Folding Mug – just so I could fit it nicely all in one bag. The Solo Stove gets a lighter and some cotton wool tinder in it, then in a bag, which nestles nicely into the Titan Kettle, which goes into a bag on top of the Mug.

Collapsable-Mug

 So – an important factor here – what do these sets all weigh?

Well, a quick measure-up gives me 489 grams for the Solo Stove system, and 455 grams for the Pocketrocket system, with around half a canister of gas – and that right there, overall, is going to be the main difference – fuel. Essentially, with the Solo Stove, you carry no fuel – just some tinder (I do carry some Esbit Tablets through, just in case). With the Pocketrocket – you have to carry your fuel. Overnight – not so much, but over multiple nights – I guess it could add up. What I need to do is put together some kind of calculator to figure out how long a given weight of a fuel canister is going to last me. Really though – if weight is your absolute main priority – then you are probably using an alcohol stove anyhow.

Cook-Char

Titanium – lightweight, but…

It is a pain to cook in. The heat transfer is so quick, you are pretty much assured to burn food onto the bottom of the kettle. This isn’t a problem with boiling water, but making custard (one of my indulgences) can be a bit tricky. You just need to make sure the heat is all the way down. Of course, with something like the Solo Stove, that means letting it burn down a bit.

Cook-Set

In Summary

So yes. Like many things related to the outdoors – part of what I really enjoy is trying different set-ups, and seeing how they compare. Realistically – it’s all lighter than it ever has been. I like the Solo Stove because of the smell of burning wood. The soot is a little bit of a pain, but worth it. After all – it’s no more messy than cooking on a  camp fire and humanity has dealt with that for many years before we got all these fancy other ways of heating water!

Cook-System-3-up

Back Country Cuisine Ration Pack

0

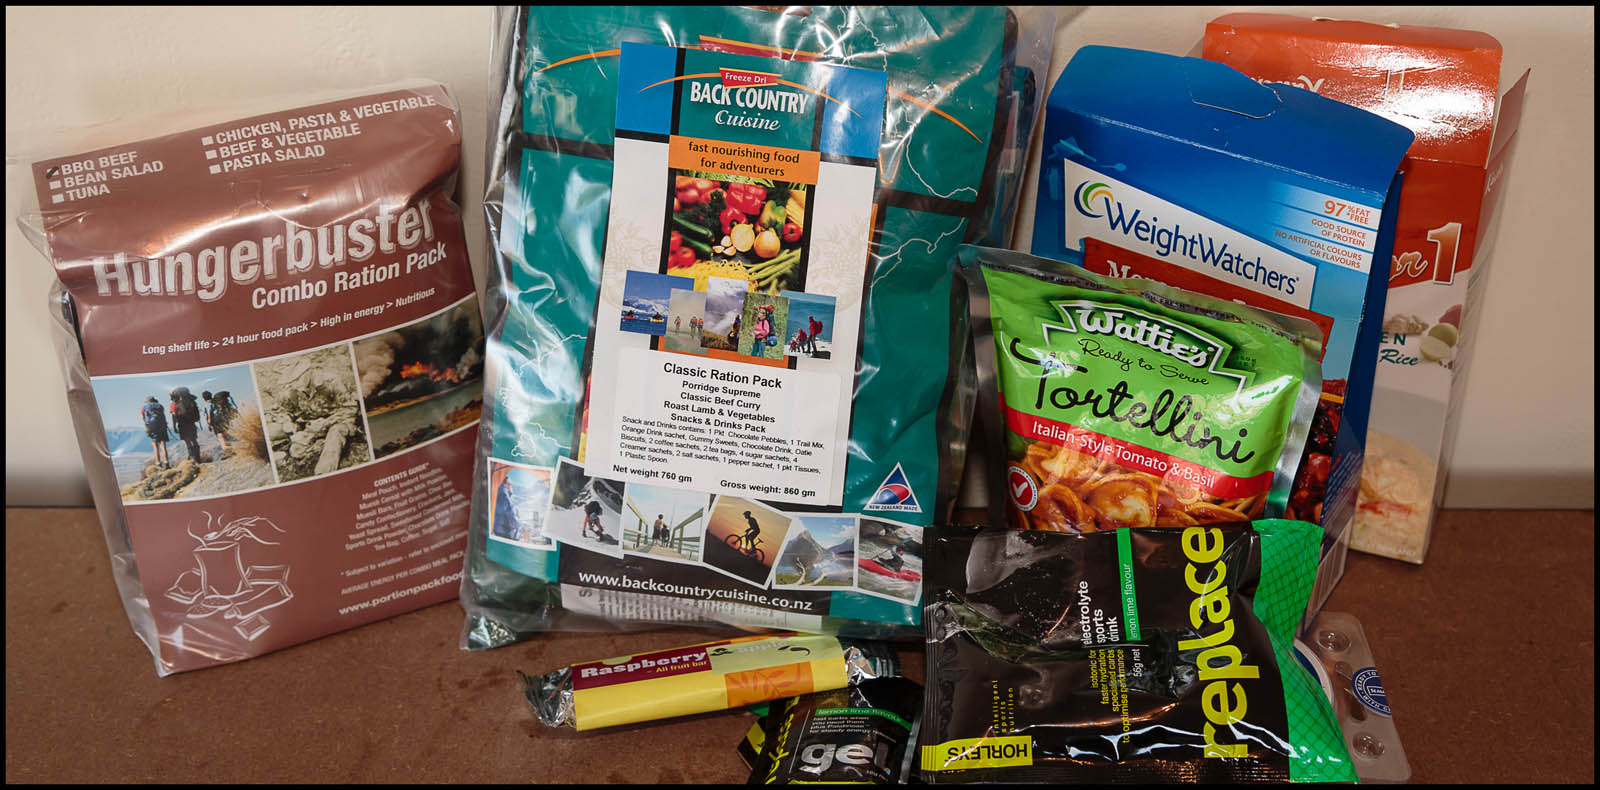
Back Country Cuisine – Classic Ration Pack

Back Country Cuisine should be fairly well known to most people who have spent some time in the outdoors. A Invercargil based company, BCC has been providing Trampers, Kayakers and really anyhow who needs light weight sustenance.

BCC Freeze-dries their food. Freeze-drying is a little bit different from Dehydrating in that the food is frozen first, then the ice crystals are removed. This means that the food doesn’t shrink as much, and also, rehydrates quicker, as there remains lots of little holes for the water to get back into once added back in. Similar to the Portion Pack system, all the food is individually packed, and is quite a goody bag then you first open it up. One thing I have found with BCC is that I will often want the ‘2 serving’ size meals to myself. I don’t think this is from lack of food, more due to a large appetite on my part.

However, the porridge from the morning filled me up and the Beef Curry again was a good feed at lunch. The snack pack kept me nibbling away during the day, and for dinner, I have had it before, and continue to really enjoy the Roast Lamb. The Mashed Potatoes are aweseome!

Freeze Dried (or Dehydrated) food is never quite the same as ‘fresh’ – and this is certainly noticed in the case of BCC food. You trade off the weight savings with a little bit of texture and taste. Sometimes this is worth it, sometimes I am happy to have a couple of extra KGs and a slightly nicer meal. Depends how long you are out for, and how much other weight you have on you.

I tend be carrying around stupid weights of camera gear, so shaving of weight anywhere else is welcome – however if I am leaving the extra lenses at home, I am more likely to make the weight up in food.


[fvplayer src=”https://www.youtube.com/watch?v=8x1oZOMrejQ”]


Ration Packs – A Primer

0

Are pre-made Ration Packs worth spending the money on?

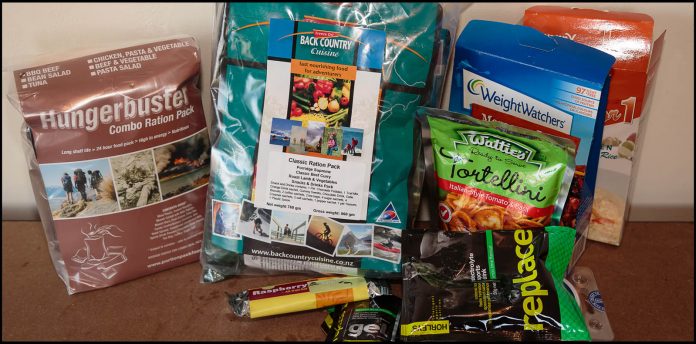
Ration Packs are also known as an MRE, Field Rations, Combat Rations, IMP and many other things depending on the country and military group involved. These are packs of food that are designed to be used when away from ‘home’ when fresh food isn’t available but more nutrition is desired than survival bars and packs. Each country has its own take on the concept and will often have different packs made up to suit specific situations and operational needs.

Essentially, we are talking about 24 hours worth of food and accompaniments, nicely packed together in one bag and ready to go. In the past, ration packs have been military in nature but there are now civilian options also coming out. Some even include their own cooking equipment in the bag, although we won’t be covering those in this comparison.

Ration Packs are designed to have a long lifespan. Not to the point of Survival Bars, but longer than fresh food. This is achieved by a combination of vacuum packing and sometimes dehydration. As such, they are also often used by preppers and survivalists as emergency food. Ration packs that use dehydration will help to reduce your pack weight.  Depending on your situation, how many days you are headed out for and your mode of transport, you may need to consider weight.

While I know I should spend more time preparing my own meals, using our dehydrator and generally ‘doing it myself’ – the reality is usually don’t have the time and will admit to just grabbing a pile of Back Country Cuisine ready meals on the way out to the bush. These ready-to-eat meals are light, generally good tasting (everyone has their most and least favourite), and offer good value.

The idea of having everything for an entire day, ready to go, is just a continuation of that desire for ease of use. Additionally, packing it all together like this also ensures that you actually have the expected/required amount of food and don’t end up forgetting to put your breakfast supplies in your pack. The idea of having a single bag that I can grab as I head out the door for one of those not-overly-planned expeditions is great!

You needs may vary, so I would strongly suggest getting a couple of these, in the different flavours available, and trying them out. Ideally before you head out for the weekend.

Nearly Legal!

0

Landie

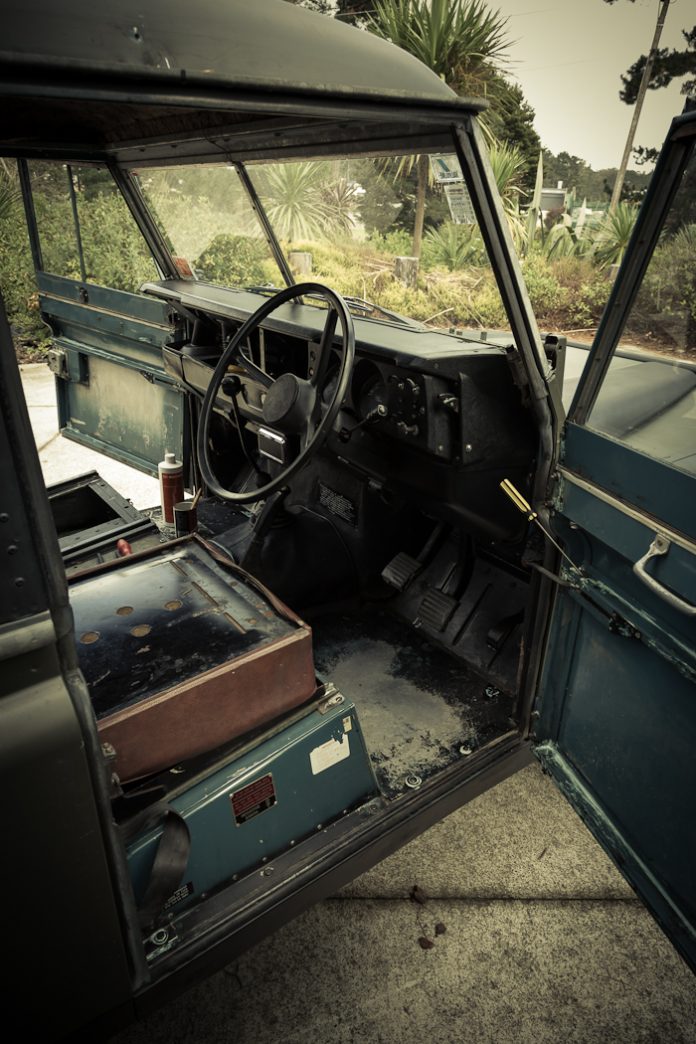
Yes, after nearly six months, and a couple of extra grand, the landie is nearly road legal again!

It has now passed its warrant of fitness, and I will get it changed over from its ‘B’ registration on Monday.

Then I can get on with the things that I want to do when I got it. Like, give it a good tune.

Buck Taylor Track – Pararaha Stream Circuit

0

The plan

Head up from Gibbons Track, through Muir Track and onto Parahara Valley Track, then heading up the un-maintained Parahara Stream Circuit, coming out onto the Odlin Timber Track and staying at Odlins Number 2 Campground.

I was keen to get off track a bit, and though this track would be a good balance of challenge and great views.

Setting off from the Carpark, I headed up the towards Gibbons Track, being passed by piles of surfers heading off to the beach. Instead of a day sunbathing, here I was, off humping a 21kg+ pack into the hills. Madness.

untitled (1 of 6)

The track quickly rose, and to my bemusement, I kept getting passed by the true mad men of the hills – the trail runners. Stopping at one point to let a group of around 10 pass by, I had to wonder if I would manage to get many photographs of native birds with that forging the way ahead of me.

I headed up, then back down the other side, ended up in the Pararaha Stream Campsite.

untitled (2 of 6)

Here was a quick break for some lunch, and I had a quick chat with a couple of families staying at the camp for the night, then put the gaiters on, and started headed up the valley.

After headed along an overgrown track, I came across a sign stating that the track beyond was for experienced trampers only, and essentially unmaintained. Exactly what I was looking for.

untitled (1 of 1)-2

The track started to cross back and forth over the stream – combining heavily overgrown tracks with some good rock hopping up the stream, until I finally got to a waterfall flanked either side by high cliffs, that I struggled to say a way past. Backtracking several times, I ended up doing some serious bushwhacking, but was unable to pick up the track again. Returning back to the waterfall, I evaluated my options, and weighing the facts that I didn’t really know where the path continued, my knee was starting to hurt a bit, and the amount of sunlight I had was starting to run out, I decided to call it quits this time and head back to the Pararaha Stream Campsite for the night.

Getting back to the camp, I also realised there wasn’t a whole lot of trees to put the hammock up in. After considering a couple of palm trees, I decided the safest option was to sling the hammock up under the shelter, providing somewhere to put the hammock up, as well as cover overhead.

untitled (6 of 6)

After catching up with the family staying at the campsite (and lending them my mozi-repellant) – I cooked up some dinner, and settled into my first night in the Hammock.

Hammock sleeping was something new to me. I had set the hammock up before, but not slept in it, so set up was relativity easy, utilising the posts in the shelter. On retiring for the night, I crawled/squirmed into the sleeping back, and promptly feel asleep.

Waking up in the middle of the night, I soon realised that the one requirement of hammock sleeping in anything other than tropical weather, is some kind of insulation underneath your back and butt. My jacket, which was rolled up as a pillow, was recommissioned as a sleeping underlay, sitting along the length of my torso. After a bit of mucking around, the chill was gone, and back to sleep it was.

The next morning, I had breakfast, broke camp (made very quick by the use of a hammock and snake skins), and headed towards the beach, having decided that route would be a bit easier than the hill climb I had done the day before. I was wrong.

untitled (3 of 6)

I guess it’s very easy to think of a walk down a beach as a relaxing thing. No so when you are walking up and down dunes with a full pack on your back. However, there was also a mass of bird to photograph, and the environment in the wetlands and dune was primal and absolutely beautiful.

untitled (4 of 6)

Realising that I couldn’t take a direct line through the wetlands (without getting knee deep in swamp), the walk back took a lot longer than expected, and also resulted in a lick of sunburn, as I was fooled into thinking the overcast sky wouldn’t burn me.

Overall though, it was a great walk, and after reading more about the track, I am determined to head back soon and complete the original plan.

untitled (5 of 6)

Summary

Location: Whatipu

Grade: Hard – un-maintained, easy to lose track.

Length:20.9km

Time:2 days

Party Size:1

Lightweight Bipods

0

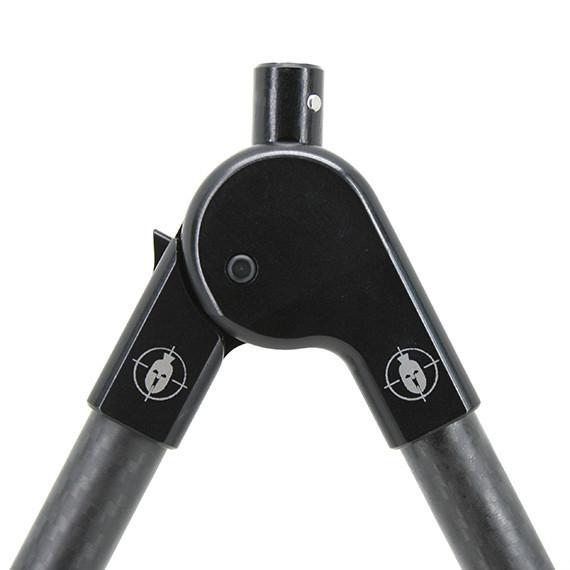
A lightweight bipod, such as the Javelin and Spartan 300 options are designed with the hunter in mind. Light enough to just throw in your pocket, these bipods are quick to setup and provide that extra bit of shooting stability when you need it most.

[fvplayer src=”https://vimeo.com/258674909″ splash=”https://i.vimeocdn.com/video/686915156_1280x720.jpg?r=pad” caption=”Spartan Bipods – 1080 – No Titles”]

Lightweight Bipod – usage

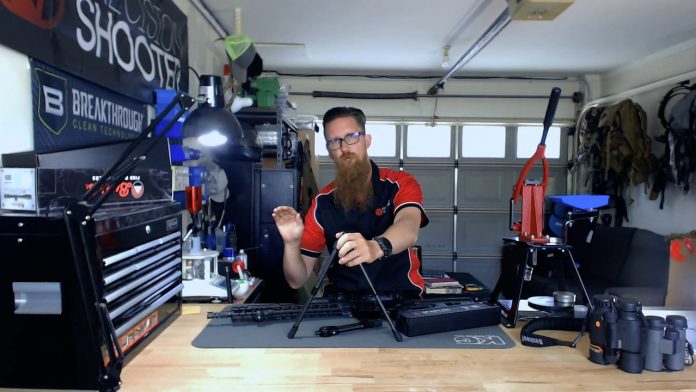
Lightweight Bipod - Spartan 300Instead of being on the rifle at all times, Spartan Precision Equipment designed these bipods to be a quick attach – so, carry it in your pocket, quietly clip it on when you need it. The Spartan 300 however, with a new design, also allows you to fold the bipod up on its mount – locking into place so it won’t swing around.

I would generally suggest usage like this – if it’s a hunting rig, lightweight, then grab a Javelin – so light you don’t have to worry about the weight, quick to put on and use. For an AR, or something where you might want to quickly deploy (say one shot in a stage) the Spartan 300 can sit on the rifle, quickly pop out and shoot!

I currently use the Long Javelin Bipod on my hunting rifle – one I didn’t always carry a bipod with. Now, with it being such a lightweight bipod – I just put it in a pocket and go! As I state in the video, I recommend the long version – which is around the same as the standard Harris Bipod length when not extended.

Alternatives to a Lightweight Bipod

I have also talked to a few guys recently that didn’t really need a lightweight bipod at all.

If you are target shooting, or long range, where stability is more important than weight, you might want to consider a Harris or Atlas instead.

[product_category limit=”3″ columns=”3″ orderby=”popularity” category=”bipod-tripod”]

Clean / Dirty Bore

0

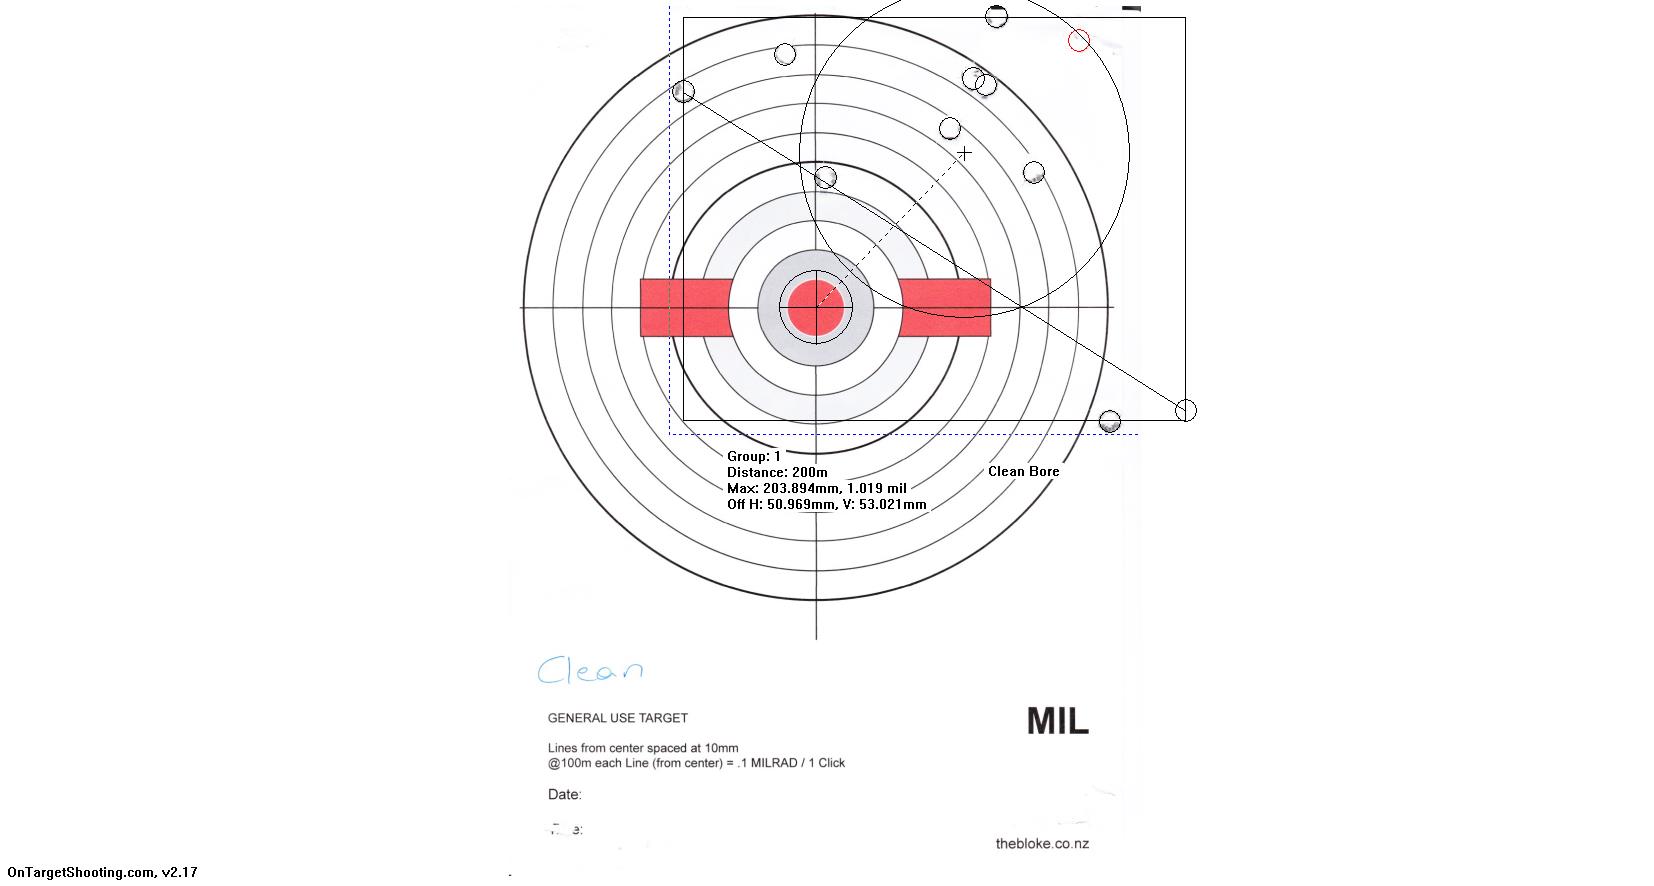
Clean Bore. Yuk.

Ever since I have started shooting – if I am working with a known load (not one I am working up) I will always shoot the first shot on a ‘Cold Bore’ Target I set up next to my main target. This shot is always the first out of the rifle for a day – a true ‘cold’ bore. After that, I will transition to my normal targets, but note where the difference (if any) may lie. Certainly, more than once, I have put the first shot in the middle of the target. Often, if it’s drifting, I am left with the impression that it’s as much to blame on the ‘cold shooter’ as it is the temperature of the barrel.

What did interest me, and something I hadn’t tested, was the effect of a clean bore versus one that had been shot through.

I was interested to test the difference. It was certainly a lot more than I thought.

I, generally, don’t clean the copper out of my barrels. This is a result of reading more than one article online, that simply suggested, that unless the accuracy of your rifle is diminishing, you don’t really need to worry about removing all the copper, in fact, in the Magpul Precision Rifle DVD, it’s suggested that the copper can provide a bit of a bearing surface and help smooth out the bore for you1 and help the rifle group.

I have put around 200 rounds through the Remington 700 build – and I was interested in testing the difference. It was certainly a lot more than I thought.

Dirtyy

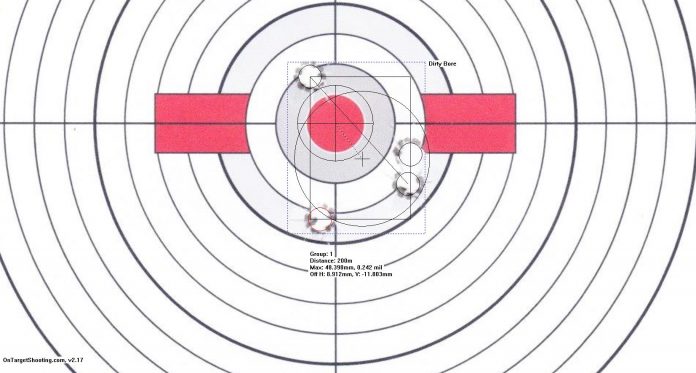
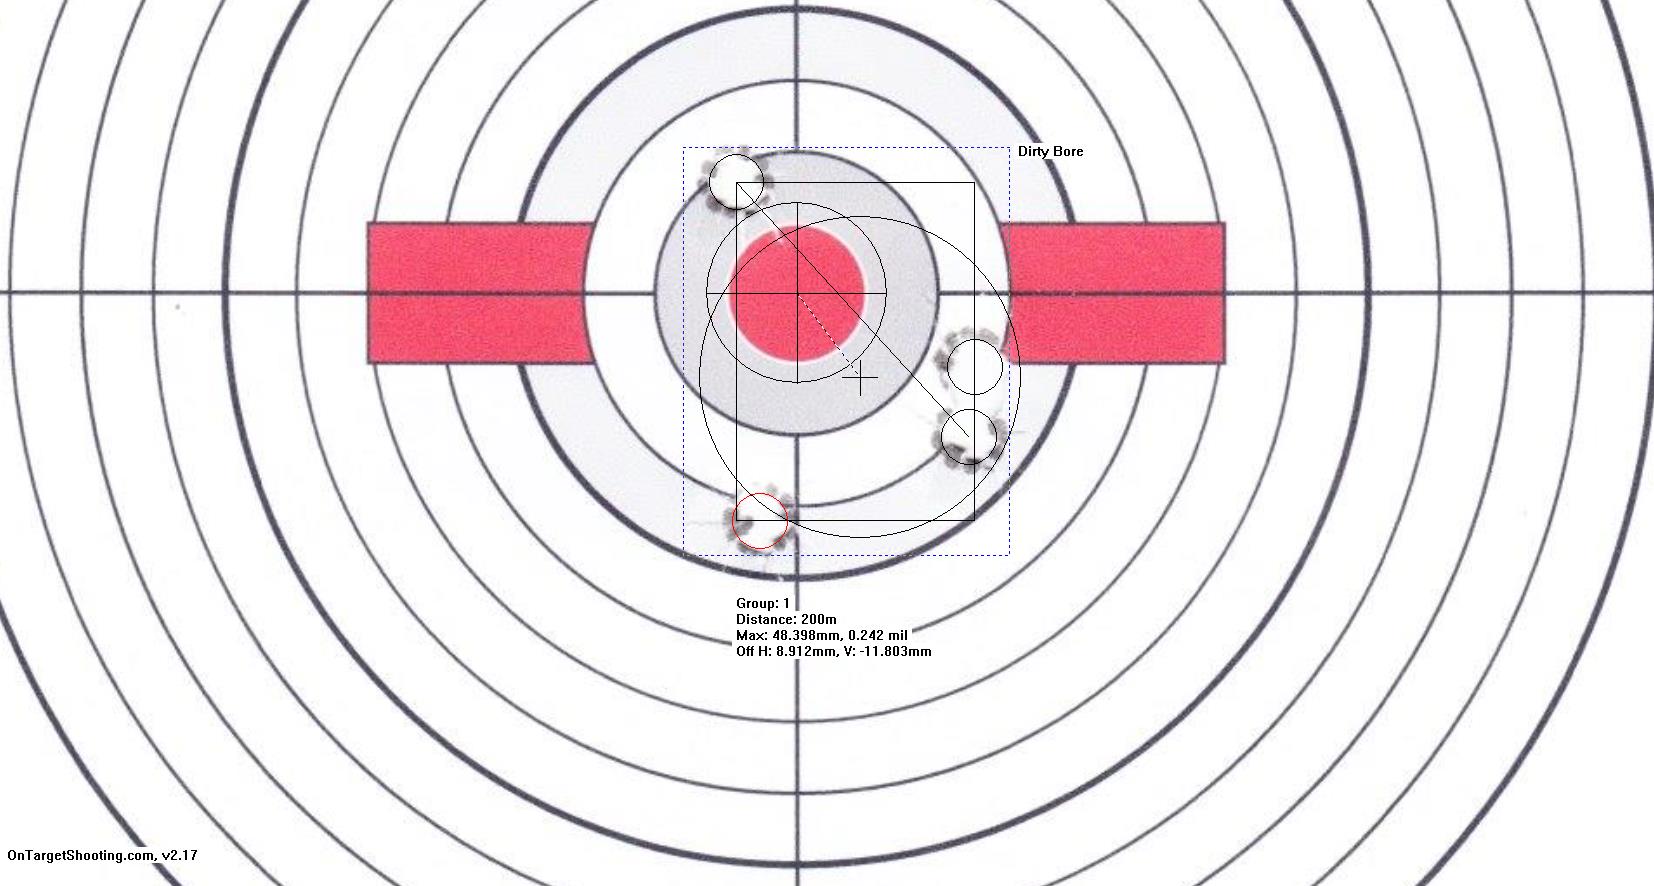
Dirty Bore. Much better.

So I started shooting on Sunday, and was really quite shocked at how far out my zero was. A couple of shots later, and I realised it wasn’t just my zero. The rounds were going all over the place! It’s rare for me to not be on the paper these days – but I had multiple shots not even close!

Like so many things in this area – it’s one thing to read about it, it’s another to test a theory and see how it relates to your specific firearm and situation.

While I expected a difference – I hadn’t expected this much. However, as more rounds went down range, the group progressively shrunk. Around twenty rounds later, it was back to something resembling respectable, around .83 MOA.

So. For my Rem 700, as it stands at the moment – I know know, that once the groups start to open up in the future (which could be in excess of 1000 rounds through it) I know it’s going to then need at least another 20 after a good clean to get it grouping again.


  1. This is more in relation to factory, cheaper barrels. High-end barrels should be smooth from the get-go. 

Ten Safety Articles Every Hunter Should Read

0

Essentials

LINK – Hunter Safety During the Roar

The Roar is one of the busiest times in the NZ Bush for hunters, for obvious reasons – this article is a good overview of the considerations and conversations you should be having before you head out – especially if you are heading out in a group.

LINK – Firearms Safety Is Your Responsibility

A reminder from Frank Ferguson on the seven rules of firearms safety.

LINK – Lemons in the Bush

A story of warning about the time I nearly cut my finger off with a machete. I did a really good job – getting halfway through the tip of my trigger finger. This article explores the actions (lemons) that led up to the incident.

Coffee-(2-of-4)

Equipment

LINK – Survival Kit or PLB?

A guest post from James Brown – discussing preparedness, what you should have on you at all times and why.

LINK – Your Fingers? Wear Gloves

A follow up from my lemon article. The only reason I still had some finger left was, in my opinion, the leather gloves I was wearing at the time.

LINK – Camouflage – Safety while hunting

Love it or hate it, Blaze is here to stay and for important reason. Anything we can do to be differentiating ourselves from the animals we are hunting is a good thing – especially when the reality is, people are still out there shooting at nothing more than sound or movement.

Coffee-(3-of-4)

Knowledge

LINK – Dealing With Buck Fever

Call it Buck Fever, call it Confirmation Bias, call it not positively identifying your target – why is it many guys get all giggidy when hunting?

LINK – Twilight Hunting – Understanding Night

One criticism of orange blaze is that during twilight, everything goes orange – but did you know, an hour later, everything goes blue?

Deerstalkers HUNT Navigation Course

Safety in the bush is not just about handling firearms. Many people simply don’t know how to navigate off track and it’s easy to get lost, even in areas you know ‘like the back of your hand’.

LINK – Outdoors Refresher Course

Head outdoors? Go do a first aid course – even though the MSC don’t offer this anymore – there are other places to get this vital information.

Evaluating your reloads – OCW Load Testing

0

Load-Testing-(18-of-21)

OCW Load Testing – the path to perfection?

Every aspect of a firearm is going to affect where the bullet ends up. The design of the action, stock, barrel and how it all fits together. Of equal importance is the ammunition itself – basically how hard and fast it is going to fire that projectile out of the end of the barrel.

The amount of powder, the weight and design of the projectile, how far it is seated into the shell itself, all contribute to the characteristics of a particular load. There needs to be a systematic method of evaluating what works and what doesn’t.

The ladder method is probably the most common method of doing this and while I intend to do a similar load development using the ladder test, this article is about an alternative method developed by Dan Newberry. Dan came up with a system that aims to find the most ‘consistent’ load for your rifle – a load where a little bit of variance in temperature, grains or other factors isn’t going to cause mysterious flyers.
Load-Testing-(14-of-21)

The method

Dan’s site gives a great deal of information about how the OCW system works and how to load for it – so pop over there to read up on it, no point in rewriting what he has already said.

Basically though, you find a recipe you would like to work from, based on either the projectile or powder you want to use. This is where you scour your reloading manuals for the starting point.

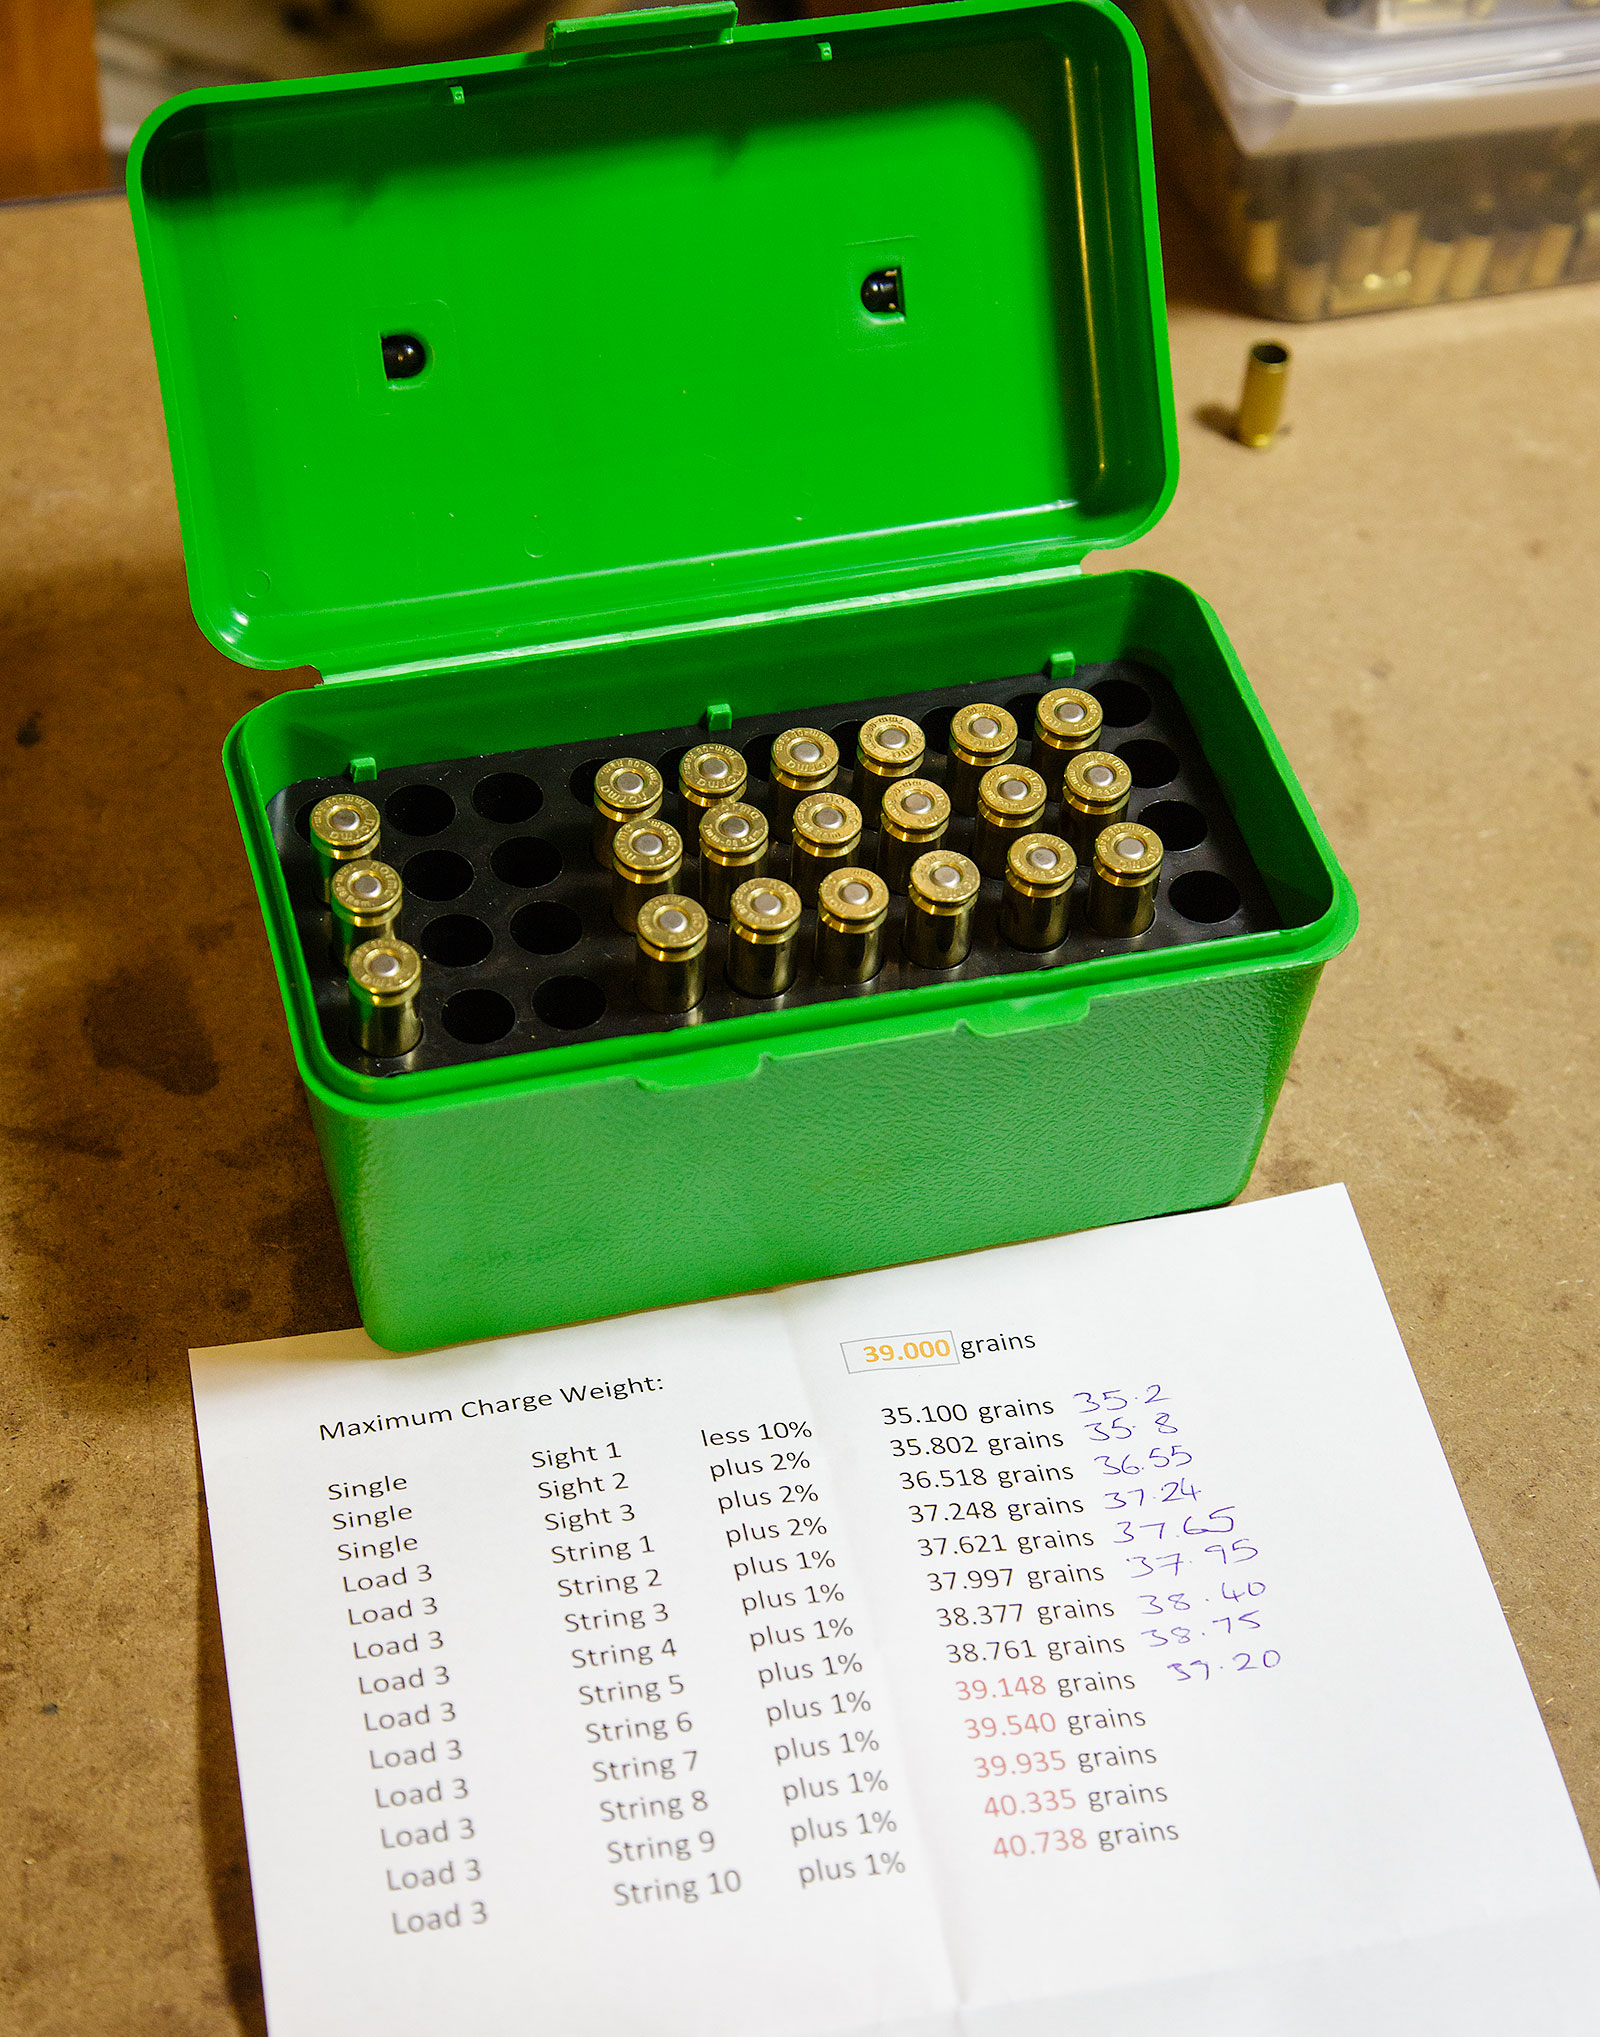
Taking the maximum load recommendation, base your test loads around this. In my case, I loaded 3 rounds at each weight. Then, pop out to your range and shoot a round robin at the targets.

I created a little spreadsheet to calculate the OCW load testing weights for me. Just get in contact if you want a copy (it produces the report above).

The shooting
Load-Testing-(15-of-21)

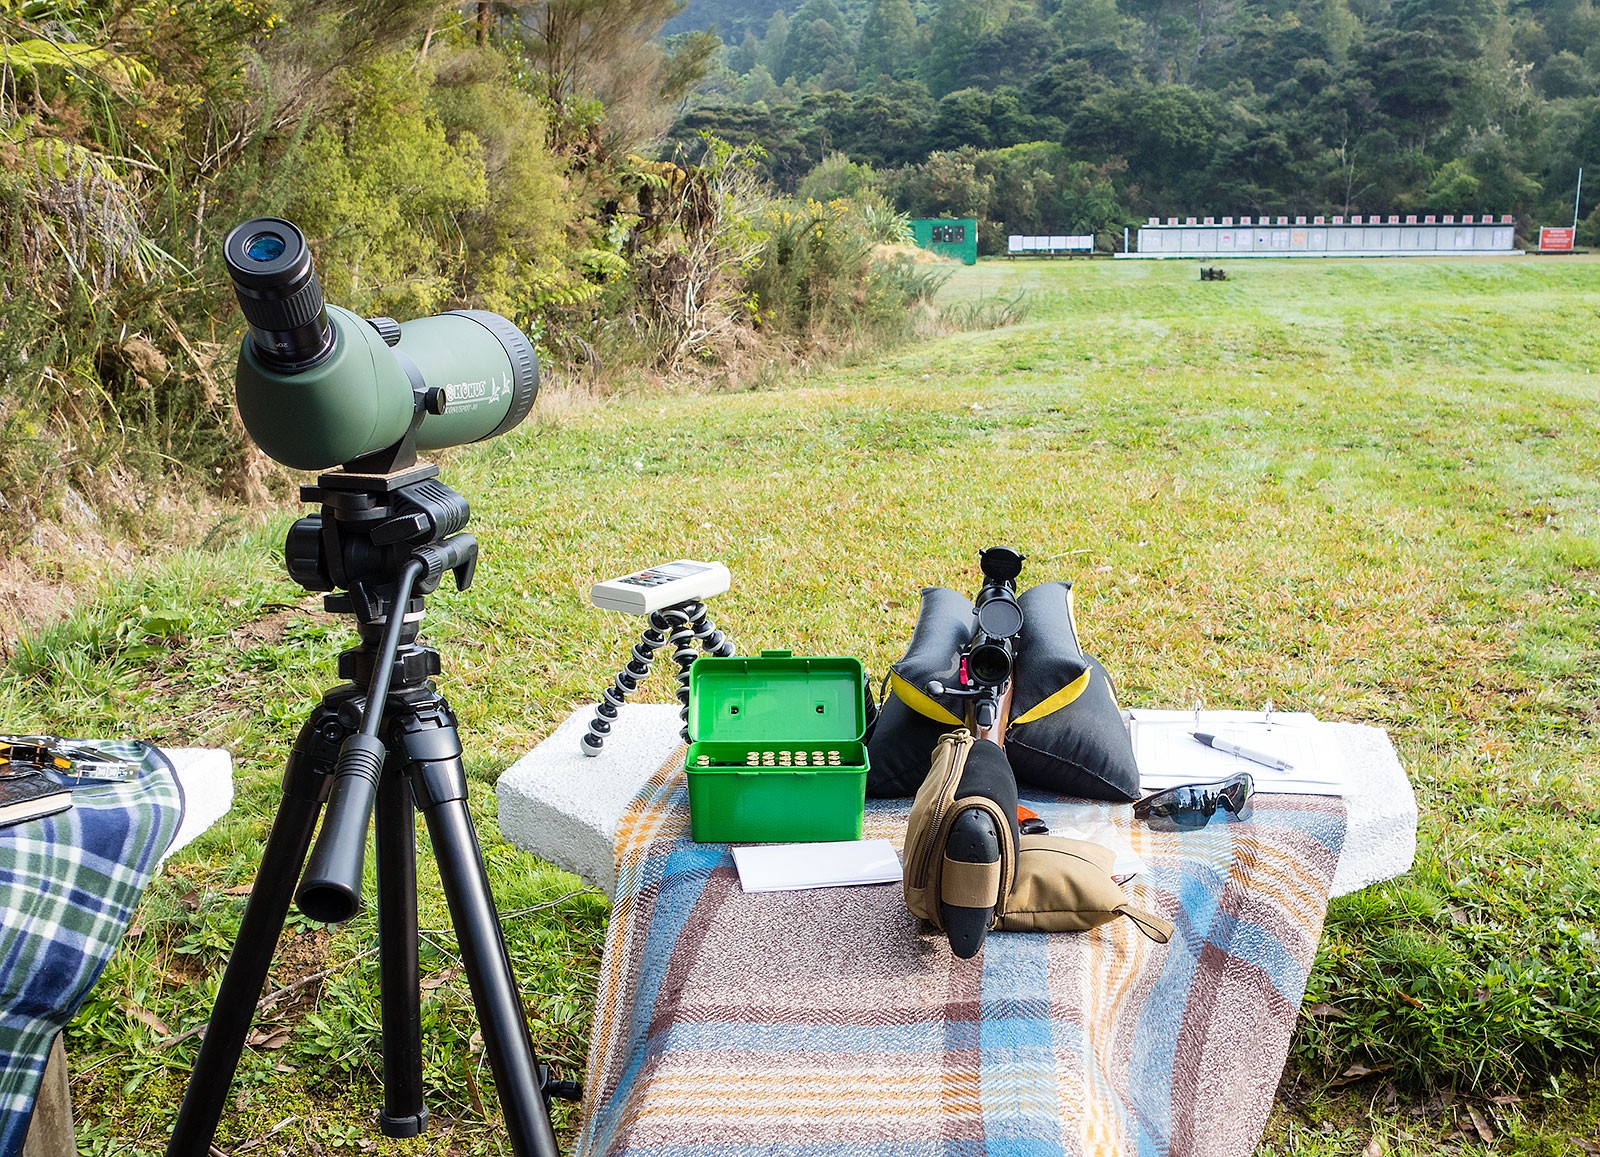
I got down to the range early as I wanted to get myself a bench to shoot off. While prone bipod is a very valid way to shoot these sorts of things, I wanted to removed ‘myself’ as much as possible from the test – so used a Heavy Bulls Bag (review soon) to sit the rifle in.

I proceeded with the round robin, gradually increasing charge load, checking after each shot for any signs of over-pressure.

This is important with reloading – and you MUST understand this before you start. At some point, you are going to be able to put too much powder in, which will create too much pressure for your rifle – which is going to cause issues. At one end the rifle just won’t perform as well as it could, at the other you could damage the rifle or yourself. Understand what over-pressure looks like and keep an eye out for it!

Dud Primers

I also got a couple (2 out of 21) dud primers. When I say dud, it means the firing pin hit the primer, but the primer itself didn’t ignite. Basic procedure for this is – you pull the trigger, you hear a click, but no bang. Stop. Wait. Around 15 seconds (there is such a thing as a delayed ignition). Then open up the action.

Either you have a dud primer, or you didn’t load the rifle in the first place (it happens). If you pull the trigger, hear a little bang, but much less than normal – you potentially have a squib load; meaning you probably forgot to put powder in the cartridge. If so you now likely have a bullet stuck halfway down the barrel.

Well done. Time to take a step back (metaphorically) and very seriously question your reloading methodology. More on that in another article.

If it’s a dud, then put it aside for disassembling later. Remember it is still a live round. Don’t just throw it away.

There is a couple of reasons for a failure to ignite/explode. Maybe it is simply a dud primer or maybe you didn’t seat the primer down deep enough in the primer pocket. This means the pin strikes the primer and instead of igniting, the primer gets pushed further into the pocket, dissipating the energy required to ignite through movement.
Load-Testing-(6-of-21)

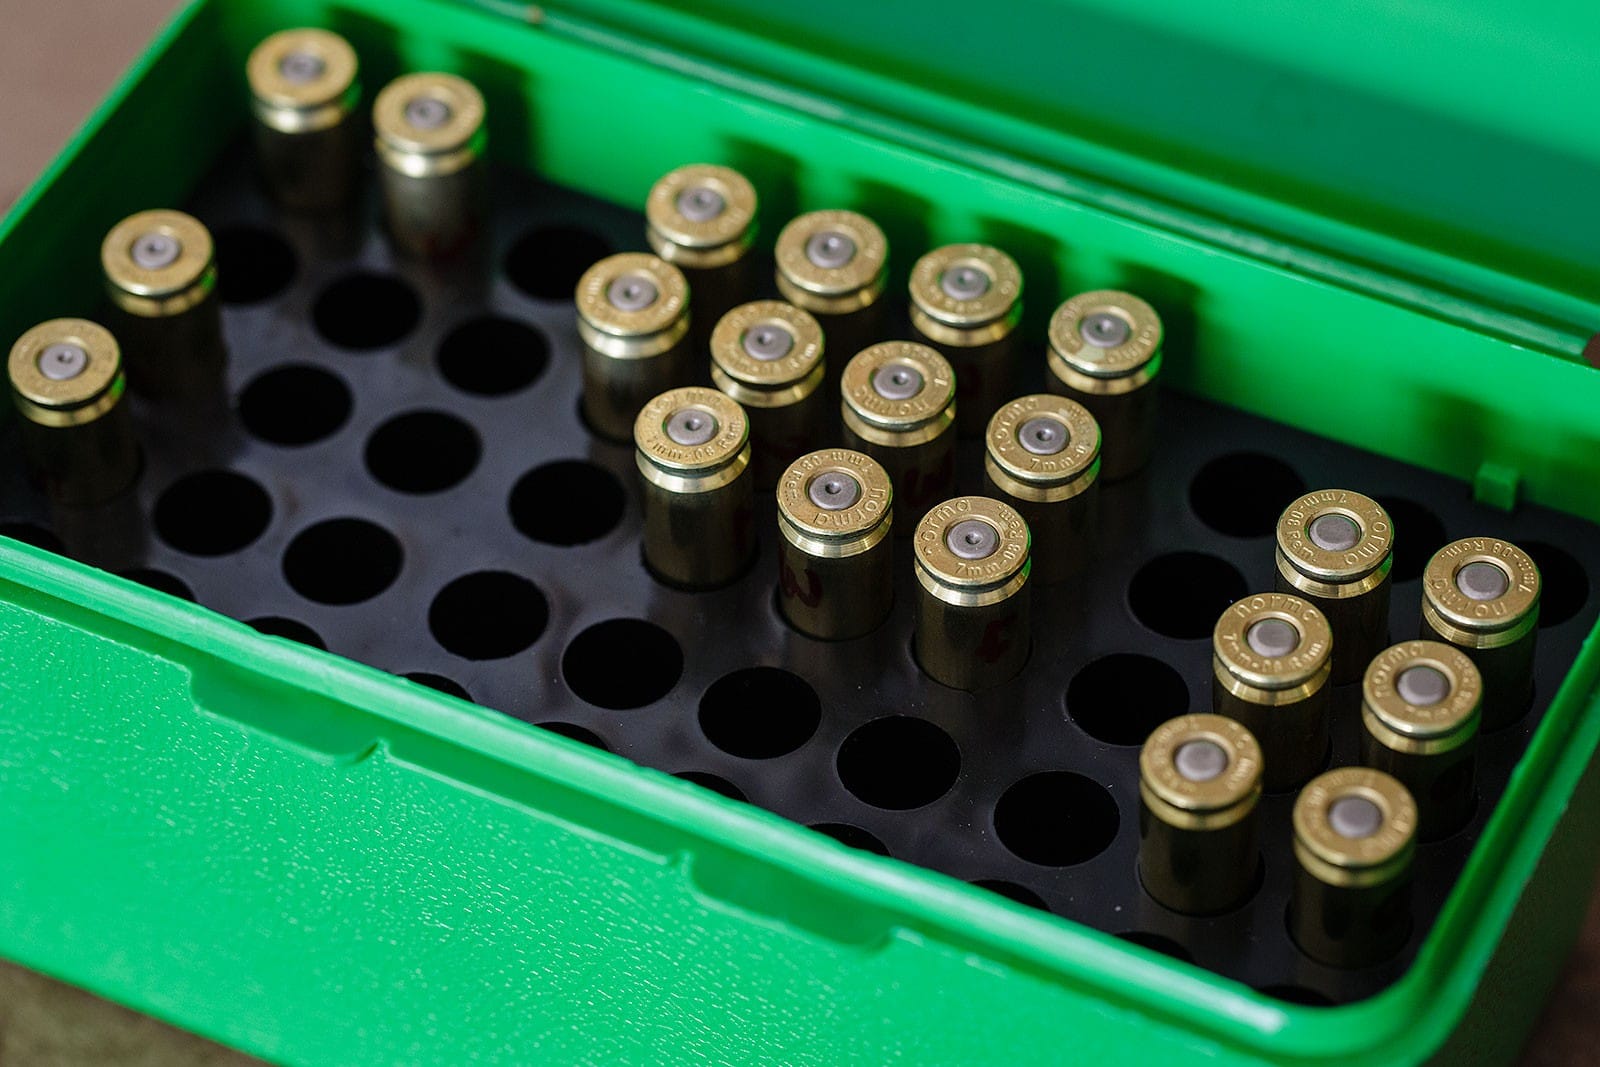
In the photo above you can see the 2 ‘duds’ on the top left, the sighting shots on the left, the test rounds in the middle and some unfired test rounds on the right. Why the unfired test rounds? Because I got some overpressure indications during my OCW load testing.

Over-pressure

Essentially, if their is significantly more pressure (because of a bigger bang) pushing that bullet up the barrel, enough that the bullet can’t get out any quicker to dissipate it, you end up with over-pressure. This can cause a multitude of undesirable side-effects. Know how to identify these side-effects means being able to identify slight over-pressure and stopping before you cause more serious damage. In my case, I spotted injector marks on the base of the cartridge. Once you know what you are looking for – it’s relatively easy to spot indicators of over-pressure.

The key to this is knowing what a ‘normal’ pressure cartridge looks like. Most likely, you will have fired some factory ammo through your rifle at some point – this is going to indicate if you normally get any kind of marking on the base of your cartridges.
Load-Testing-(7-of-21)

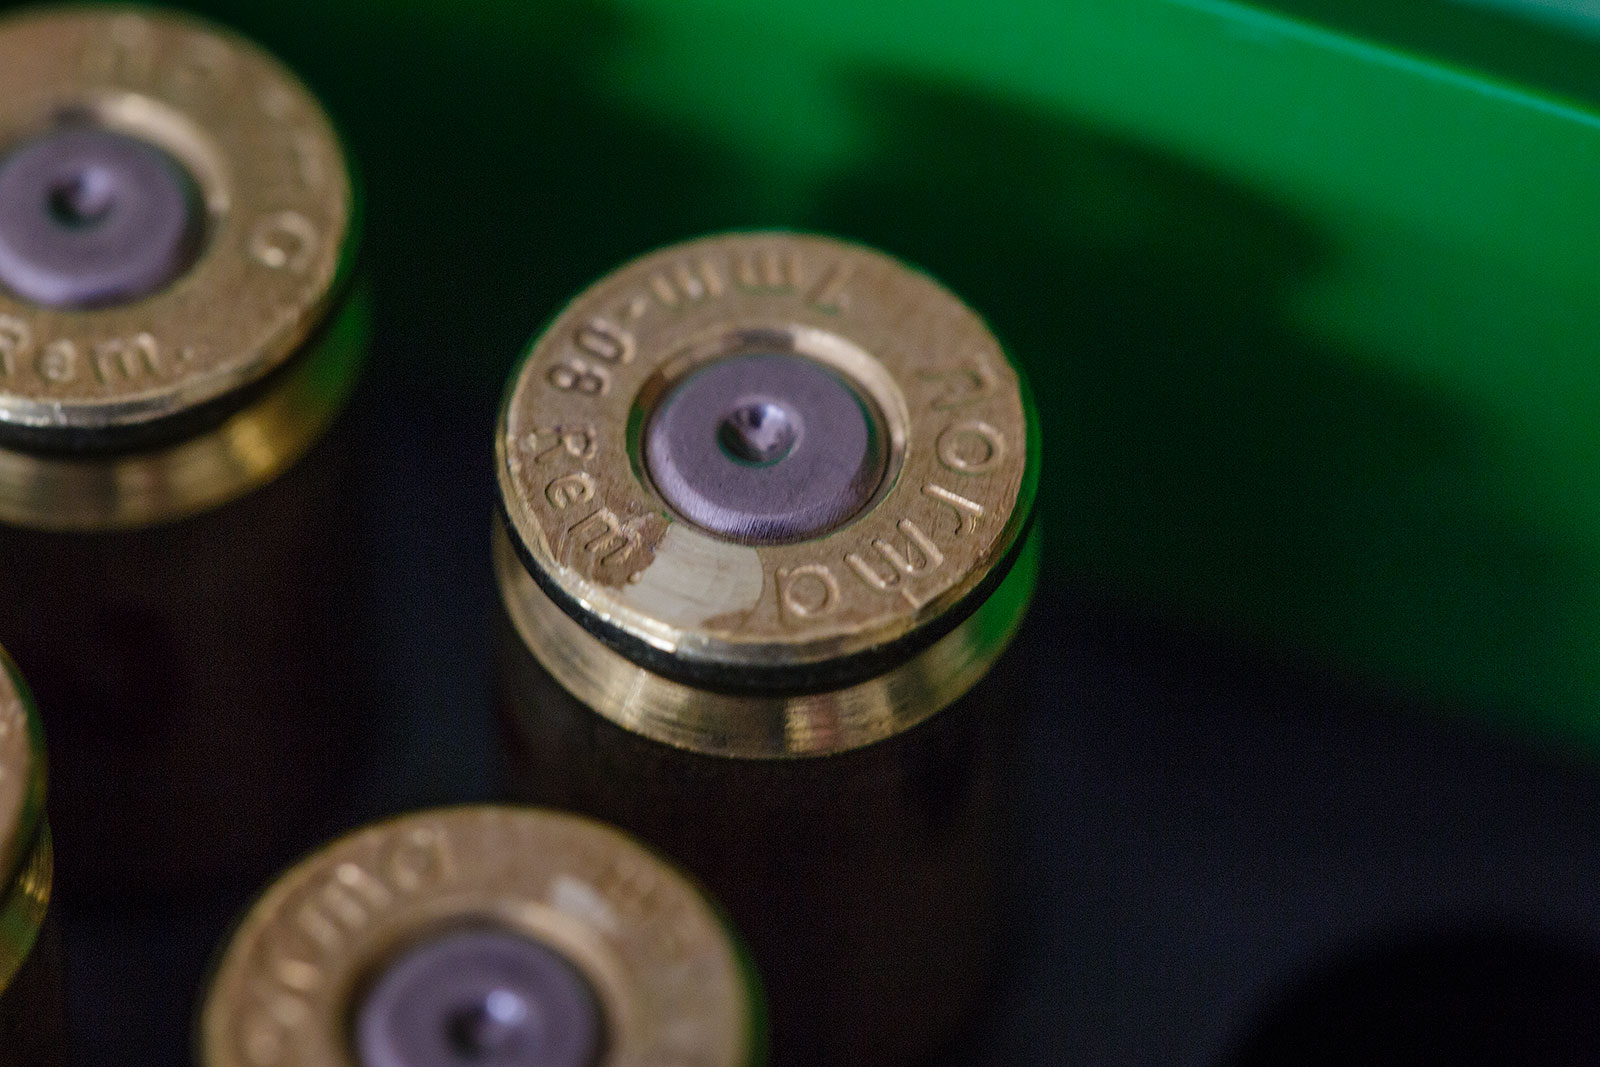
In the case of my X-Bolt – having fired a range of different factory ammo, I know there shouldn’t be any markings. So when I spotted the cartridge to the left, I knew something was up. See that marking on the rim? That the cartridge hitting/forming around the ejector pin on my bolt.

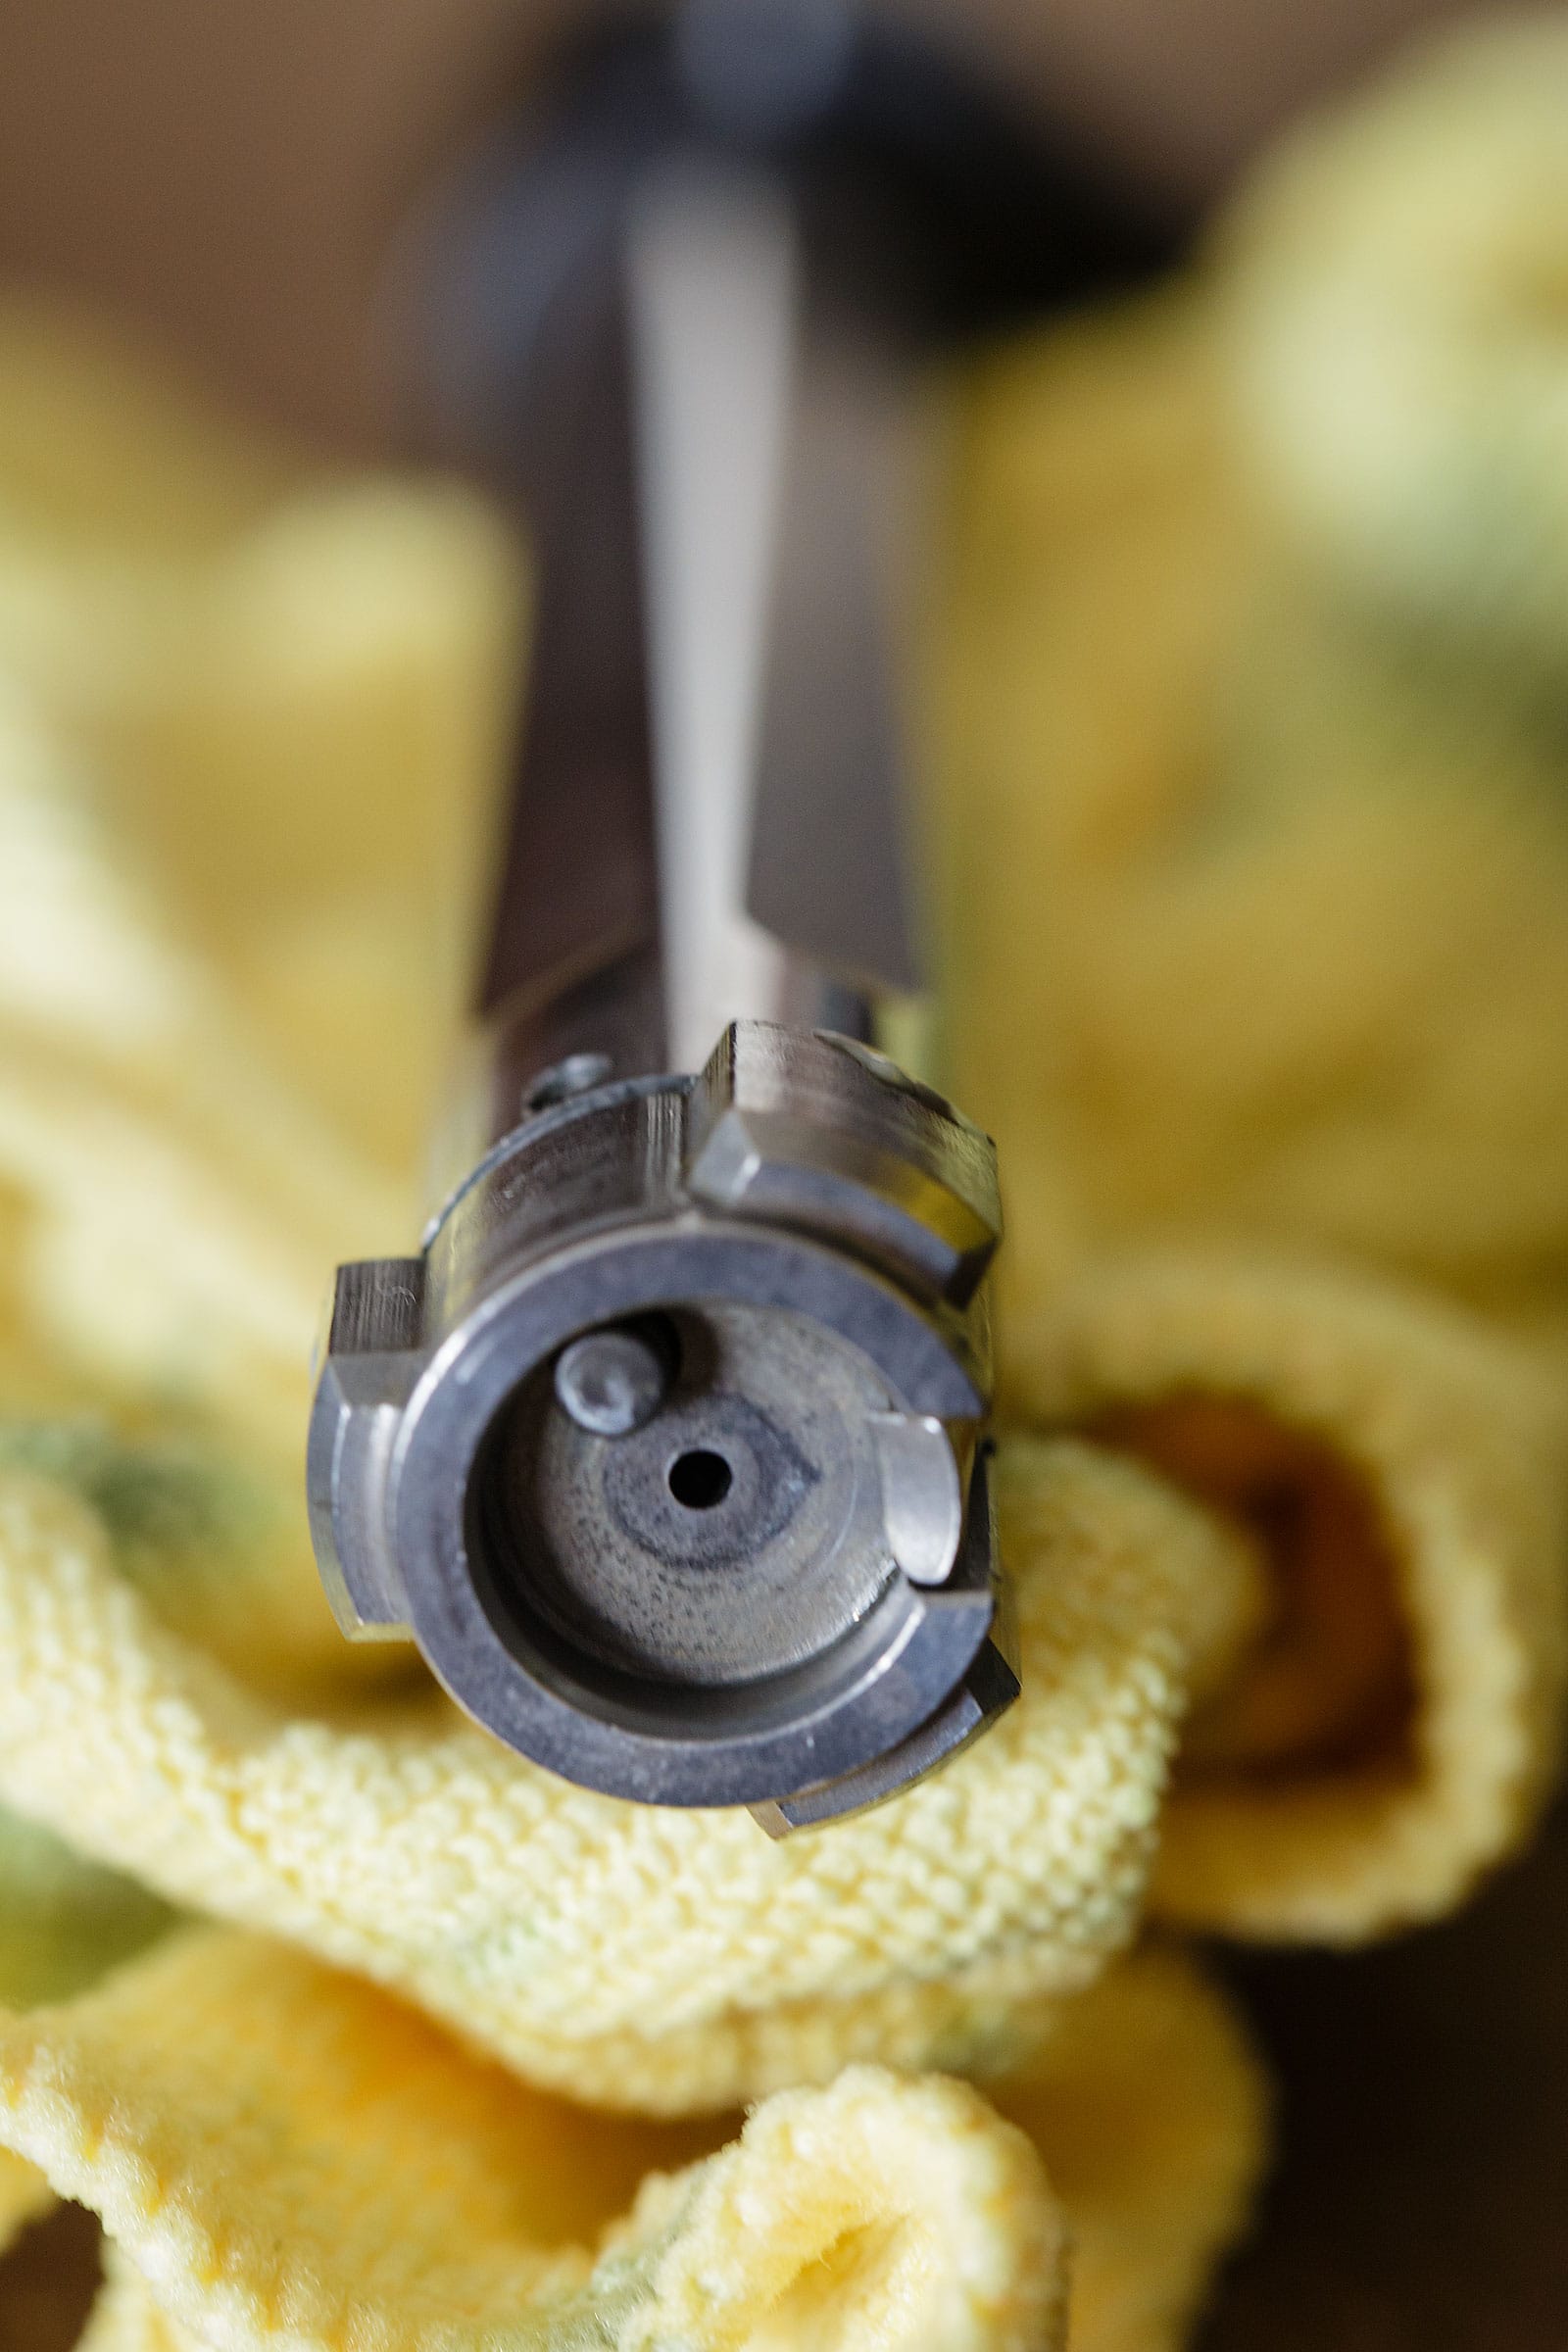
See the pin top left? In this case, my cartridge got so hot, the brass softened, got pushed back and left an imprint of the ejector pin on the case. This is a classic sign of overpressure – especially when I know that it doesn’t happen with factory ammo.

It’s at this point you need to stop. Going any higher in pressure may bring you closer to major issues. You have likely reached your maximum load in the OCW load testing procedure.
Load-Testing-(5-of-21)

Other signs include a difficulty in opening the bolt, damage to the primer itself and excessive recoil.

The Results

Here is the important thing to remember when using the OCW Load Testing method. You are not looking for the tightest group. That is ladder testing. What you are looking for is the charge weight that sits in the middle of the targets that show the most consistent point of impact. That is, the weight where you can have the pressure go up or down slightly (due to load variance, temperature or other variables) and still have the most consistent point of impact.

Once you find that point, you can refine the group through overall cartridge length (OCL) adjustments and you can also re-zero the rifle to get the point of aim (POA) and point of impact (POI) the same.

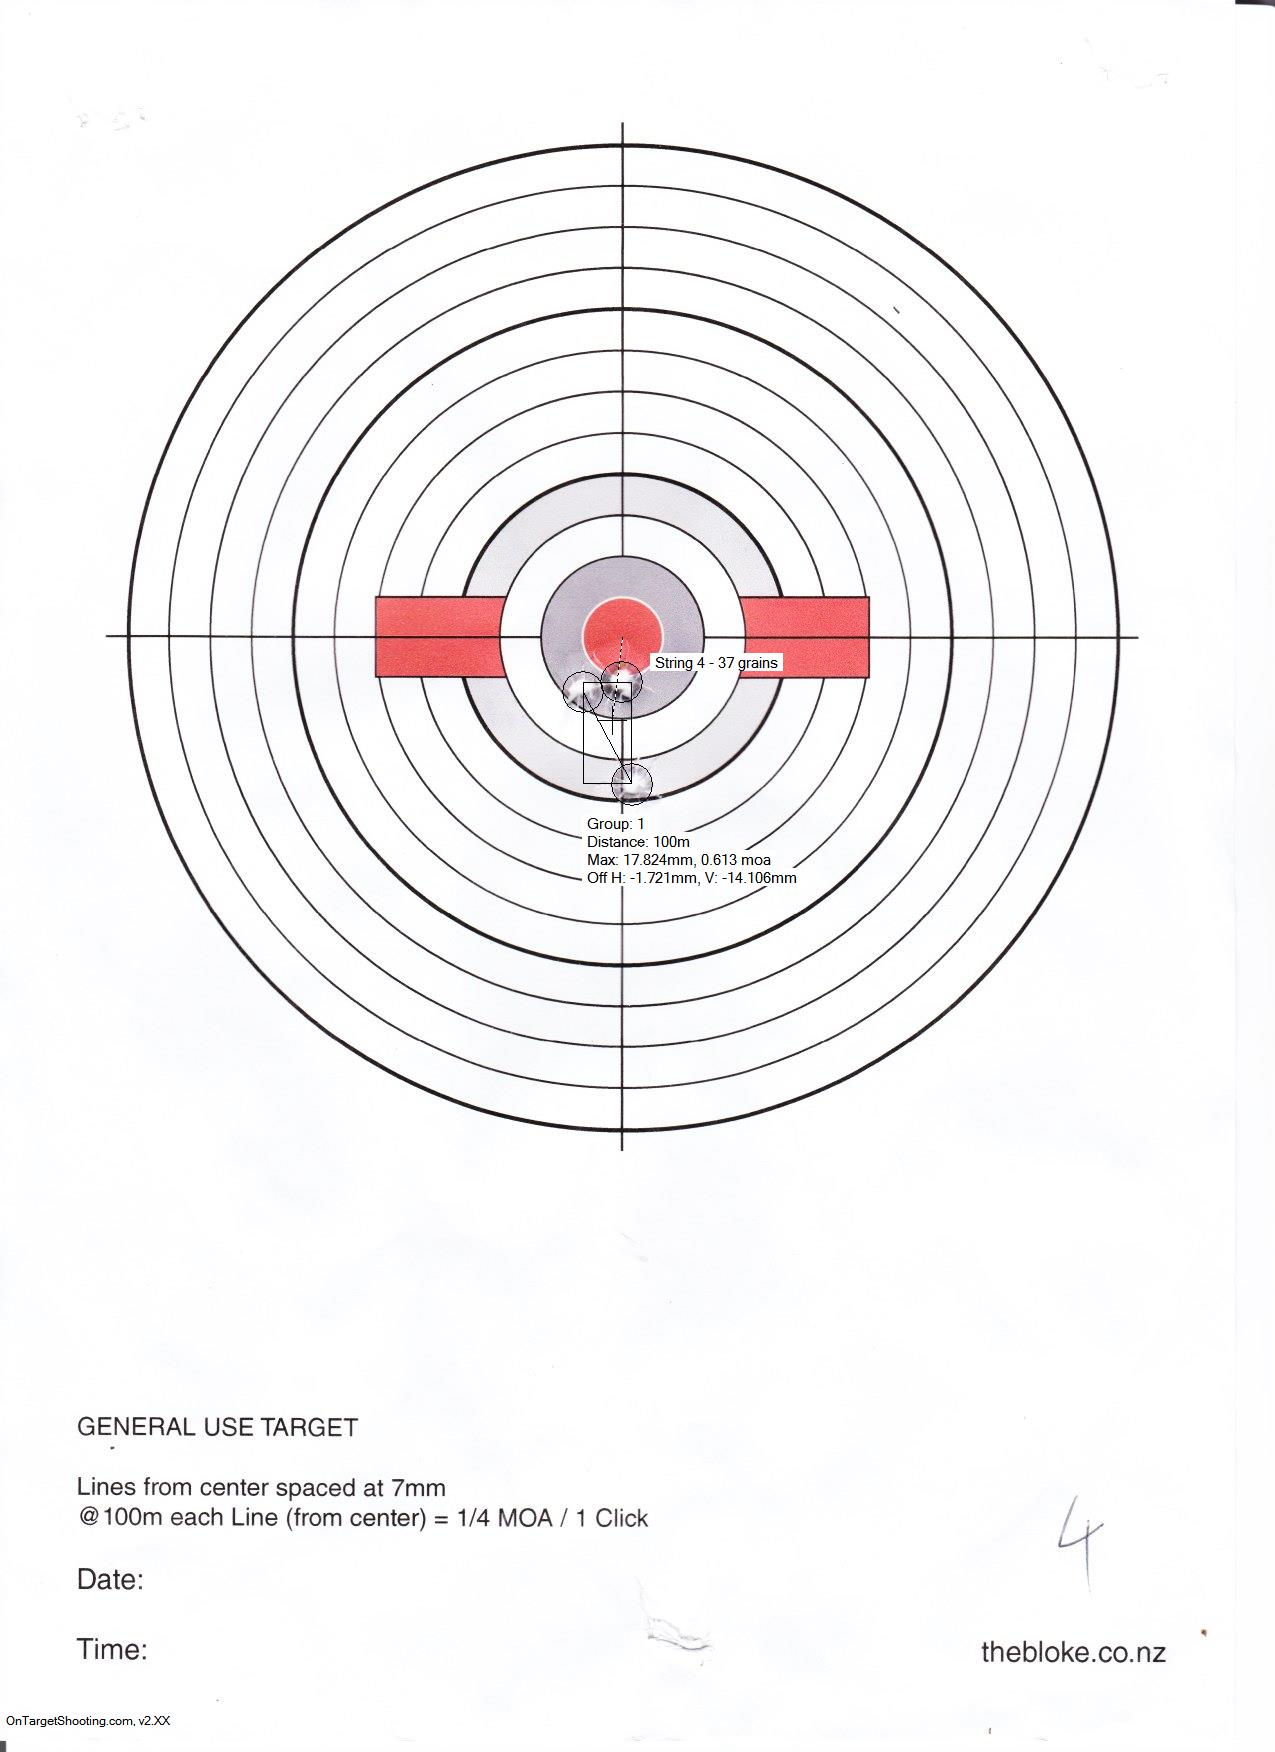
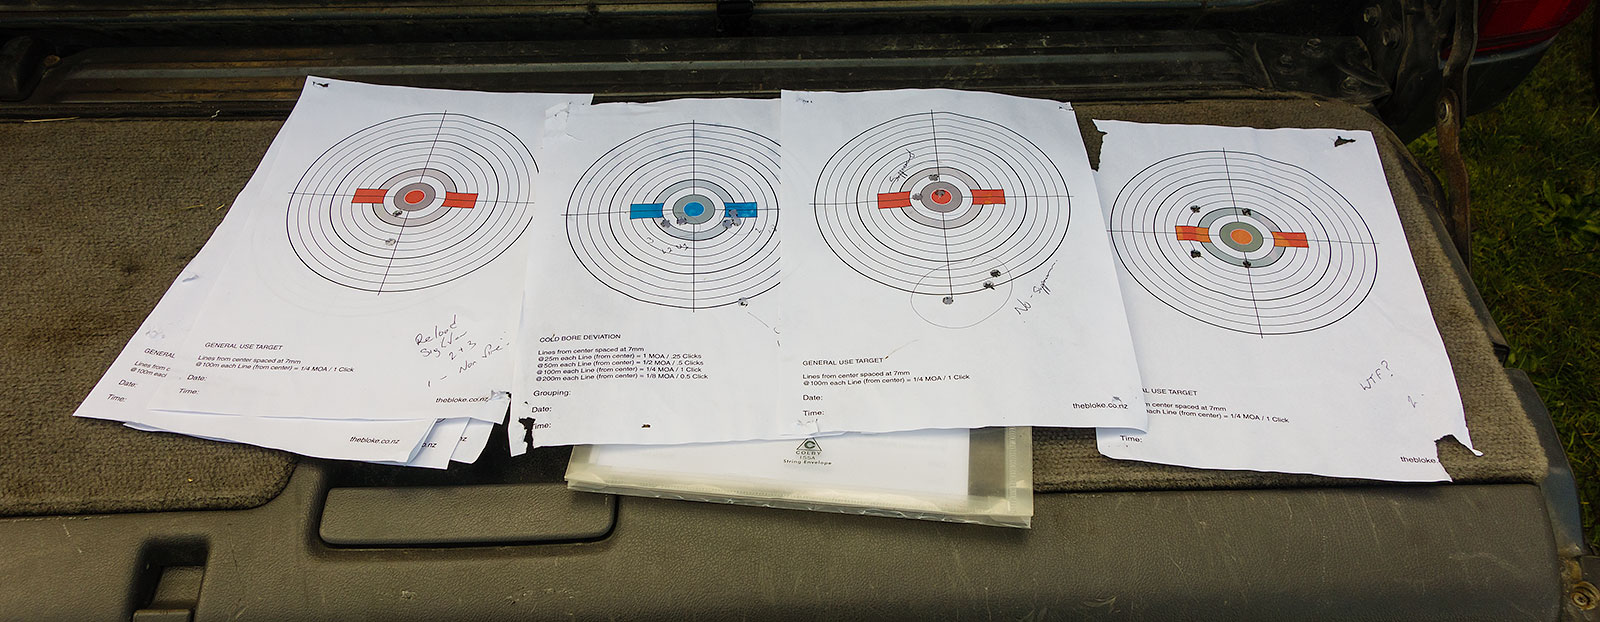
However, what this means is that you need a good series of targets to compare. My issue was because I was running into pressure issues before I was able to shoot through all the test loads I only have four targets to compare. One of those also included a dud round.
String1

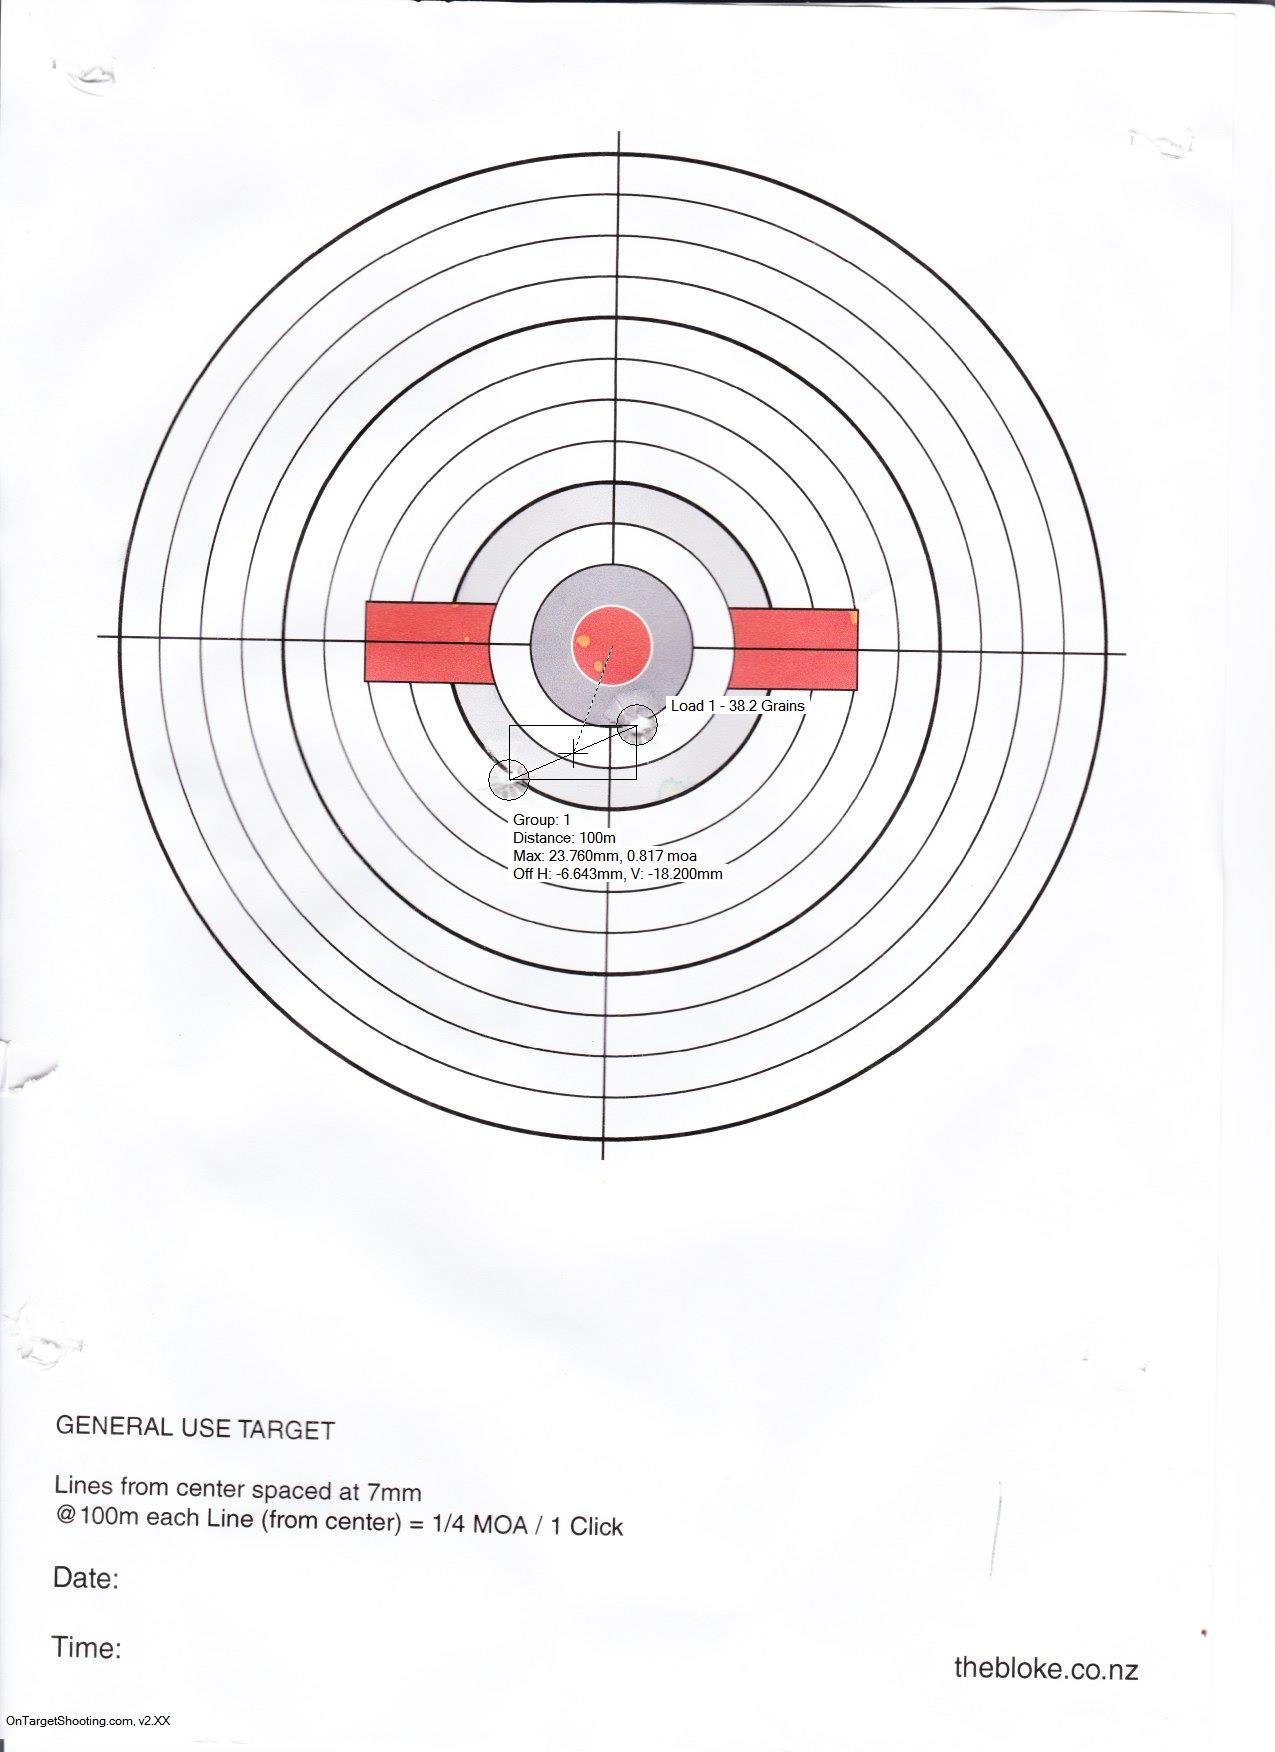
Comparing the targets, if you were running a standard ladder test, target 4 would probably be the one to work from. However, the tightest group isn’t necessarily what we are looking for. See how string 1, 3 & 4 have a similar POI, while 2 has drifted to the left? That’s the correlation we are actually after. But this requires targets either side to compare too.

It’s also worth noting that all these shots are well within ‘minute of deer’. I am doing this to get the maximum accuracy out of the rifle – but any would have been suitable for hunting with.
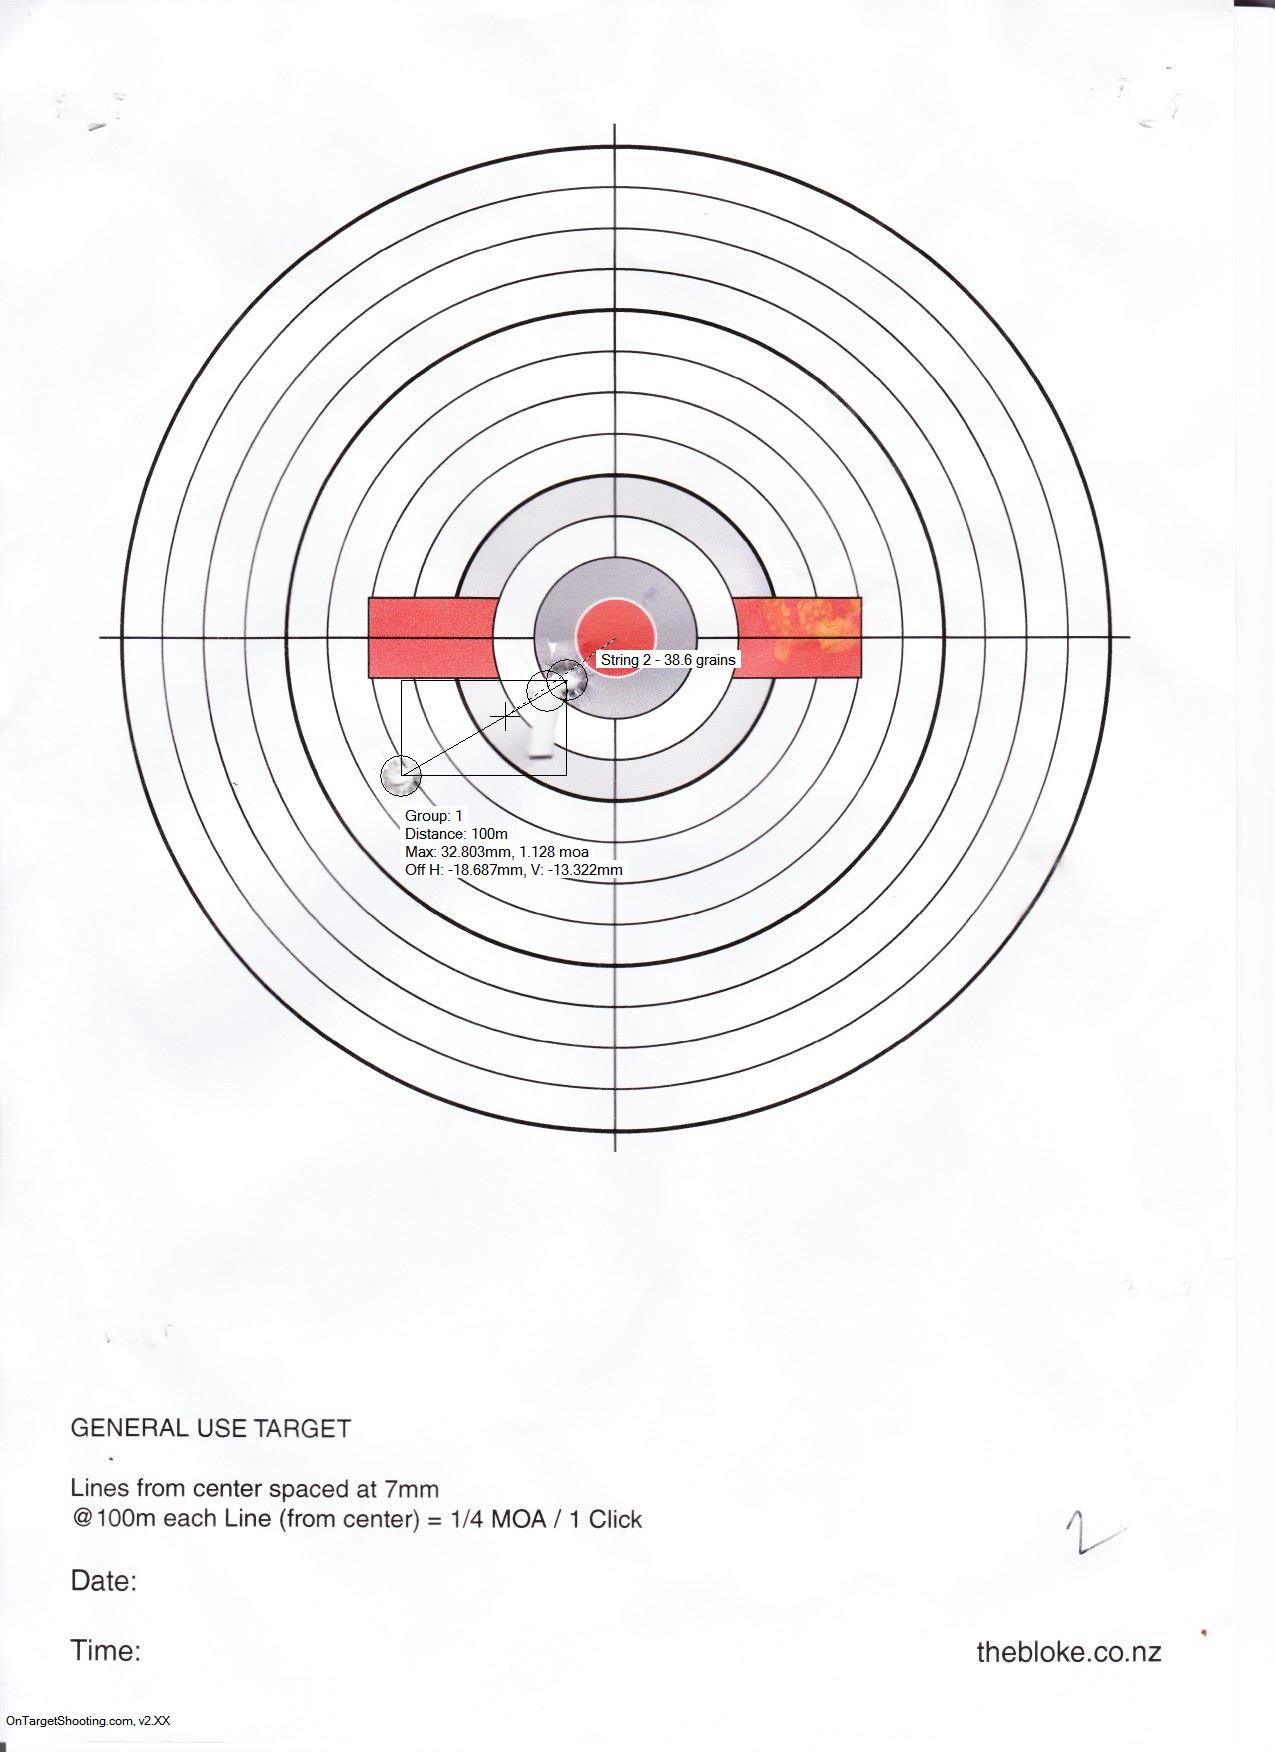
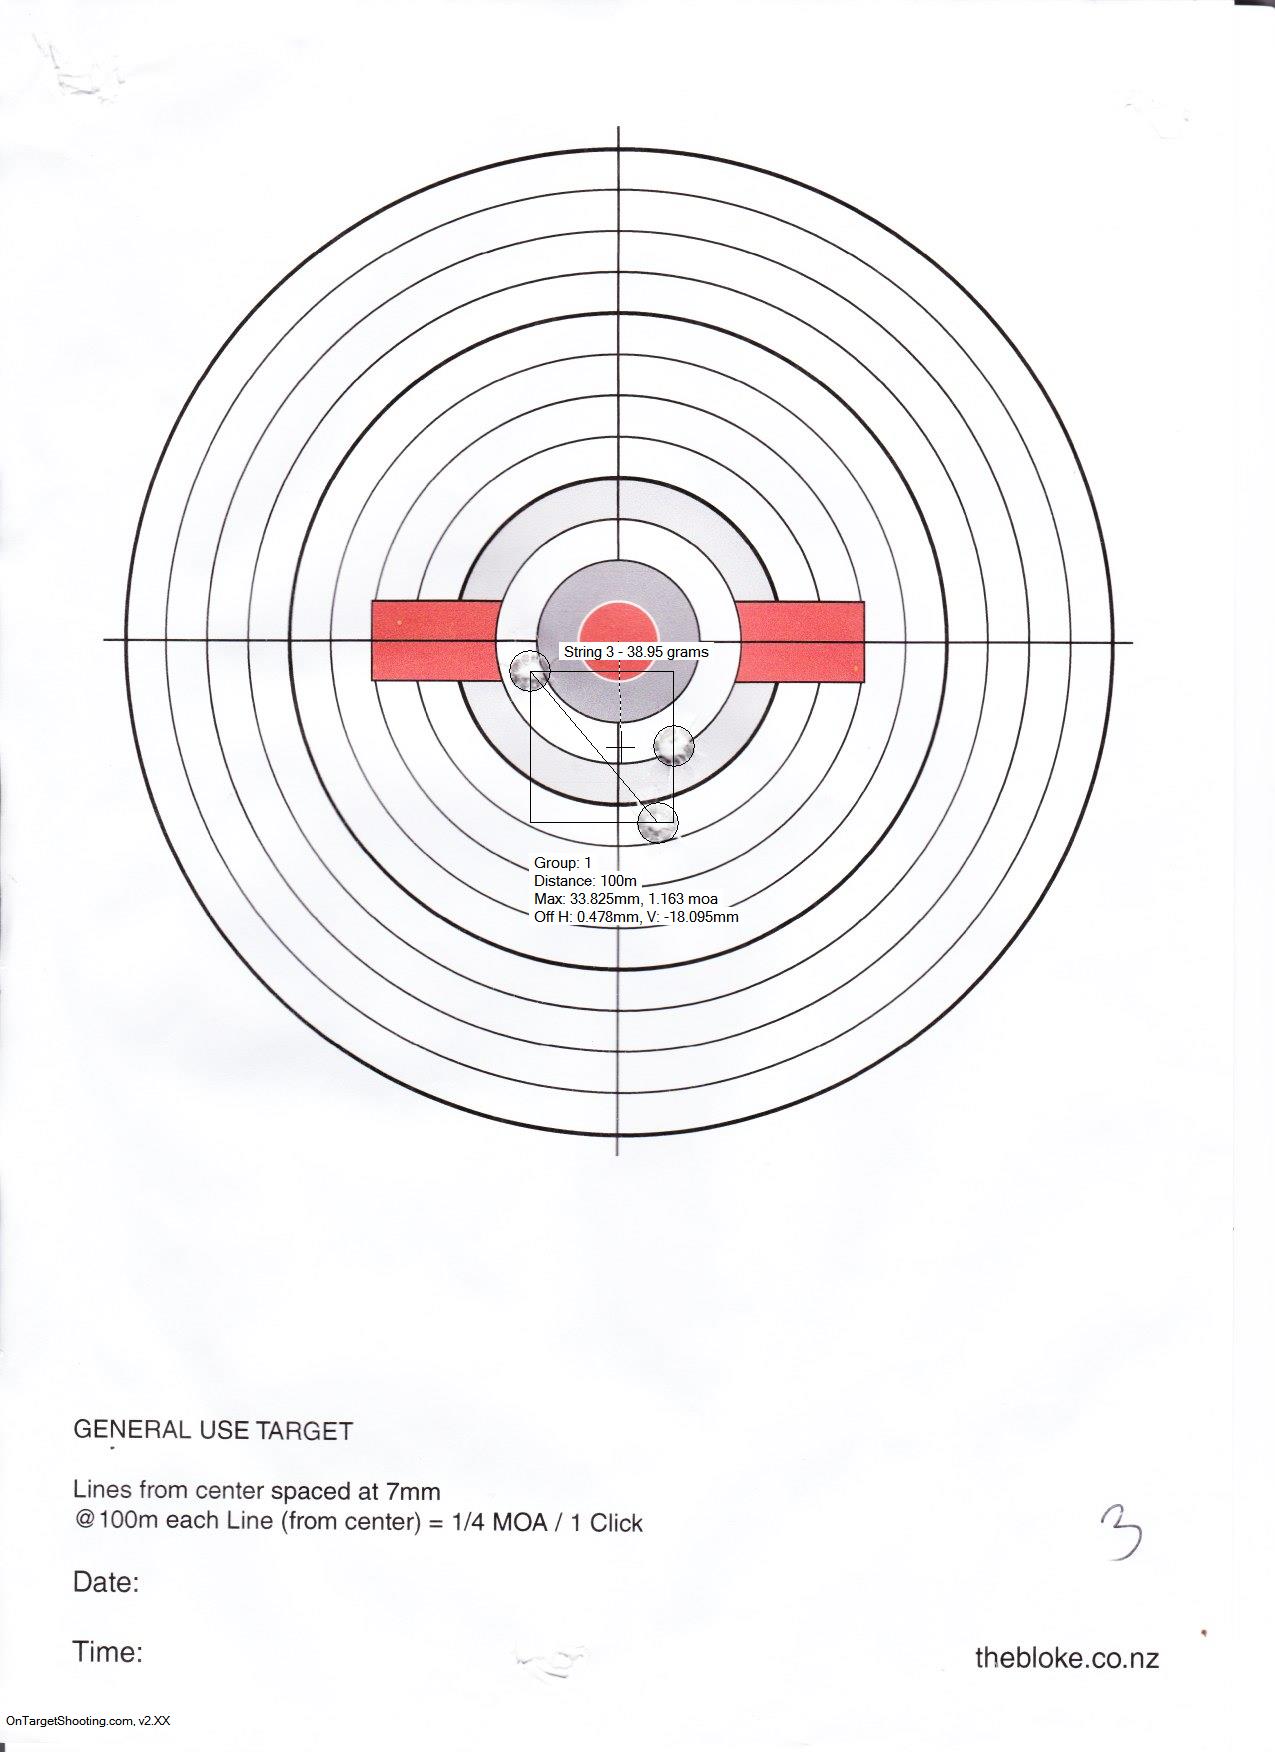
String2String3String4

Basically this means I need to re-run the test, which just means more time at the range, which is ultimately a good thing.

I have reloaded a series of weights where the overpressure load from this test is my highest load. This means I should get six targets to compare. Actually it will give me ten, as these existing targets will be different load weights to the next lot.

So, back to the range it is.