Home Blog Page 41

Hazard 4 Camera Pouches – the Forward Observer & Jelly Roll

0

untitled-1-of-1-22

Camera pouches that are so good, I have two!

I have two sets of these camera pouches now. The first set in black, the second in Coyote Brown and either one or the other gets used on a daily basis.

It all started when I wanted to find a better way of hauling all my camera gear around with me while out in the bush. The existing solution either seemed to be ‘store it in the pack, get it out when you need it’ – which didn’t really work when suddenly seeing a photo of an animal I wanted to capture, or, some system from a camera gear manufacturer, who really didn’t seem to have spent much time walking long distances in the back country.

I had already started down the path of military styled equipment – my Mystery Ranch Packs all had MOLLE on them, as did several of my day packs. I already had a sling pack from Mystery Ranch – the Plan-B – so when I spotted these two camera pouches from Hazard 4, I figured they would be worth a go.

Man have they worked out well. It’s fair to say that the rest of my carry system now rotates around these two pouches and their contents. In my case, it is a Canon 5d Mk III and a Canon 100mm L Macro Lens.
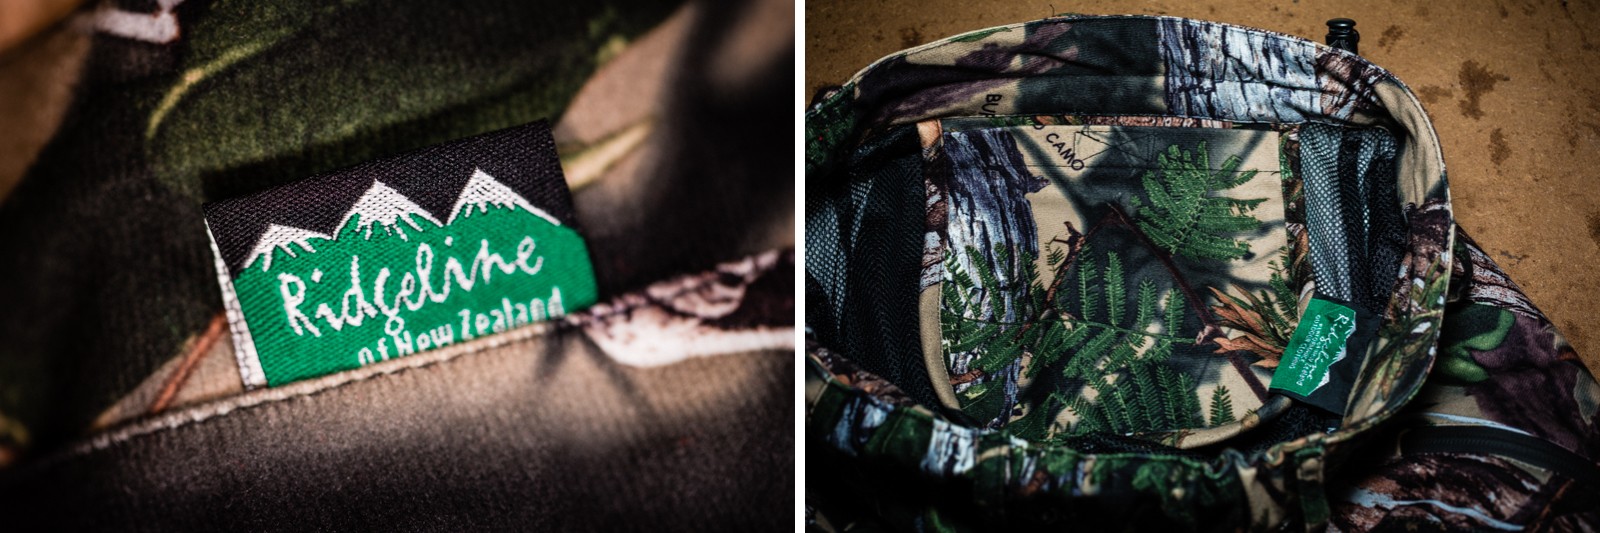
Who is Hazard 4?

Hazard 4 is a company based in California, a subsidiary of Civilian Lab. Hazard 4 focuses on creating forward thinking tactical products, often solving problems other companies haven’t addressed. At this time, I believe they are the only people making MOLLE SLR camera pouches.

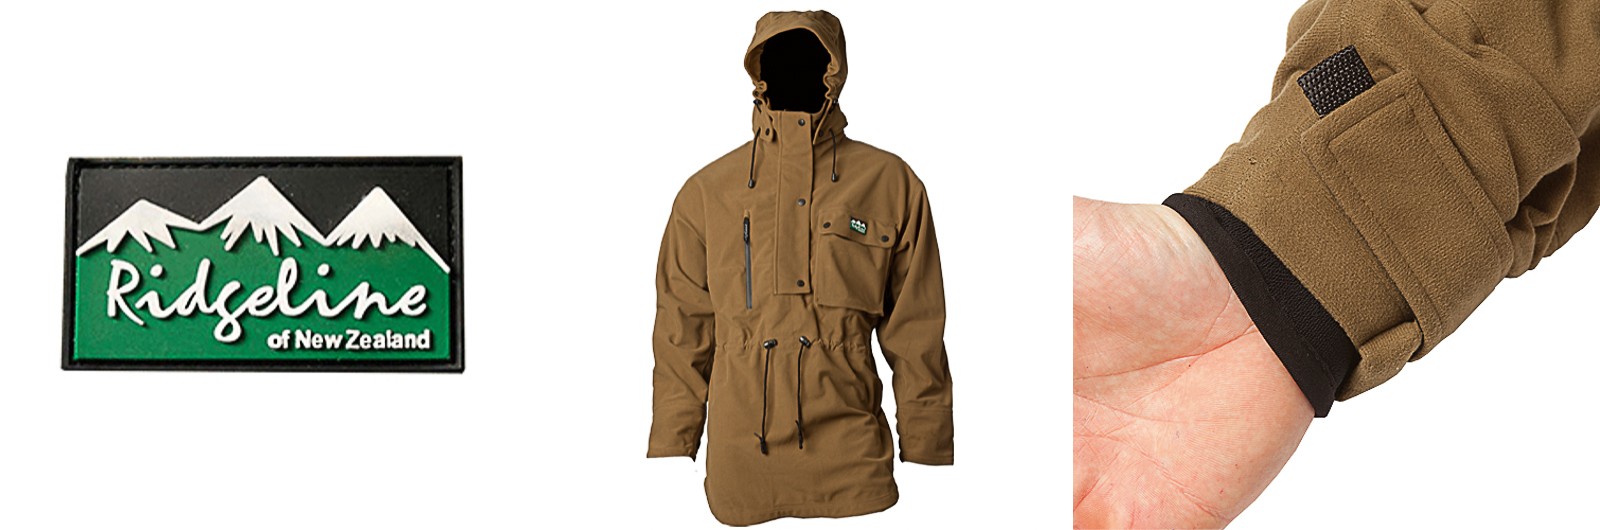
They make a range of packs, pouches and apparel – among other things, a new take on the Classic Poncho, as well as a couple of Tactical Rash Guards (for recon surfing maybe?).

untitled-1-of-1-3

Build

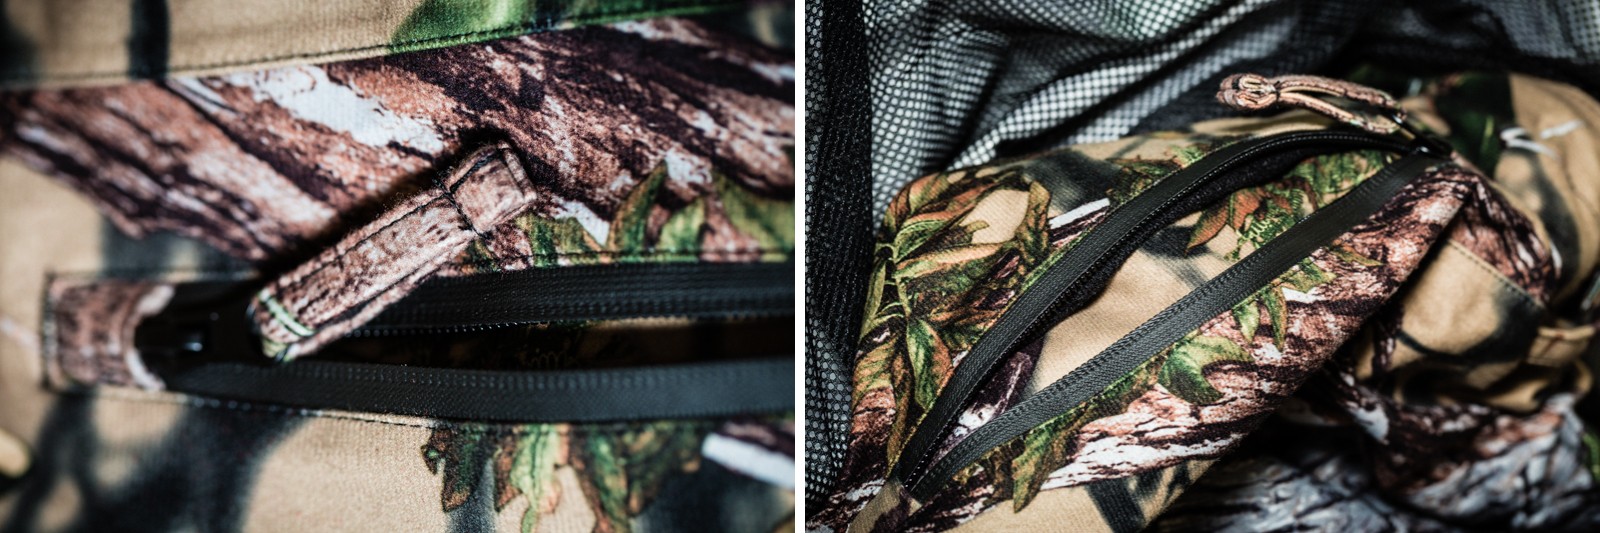
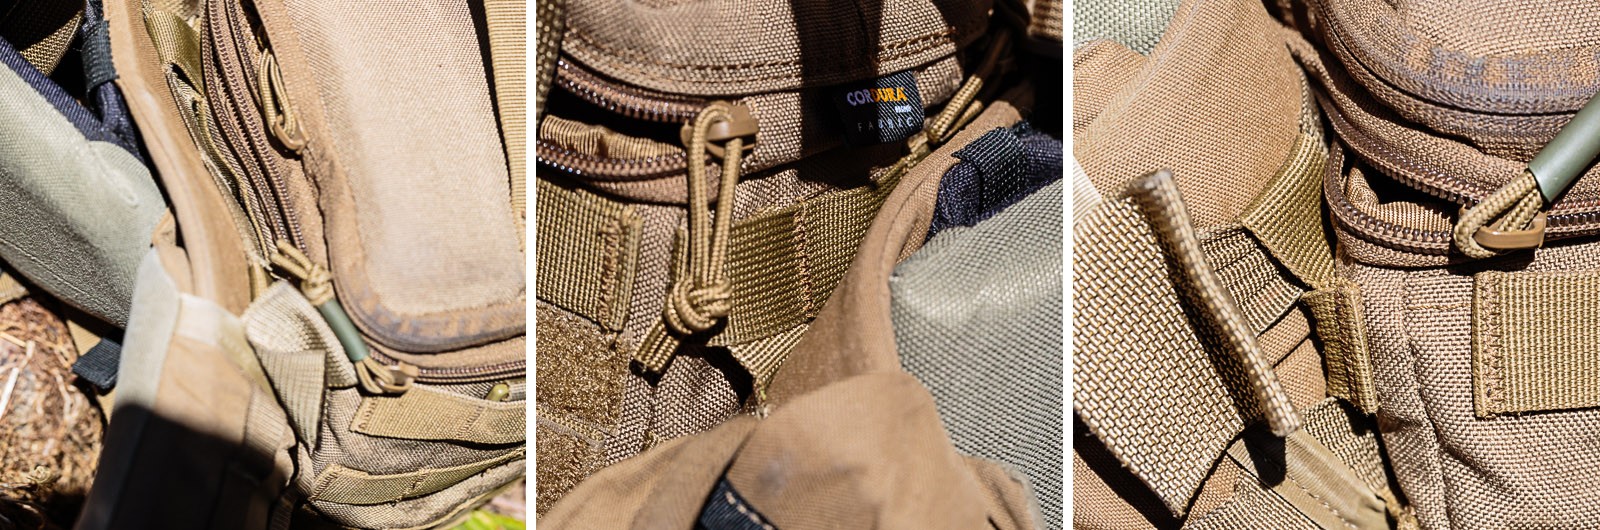
Both packs are made out of Invista Cordura 1000D, this is a heavy, Mil-Spec Material – designed to take pretty much anything you can throw at it. The zips, pulls and webbing, are all heavy duty, high quality product. I have been using these a lot over the last year and have yet to see any issue with the stitching coming lose. They are built well!

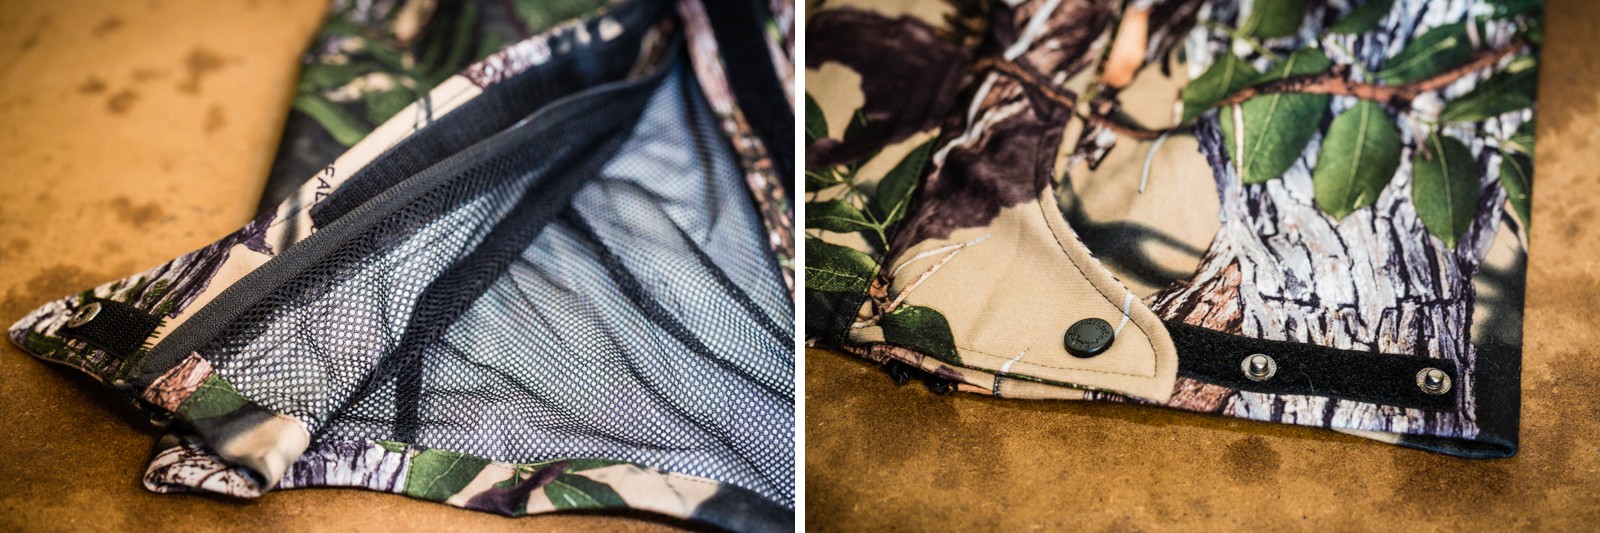
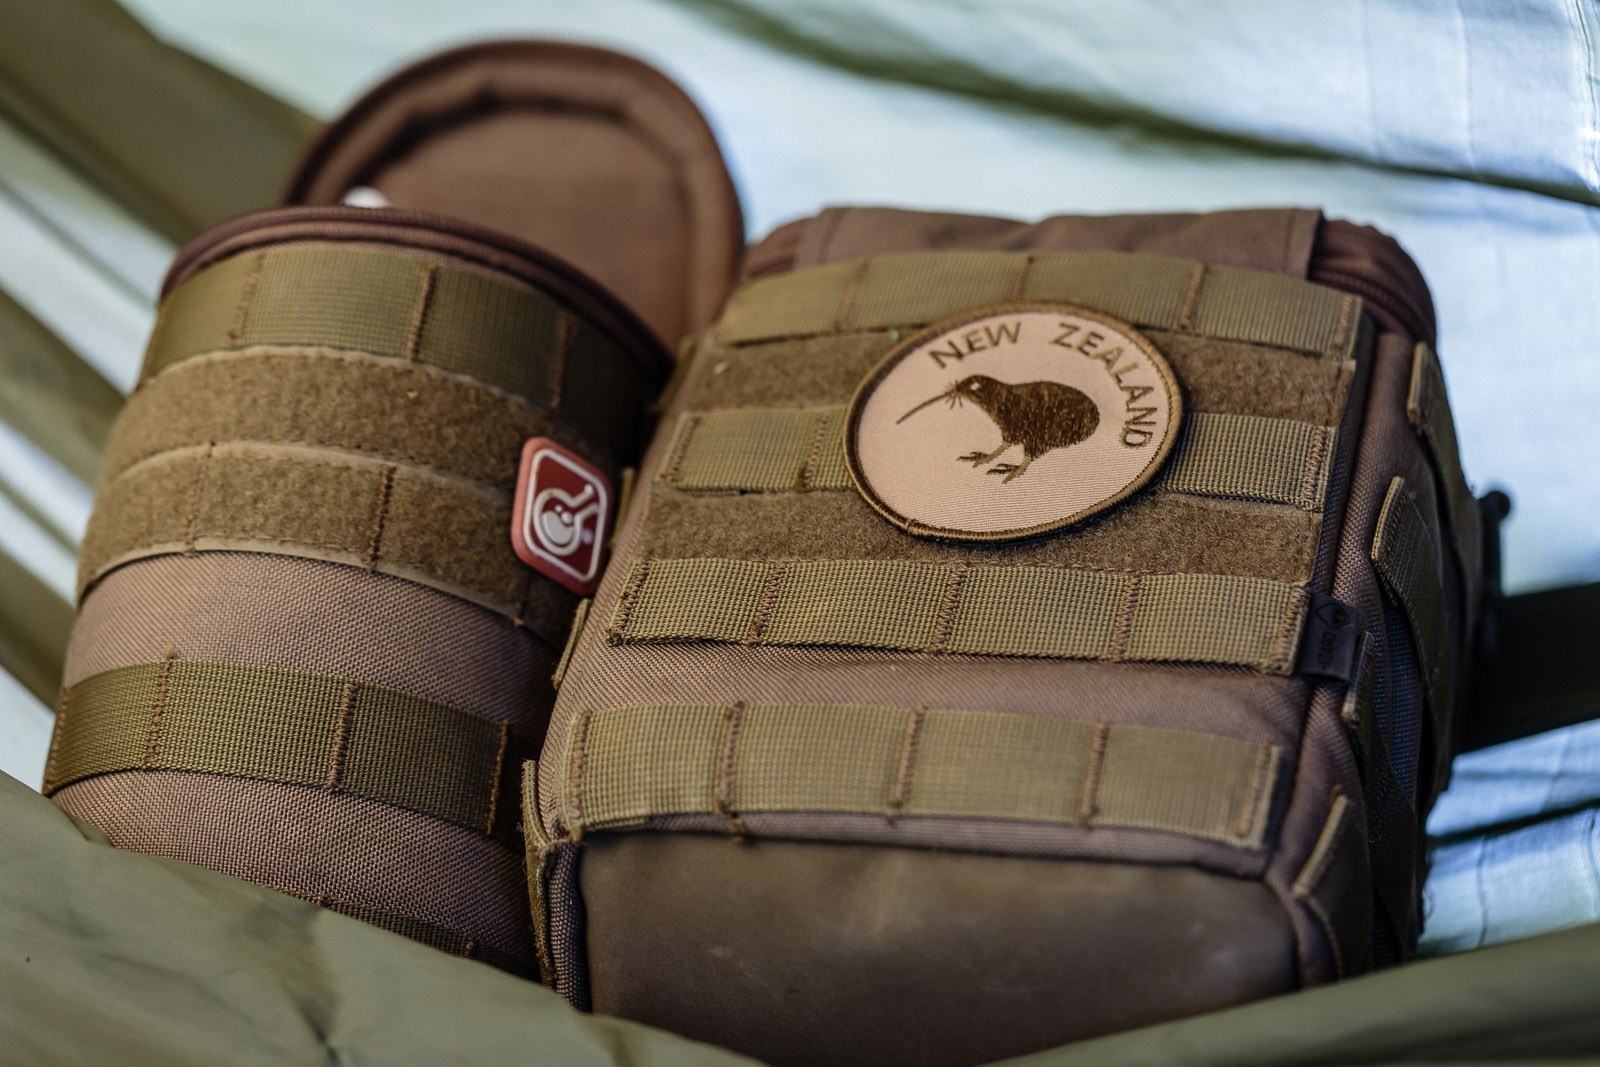
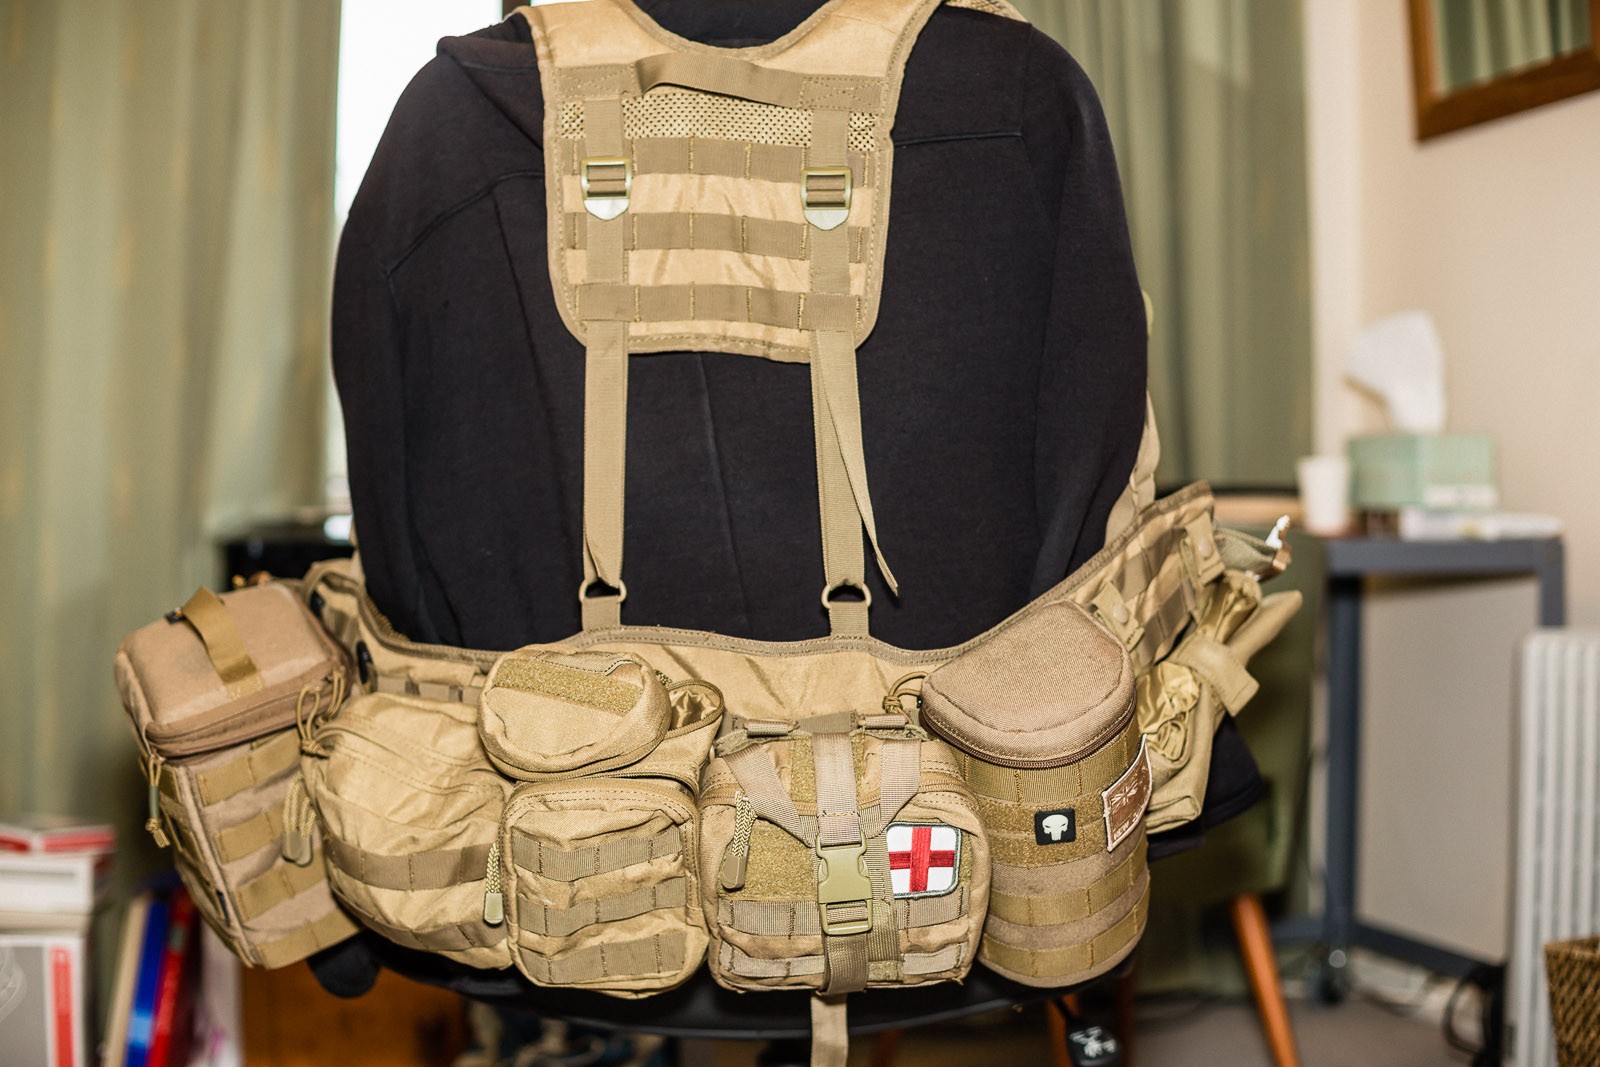
Both have velcro on the outside of the camera pouches (great for additional morale patches) and additional MOLLE for attaching further pouches to the outside. Not that I would – as I imagine the whole system would start getting a little lopsided.

Forward Observer Camera Pouch

The Forward Observer is the SLR pouch. Big enough to comfortably take the 5D III with a 24-105 on it, the pouch contains a pile of padding – enough that I can comfortably sling the pack around – without worrying that I might damage my camera. That doesn’t mean I am going to throw it over a cliff – but it does mean I don’t have to baby my pack when I am carrying a pile of expensive optics.

In addition to it’s main camera pouch – the system has a separate top pouch – ideal for carrying spare batteries, memory cards, cleaning items and so on. I can also fit a polarising filter in there if I want to. Each side and the front also has a slim slot on it – ideal for dropping the lens cover into, or holding a larger grey card.

The camera fits snug in the pouch – I generally drop it in there, then half close the zips on top to secure the unit. If I want to get it back out quickly, I can all but tear the top open and instantly have access to the camera.

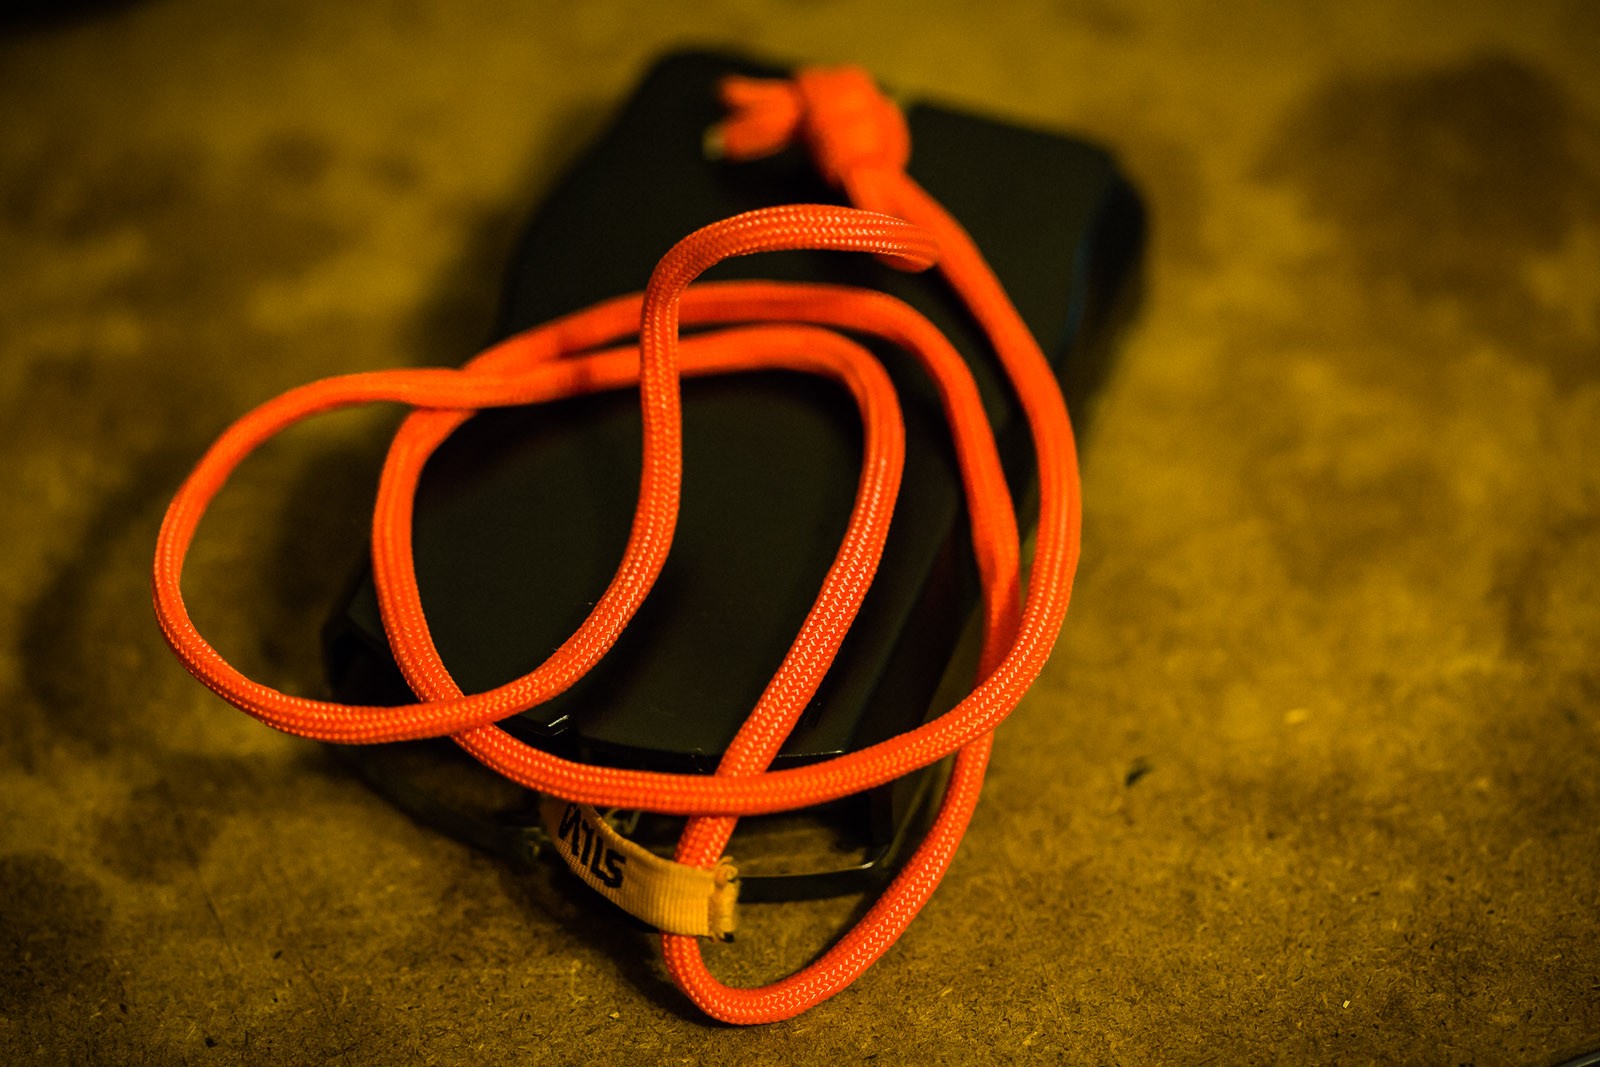
An additional system I use when it comes to protecting my camera is a pistol retention lanyard. Normally, people are going to have a strap around their neck when using the camera. Especially when there is the potential to send it over a cliff, down a scree bank or into a river or stream. While I didn’t want a strap around my neck, I did want something to secure the camera to myself. My solution was to attach one end of a coiled retention lanyard to the camera tripod mount, and the other end to some webbing at the top of my pack strap. This basically means, if I drop the camera, it slowly extends out to about knee height, without touching the ground, and without disappearing down into the scrub somewhere.

I try not to drop the camera as a rule, but it is good to still have a form of backup there.

The Jelly Roll Lens Pouch

The Jelly Roll has a similar construction to the Forward Observer. It snugly holds my 100mm Macro Lens, and keeps it nice and handy should I want to switch over the lenses on the camera while out in the field. It saves me having to stop, take off my pack, unload it and then pack up again to carry on. Do that a couple of times, and you quickly see the benefit of having the pouch on your hip.

13

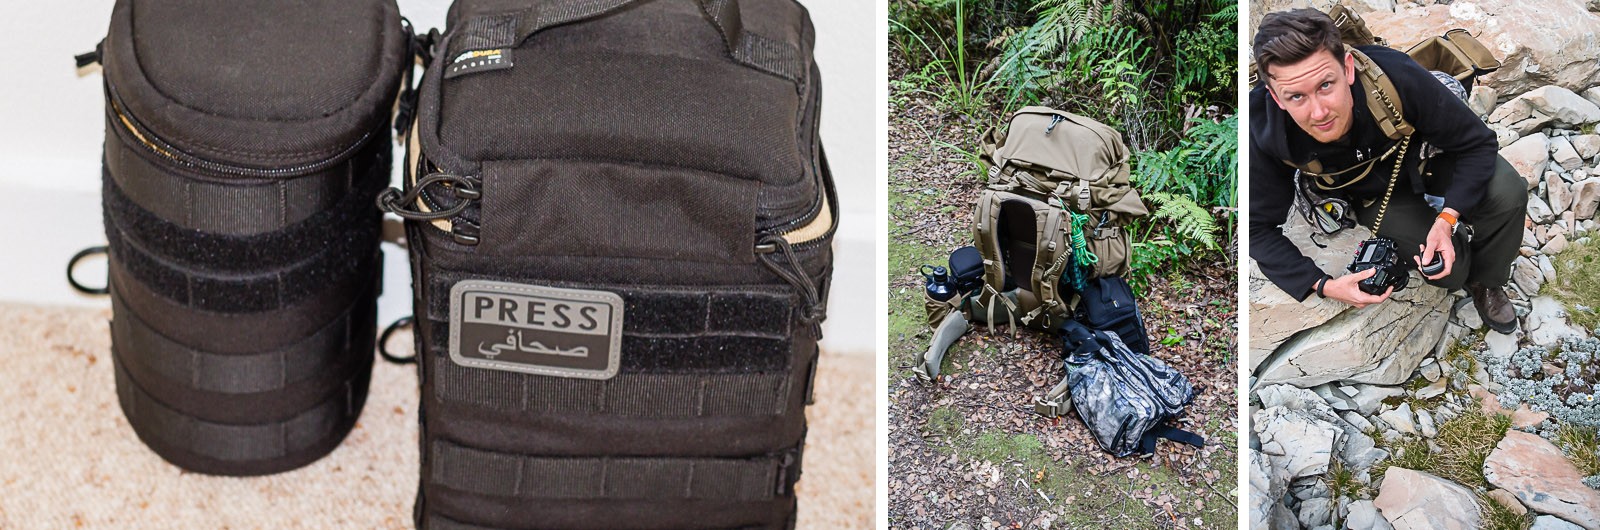
Modular Load Distribution

Being MOLLE pouches, I can use these on all my packs that are set-up with webbing. Main pack, day pack, battle belt – all can carry either or both of the pouches – depending what I am up to. It makes the system so versatile, and generally, I can always keep the weight down on my hips – right where it should be for ideal weight distribution.

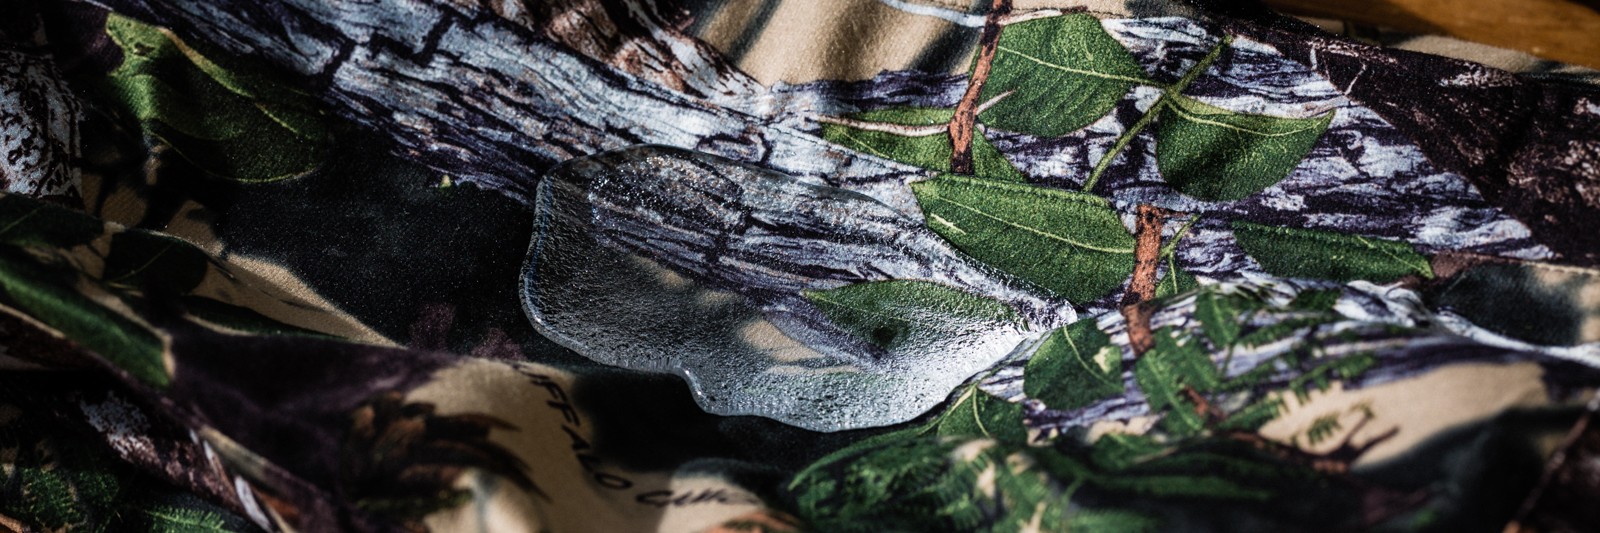
On the whole, I am really impressed with these things. I have used them heaps, in good weather and bad, and while they aren’t waterproof, it takes a while for the water to ingress into the pouch. At which point, I normally take the camera out and put it in a dry pack but I am not really taking a lot of photo’s at that point anyhow. They take a while to dry out, but no more than the rest of my gear.

untitled-1-of-1-4

The only one, minor quibble I have is this. By my reckoning, and I may be totally wrong here – is that the MOLLE strapping on the back is set up slightly wrong. To my thinking the webbing should be down one ‘row’. Meaning the strap comes out, through the first run of webbing on the pack, then back through the first run on the pouch, and so on. As it is – however I set it up – there is a always a gap between the strapping and the pack.

I sort of circumvent this by using a pair of Blade-Tech MOLLE Loks anyhow – they allow me to quickly attach or remove the pouches, but, you know, details matter to me.

31

All in all though. These camera pouches are phenomenal. Changed the way I carry my camera, and always get enquires whenever people see me out and about with the camera. Like I said, I have really ended up developing the bulk of my carry gear around them. I see they also now have the Wedge – which I would be interested in checking out at a later date.

Sleeping Bags – Synthetic or Down?

0

I am new to overnight tramping therefore I had no real knowledge about sleeping bags and their composition.  I mean, when I was a kid sleeping bags were only used for staying over at a friend’s house, so with childhood innocence I thought they were all the same; right?  How wrong I was…

I have been working my way through the Mountain Safety Council’s (MSC) bushcraft courses  and very quickly discovered not all sleeping bags are made equal.

After lugging my 3.6kg synthetic sleeping bag around the Hunua Ranges, overnighting under a fly, and not getting a wink of sleep I was beginning to see my old bag may not be up to scratch. So I began my research and in short this is what I discovered.

Sleeping bags come in two very different varieties:

09jan-sleeping-bags

http://www.consumer.org.nz/reports/sleeping-bags/sleeping-bag-basics

Now let’s break it down (excuse the pun):

  • Down is going to be lighter and smaller, but if you get it wet it’s worse than useless.
  • Conversely, a synthetic bag is going to be bigger and heavier but if it gets wet you’re not going to freeze your tits off.

Most down sleeping bags try to overcome the whole, wet = no insulation shortfall, by treating the outside of the bags with DWR (durable water repellent).  Essentially, this coating is designed to repel water but it isn’t going to stand up to large quantities of the stuff.  If you’re likely to be getting wet your best bet is going to be synthetic.

So here I was facing the same dilemma I am sure most people have come across when buying a new sleeping bag.  Do I go down and have a nice light, small bag which if it gets wet becomes a heavy, useless burden?  Or do I go synthetic which weighs more, is bulkier, but if it gets wet will still provide around 80% of its usual warmth?

So I put the question to MSC instructor and gearhead Peter Warowis.  His response, why not get the best of both worlds?  I was staggered, during all my research I had not once come across this mysterious hybrid bag Pete spoke of.  Where did I purchase this fabulous, potentially mythological sleeping bag?  Pete chuckles at the confused expression stamped all over my face, and enlightens my inflexible mind.

Pete’s solution to the problem:  Have two sleeping bags!

Now, hang on and let me explain in 3 easy steps.

1. Have your main synthetic outer bag

2. Have a very light, down inner

3. Place bag B inside bag A and viola!


So with that in mind I used my research to buy the following:

Synthetic bag:             Kathmandu’s Globe

Kathmandu-Globe

Down bag:                   Macpac’s Escapade 150

macpac-escapade-150_4f29e83a473db

Armed with my new set-up I hit Mt Ruapehu on the MSC above the Bushline course where I slept under a fly, with my bivy bag, and two sleeping bags.  I awoke at 7am having got a full night’s comfortable sleep to find snow covering everything in sight.

So what have we learnt?  Be flexible when trying to solve your gear solutions.  I wholeheartedly recommend Pete’s method to anyone looking at buying a new sleeping bag as you get the best of both worlds.

Ridgeline Sable Air Flow Long Sleeve Hi-Vis

0

As part of the Hunts Course I have been undertaking – I have become increasingly aware of the need for hi-vis in the bush. It’s too easy to disappear wearing subdued or camouflage clothing in the back-country and while this is theoretically what you want – it is not so good when there are other hunters about with the same idea!

I already had a Ridgeline Blaze Camo Vest but noticed that as soon as I had my Ribz Front Pack and Backpack on, most of the Blaze was being covered up. There is no point wearing it if it can’t be seen!

I decided I wanted something long sleeve – but didn’t want to cook alive in it. Hence, hunting down the Ridgeline Sable Air Flow Long Sleeve Hi-Vis.

The Sable Air Flow is essentially a light weight, high coverage top – ideal for hunting in when it gets hot, and when you want a lot of blaze drawing attention to your location. The material, while being very light and perforated, it surprising robust – as I found out recently while bait lining just off Cutty Grass Track in the Waitakeres. So named, you guessed it, for the amount of cutty grass in the area.

So, while my knees may not have come out of it unscathed – the top did. In fact, if it wasn’t for the long sleeves on the top, I imagine I would have had a lot more cuts over my forearms from having to push through all the high grasses on the line.

airmesh

Heat wise – well – I was carrying a pack, and going up and down guts. So I did sweat a little – but no more than I would have if I had been wearing a light T-Shirt, or for that matter, a singlet. If you are heading out in slightly colder weather, just leave a shirt on underneath – I did that during a recent trip – and was snug. If it heats up, just take off the under-shirt – the concept of clothing layering in action!

In short – the shirt (and the matching cap) are great. Lots of visibility, with robustness, and no overheating. These will definitely be coming with me on all the hunting trips in the future.

untitled-1-of-1-21

The issue I really have now, is my Coyote Brown Pack and Camo Front Pack. I am looking to replace the Ribz with a new version in Blaze, and will likely replace the pack shortly with something blaze as well. Remember, while it’s the shooter’s responsibility to positively identify their targets – it makes sense on your part to make that as easy as possible for them!

Ridge_RuggedRata_Blaze_lge


Toughtprint Paper Test – 100% Waterproof Paper?

0

Waterproof2


Toughprint is a 100% Waterproof sheet that looks, and feels like paper but with the added bonus of being so tough it won’t tear even when wet. Toughprint can be used for all sorts of applications where normal paper would not cope even when laminated.

Ok. So big claim. Waterproof Paper.

I traditionally have used a combination of a printed LINZ Topo50 Map sealed up safe in a bag (in case I need it), and a smaller A4 printed and laminated section of map – specific to the area I am in.

This has worked well. The only real issue being that the laminated A4 is a bit of a pain to fold up to put in your pocket. So when I saw the Toughprint advertised online, I thought it would be worth a go. There isn’t a whole lot of information available about the Waterproof Paper – it is a hybrid of paper and plastic, is apparently eco friendly, and nearly indestructible. Ok then.

I ordered a box, read up a bit online, and printed a map off. Nothing magical with the printer settings (a Canon MG6360) – though I did decide to leave it a good couple of hours to dry out. We were off for a day in the Waitakeres, so thought it would be a good test. Wrote down some grid refs on the paper (permanent marker), folded it up (much like paper would), put it in the pocket and headed out.

waterproof

I did note the the colours we possibly a little lighter than I would have expected. Though, in hindsight, after reading a little online, because I didn’t layer heaps of ink into the Waterproof Paper that may have caused the great results I experienced with this test.

The trip out itself was fairly uneventful. So when I got back I decided on a bit of a torture test.

First thing – chuck it in water – I soaked the central section of the map underwater for an hour, then grabbed a paper cloth, and wiped the crap out of it. Despite getting a little black on the paper towel – the print itself wasn’t noticeably altered. Alright then, something a little more major. I then took the paper, scrunched it up into a ball, flattened it back out, and put it back in the water. Overnight.

No major change – paper towel, this time came off with even less ink on it, and the map was still totally usable. Maybe a little ‘lighter’ on the print – but nothing worth worrying about.

Waterproof1

What did the test prove? If you accidentally scrunch your map up into a ball and leave it submerged at the bottom of a stream overnight while out in the bush – the map will still be readable in the morning. What more could you ask? I don’t know if it burns. Realistically, if you do drown your crumpled map and then manage to set it on fire, it is likely that you have bigger issues going on.

I have read about people having mixed results with this Waterproof Paper online. I think there are two points – firstly – make sure you get the right paper for your printer – there is an inkjet option and a laser option. Secondly, go easy on the ink. If you have an ‘economy’ mode option that might be the better choice. I imagine the paper has a saturation point, after which additional ink will come back out. If this happens then simply wipe off the extra ink, and the map underneath will still be fine.

One thing I am wary of, is that I won’t be able to write on it with a marker pen, then wipe it back off with a dab of alcohol afterwards. This is one of the benefits with using laminated sheets – though, I guess with the paper, I can just print off a fresh map each time anyhow. I did try it. It just smears whatever you wrote on the paper. Interestingly, the map itself didn’t smear though.

Cost wise – $26.99 for 10 sheets – so that works out at $2.69 per print. Not the cheapest option in the world. But then, I also shoot rifles – so I could just take one less shot at the range over the weekend and cover it. 😉

So – your turn – Do you have a foolproof method for keeping your maps dry? Share it below!

Getting correct Cheek Weld – easily adjustable Comb Height

0

foam-final

Cheek Weld – why is it important?

Proper cheek weld is critical in long gun shooting accuracy. Why? Repeatability. If you are constantly changing where your head, and your eyes sit in relation to your scope – because you are lifting your head up and down, or back and forth – then the sight picture, and therefore, where you are aiming, is constantly shifting. This isn’t so much of an issue out to 50 meters, but the further out you get, repeatability is necessary in order to put that round in the same place.

What are we looking for when we talk about proper cheek weld? For the moment, we are going to ignore horizontal adjustments and assume you already have eye relief set up correctly. So, vertically, we want the rifle stock to fit you so that when you rest your cheek on the top of the comb, relax the neck and head, you will be looking straight down the middle of the optical system.

If you have to lift your head up off the comb, or push it down, you are introducing muscle tension – which in turn is creating deviation from your natural point of aim – and that is not likely to be repeatable, shot after shot.

Comb Height – why are they never right?

It is highly unlikely that any of your rifles will fit you perfectly right out of the box. Why? Because manufacturers have to follow the bell curve when it comes to the design of their stocks. The stock will fit most people, fairly well. It will also then, need adjustment for most people, to fit perfectly. Unless you are talking about a stock that has been custom-made for your shooting style and physical characteristics, it’s not likely to fit perfectly.

Combine that with variable options in scope height – both the scope itself and the ring size, and you have a nearly unlimited amount of options on any one rifle. So it’s no surprise that it likely won’t fit correctly right out of the box.

Pat Sludds Rifle Butt Pad

Some of the higher end stocks are available with adjustable cheek combs built-in – these allow you to set the stock up to suit your scope and position and can enable a perfect weld.

There are also several third-party adjustable combs on the market – generally they require you to drill through your stock to install the required hardware – once done though, you have an adjustable set-up.

Check-Rest-Comb-Riser

If you don’t really want to drill through your stock – you still have options.

Some people go to town utilising fibreglass – creating a whole new stock profile – duct tape seems to work for some. However, I was looking for something a little tidier and ultimately easily reversible for my set-up.

Lifting the comb on the X-Bolt

On my new 7mm-08 X-Bolt, I put a Z3 with a 30mm objective, and the lowest rings I could get – but was having issues with my ‘natural’ cheek weld still being too low. In prone, I would rest my check on the stock, close my eyes, relax, open my eyes, and be looking into the bottom of the scope. Same standing.

So, while I could ‘make do’ – I started pondering an easy method of lifting up the comb. I already had purchased a stock ‘sock’ for the new X-Bolt, and realised a really simple way of supporting my head a little higher would be to pack some high-density foam under the neoprene sock. It would hold it in place, keep it looking tidy, and I could just add more foam until I got to the right height.

Cheek weld

As it turned out, once I had found some foam (I just cut up a foam roll sleeping mat in the end) – I only needed one layer to get my eye to the right height. I simply put the foam over the butt, sketched out a shape and cut it down to suit. A little trimming on the edges, really just for aesthetics, and it was installed and ready to go.

foam2

A really simple solution, to a really complex problem for people.

I will spend a little more time shooting with it on and report back.


[product_category category=”stock-accessories” per_page=”5″ columns=”5″ orderby=”popularity” order=”ASC” operator=”IN”]

Ring Lapping with the Wheeler Scope Mounting Kit

0

[fvplayer src=”https://www.youtube.com/watch?v=xA0GAKEKt1g”]

Scope Ring Lapping is one of those things you may either think critical to the optimum operation of a scope, or it might just be something that you consider to be a waste of time. Either way, there is currently a lot of information out about it.

I have recently purchased some decent optics for my rifle, and wanted to make sure I was getting the best out of it. To me, lapping off the inside of the rings to ensure you get even surface contact makes sense, as does aligning the rings to ensure no undue stress is being placed on your sight.

Because I am mounting it onto a Browning X-Bolt – alignment didn’t seem to be much of a problem. The X-Bolts unique mounting system all but ensures the bases are going to be on straight – so, unless the rings are totally off, you should be fine to go.

Ring Lapping

Lapping the inside of the rings provides several advantages.

  • Less ‘Ring Rash’ – you don’t damage the surface of your nice new scope
  • Less stress on the scope itself by being pulled out of alignment, or being pulled in two different torque directions
  • Ensuring maximum contact between scope and rings

Be sure to go back and sight your rifle once you have completed ring lapping. It will more than likely shift your POA.

Ring Lapping may be something you consider. On a cheap plinker that never gets cleaned and generally gets bashed around – maybe not. But on a nice set-up which you expect to be accurate and perform at its best – why not? It’s not that expensive, doesn’t take that long, and you can do it yourself.

Ridgeline Torrent II Waterproof Pants

0

ridgeline_torrent_

I don’t like soggy legs.

You may have already read my review of Ridgeline’s Monsoon II Jacket.

While I still plan on putting a waterproofing treatment on my Cactus WK Trade Supertrousers, and I already had a pair of Stalker Pants from Ridgeline, I thought it would also be a good idea to get some proper waterproof pants. I have signed up for the NZ Deerstalkers HUNTS course, so could be spending some time in the wet, before the NZ summer gets properly underway.

I really like the Moonsoon Jacket, it has a few issues, which I believe Ridgeline are already in the process of fixing, so I thought I would check out the matching pants. Ridgeline do a Roar Pant – but I was a little concerned that they would be a bit of a sweatbox, and it seems Ridgeline agree, as the Roar Pant is now being phased out, to be replaced by a couple of newer, lighter and more breathable pants. The Torrent Pant, I guess, can be considered the first of those.

The Basics – what is it made of?

The Ridgeline Torrent II Pant is a 100% Windproof Soft Touch Silent Shell that is highly breathable.

Yes. That’s straight from the promo material. Essentially, Ridgeline use a material called QuietTex. I have already mentioned my little issue with your industry standard GoreTex – it makes you sound like a packet of crisps. QuietTex is a combination of a Soft Shell style outer later, a waterproof but breathable mid layer, and a mesh liner. This produces a product that is waterproof, breathable, but still remains quiet enough for stalking, or even managing to walk without creating a constant ‘swish-swish-swish’ sound that normally accompanies people in hard-shells.

Brand new, and wearing them for the first time, they do make a bit of sound, but no more than any new pair of pants. One or two washes to soften up the material just a touch, and you won’t have any issues.

Their Monsoon Jacket was heavy enough – I can only imagine how hot the Roar Jacket would be – so I was a little relieved to find the Torrent was a bit lighter – material wise – than my existing jacket. More than likely, instead of shorts and gaiters, I will end up wearing just these pants – and I don’t want to end up getting wet from the inside.

Yes, it’s a bit more toasty than the Kiwi standard, a pair of shorts and some thermals. I am sure that after a good run, it’s going to be warm – about as much as wearing any other pair of trousers would be. However, what it won’t be, is the leg sauna that I got the last time I wore my existing, non-breathable over trousers. Peeling off a wet (internally) pair of plastic pants is not a nice thing.

tight

Sproing!

The Ridgeline Torrent II Pant has an elasticated waist – at first I thought it would be too tight – however, it’s not constrictive, so I would be happy to wear it without a belt, just using the draw tightener on the front. However, if you want or need a belt (maybe to hang stuff on) – it does have belt loops to help keep things in place. It’s certainly not going to be a necessity. Overall, these are a comfortable pair of trousers. Non-binding, so nice and easy to crouch, prone and stretch in.

ridgeline_torrent_pockets

Storage – how much stuff can I carry in it?

These pants have 3 pockets – 2 outside pockets with waterproof zips, and one internal stash pocket.

I love pockets with zips when I’m out in the bush. I always have my E.D.C. of a small torch, knife and lighter on me, and when heading out, I will often also put a wound dressing in the other pocket, separate from my IFAK or party first aid kit. Having a zip on it means I know nothing is going to fall out of my pockets when I find myself bush bashing, lying down (prone), hanging upside down, or many of the other positions I have found myself in the bush.

ridgeline_torrent_innerpoket

The internal stash pocket is going to be ideal for carrying small, soft items mainly because it’s right against your pelvis – so you don’t really want anything with an edge on it.

I am thinking a beanie, or pair of gloves – next to the body will keep them warm, so you don’t have to waste any body-heat warming them up when you put them on.

ridgeline_torrent_leg_cuffs

Using it as an overpant – do I need to take my boots off?

Well, no. No you won’t. The Torrent Pant has a 1/3 length boot zip on both sides, as well as 3 dome snap ‘diameters’ so that you can get the trouser nice and snug around your boot. The legs have a zipper covered in a Velcro ‘baffle’ – so you aren’t going to be getting anything caught up in them. There is certainly enough space to get the pants over my Meindls, though, like anything with a mesh lining, you will likely get the mesh a little caught up on the boot at some point. No major, just do be in a hurry to pull these things off.

Talking of the mesh –

ridgeline_torrent_inner_mesh

Am I going to sweat to death in it?

No, not really. Like I have already mentioned, these are no more sweaty than a pair of jeans. The breathable membrane does work, and, word has it that Ridgeline are already looking to upgrade the material to an even more breathable material shortly. You will sweat a bit if you find yourself running around after things in the bush. That’s to be expected. However, you won’t be standing in a pool of your own sweat afterwards.

ridgeline_torrent_water

But does it leak?

The material is said to be 100% waterproof. To me, that means it will stop the rain getting through for a long time, but like any other waterproof product, will eventually wet out, and need to be retreated. This is the same for a $600 Gore-Tex Pro Jacket, or any other breathable fabric.

Well. They certainly got tested.

I got myself a new motorbike recently and needed to ride it back up from Palmerston North. In the rain. Through the Desert Road. Gale force winds. Rain. Lots of it. No leakage. None. Happy man. I got a little rain down the back of them – but that was more the case of the jacket not covering the gap enough.

Kicking around the Waitakeres baiting possum traps over a drizzly weekend also left me dry. So yes. They work!

Baitlining – Ark In the Park

0

untitled-3-of-3

We made a quick excursion into Waitakere today to refresh the baits in the possum traps. As part of the Ark In the Park program, there is a regular maintenance and baiting program going on, which has significantly reduced the amount of predators in this ‘mainland island’. As a result, it’s one of the few places you can find Kōkako in the bush.

We try and get out at least once a month to help out. It’s a great reason to get into the bush, a good chance to try out new gear, and a great opportunity to give a bit back to the environment.

Today was a moderate/hard line – there are various grades of track you can go down – from easy, minimal effort bait lines, to the hard lines that involve a bit of climbing – and as was the case today – a bit of rope work as well.

We got the line done in a couple of hours, and it was a good chance to give the Ridgeline Torrent II Waterproof Pants I am testing out a good run.

I was pleased to find they didn’t cause me to overheat. There was a bit of warmth – as can only be expected with a waterproof pant, but not too much that I was cooking. Certainly, some decent zippered vents on the side wouldn’t go amiss, but nothing too major. Summer would be a different issue – but then, I can’t really see why you would be wearing long waterproof pants in the middle of summer anyhow.

Similar case with the Ridgeline Monsoon II Jacket – did it’s job – got a bit warm, and in this case, would definitely benefit from armpit zippers.

Compass

Another little modification I decided to make, was to replace the standard lanyard on my Silvia Compass with a blaze orange paracord line. At one point, while scrambling up a hill, the thin lanyard actually broke – and I suddenly realised that the compass could very easily disappear into the scrub. It doesn’t take much for you to lose things in the bush.

Another good day in the bush.

It’s here. The Nightster.

0

Because, well… why not?

untitled (2 of 2)

Those who know me, know I have been on and off bikes for years. The last being a Triumph Daytona 675. That thing was (is) a missile. Especially once I had a bit of a play, shortened the gearing and changed the fuel map.

Anyhow – awesome bike – hard on the knees. And wrists. And back. And really totally ridiculous for daily riding.

So, I thought I would get another bike, potentially equally ridiculous for daily riding – a Harley Davidson 1200N Nightster.

I had looked online for another project – something I could play with a bit, customise a bit, without having to have access to a fabrication shop (though I do) – nor being a mechanic (which I certainly am not).

Harley has long been a favourite for people wanting to customise their bike – and the reality is, I have always absolutely loved the sound of them. Even compared to the Japanese Twins, it’s hard to beat the lumpy, totally over the top sound of Harley’s Twins.

One problem though – I really, really don’t like chrome on a bike. Nor tassels, or rhinestone, or many of the other items that seem to go along with Harley’s and Harley Culture.

Looking online, I spotted a particular range of Harley – the Dark Custom, or, as is now available – the Nightster.

The Nightster is the Harley Sportser, without the bling.

The Sportster, is Harley’s nod to yesteryear – particularly, the time before the Japanese Domination of the Sports Bike market, when stripped down machines like Harleys and Triumphs were on the track.

harleys

People seem to have forgotten there was a time before fairings.

Anyhow. Had a bit of an idea of the bike I was after – found myself a Nightster. Purchased it in Palmerston North – rode it up through the Desert Road in the middle of a storm. Hanging on to the handlebars for dear life.

untitled (1 of 2)

Essentially the plan is to make a Bobber – pull off all the excess items, strip it back down to basics. It’s an interesting balance of aesthetics vs practicality. For example – the front fender has already come off – though it might go back on after the first day riding it in the wet. We shall see. The rear mirrors have been reversed – and the light fairing will be coming off, as well as the upper belt guard and sprocket cover.

It certainly needs some better rubber on it – I was spoilt with the Daytona – but still – I like a bit of grip in the wet.

It’s loud – and will likely end up louder before I have finished with it – though I like the idea of baffles in the pipes – heaps of rumble, but rolled off top end.

Tank lift, fender chop, sports suspension, ram air, turbo… it might never end.

That’s the great thing with these bikes – there are so much bolt on products, if you can think of it, someone has already probably made it!

Ridgeline Monsoon II Jacket

0

Ridge3

Staying Dry, without sounding like a crisp packet

Need a heavy duty rain jacket that will take a punishing, keep you dry, but not rustle and make a pile of noise like most Gore-Tex jackets do? Don’t want it in bright colours? The Monsoon II Jacket from Ridgeline might just fit the bill.

Hunters, Photographers and people who like blending in

For anyone spending time outdoors a good hard-shell rain jacket is essential. Traditionally the colours they are available in are not all the conducive to blending in with the environment – as fashion changes they go from Red to Blue to Highlighter Green. while there are valid reasons for wanting to be seen, sometimes you just don’t. You might be out on a hunt – either with a gun or a camera, or simply prefer not to stand out so much from the environment around you. Whatever the reason, the Ridgeline Monsoon II Jacket provides a great alternative to the high-street options out there.

Available in Teak or Buffalo Camo, the Ridgeline Monsoon II Jacket is made out of their own waterproof/breathable and abrasion resistant seam sealed RL-Tex three layer shell – which translates to a waterproof layer overlayed with a softer style of fabric, bonded and seam sealed. The result is a jacket that is waterproof, breathable (to a point), but doesn’t rustle like Gore-Tex or eVent fabric is known too. If fact, it’s nearly silent.

Looking like Friar Tuck – the smock

I have had a range of jackets in the past and as I am often wearing a pack, either in the form of my Ribz Chest Pack or my Mystery Ranch Nice Frame (or both) the two lower pockets on most jackets are rendered ineffective. I was keen on a design that omitted these useless pockets. The smock design means the jacket is pulled down over your head. It is also longer than many of the modern jacket designs – especially down the back – where the length enables you to sit down on the rear of the jacket – protecting your trousers from the wet ground. There is a drawstring cord that you can use to tighten the lower half around your body, but I actually ended up removing.

The hood is large and can be pulled down right over the face, or if not needed, removed completely, though a raincoat with has no hood seems a little pointless.

You get two pockets with the jacket, one traditional expanding pocket that is large enough to carry a pair of binos and a close fitting second pocket – ideal for maps and the like. These are both water proofed.

There is a zip that runs down half of the front, and combined with the dome over flap, provides an ability to regulate temperature through venting. It’s worth noting though – despite being sold as a breathable fabric – it’s going to get hot under there.

Venting – building up a sweat

While being marketed as a breathable material, the RL-Tex quickly builds up heat – especially when being physically active. Given the nature of the jacket, it is highly likely you are going to be bush bashing or potentially chasing prey. If you are wearing much underneath the jacket, you are soon going to be overheating.

The zip helps in regulating temperature, and I can’t really say I have really had any major issues with overheating in the jacket – you just need to be aware that it is going to have it’s own insulation properties – you can probably leave the fleece layer in the pack.

On saying that the jacket layered on top of my Icebreaker Hoody and another merino base layer kept me toasty warm while tramping through the snow during a trip above the bushline with the MSC. As the sun started heating up the land, the insulation came off, but during that cold morning – it was nice to have the extra heat retention going on.

Talking to the guys at Ridgeline – there is the possibility that the next version will have pit zips as well – which would be a welcome addition. Pit Zips are a great manual way of regulating heat – and means you don’t have to rely so much on the ‘breathability’ of a material – which I personally find gets over hyped by most manufacturers.

Wetting out – and getting wet wrists

The one issue I have with the jacket is at it’s wrists – specifically, the way that water seems to get drawn back up inside the cuffs of the jacket.

The cuffs are a dual layer design – the quiet material on top of a neoprene inner cuff – the inner cuff provides a wind tight seal on the sleeves, and theoretically stops water getting up onto your clothing underneath. However, I have found that wearing it out in the rain will result in the cuffs tracking water up onto your wrists and in several cases, down into the inside of my gloves, essentially rendering my waterproof gloves pointless.

This is likely also due to the fact that the jacket does wet out fairly quickly – this is the result of me owning it for a little while (jackets do need regular retreatment to stay waterproof, btw) and I believe partially due to the ‘quiet’ material that is used on the outside. It takes a fair bit of water, but will eventually wet out. I am looking at treating it shortly with a waterproofing system, something from the Nikwax range – this will reduce the cuff issue for me – as if the water is tracking off, rather than soaking in, it won’t be heading back up and giving my the feeling of permanently wet hands.

ridgeline2

It’s not a show stopper for me – as I really like the Ridgeline Monsoon II Jacket beside this – the waterproofing treatment will reduce the amount of water that heads back up the cuffs. I have ended up with particularly cold hands on more than one occasion – and handling things (think rifle/knife) can become a little harder than needed if you have wet hands.

Variations on the theme

There is actually be three versions of the Monsoon Jacket out there. The first version, which had exposed neoprene cuffs (and real issues with wet wrists) the ‘II’ Version that has the extra material over the cuffs (what I have), and also a Euro edition, which adds hand warmers to the sides of the jacket. I don’t really miss the hand warmers myself – as they would be covered over by my waist belt or pack anyhow. Too be fair, our winters aren’t as cold as some of Europe’s either.