

OCW Load Testing – the path to perfection?
Every aspect of a firearm is going to affect where the bullet ends up. The design of the action, stock, barrel and how it all fits together. Of equal importance is the ammunition itself – basically how hard and fast it is going to fire that projectile out of the end of the barrel.
The amount of powder, the weight and design of the projectile, how far it is seated into the shell itself, all contribute to the characteristics of a particular load. There needs to be a systematic method of evaluating what works and what doesn’t.
The ladder method is probably the most common method of doing this and while I intend to do a similar load development using the ladder test, this article is about an alternative method developed by Dan Newberry. Dan came up with a system that aims to find the most ‘consistent’ load for your rifle – a load where a little bit of variance in temperature, grains or other factors isn’t going to cause mysterious flyers.
The method
Dan’s site gives a great deal of information about how the OCW system works and how to load for it – so pop over there to read up on it, no point in rewriting what he has already said.
Basically though, you find a recipe you would like to work from, based on either the projectile or powder you want to use. This is where you scour your reloading manuals for the starting point.
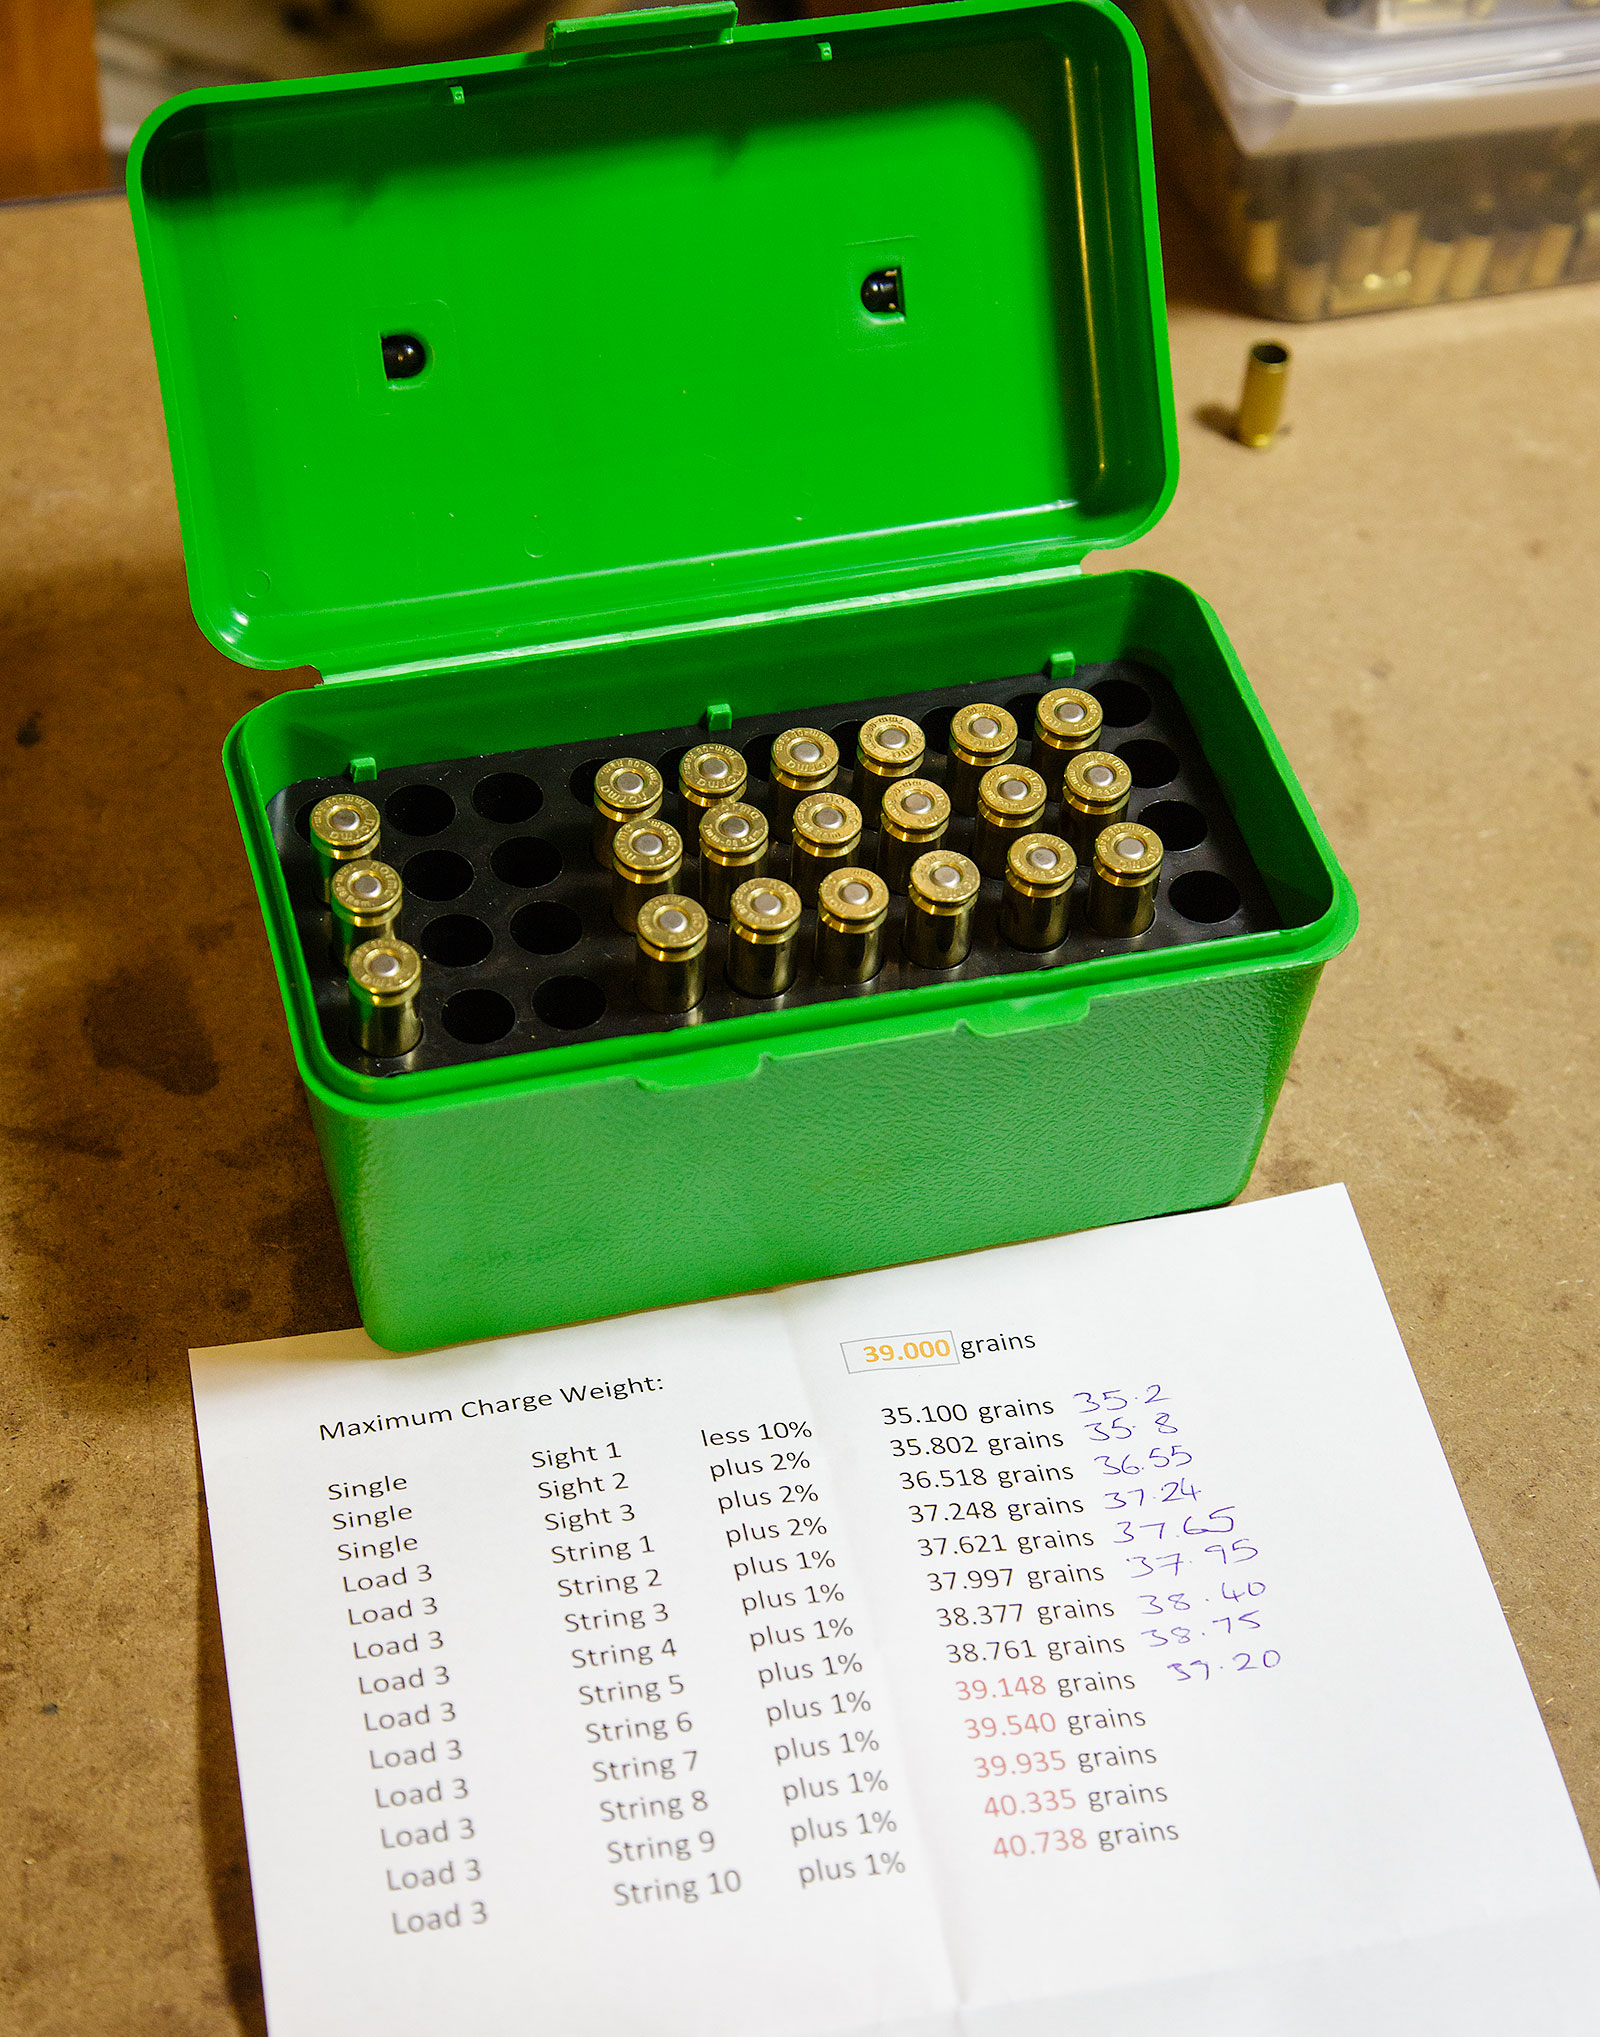
Taking the maximum load recommendation, base your test loads around this. In my case, I loaded 3 rounds at each weight. Then, pop out to your range and shoot a round robin at the targets.
I created a little spreadsheet to calculate the OCW load testing weights for me. Just get in contact if you want a copy (it produces the report above).
The shooting
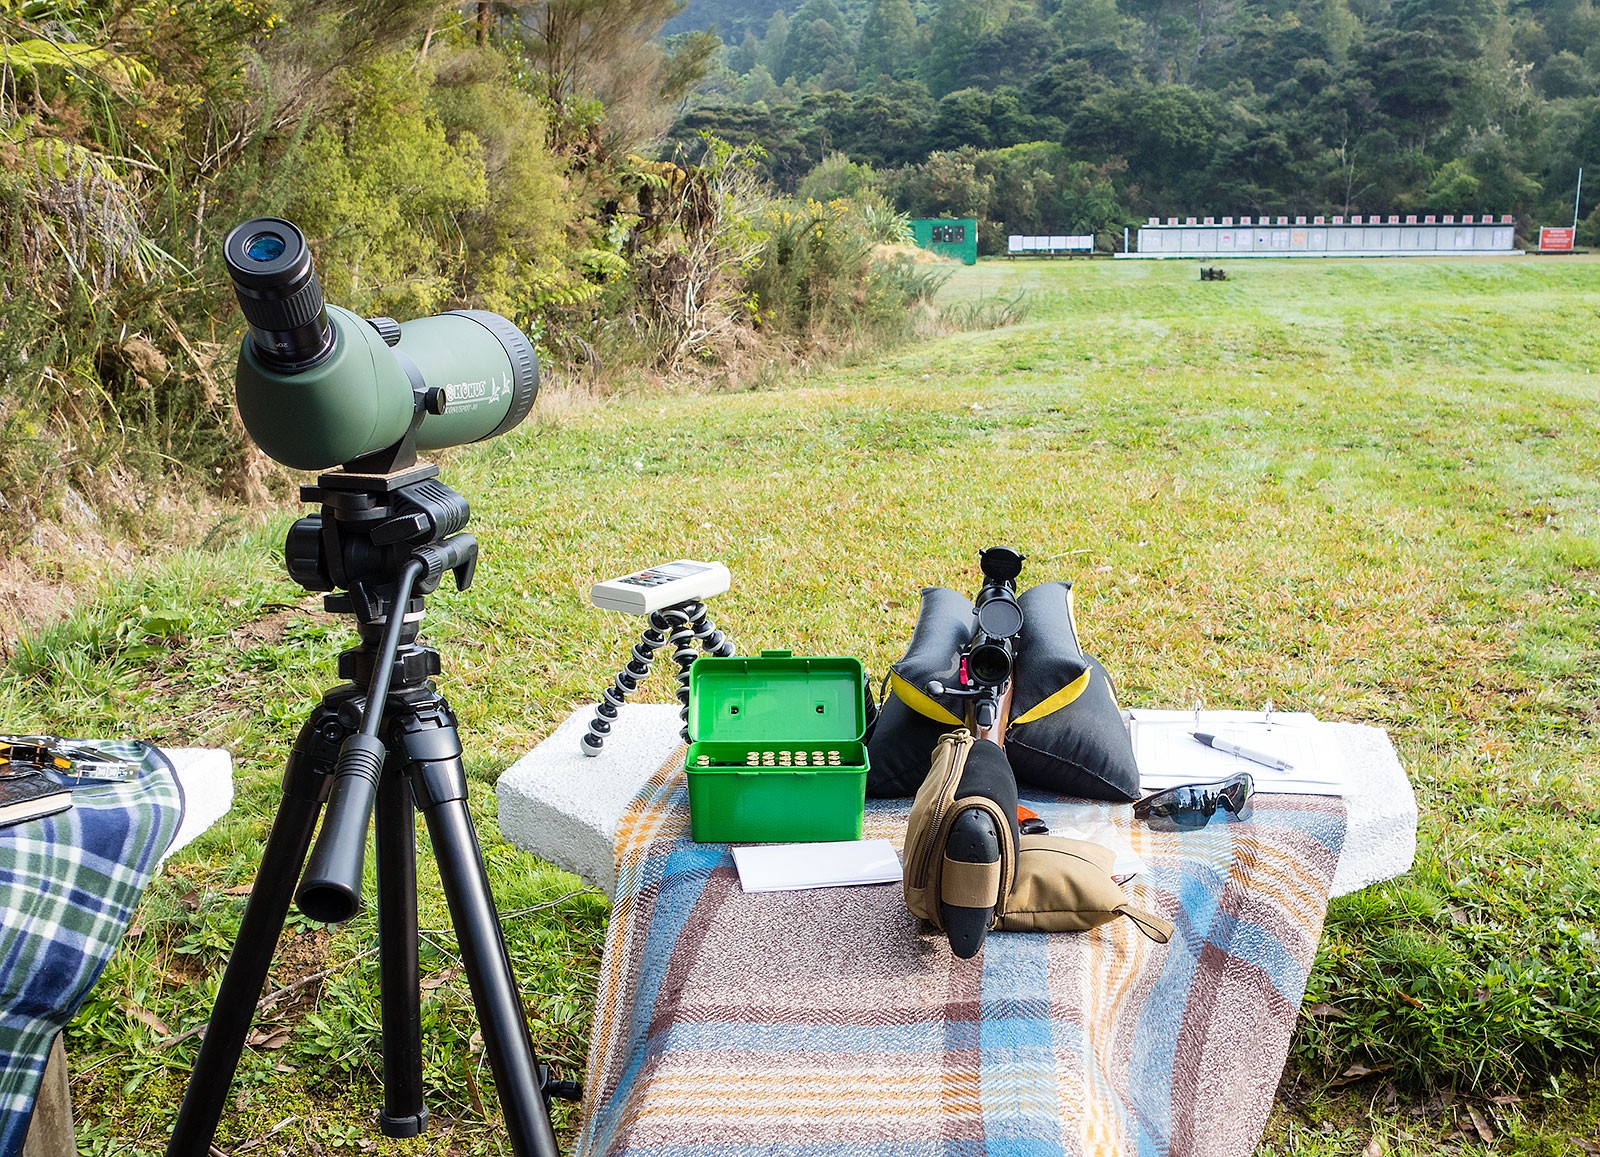
I got down to the range early as I wanted to get myself a bench to shoot off. While prone bipod is a very valid way to shoot these sorts of things, I wanted to removed ‘myself’ as much as possible from the test – so used a Heavy Bulls Bag (review soon) to sit the rifle in.
I proceeded with the round robin, gradually increasing charge load, checking after each shot for any signs of over-pressure.
This is important with reloading – and you MUST understand this before you start. At some point, you are going to be able to put too much powder in, which will create too much pressure for your rifle – which is going to cause issues. At one end the rifle just won’t perform as well as it could, at the other you could damage the rifle or yourself. Understand what over-pressure looks like and keep an eye out for it!
Dud Primers
I also got a couple (2 out of 21) dud primers. When I say dud, it means the firing pin hit the primer, but the primer itself didn’t ignite. Basic procedure for this is – you pull the trigger, you hear a click, but no bang. Stop. Wait. Around 15 seconds (there is such a thing as a delayed ignition). Then open up the action.
Either you have a dud primer, or you didn’t load the rifle in the first place (it happens). If you pull the trigger, hear a little bang, but much less than normal – you potentially have a squib load; meaning you probably forgot to put powder in the cartridge. If so you now likely have a bullet stuck halfway down the barrel.
Well done. Time to take a step back (metaphorically) and very seriously question your reloading methodology. More on that in another article.
If it’s a dud, then put it aside for disassembling later. Remember it is still a live round. Don’t just throw it away.
There is a couple of reasons for a failure to ignite/explode. Maybe it is simply a dud primer or maybe you didn’t seat the primer down deep enough in the primer pocket. This means the pin strikes the primer and instead of igniting, the primer gets pushed further into the pocket, dissipating the energy required to ignite through movement.
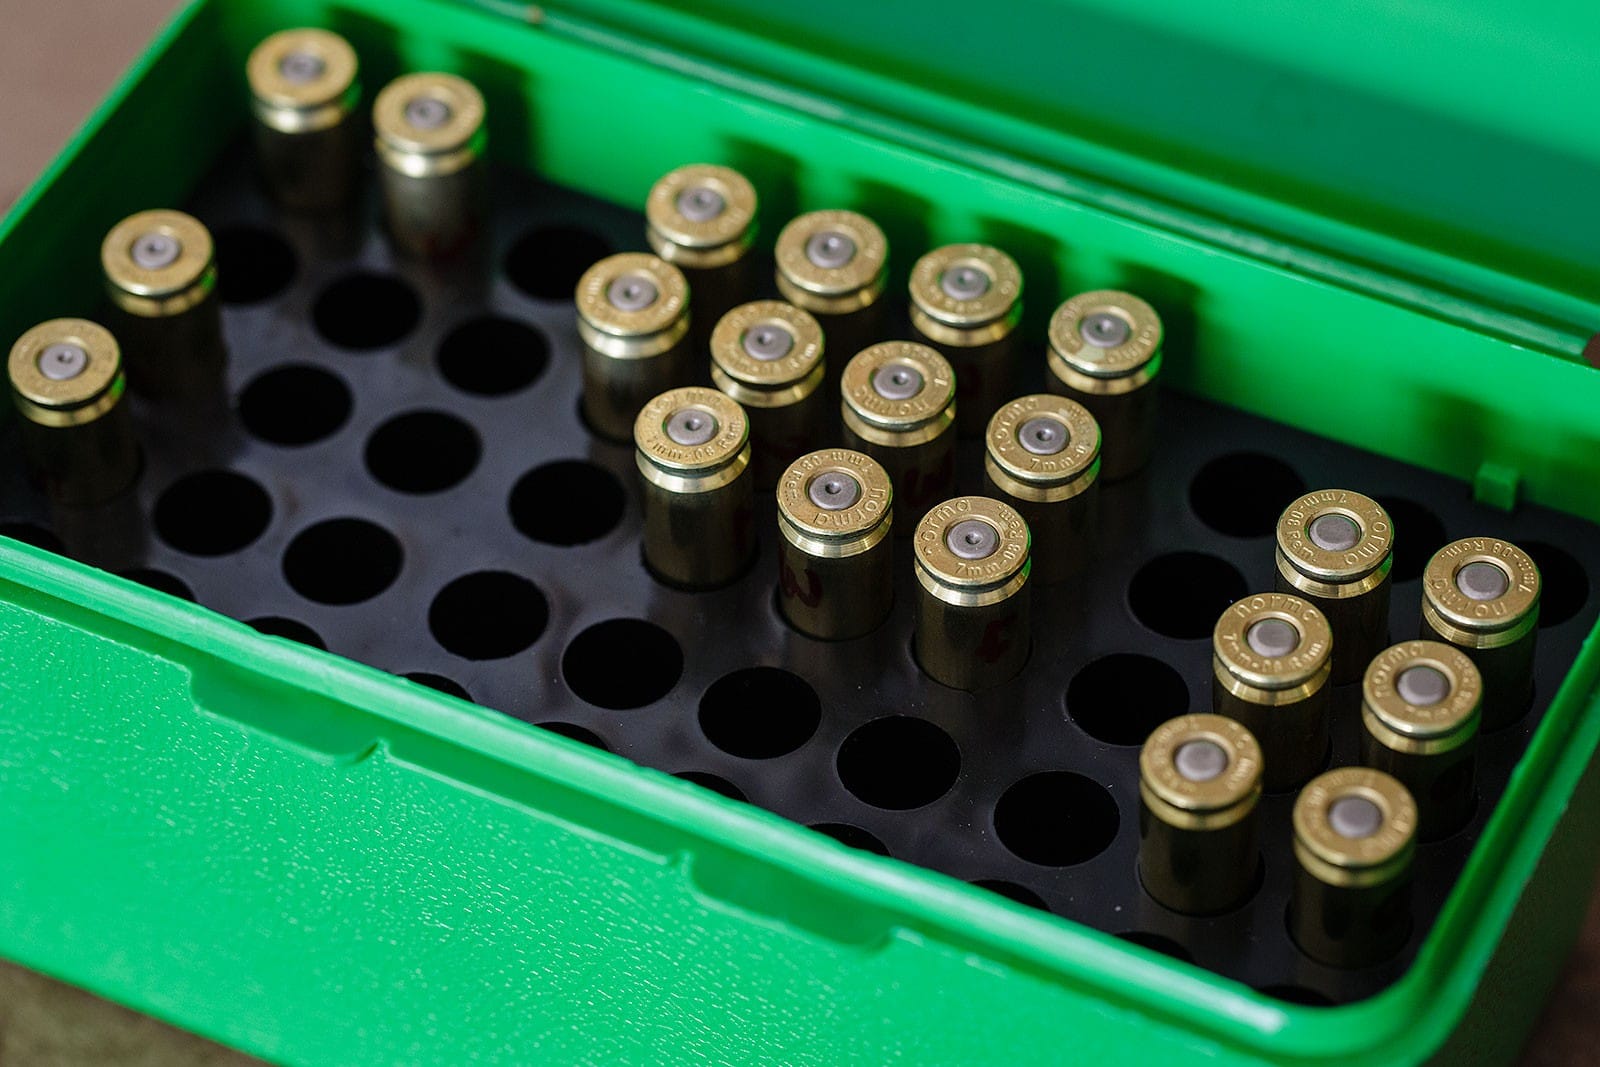
In the photo above you can see the 2 ‘duds’ on the top left, the sighting shots on the left, the test rounds in the middle and some unfired test rounds on the right. Why the unfired test rounds? Because I got some overpressure indications during my OCW load testing.
Over-pressure
Essentially, if their is significantly more pressure (because of a bigger bang) pushing that bullet up the barrel, enough that the bullet can’t get out any quicker to dissipate it, you end up with over-pressure. This can cause a multitude of undesirable side-effects. Know how to identify these side-effects means being able to identify slight over-pressure and stopping before you cause more serious damage. In my case, I spotted injector marks on the base of the cartridge. Once you know what you are looking for – it’s relatively easy to spot indicators of over-pressure.
The key to this is knowing what a ‘normal’ pressure cartridge looks like. Most likely, you will have fired some factory ammo through your rifle at some point – this is going to indicate if you normally get any kind of marking on the base of your cartridges.
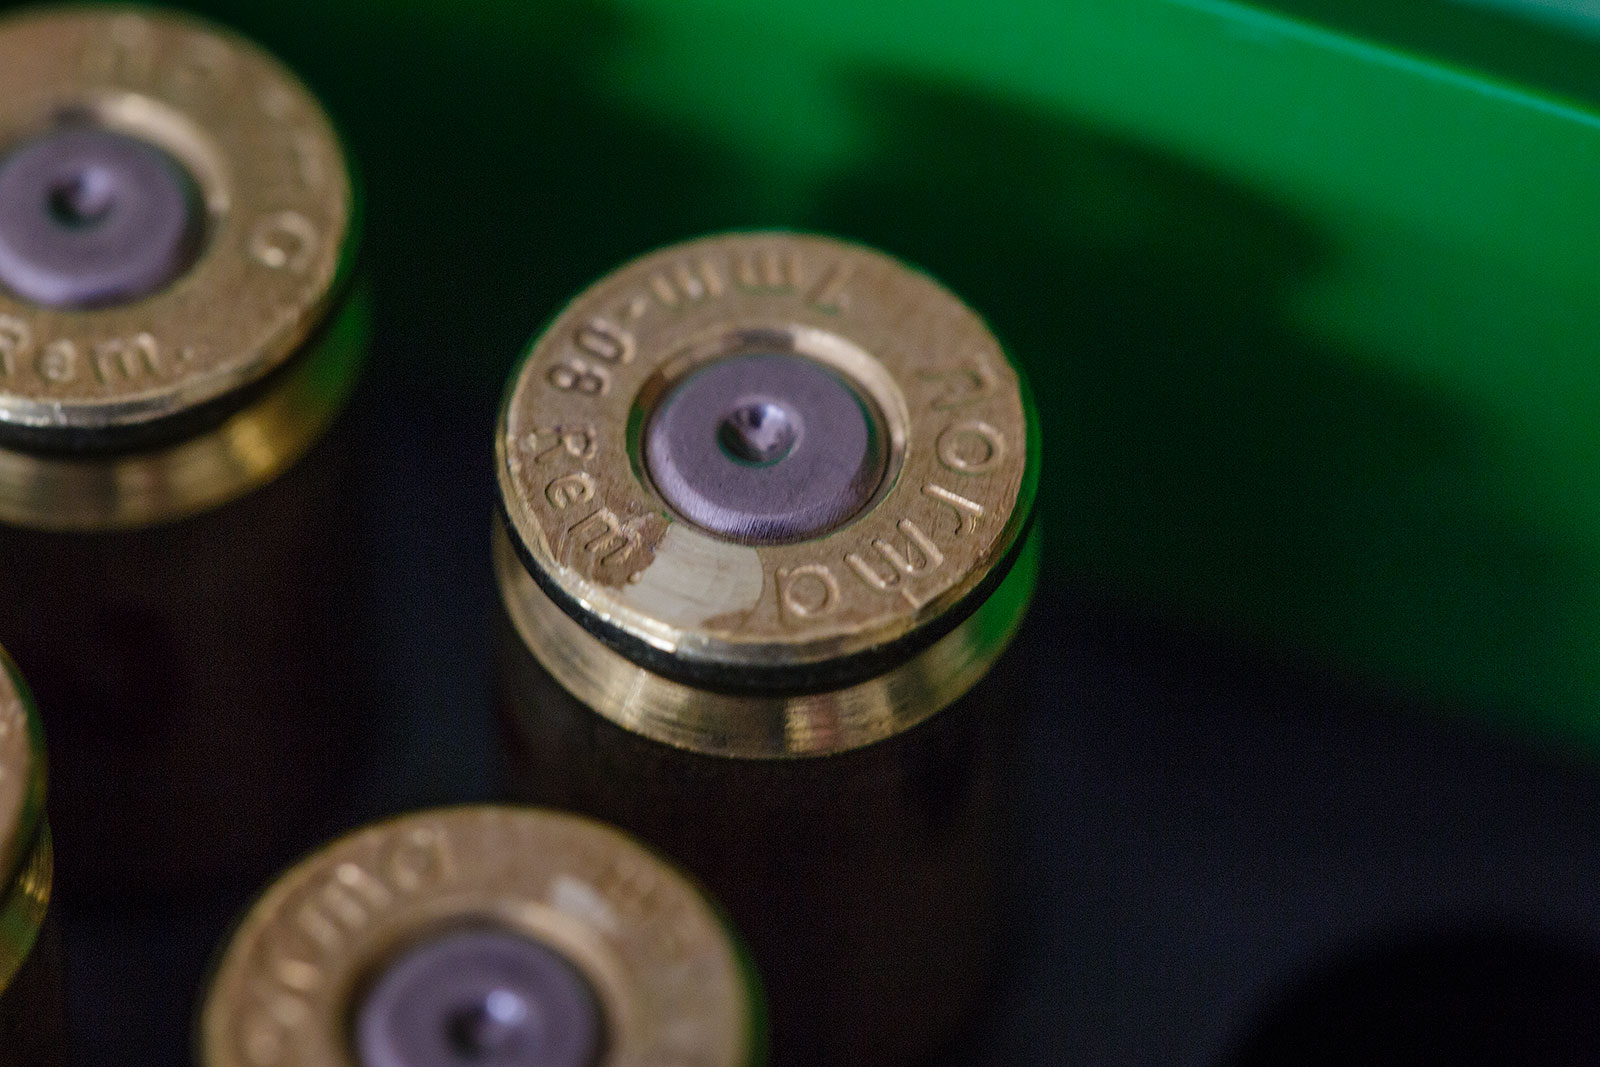
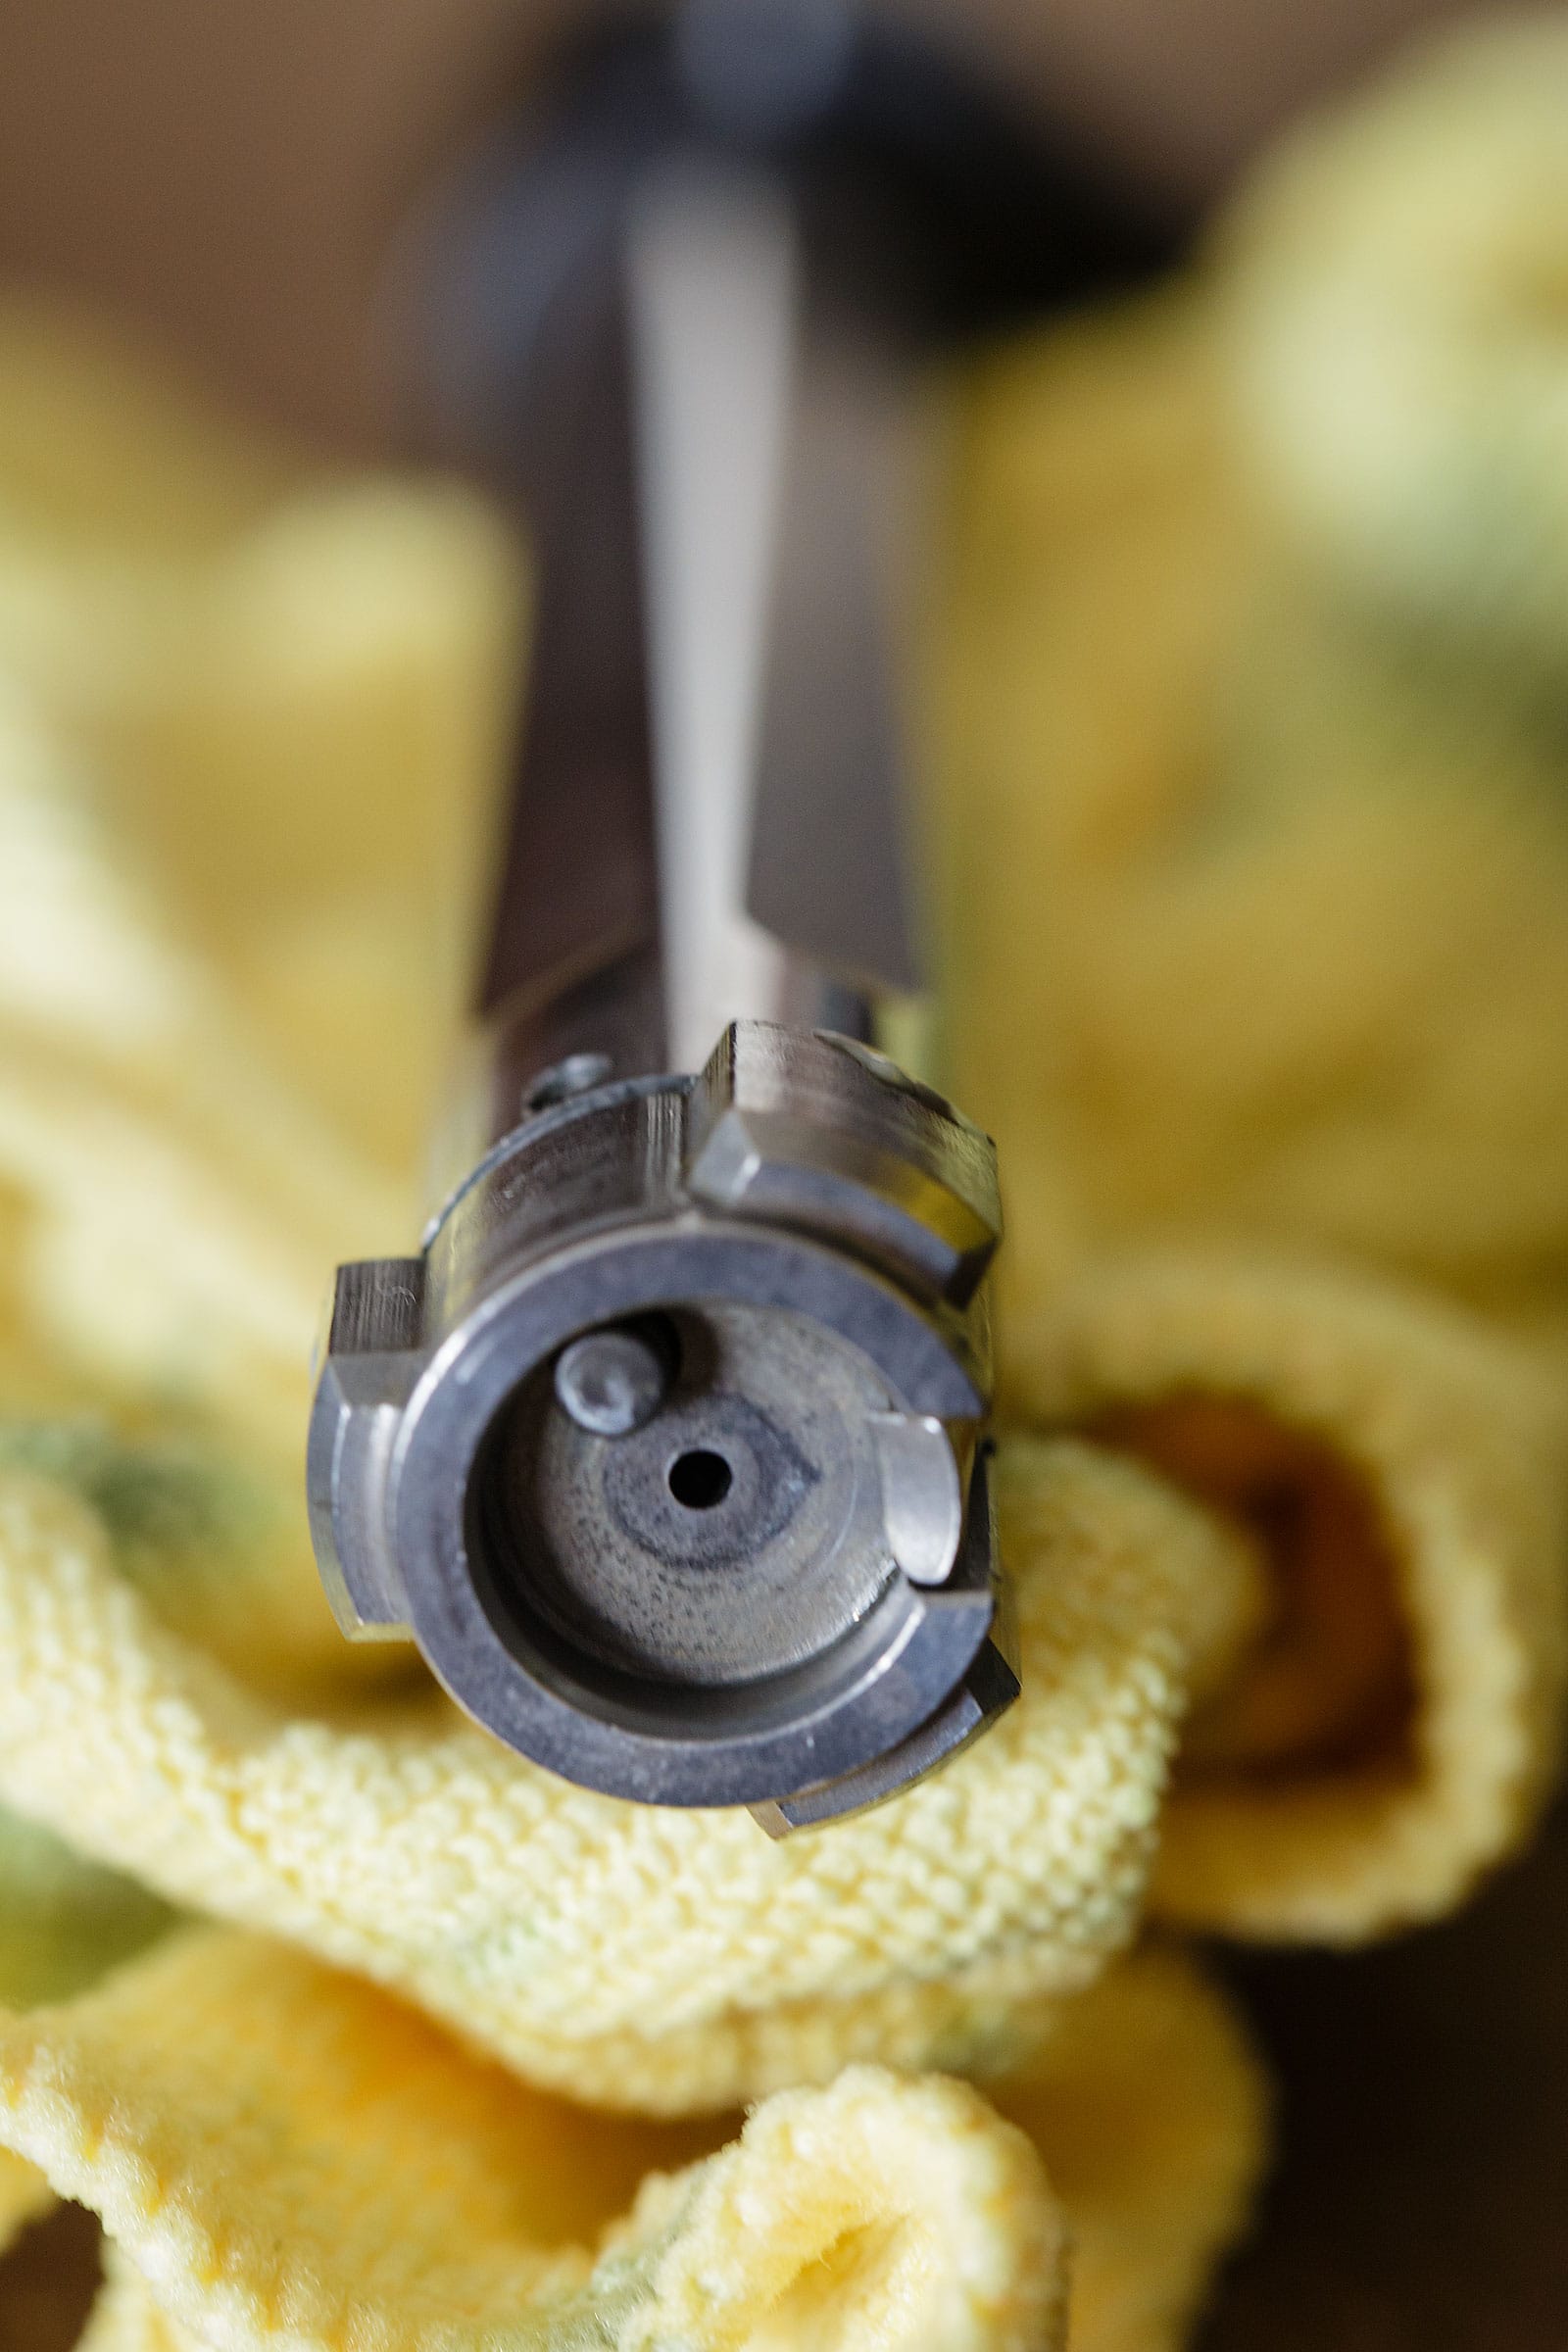
In the case of my X-Bolt – having fired a range of different factory ammo, I know there shouldn’t be any markings. So when I spotted the cartridge to the left, I knew something was up. See that marking on the rim? That the cartridge hitting/forming around the ejector pin on my bolt.
See the pin top left? In this case, my cartridge got so hot, the brass softened, got pushed back and left an imprint of the ejector pin on the case. This is a classic sign of overpressure – especially when I know that it doesn’t happen with factory ammo.
It’s at this point you need to stop. Going any higher in pressure may bring you closer to major issues. You have likely reached your maximum load in the OCW load testing procedure.
Other signs include a difficulty in opening the bolt, damage to the primer itself and excessive recoil.
The Results
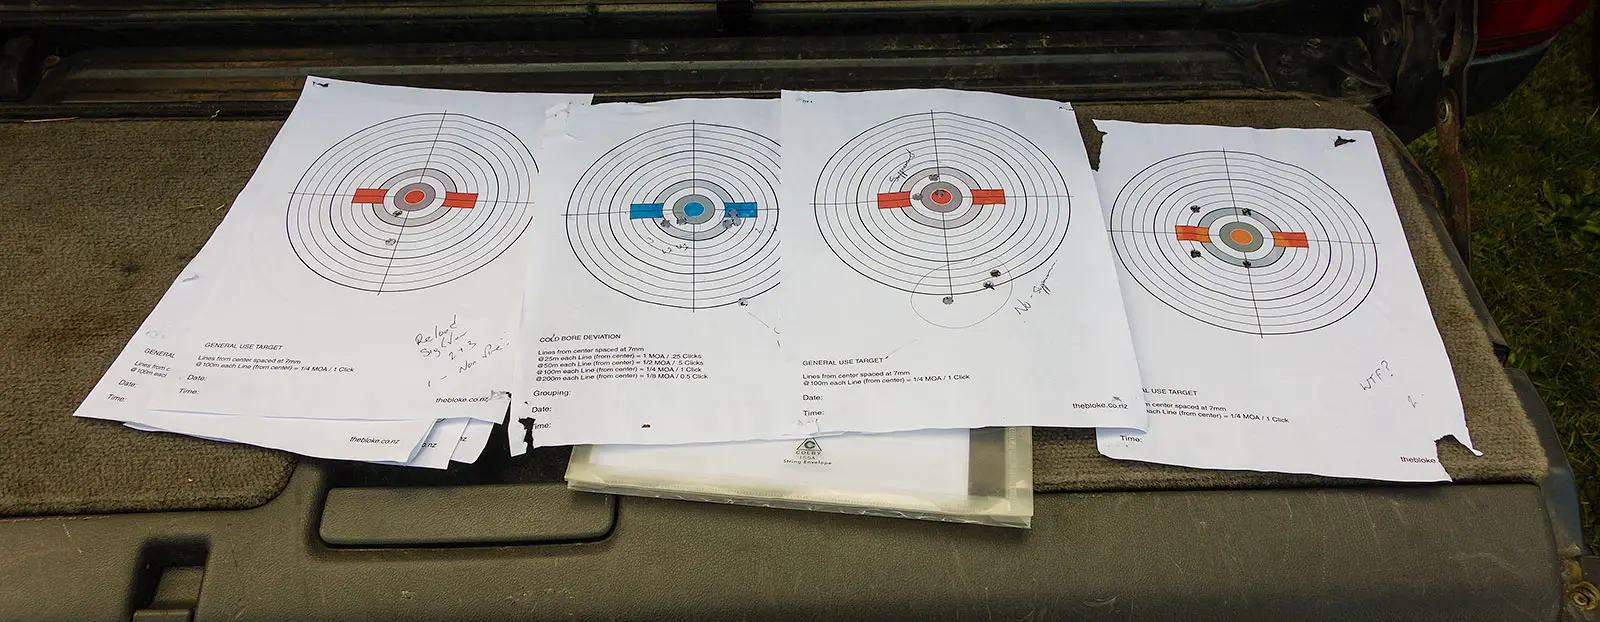
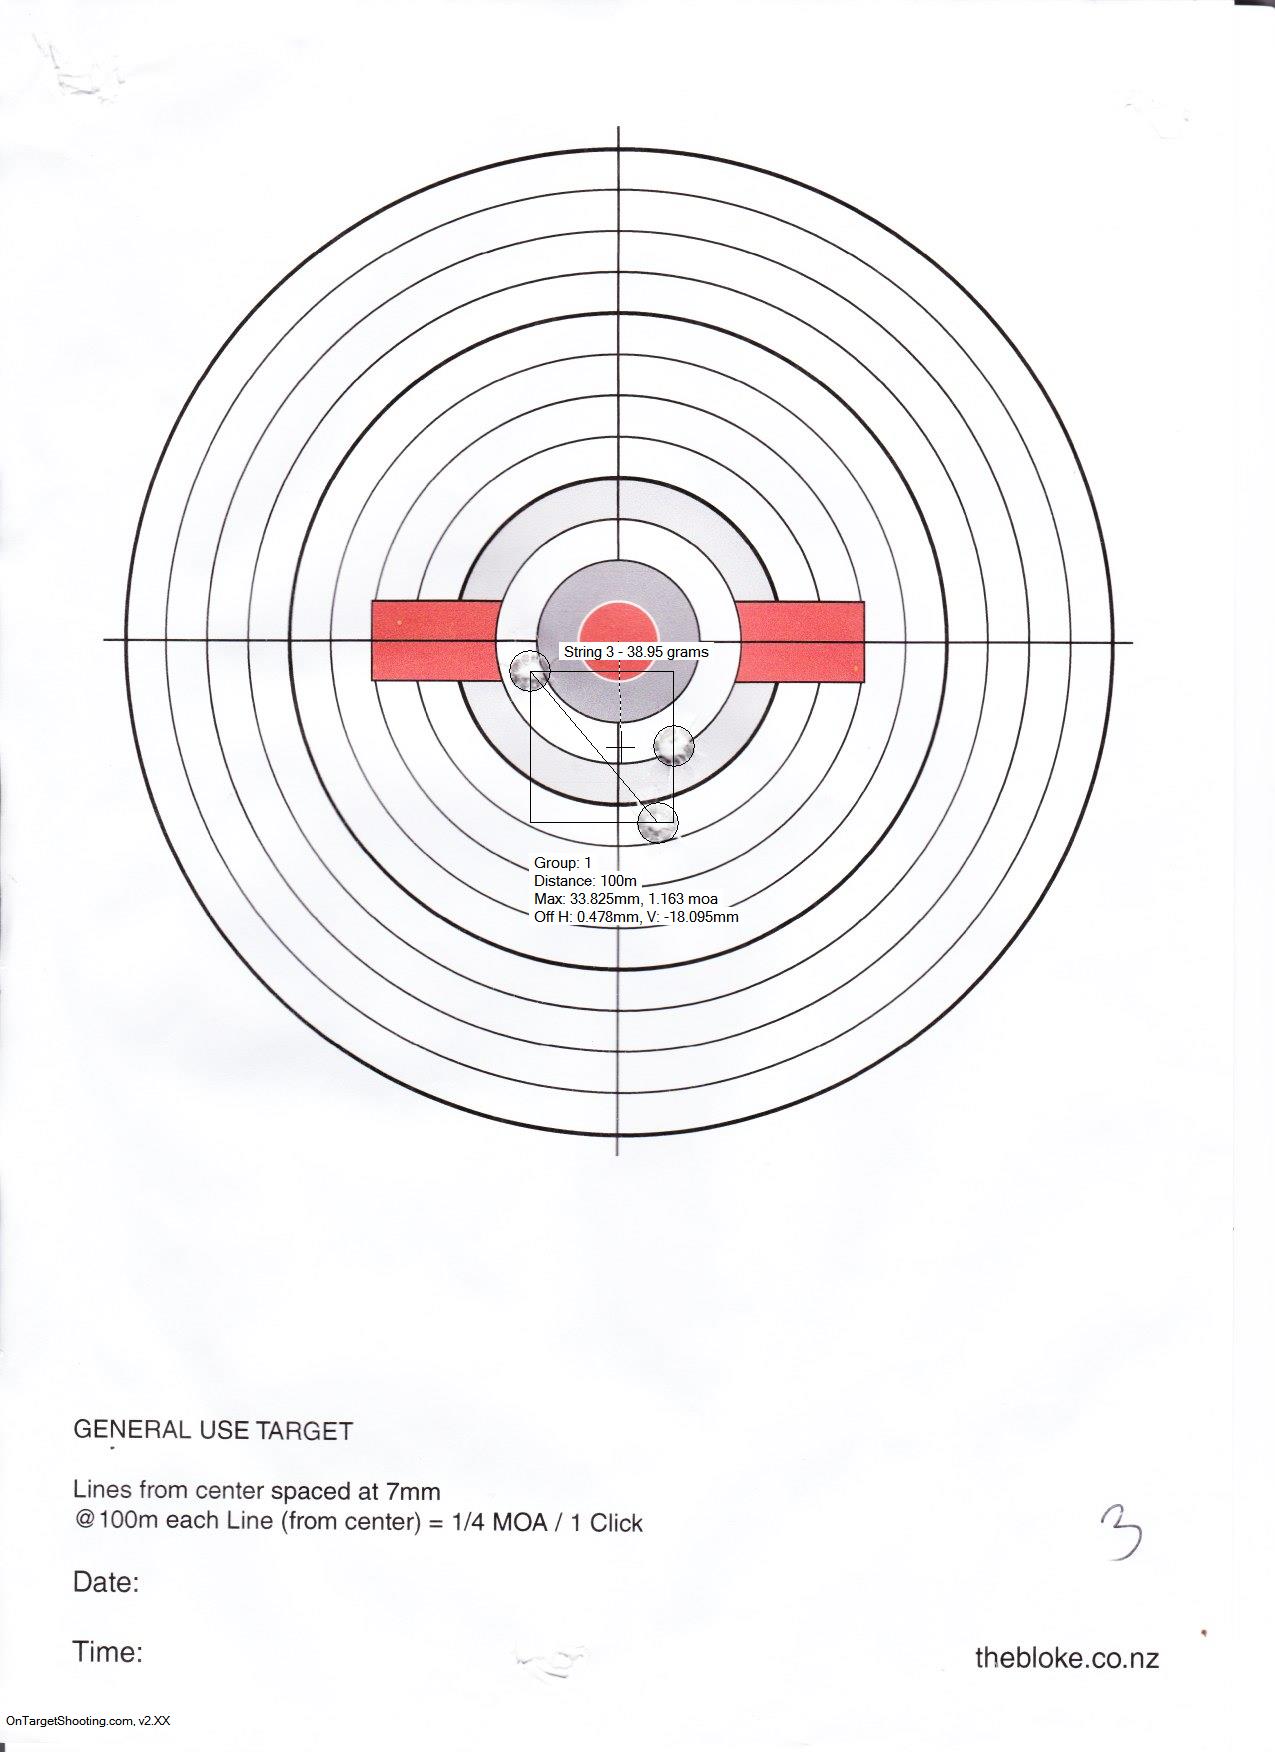
Here is the important thing to remember when using the OCW Load Testing method. You are not looking for the tightest group. That is ladder testing. What you are looking for is the charge weight that sits in the middle of the targets that show the most consistent point of impact. That is, the weight where you can have the pressure go up or down slightly (due to load variance, temperature or other variables) and still have the most consistent point of impact.
Once you find that point, you can refine the group through overall cartridge length (OCL) adjustments and you can also re-zero the rifle to get the point of aim (POA) and point of impact (POI) the same.
However, what this means is that you need a good series of targets to compare. My issue was because I was running into pressure issues before I was able to shoot through all the test loads I only have four targets to compare. One of those also included a dud round.
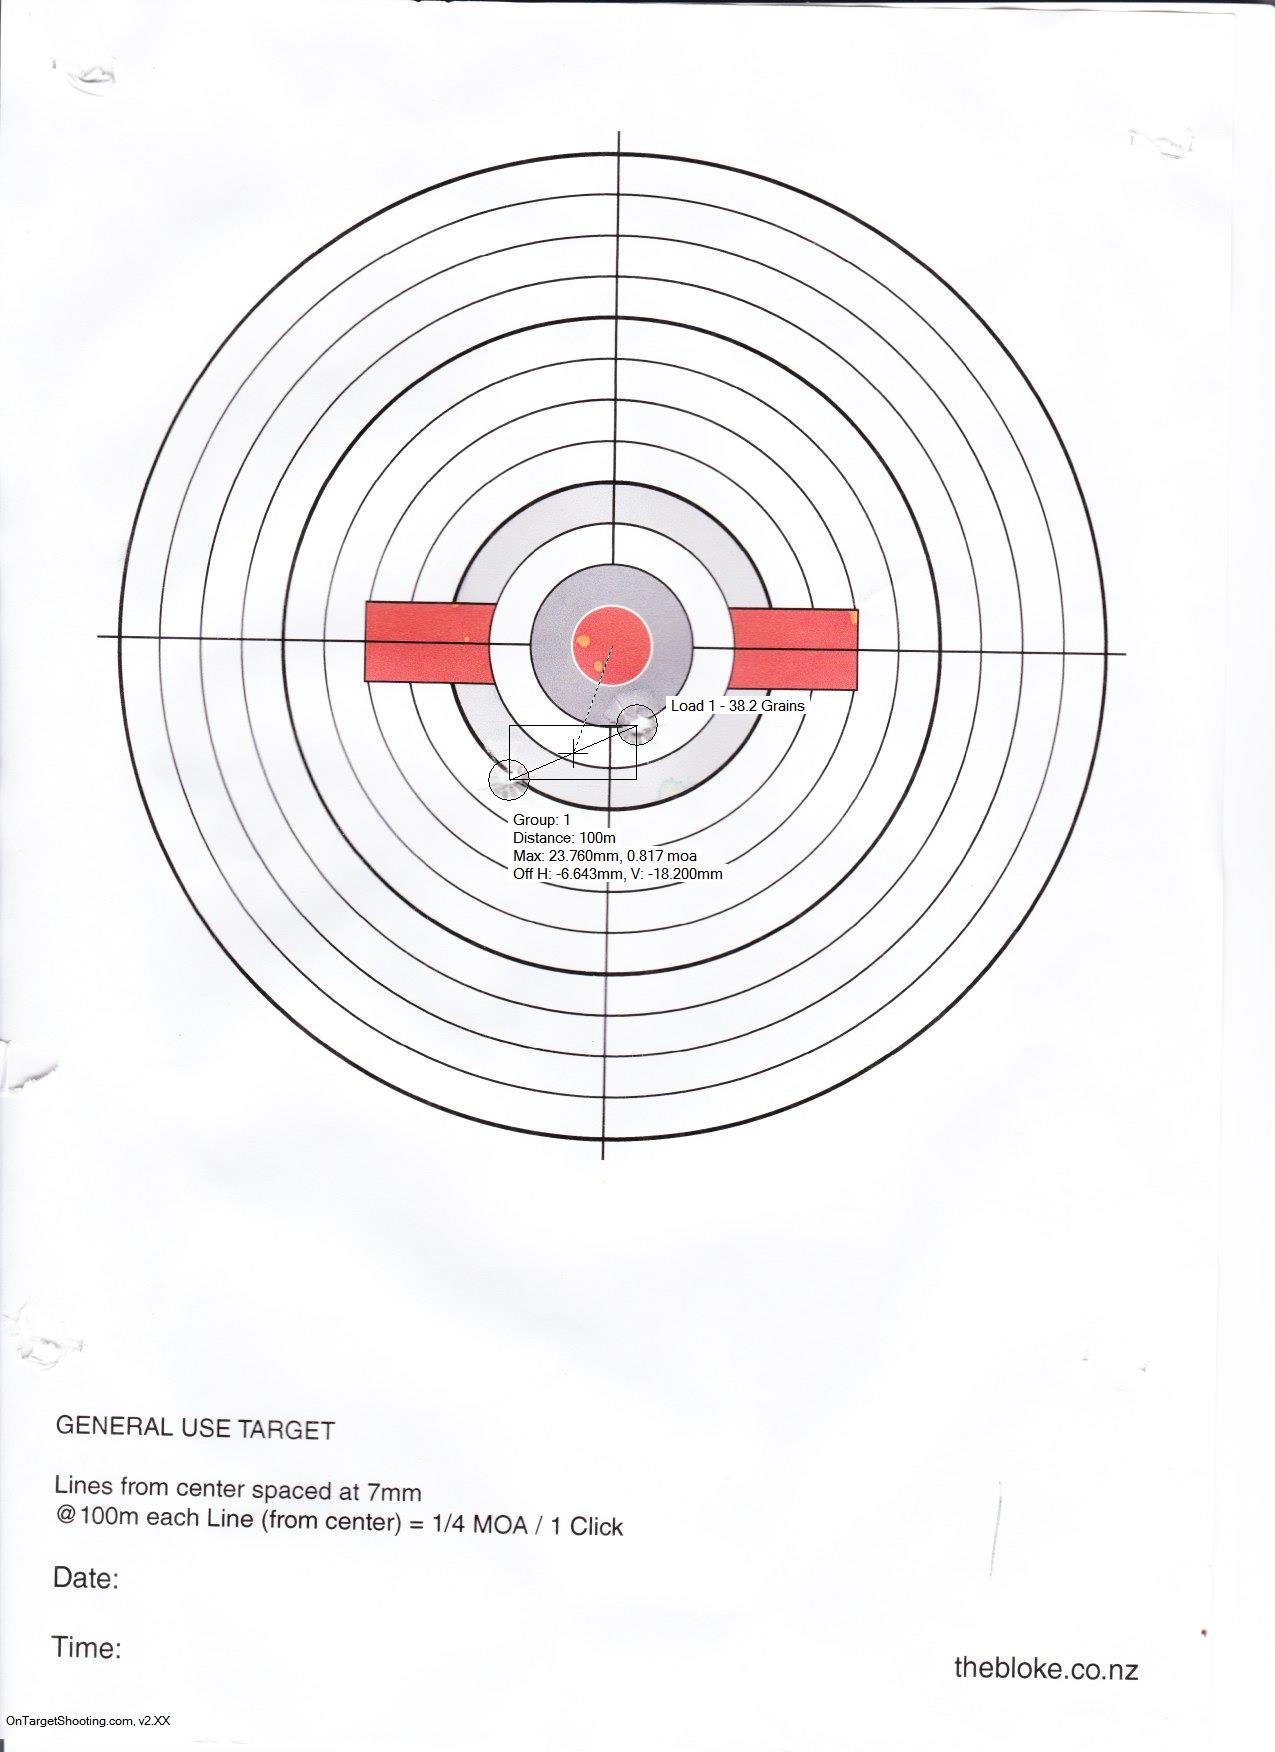
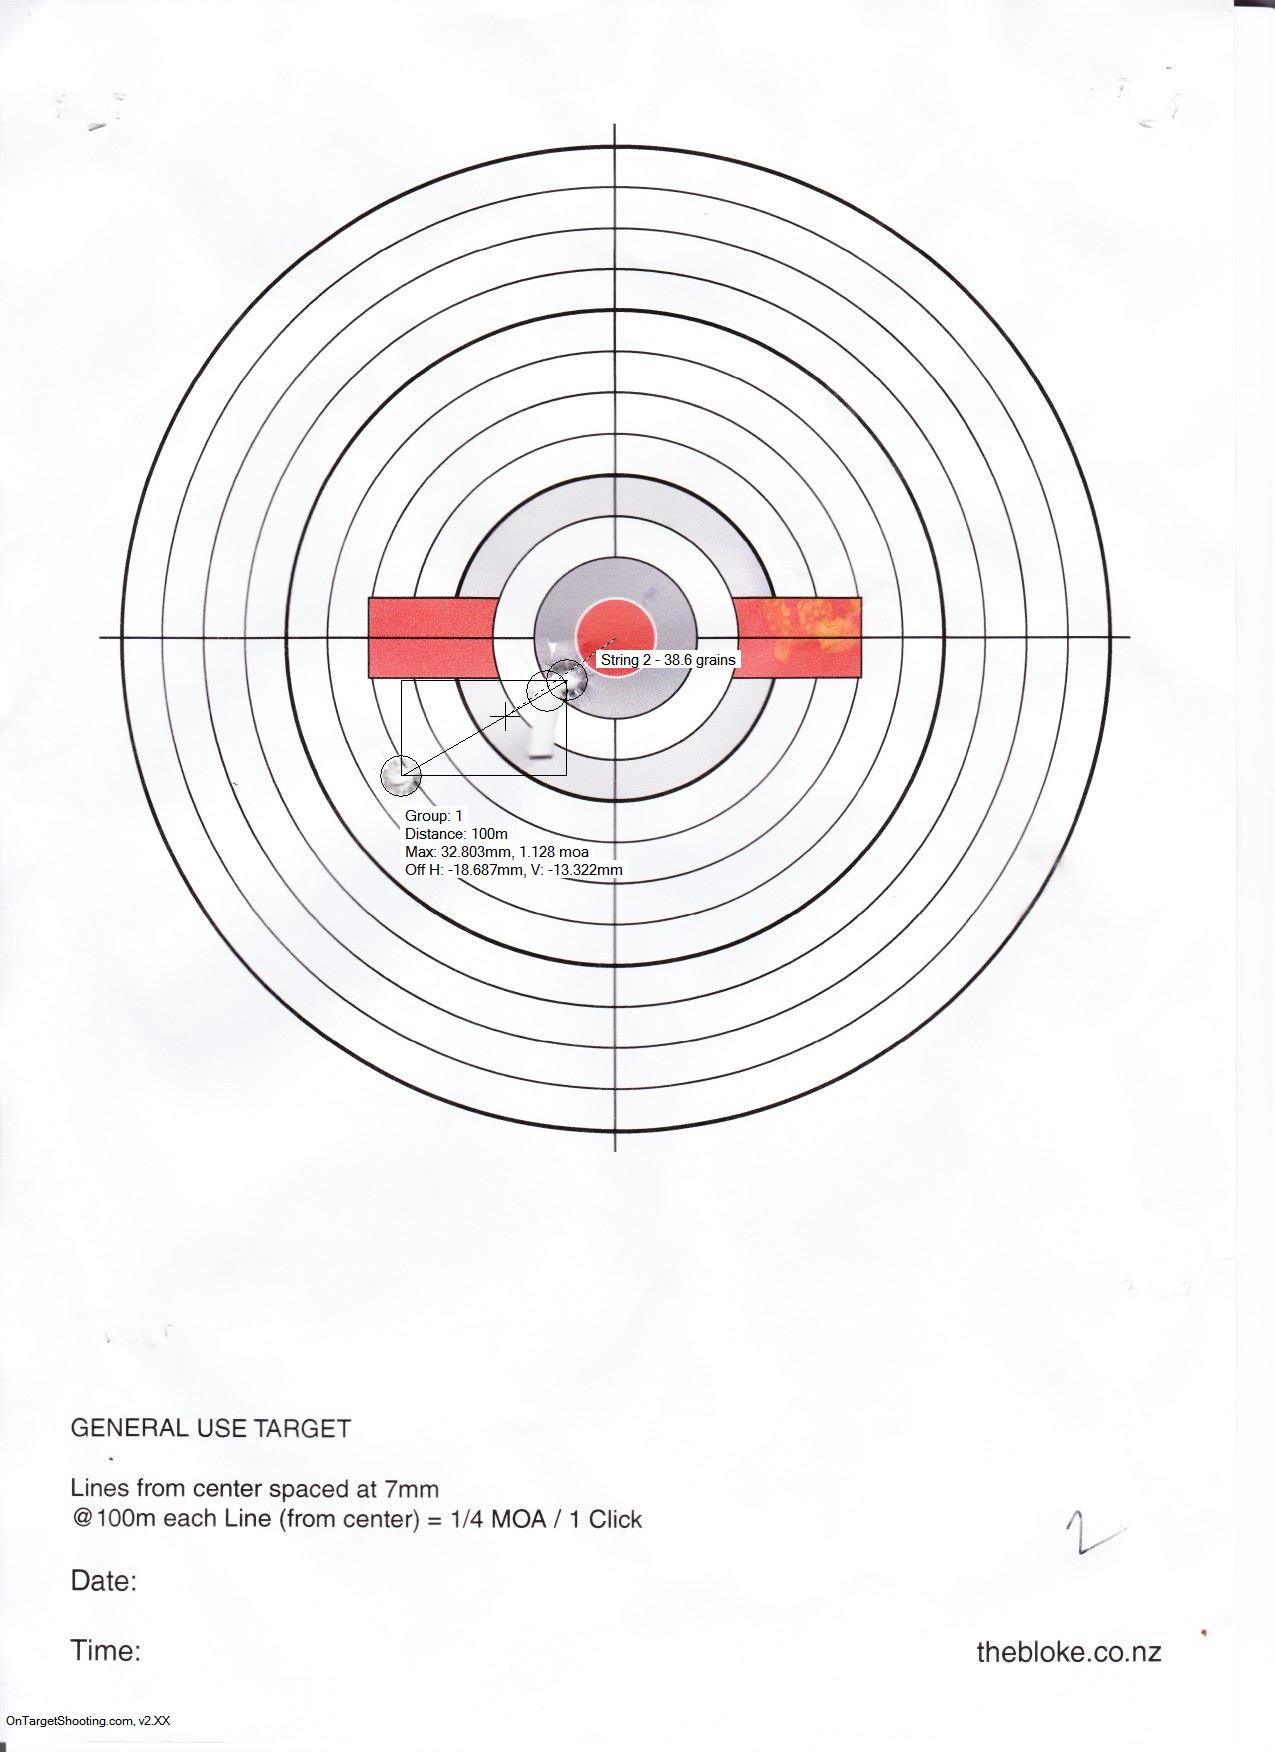
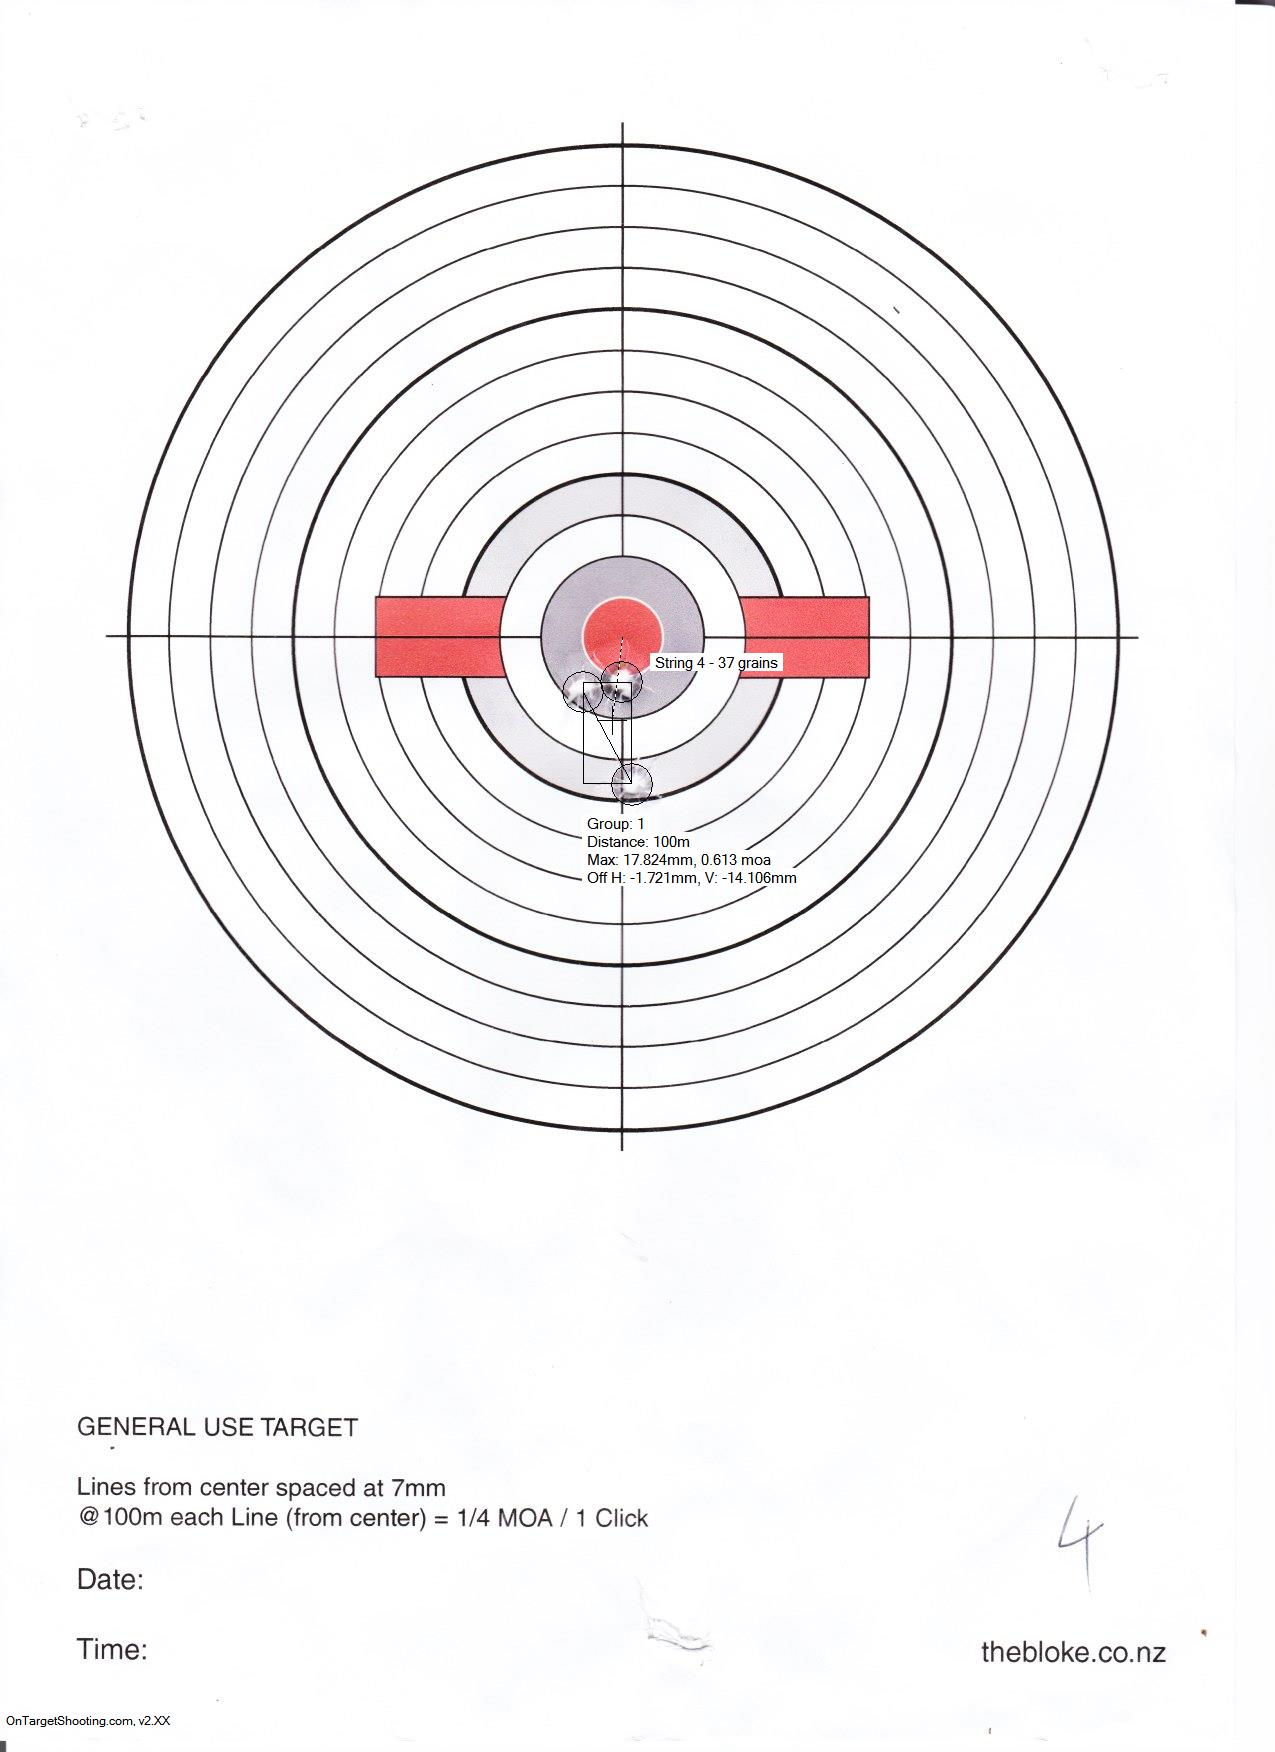
Comparing the targets, if you were running a standard ladder test, target 4 would probably be the one to work from. However, the tightest group isn’t necessarily what we are looking for. See how string 1, 3 & 4 have a similar POI, while 2 has drifted to the left? That’s the correlation we are actually after. But this requires targets either side to compare too.
It’s also worth noting that all these shots are well within ‘minute of deer’. I am doing this to get the maximum accuracy out of the rifle – but any would have been suitable for hunting with.
Basically this means I need to re-run the test, which just means more time at the range, which is ultimately a good thing.
I have reloaded a series of weights where the overpressure load from this test is my highest load. This means I should get six targets to compare. Actually it will give me ten, as these existing targets will be different load weights to the next lot.
So, back to the range it is.