Home Blog Page 35

The Camping Coffee Conundrum.

0

In the blood.

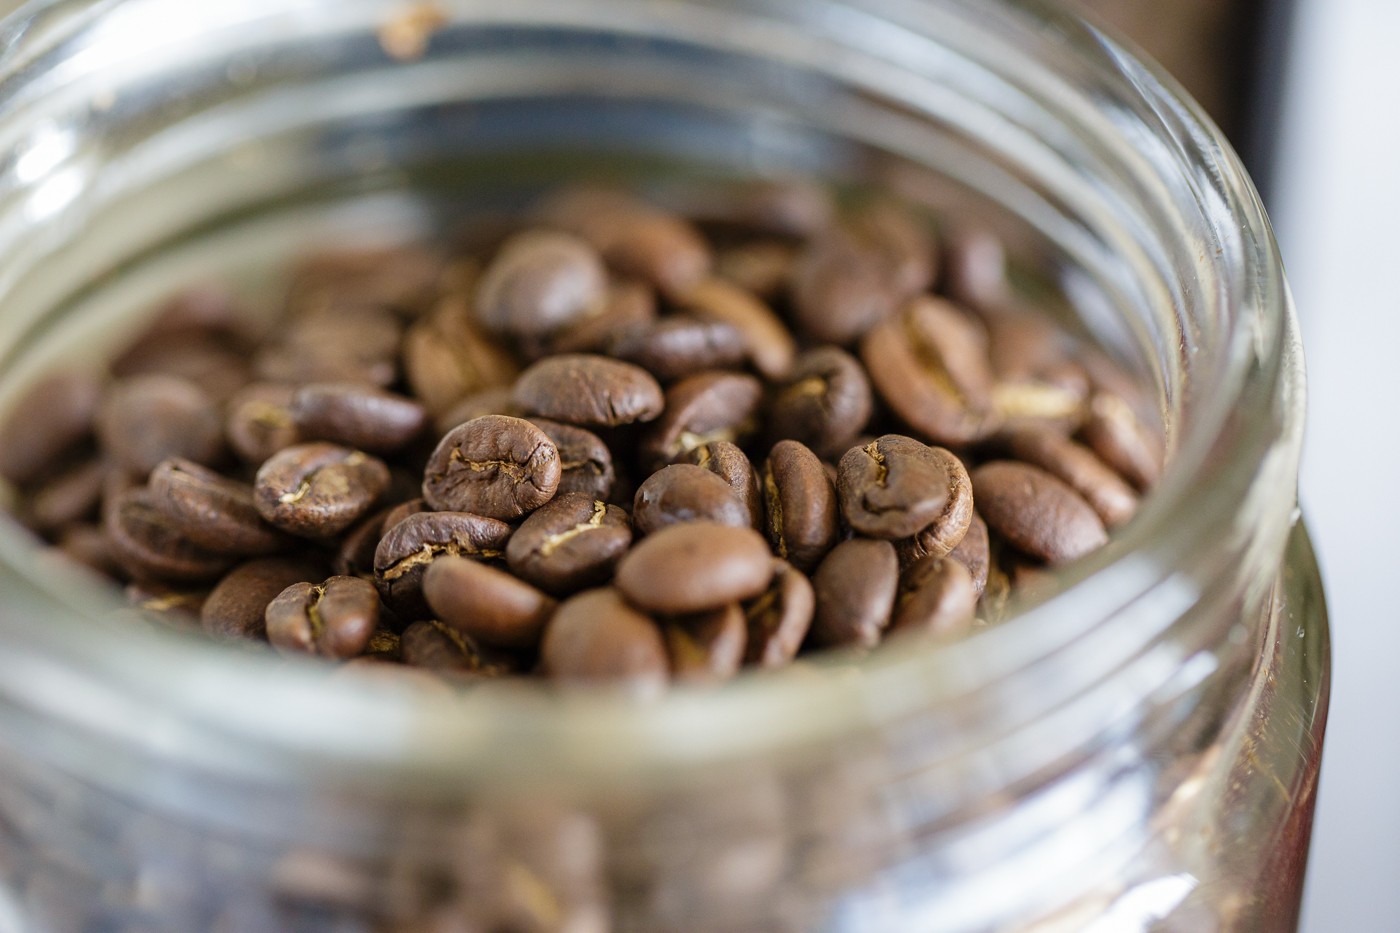
I will happily admit; I am a fairly decent coffee addiction.1 I made myself a coffee before I sat down to write this. One of my favourite ways – the old’trusty stovetop espresso. I have stopped drinking coffee in the evenings these days, but in the past, it was not unheard of for me to take a coffee to bed with me and drink it while I had a read and settled in for the evening. Camping Coffee is just the logical extension of this.

See, I have been drinking coffee since I was a baby. As the stories goes, my parents found I was lactose intolerant, but could keep down milk with coffee in it, hence, I drank coffee in the bottle, I have periods of drinking more or less coffee, but I can’t think of any time in my life where I have gone more than a week (closer to day) without at least one.

Pretty much essential to getting me going in the morning.

Consistency, consistency, consistency.

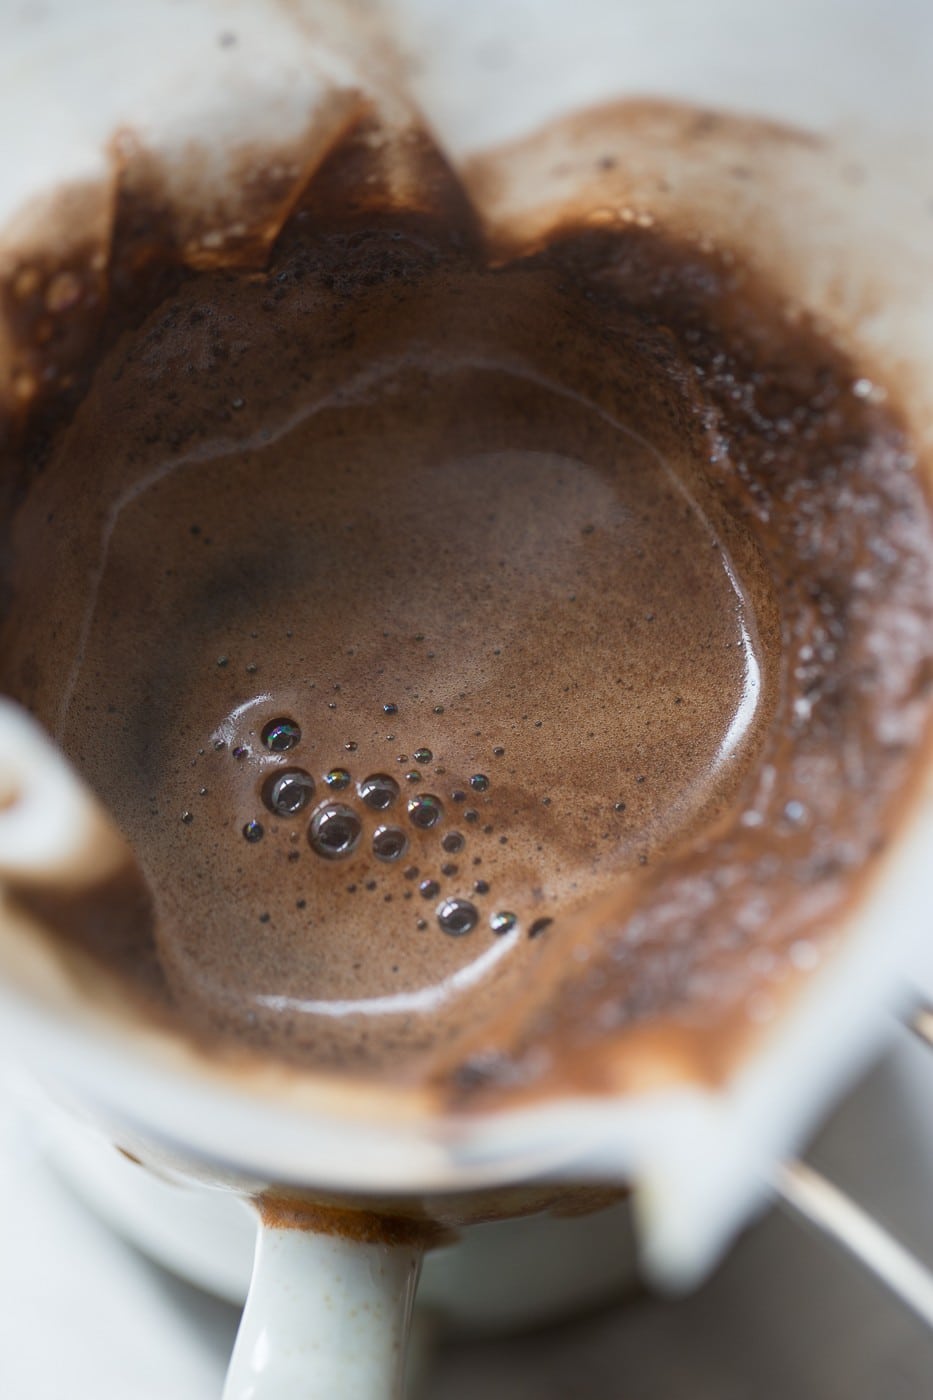
However, I have also become more and more particular about the coffee I drink.2 While I haven’t gone to the extent (and cost) of a home espresso machine, most weekend mornings starts with a French press, with the amount of coffee and water being measured in grams (34 of grams to 500ml of water is the current preference) and after one or three of those, the stovetop is normally brought out around three for another shot. During the week, bullet coffee is breakfast, and I am seriously considering getting something for the office, where the machine there, just isn’t up to par.

To be fair, I am not at the point of some of the pour-over folk.

[fvplayer src=”https://www.youtube.com/watch?v=c7tlICRTfpg”]

However, I do believe in consistency, though don’t necessarily have the inclination to spend that much time making a cup of coffee.

Camping Coffee – the perfect portable brew.

So, of course, this leads me to try to make a good brew in the bush.

Instant

Initially, like many others, I simply used instant coffee and milk powder. Simple, lightweight, easy. Horrible tasting (to me). First thing in the morning, part due to habit, part due to addiction, I look forward to my first coffee and therefore, I like it to be tasty and enjoyable. I just don’t enjoy instant coffee.

I tried the fancy instant coffees – but they just come across as badly flavoured (normally overly sweet) instant coffees. They taste like a gimmick.

Coffee Bags

Just not big on the coffee baggies.

By my understanding, these are often ground coffee, some with a mix of granulated instant coffee thrown in for good measure.

I am yet to find one of these that is palatable. I think, in major part, because the coffee has likely been ground weeks, if not months beforehand and then sat on a shelf until purchase. Not good.

The French Press

I carried a French press out with ground coffee – simply boiling up water and making it on the fly – but that was just taking up far too much space and weight. I believe it was my first step in camping coffee after instant.

If you are using something like a Jetboil, then you can get a plunger that will fit into that for storage – I have been considering a Jetboil for a while – and should I get one, the plunger will be on the required accessories list.

The coffee is good. No doubt about it.

In this category also (to me) – sits the Aeropress – an item that has long gotten very good reviews. May be time for me to check it out!

The Drip

My simple homemade camping drip coffee system.

What has been the goto for me for a while has been a drip system. I picked up a GSI Java Coffee maker – but realised the unit was massive – and ended up with something a bit simpler to achieve the same thing – I pulled the arm off a small metal sieve and use small coffee filters.

Again, really good camping coffee. This is normally what you will find me carrying with me.

The Machines

There are a couple of systems that promise portable espresso style/grade coffee that I am yet to try – but very interested in doing. The first I heard of was the Handpresso – and the other, the minipresso – both very similar in nature – featuring a system that you load up with ground coffee (or pods), hot water and then manually create pressure to extract the coffee by hand pump.

People will argue that the Minipresso can’t deliver a real espresso coffee (it can’t get up to 8 bars of pressure). However, the Handpresso is also heavier.

You can find reviews online heavily favouring one over the other, so it’s a little hard to definitively say which would be better.

[fvplayer src=”https://www.youtube.com/watch?v=ADvJyYBF8FA”]

Finding the perfect brew

So, it seems I am still on the hunt for the perfect brew. I swing between wanting the absolute minimal weight and realising that I am happy to carry a little more weight in exchange for a decent coffee first thing in the morning.

At the moment, I am sticking with my homemade system with the sieve and filter – however, there is one aspect I haven’t addressed – and one that I think makes even more different than the different brew methods. But that’s for the next article!

Camping-Coffee-Conundrums (4 of 8)


  1. this whole post is very ‘first world problems’ – so I suggest you stop reading right now if that is going to get up your nose. 

  2. that is unless I haven’t had one by about midday, then anything will do. 

Weekly Update – 18th January

0

[fvplayer id=”15″]


A chat with Ryan Cleckner

0

Ryan Cleckner is a man with a million projects, and all of them important.

For this show, we talk to Ryan Cleckner, potentially, the best recognised, least known man in the gun industry.

If you have ever done a search for anything gun related, you have likely ended up on one of his many youtube videos. From scope mounting, firearm cleaning, to the Hemispheric Distortions those of us shooting down in the south of the world need to deal with, Ryan has long been teaching and sharing knowledge.

Check out his book, a phenomenal intro into the world of long range shooting, and his weekly podcast, Going Ballistic.

Check out his hub for all his projects – gununiversity.com/
And his new system for alerting and managing friends, colleagues and first responders in emergencies – maydaysafety.com/mayday-safety-app/

We talk equipment, hunting, the brilliance of the Tikka TAC A1 and much more. Check it out, share, tell everyone about it! It’s appreciated.

Last Update for 2018?

0

[fvplayer id=”5″]

Article link – Steiner T5Xi First Thoughts

VRTBR C7 Pants and Parka – more thoughts

0

It’s well overdue for some more thoughts on the sublime Waterproof Clothing that finds it’s origins in the Nordics but is equally home in New Zealand.

I have had the VRTBR C7 Pants and Parka for several months now, and much like the Thermal Fleece Layer, every time I put them on, I revel in just how awesome they are. Since the day I first unwrapped the package, waxed paper, wax seal and all, I have marvelled at just how nice hunting clothing can actually be.

Yup. It’s gushy. And, if you are content with the traditional fleece baggies and top, then you might as well just stop reading now.

[fvplayer src=”https://vimeo.com/294688222″ splash=”https://i.vimeocdn.com/video/731651190_1280x720.jpg?r=pad” caption=”Parka-Pants”]


If you want some background –

VRTBR – Premium Outdoors Clothing from the Nordics.

The VRTBR T2 Base Layer – modern thermals.

I have already talked about the base layer, and will also put something down soon on the Thermal layer, but for now, I want to get up a few more thoughts on the outer, waterproof layer.

I have struggled with waterproof jackets over the years. No matter what I did (or how much I spent) – I always seemed to end up with a jacket that would wet out, or leak, through a few, reoccurring and specific spots.

Hitpoints – eVent DV Alpine

  • Woven silent matte face fabric
  • Weight for MENS C7 Parka XL: 1206g
  • w/b membrane eVent® DV Alpine
  • Water column of 20m
  • High breathability of 20,000 g/m2  

Being eVent, it’s been laboratory tested and has to meet stringent requirements in both the design and fabrication of the garments. As such, it also means that it’s built to a very high standard. And it shows.

I like the cut of the jacket – it’s long, both in the form of the anorak and the arms – in NZ we are quite used to (and tend to prefer) the longer jackets – and this was something that influenced my decision to try out the VRTBR equipment. However, the fact the zipper can be opened from the bottom as well means I can keep the jacket a little open to make access to the pockets etc a bit easier to access.

The zips also allow to open up the entire side of the jacket – perfect for heat management, and a nifty little design feature – the entire jacket can basically be ‘let-out’ meaning you can wear a puffy down jacket under it and not be compressing the insulation, then when you don’t need it, the jacket sinches down, and isn’t a big, billowing tent.

Pockets, pockets, more pockets

The pocket material itself is red, as is the lining of the jacket – a safety/signalling feature should you need it, but the pocket material is also stretchy. This is awesome, in that it keeps everything quiet in the pockets, not hitting together and clinking around while stalking – but I did notice, in the wet, wearing gloves, it cane makes things a little trickier to access and more specifically, put away.

There are plenty of pockets. On the pants, you have thigh and waist front pockets, on the jacket, chest and arms. In the rear is a storage pocket that is designed for gloves, hats and other snivel gear – perfect for drying them out whilst you wander around.

The front Kangaroo pocket integrates with the fleece layer – allowing you to warm your hands in the thermal layer, and, whilst wearing a pack, run the straps through the inside and allow heat to escape still. Smart.


Noise, wear, durability

I haven’t had the gear long enough to report on long-term durability – but – the designers have, and I have seen some rather dirty photos of gear. Dirty meaning it’s been through mud, hills, rivers and so on, and simply washed out at the other end, good to go again. The layered material provides abrasion resistance, and this is beefed up at the knees, seat, shoulders and wear points. eVent (and most breathable membranes) is not the quietest of materials – but the out layer provides a large amount of dampening – making it no noisier than most other clothes. This isn’t a summer bush stalking setup. But, then, of course, it isn’t.

Technical outerwear benefits from regular washing to perform optimally.

In fact, the material manufacturers likely recommend you wash your jackets a lot more than you likely already are. I have heard it suggested that you pretty much was the kit every time you get back from a trip. This doesn’t mean you need to retreat the DWR each time, but clean gear breathes better and will bead water better as well.

Let me know…

I realise this site is now read from people all over the world, but, for those of you living in NZ, please let me know if you would like to try some of this kit out. I know the concerns about ordering site unseen – and have been bit more than once with it. However, I also know that you will appreciate this stuff once you get to try it out – so please – hit me up, and I can try to get something to you for you to check out. Sizing is pretty good – myself being a large in the whole system, but it’s nice to try before you buy.

Back to Balnagown!

0

A trip to Balnagown to experience the Roar!

Following up from my trip up to Balnagown with the camera, Richard suggested I head back up with The Missus to stay the night in the hut and hear the deer roar. It was a great excuse to head out overnight for a bit of time with my partner, and experience something new (it’s my first roar). Right about now we are heading into ‘peak roar’ – and from the moment we got there, we knew it was going to be a bit of an experience.

The experience for everyone

On the way up we caught up with Richard and his client for the day – a young guy (with a decent beard and an awesome Valiant) who had been out with Richard for the day getting himself an animal. If I understand it right, they had got a deer, cleaned it and put it in the chiller, then in true Richard style – headed back out to check out the animals some more. Richards enthusiasm for it all is contagious. He has a pile of knowledge and is keen to share it.

The particular client he had was still in the process of sorting himself a firearms license – but he was able to head out with a Richard and score himself a nice animal after a decent stalk and walk away with the experience. I am sure he will be back.

After a coffee and some excellent Lumberjack Cake (thanks Stephanie), Richard took us out to the hut, made sure we were settled, planned the next day, chucked us a new spotlight to try out and left us too it.

Loud evenings

I, unfortunately, didn’t get many night photos. But what I really should have done was taken up a decent audio recorder. I must have spent close to an hour standing outside just listening to the bullfrog like croak of the Fellow Deer all around us.

Richard’s hunting block is awesome in that it is also a bit of a natural amphitheatre. A big bowl that reflects all the sound of the deer through the bush blocks down into where the hut is located.

We had nearly 360 degree roars going on. Animals grunting, the crashing together of large sets of antlers, the separate calls of the Doe and Fawns. With the spot light we had on us, we could sweep the countryside and see all these green eyes glinting back at us from the distance.

Wandering

After waking up a couple times during the night to the sound of very deep, throaty roars from the distance, we had a feed and then a quick walk around. I was reminded how fast the animals disappear when you head out on foot. More than once, I waited, trying to spot anything in the bush in front of me, only to step off and realise I had an animal within meters to my side. They might be loud, but they can also be very quiet when they want to.

I took the camera with me, but much like last time, it was many shots of the rear of animals as the bolted. I need to practise my stalking much more.

Learning to process a deer

I had expressed to Richard that I was keen to go through the process of skinning and gutting an animal again. We had covered it previously during the HUNTS course, but I wanted to get more hands on and just reinforce what I had learned.  I am planning on heading out into the Kaimanawas in the next couple of weeks for a week of stalking Sika. So I wanted to be sure I has the appropriate skills, should I manage to take one of the ‘Ghosts of the Forest’ down. Anyone who knows me will appreciate I like to be prepared to go into things, so I figured this was the perfect opportunity to learn and practise these skills.

I think this is one of the great advantages of what Richard offers – if you want to stalk – you can head off into the bush block and do the hard yards. If you don’t have the time (not everyone can escape all week to hunt), fitness levels (older hunters, disabled hunters) or resources (gun, knowledge of areas) – then Richard can customise the hunt to you.

Entry and Exit wounds

In my case, I basically wanted an animal to process. So Richard was able to very quickly lead us to a suitable animal, which I dropped with the X-Bolt; Quickly learning a valuable lesson in the process – you need to be mindful of both entry and exit points on the animal. I hit it right in the shoulder. So it took a couple of steps back (I also learnt back means dead – it’s disabled, cant run and drops quickly) and dropped dead. Unfortunately, I should have let it get a little bit more on a right angle to me, as the exit would passed through the gut. A little-spoilt meat, but lesson learned.

While we waited for a few moments before walking up to the animal, we checked out a couple of other bucks, seemingly totally uncaring to the plight of their younger herd member close by, having a good old scrap on the hillside. Richard explained their behaviour – the walk, the back away, the challenge and the engagement. It’s great having someone so schooled in habits of the animals explaining the how/why and what of their behaviour. We grabbed the animal and brought it back to the hut to process.

Simple, effective tools

Honestly, I think Richard could process an animal with his bare hands. His father worked at the meatworks, showed him how to process animals at an early age and it’s a skill he has quite plainly honed over the years. While many a hunter initially goes out and buys the biggest baddest skinning knife he can lay hands on, Richard is quite efficient totally skinning and gutting the animal with, wait for it… his $8 pocket knife.

Richard went through the process with me from beginning to end. Passing on a pile of tips and tricks along the way. I walked away with a new skill set (that I am now keen to practise, an animals worth of meat and a very unique experience for both myself and my partner.

Weather you are getting into hunting (like myself) and want to develop and practise your skill-set before heading back county, you only have a short amount of time to get in your hunting fix or you simply want a unique experience (and maybe will only ever do it once), Richard and Balnagown is certainly a way to do it. I am already planning on heading up again. Even if it is simply to spend some more time up there with the camera observing the animals doing what the do. Hiding from me!

Balnagown Hunting – http://balnagownhunting.co.nz/ 

Simple Blue Cheese Sauce (awesome on steak!)

0

This is a simple, quick to make, and delicious sauce for your next steak meal.

  • Take 30g of butter, melt in a saucepan.
  • Whisk in 1 tablespoon of flour
  • Slowly pour in 150ml of milk, whisking constantly
  • Bring to simmer
  • Add 50g of Blue Cheese, stirring until melted
  • Apply to meat
  • Win

God. Yes.

Sika Show 2018 Recap

0

Taranaki Long Range Shooters & Join My Hunt

Graeme from Taranaki Long Range Shooters

Ras from Join My Hunt

Starting us off, a good chat with the lads.

If you are looking for a community to join and get out shooting. Check out the Taranaki Long Range Shooters Group – these guys have grown in size rapidly, setting up regular gong shoots and competition and forming a very active online community.

Beretta NZ and SportEar

https://www.sportear.com/

Protect those ears! I like the fact these are actually custom tuned to your hearing.

Beretta NZ, Tikka, Sako – the new T1X!

Beretta NZ

The 22LRs are coming! But we get a first look at the T1X platform.

Simon Gillice from Gillice Practical Events

Gillice Practical Events

Get down to one of his shoots soon!

Twin Needle

Twin Needle (and I just spotted a new website!)

Day Two, Matt and I have a chat.

Andrew from Legend Hunting Gear (Movie Armourer)

Legend Hunting Gear

Part of the firearms community you don’t always hear much about.

Steve from Southford Labs

Southford Labs

Looking forward to playing with the new stock! (Especially when I get my mitts on a leftie!)

Firearms Project Update

0

Police have now confirmed venues for the six community sessions and look forward to meeting firearms community members that can attend.

Basically, this sounds like the reveal of a new online firearms licensing system. Certainly – we can see the first steps towards that with the theory test now being done digitally.

District Date Venue Time
Christchurch Monday 8 October The Balmerino Room

Riccarton Park Racecourse, Racecourse Road, Riccarton, Christchurch

7-8pm
Palmerston North Tuesday 9 October The Carlton Room

Distinction Palmerston North, 175 Cuba Street, Palmerston North

7-8pm
Wellington Wednesday 10 October SPCA

140 Alexandra Road, Newtown, Wellington

7-8pm
Auckland Tuesday 16 October Ponsonby Rugby Club

1 Stadium Road, Western Springs, Auckland

7-8pm
Hamilton Wednesday 17 October Distinction Hamilton

100 Garnett Ave, Te Rapa, Hamilton

7-8pm
Invercargill Thursday 18 October Invercargill Workingmen’s Club

154 Esk Street, Invercargill

7-8pm

More details here – http://www.police.govt.nz/advice/firearms-and-safety/news-and-updates

Hunters Element Vital Trousers

0

So the hunt was on for some pants, that didn’t weigh me down or restrict me as I had always thought pants would.

Everything on the market seemed too bulky or heavy until I stumbled upon the Hunters Element Vital trouser.

Built for purpose

It was soft, light-weight fabric, a straight (almost tapered) leg so it easily sits over my boot, but most importantly also fits under my already very snug gaiters. Win!

The fabric doesn’t “swish” together whilst stalking, another reason I had always thought pants were a clumsy option.
Hunters Element have labelled the pants a barrier layer, the fabric is scent guarded and rain-proof and I can easily wear thermals underneath on really cold morning hunts or around camp.

It has four pockets. Two of them are cargo style on the thigh and all with very slimline zips so weight is at a minimum.

The one fault

If there was a fault with them, it would have to be the waist button which is a dome or push together type button. This can pop undone. I have since added two eyelet clasps to stop it from doing so.

I also have the furnace layer shorts with a button and buttonhole which in my opinion is the best option for clasping.

But all in all, I was so happy with them, I even bought a second pair!