Staying hydrated in the bush, be it tramping, hunting or day-walking is both a comfort and a safety issue. Having chapped lips, a ‘dry’ throat and the beginnings of a headache while trying to enjoy the wonders of NZ’s native bush isn’t fun. Get to the point where your decisions are getting impaired, and your body is starting to shut down, and you have a major problem. Water can almost be considered the lubrication of the body. It lubricates and cushions joints, protecting your spinal cord and other, delicate tissues. It helps maintain your core temperature and it acts as the transport mechanism to rid the body of waste through urination, defecation and sweat. Remember, our bodies are nearly made up of 60% of water, and it is important that we maintain that balance. If you need to see how important water is to living objects – just watch how quickly a plant will wilt from lack of it, and how quickly it will ‘perk up’ when it is given some water again. The ‘rule of 3’ says we can live 3 seconds without blood, 3 minutes without oxygen, 3 hours unprotected in cold or heat, 3 days without water and 3 weeks without food. Those 3 days are quickly going to get really unpleasant if you are dehydrated.
Symptoms of Dehydration
Early signs of dehydration:
Increased thirst.
Dry mouth and sticky saliva.
Reduced urine output with dark yellow urine.
Symptoms of moderate dehydration:
Extreme thirst.
Dry appearance inside the mouth and the eyes don’t tear.
Decreased urination, or half the number of urinations in 24 hours (usually 3 or fewer urinations). Urine is dark amber or brown.
Lightheadedness that is relieved by lying down.
Serious time – get it sorted!
Altered behaviour, such as severe anxiety, confusion, or not being able to stay awake.
Faintness that is not relieved by lying down, or light-headedness that continues after standing for 2 minutes.
Weak, rapid pulse.
Cold, clammy skin or hot, dry skin.
Little or no urination.
Loss of consciousness
It’s not just water though – how salty are you?
Electrolytes, really simply put, salts, are also necessary for the optimum (or even regular) functioning of the human body. When we are sweating due to exertion, like carrying around a pack for a couple of hours, up hills, down hills, up another, down another, we are sweating out water, but also minerals and salts like sodium, potassium and chloride. These all serve important functions in the body, and if we simply start pumping in large amounts of distilled (bottled) water, then we may also start flushing out these important salts with replenishing them.
I have experienced this in the bush – drinking lots of water all day, only to get to camp in the evening with a headache. In fact, it can get to the point where it seems the more I drink the thirstier I get. After some food into me, and it starts digesting, adding salts back into my system, this can come right again.
Maintaining peak performance – get drinking!
You would be hard pressed to find any athletes that don’t understand that maintaining correct hydration levels are important. Tramping and Hunting isn’t all that different – you are exerting energy, burning fuel, and you need to keep the engine running correctly. Thankfully, it’s not really that hard to get enough fluids into you while tramping. You just need to make sure you up your water intake. It is suggested that the average male requires 3.7 litres of water per day, and the average female, 2.7. Now, think for a moment, do you get that much already? If not, you may already be in a permanent state of mild dehydration. Add onto that some exercise, sweating and exertion, and you are definitely heading towards a likely case of dehydration.
How much do I need to drink?
As soon as we start working up a sweat, our fluid intake requirements increase, somewhat dramatically. Though there are various theories on how much you should be drinking, a good guideline is between 500 mils to 1 litre additional per hour of exercise, depending on how hard you are working. Good (and simple) gauge? If you are thirsty, drink. Despite what some companies (oddly enough, selling bottled water) might tell you, the human thirst mechanism is telling you exactly what you think it is. Thirsty? Drink. Not thirsty? You can probably back off a bit. If you are out for longer than an hour, then the potential to begin depleting your electrolytes also increased. While you could take out a bottle of the heavily marketed sports drinks, which, along with the vitamins and minerals you need, also include artificial flavours and sugars, you could also just make your own, or get some of the newer products coming onto the market that have the stuff you need, and less of the stuff you don’t.
While it is wise to take all the marketing hype with a grain of salt, the fact still remains that for most animals, their sense of smell is a large part of their natural defence system; often more so than sight.
It is true that a massive market has developed around hunting – from the wide selection of firearms to clothing and gear to nearly any gimmick you could imagine – if there is something that you could be sold it’s likely on the market already. However, this article is more about being aware of the scent you may be putting off and what you can do cheaply and effectively to deal with it.
“I don’t do anything for scent control, and I still see deer.”
Yes. Again true – and if you are always able to manage the winddirection, ensuring you are coming in with the wind in your face, you may not need to worry as much about scent control. But. I would also imagine you have found yourself in less than ideal wind conditions, or if you are a bow hunter, you want to be able to get in as close as possible without being detected. In fact, even if you are carrying a rifle, in many bush hunting situations you are likely going to be within 50m – a distance where scent control does become very important.
“People have hunted effectively since the beginning of time, and they did not worry about scent control.”
Yes. They were also using stones and clubs, maybe even pointed sticks and were wearing loincloths. Things have ‘improved’ since then and hunting pressure has also meant that it’s important to maximise your chances. So why not?
What causes odor?
Well, you basically.
Animals, particularly hunted ones, soon learn the smell of human. Sweat, dead skin, breath, all contribute to your unique and personal smell. Add on top of this artificial and natural smells from washing and cleaning products, food, smoking and so on, and we have a cacophony of scent alerting any animals in the area. While there are exceptions to the rule, most animals don’t like the smell of something unknown and will bolt as soon as picking up on it.
Scent Control is the process of eliminating these odours or at least going through all practical steps to minimise them.
Personal Smell
Let’s start with yourself. You stink. Maybe not enough for you or most people around you to notice, but to an animal (deer) whose nose is over 20 times more sensitive than ours you are likely a beacon of smell wafting through the bush. So it makes sense to minimise that odour as step one of our scent control process.
Meet our best friend in our quest to reduce our scent. Baking soda (sodium bicarbonate)! Its time to break out the Edmonds!
Baking soda has long been known to help in the reduction of odours and it’s cheap! So before you head out and buy the latest miracle scent killer – try this – non-scented body wash (which generally still have a bit of a scent) with some baking soda mixed in. Be careful – this mixture can become quite the exfoliant – i.e. abrasive! Have a good scrub just before you head out to remove any dead skin and lingering odour. If you really want to go to town, brushing your teeth and having a gargle with it won’t go amiss either.
It’s also not a bad idea to reduce your internal source of smell either. Avoid the hot curries the night before heading out, or anything with a pungent smell. Some people also swear by taking a Chlorophyllin Copper Complex Supplement. This apparently reduces odour generation from the inside out – your sweat won’t smell, nor your breath and apparently, your shit won’t stink. Apparently – can’t say I have tried it; though, I do plan on giving it a go.
Clothing
Your clothing will not only absorb your smells but additionally, most cleaners have added fragrances. So while your partner might like how you smell in your hunting gear – it might not be the most conducive to actually seeing anything.
There are now many commercially available scent control washes on the marketplace, many containing odour controlling elements like silver, carbon and whatever else is the flavour of the month.
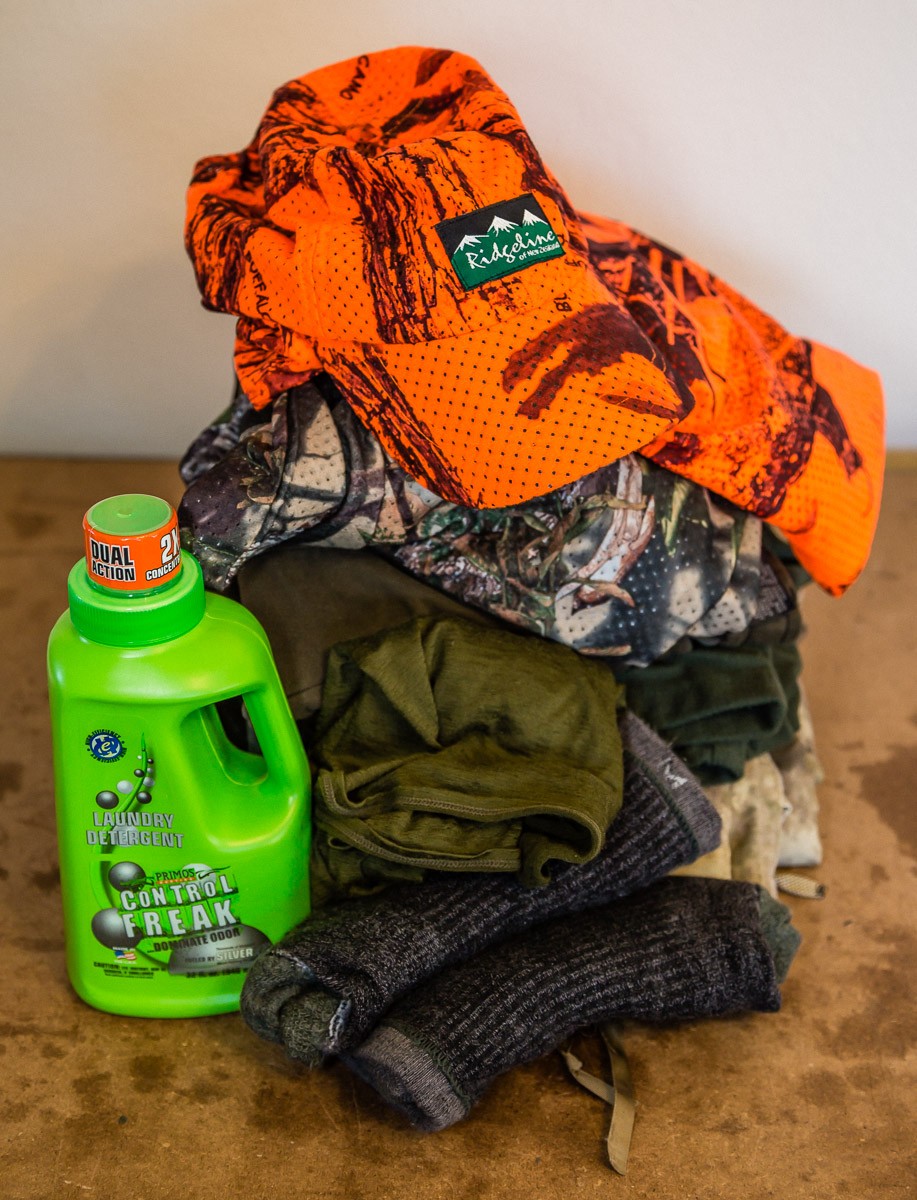
I am currently using a product called Control Freak by Primos. Interestingly, it doesn’t have an ingredients list on it, but it says it is ‘powered by Silver’.
However, guess what many of these washes primarily contain? Water, sodium bicarbonate (baking soda again) and hydrogen peroxide (bleach). Not too hard to make something up yourself, should you want to.
It’s also important once you have washed the scent out, to store the clothing separate and ideally sealed away from any other odours. Many people have a dedicated plastic box in the garage that their gear lives in. Further to this, it makes sense to not put on the hunting gear until you are actually out in your hunting area – i.e. don’t wear it to Macca’s on the way out into the bush!
Boots
Yes, like me, your feet probably stink. Especially if your boots are leather and occasionally get wet. But guess what’s coming to the rescue? Yes. Baking soda. Dry those boots out properly, sprinkle the insides with baking soda (leave some in there) – and you are most of the way there.
It also makes for an interesting argument for rubber boots – which I do plan on also trying out in the near future. Rubber theoretically doesn’t hold smells – but if they are lined – the inner may do so.
Equipment
And the rest!
Think pack, webbing, hats, gloves, hell, even your rifle, bow, knife – anything on you.
A simple solution – a mixture of water, bleach and you’ve guessed it, baking soda in a spray bottle (easy on the bleach).
Also remember, once in the bush, pack your lunch in an odour proof container. Its little things like this that quickly add up.
Does it work? How can I tell?
Good question. And really, I have trouble telling myself. I would notice, for example, if all my hunting gear smells of lavender. But in regards to myself? It gets a bit harder to tell. I am used to what I smell like, so don’t really notice it anymore. Realistically, there isn’t an easy way to measure smell. So I generally just stop, sniff and see if there is anything major going on.
Scent control isn’t really some magical mystical process that requires expensive washes and sprays to work. In fact, you probably have some of the best scent control methods already in your house.
There are plenty of options out there if you really want to go to town – carbon and silver lined clothing, animal gland and urine sprays (yum) – but I would strongly suggest getting the basics down pat before worrying about spending too much on these things. Also, it’s probably also a good time to take stock and ask yourself how noisy you are when stalking, how much attention you pay to the wind, how much you are using geography to your advantage and so on. Scent control can help – but you are going to need to have the basics right. If you are stumbling and crashing through the bush, downwind from an animal, there are other things you need to work on first.
Once you have scent control sorted, we can look at the second aspect of manipulating smell – attractants.
So – your turn – got any tips and tricks for reducing your scent in the bush?
Each customers requirements are different. Though, we have a few regular requests we have from customers. Often, they want someone to confirm the zero on a rifle, and provide some ballistic data for them as well.
We receive rifles in parts (i.e. scope not mounted) – through to rifles that customers have been using for years, but just keen to confirm and check before heading away on a bit trip.
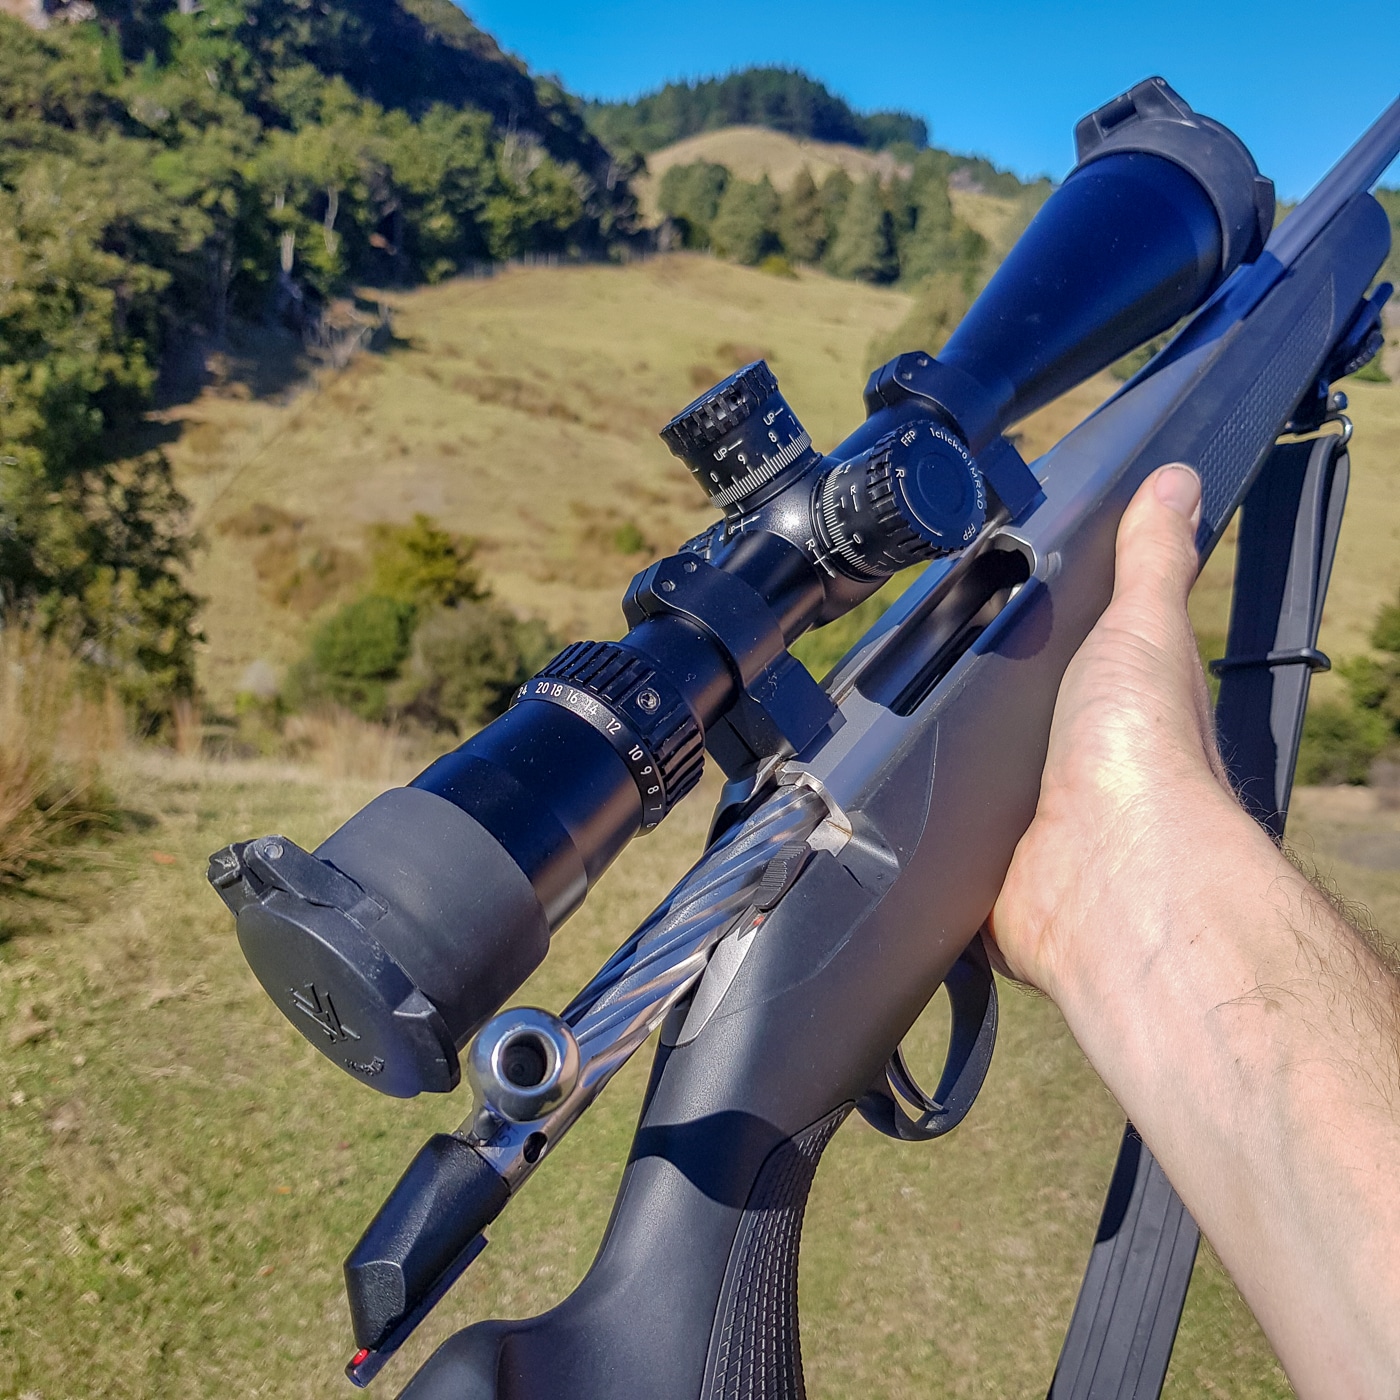
This particular rifle was the customers primary hunting rifle, and, while they had already mounted the scope (a rather nice Nikon FX1000, more about that separately) they wanted to have the zero confirmed, and wanted me to chronograph and develop some ballistic tables for them. They are using factory ammo – and essentially wanted to get some more accurate information, beyond the ‘box’ info.
I picked up the rifle and headed out to Balnagown Hunting – a private game estate in Auckland that we are also able to do some shooting on.
Conditions and Data
When setting up a customers rifle, I tend to gather as much information as I can, some of it won’t be used, but, it’s good to have and it all gets kept on file, should we need to refer back to it someday.
I quickly confirmed the rifle and scope were level and that the screws were torqued correctly. If we have the customer there, we then set the scope up to them – but – as this customer just had me take the rifle away – I left the eye relief as is (there is no point just setting it up for me) and proceeded to check the zero.
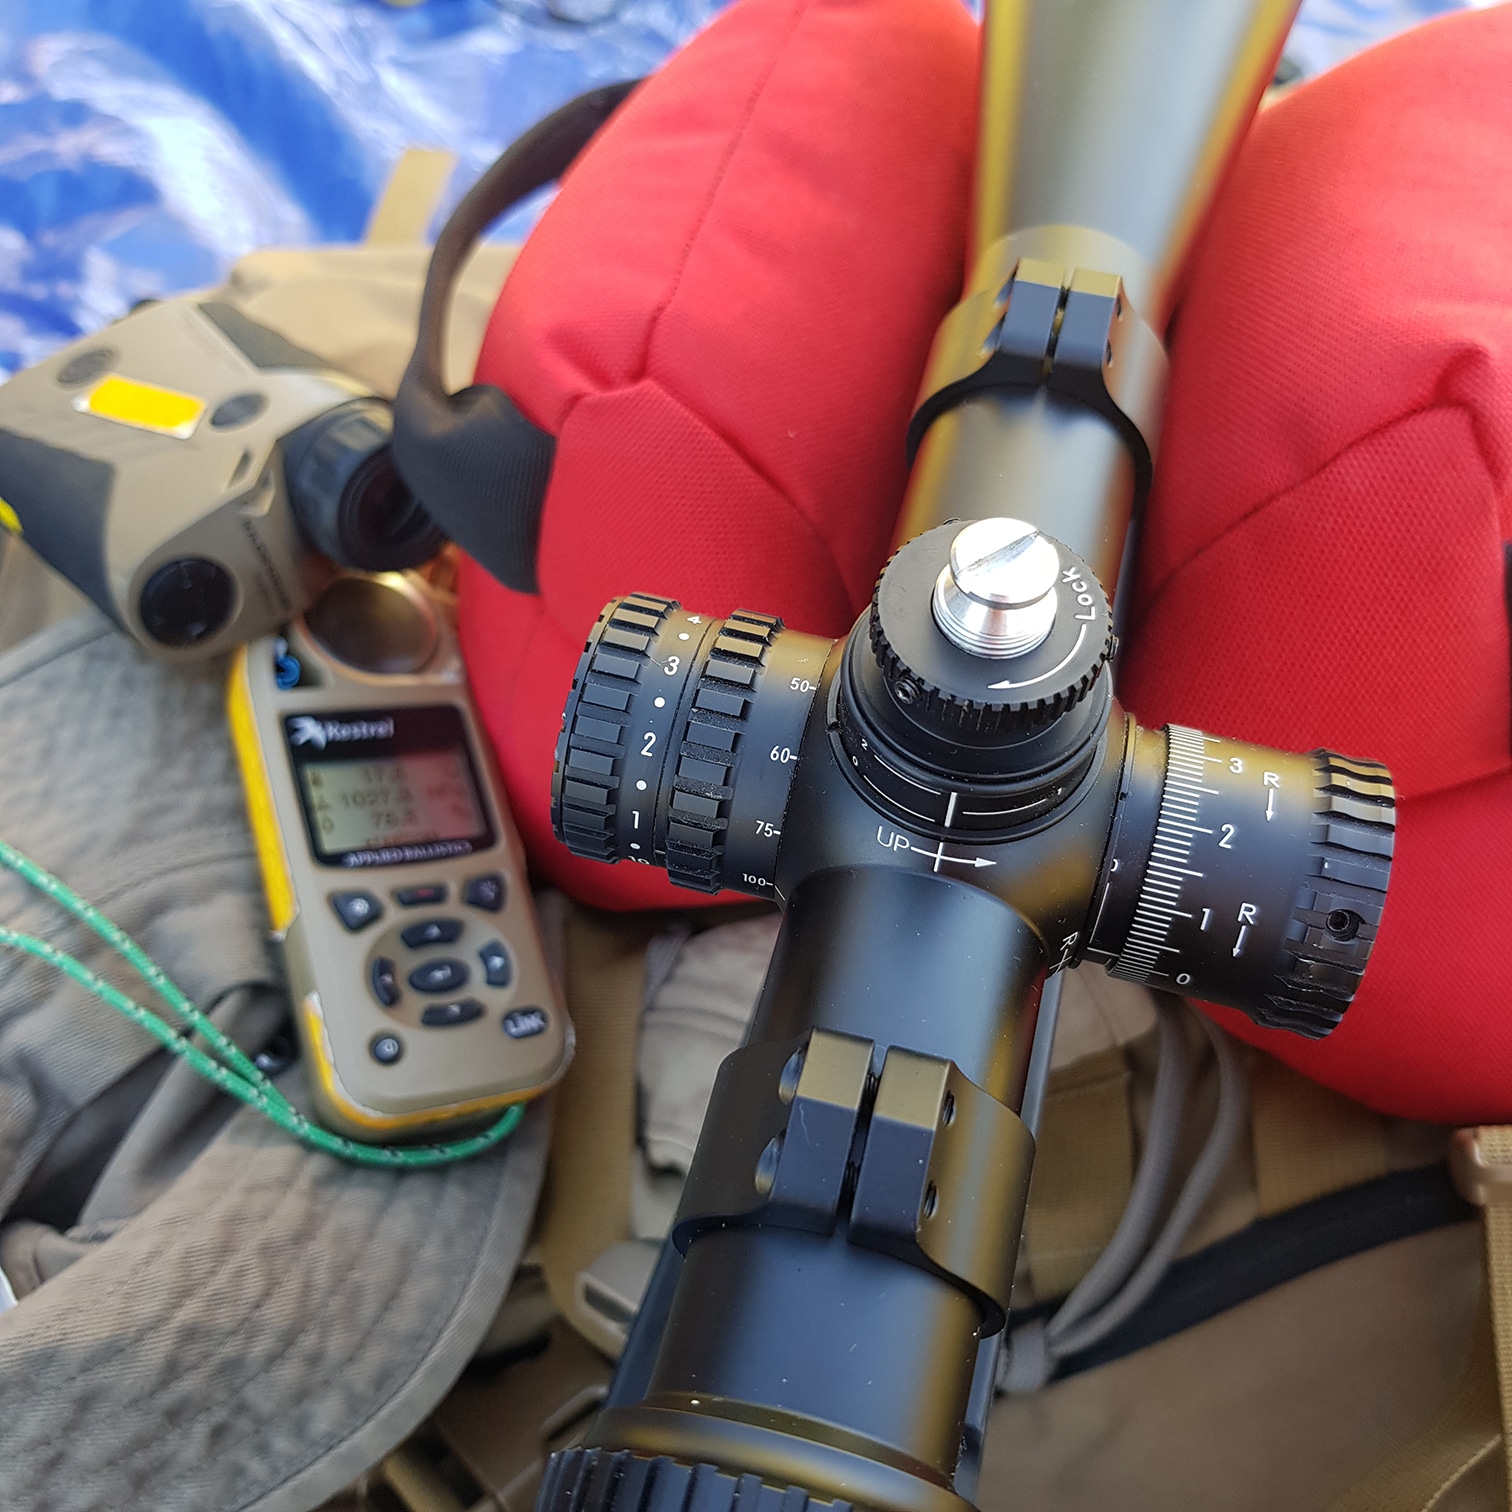
All of the shooting for the day was done ‘through’ the Labradar Chronograph – I have found there can be a wide difference in velocities when it comes to factory ammo – both within the same box and across different batches. I had been given a couple of boxes of ammo from the customer, and, since they were continuing to use this ammo, shot a variety of round out of all of them.
Noting down the environmental conditions throughout the day, we captured not only the zero but also the conditions the rifle was zeroed in. This becomes particularly important when a rifle set up in, say, Auckland, heads down to the South Island for some mountain hunting. Different temperatures and altitude will affect the POI, and this becomes even more important when hunting to further out distances. It may only be a click or two, but in precision, it counts.
Zero
I much prefer to have a customer zero their own rifle. There is a variety of reasons for this.
Firstly, I feel a zero should represent the system, not just the rifle. Hence, I don’t like the idea of zero’ing a rifle on lead sleds or the like. Sure – it gives you a ‘mechanical’ zero – but unless you plan on taking the sled/rests out into the field with you, it’s not a true ‘zero’ in that, when YOU shoot it, it wont be shooting the same as it did on the range. Therefore, I suggest to people that the zero their rifle in as close to the same setup as they would when hunting/competiting.
Sure, you might say – but I will get better groups shooting off a captive rest front and rear.
Well, maybe, but that’s also then giving you a false impression of how well you can shoot that rifle. That can lead to overconfidence, which, ultimately, could lead to you taking a shot you shouldn’t have and wounding an animal. Sorry. No ego boosting group photos around here. Keep it honest.
Also, being left-handed, I tend to know that I am likely one click to the left, compared to a right-handed shooter, or, they are one click to the right compared to me.
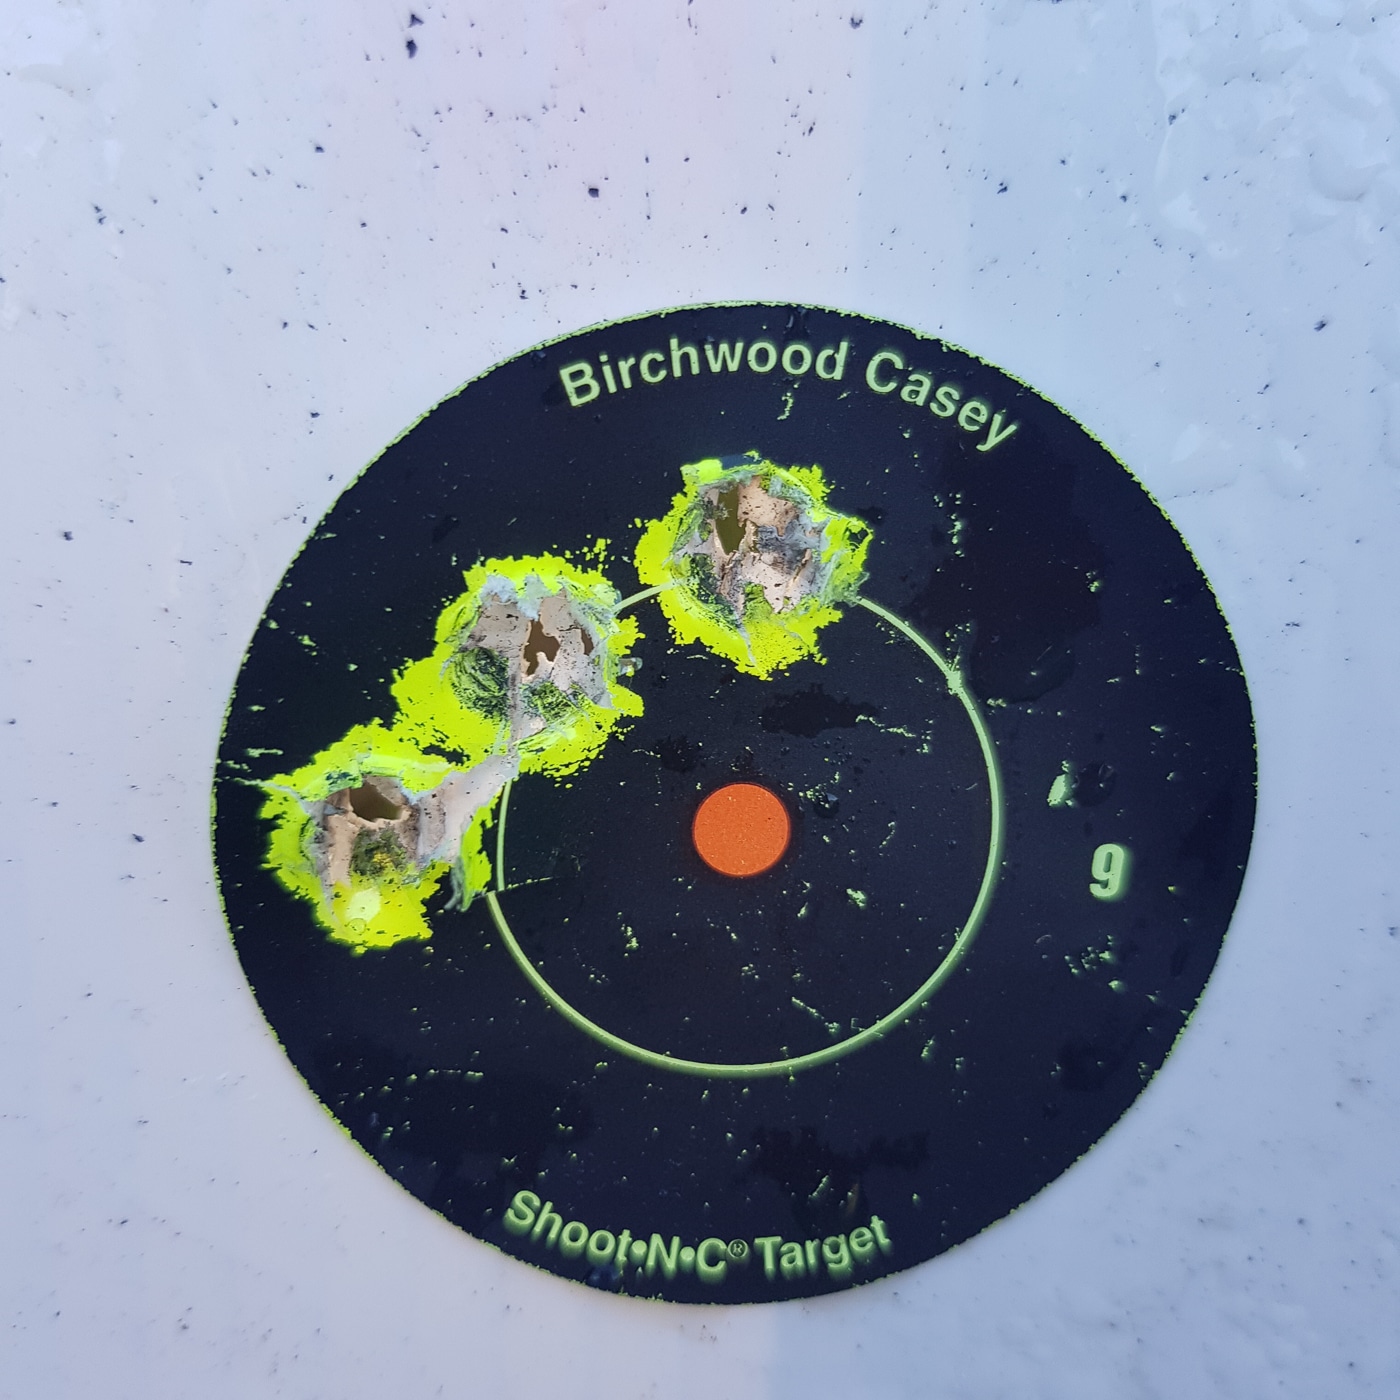
In this case, after an initial group, an adjustment (photo) I decided to come down one click more but left the one click to the right off – the owner is right-handed.
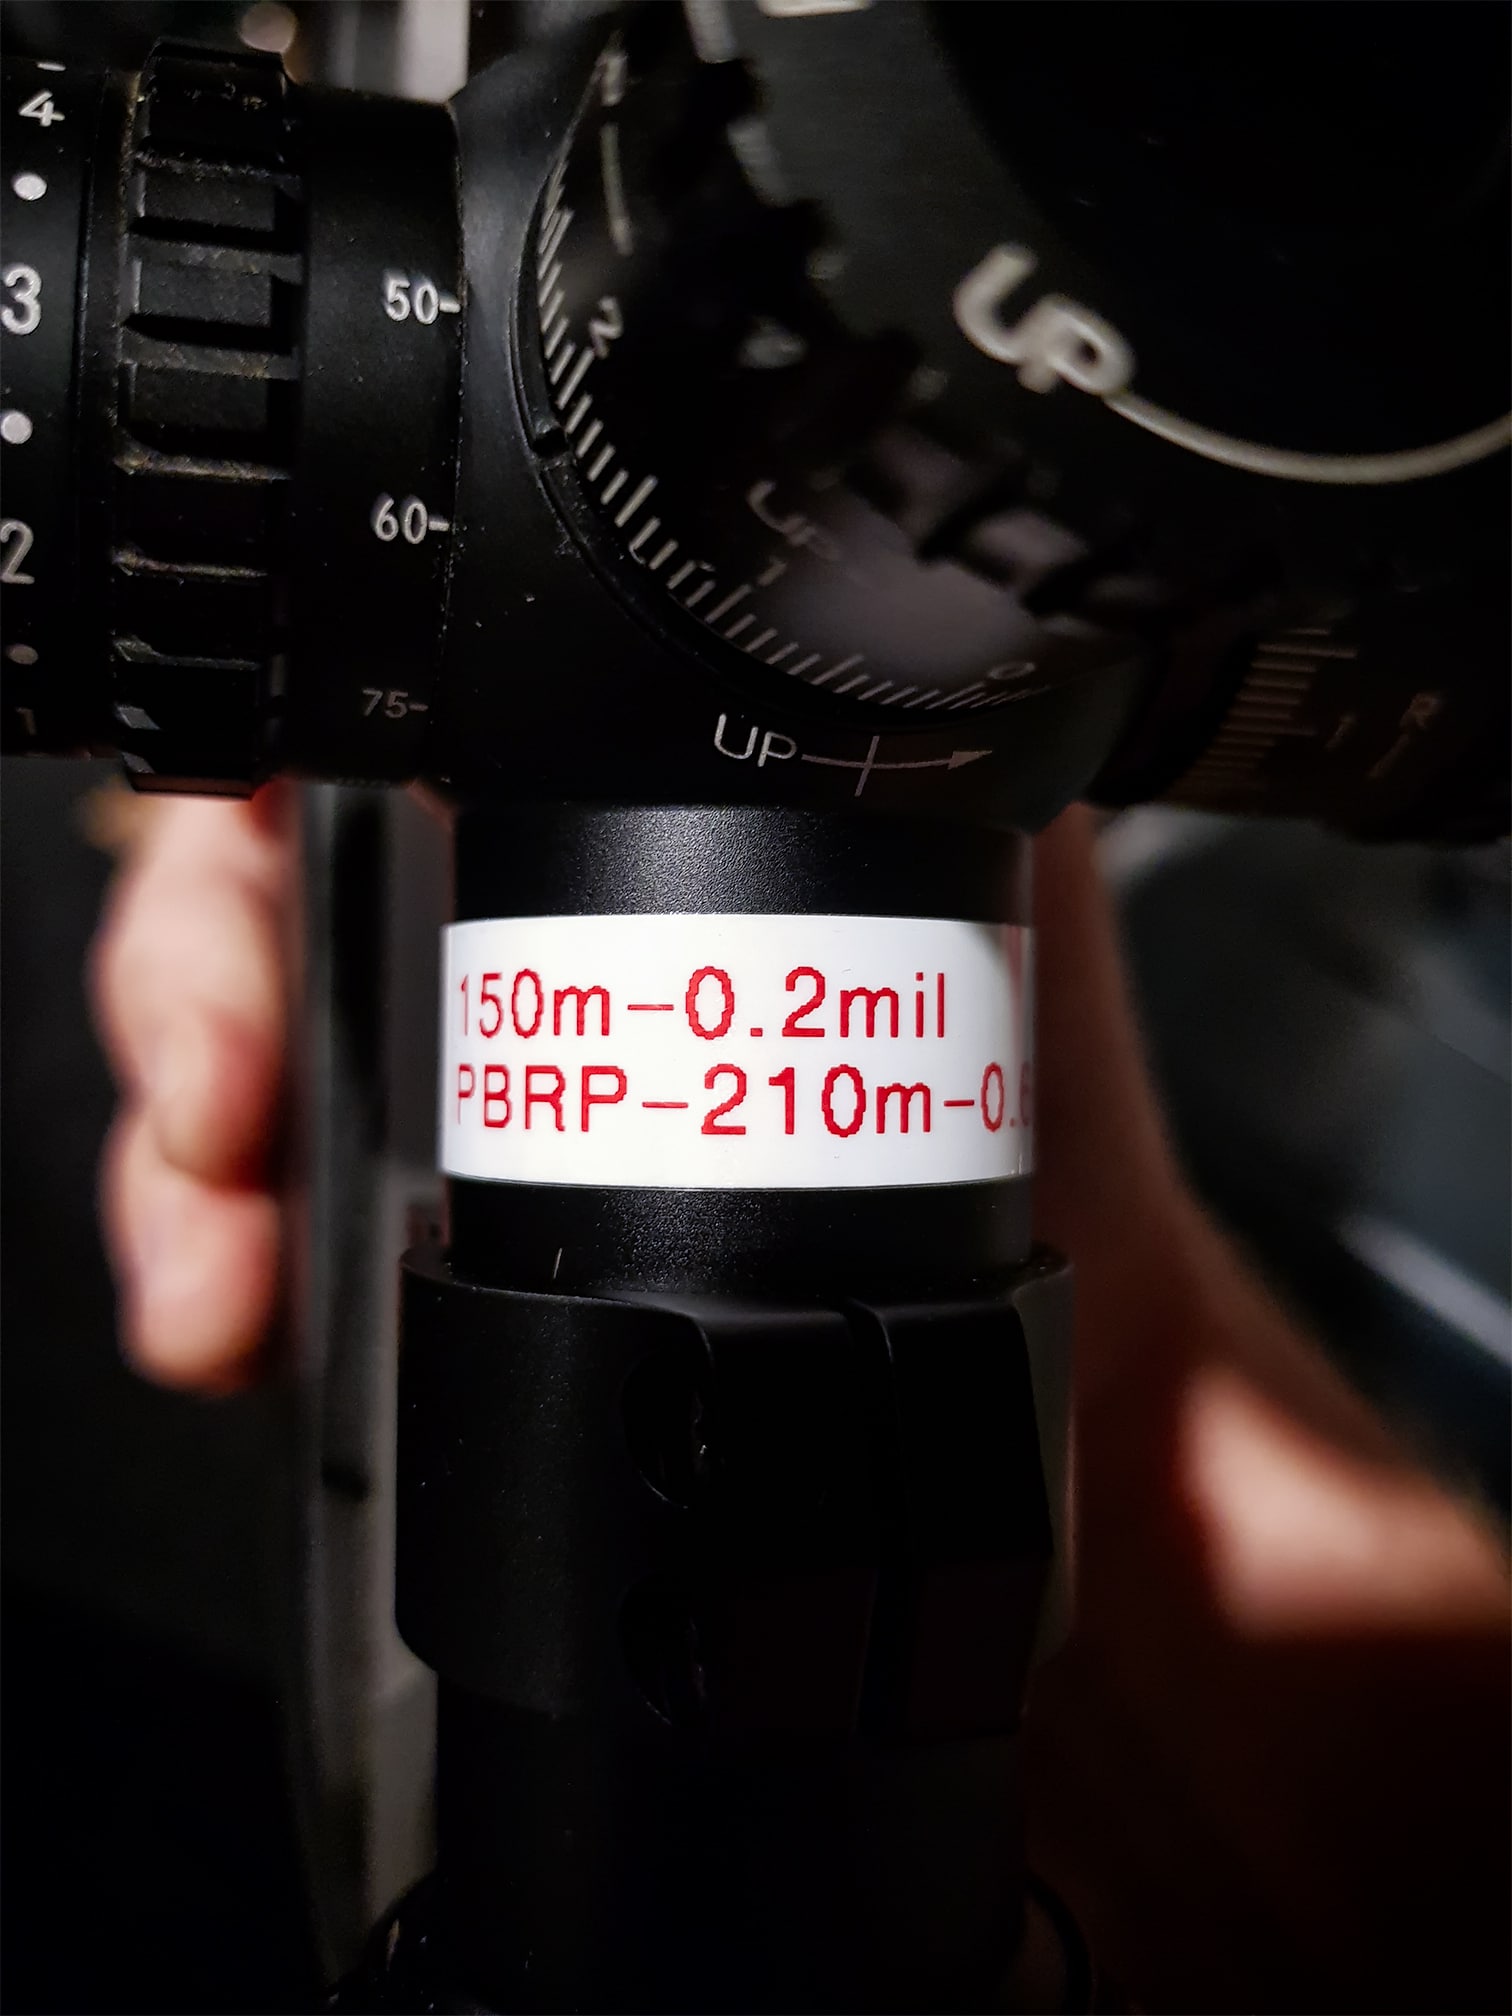
Final zero was set to 100 meters, but, the customer had discussed his preference for a 150-meter ‘walking zero’. A discussion around this basically came down do an ‘observational’ point blank range zero function, so, in order to make use of the scope (and the ballistic charts) I zeroed the rifle to 100 meters, but, included a sticker right next to the elevation turret so he can quickly go from the ‘range’ zero to ‘walking’ zero and back again. In addition, I included a calculated point blank zero adjustments for him as well.
I often find, but talking things through with a client, you find out more about their thinking and can offer alternative suggestions improving on what they are already doing. It’s not about having one right way to do things, it’s about understanding their thinking and their existing methodologies and working in with them.
Chrono
Surprise, surprise (well, not really) the box velocity out of a different gun was different from the customer’s actual velocity.
While not huge, there was about a 50fps difference (lower) than what it said on the box. At distance, with a ballistic chart, that would have equated to a low shot.
In the end, we put 20 rounds (high because the average velocity was the focus for the setup) over a chronograph. Interestingly, the SD was around 14fps – which – over a couple of boxes of factory ammo, was actually surprisingly low. I have seen much worse out of what would be considered ‘better’ ammo from the same company.
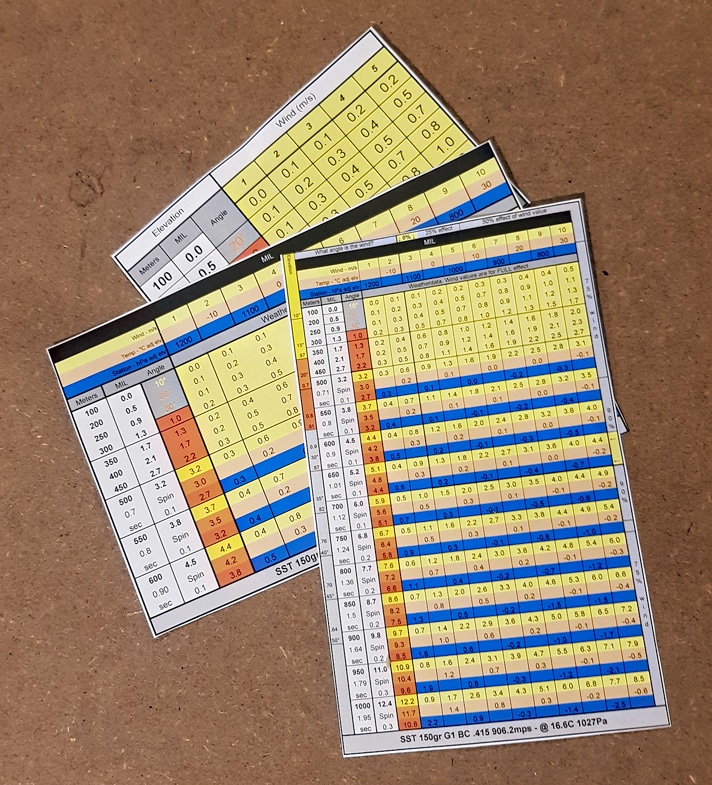
Ballistic Tables and Report
Part of the process was producing a set of ballistic tables for the customer.
This includes a basic ‘drop chart’ and more comprehensive chart with wind corrections and a comprehensive report that also includes a quick reference for differing atmospheric conditions including temperature and air pressure.
In addition, we put together a report about what we did, with some tips and tricks on how to get the most out of the firearm.
Thanks for sorting out the ballistics on my rifle mate. A job well done!
VernHappy Hunter
Get your rifle sorted!
Come out and spend a day with me setting up your rifle – or, if time constraints are in place – let me know and we can get it all done for you. Hunt and shoot with the confidence that the rifle is shooting as well as it is capable of.
At the Shot Expo 2019, we caught up with Simon from Prac Med New Zealand.
Simon is been hard at work educating and creating products that will (and have) save lives.
If you don’t already have one, please, seriously considering sorting your self a IFAK, IFAS and get the training to use them. Simon is putting on courses around the country – check them out over here – https://www.pracmednz.com/workshops
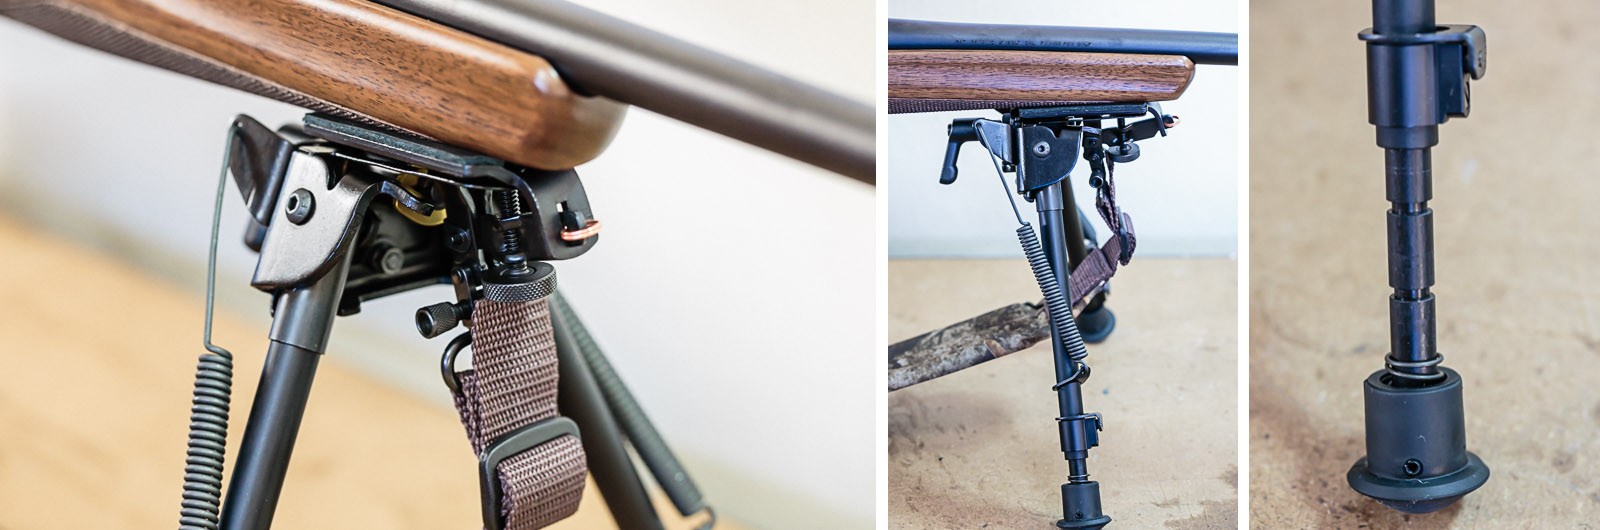
This is just a quick vid showing how fast a Pod Lock and Harris BiPod attaches to a rifle.
I grabbed the BiPod after struggling the last couple of times at the range with rest bags – essentially – they are all too low for me.
I started out with a couple of buckwheat pillows stuffed into a cram-sack. Was alright – but not overly stable. Then, I grabbed a 15″ Bulls Bag to try out – a whole lot more stable, but so low that the butt of the stock was hitting the ground. Certainly didn’t need a rear rest. I will relegate that one to Bench Shooting.
Whether or not I take the Harris BiPod out into the bush with me remains to be seen – this rifle is still primarily a hunting rifle. The extra weight, combined with the upcoming suppressor, could make it a bit too front heavy.
More of a test/review once I have had a chance to shoot the Harris BiPod.
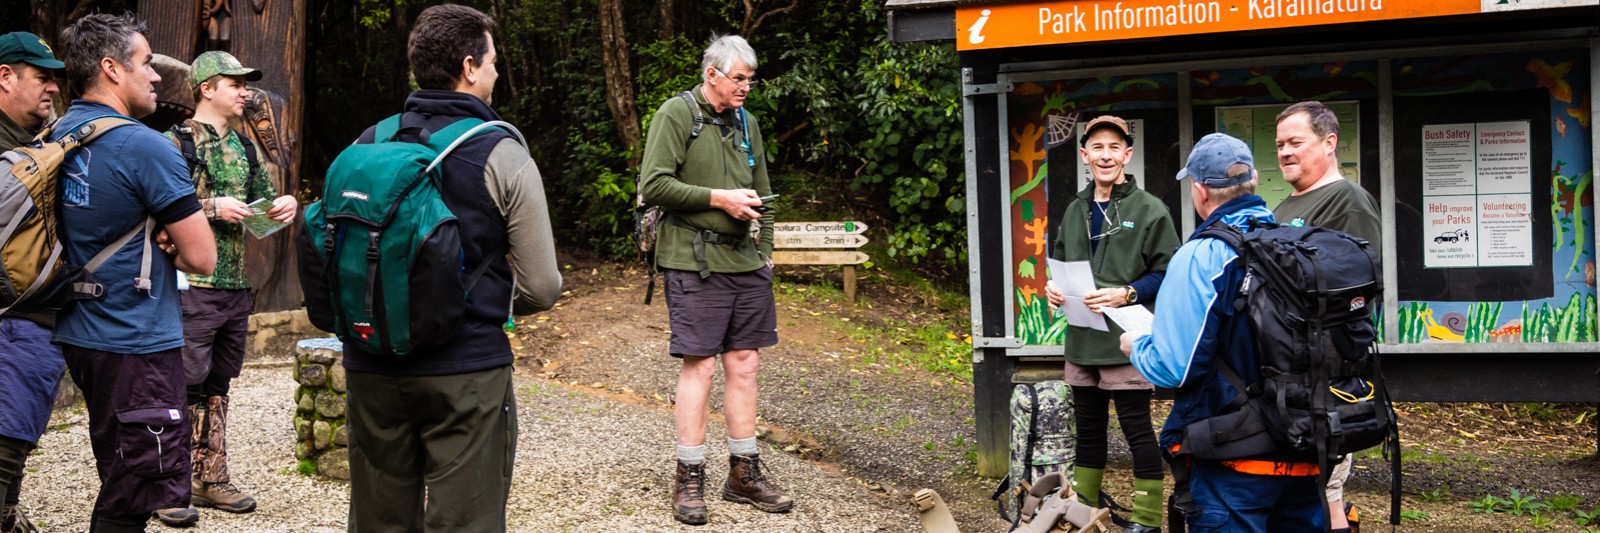
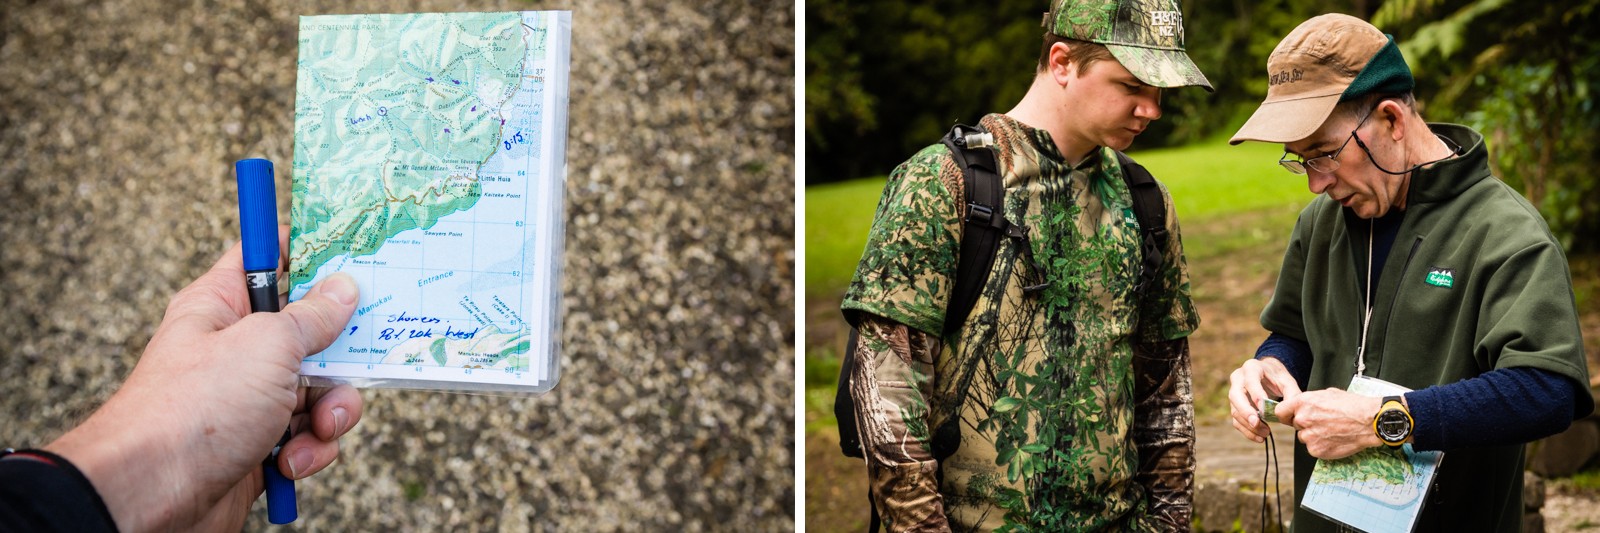
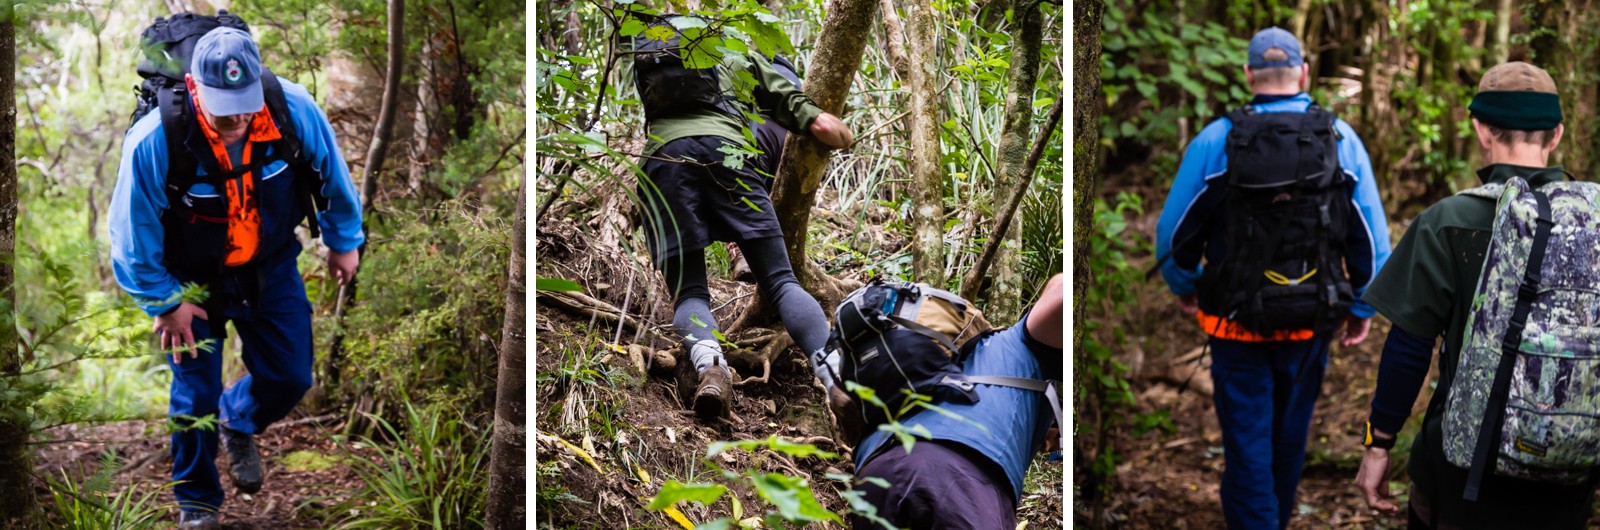
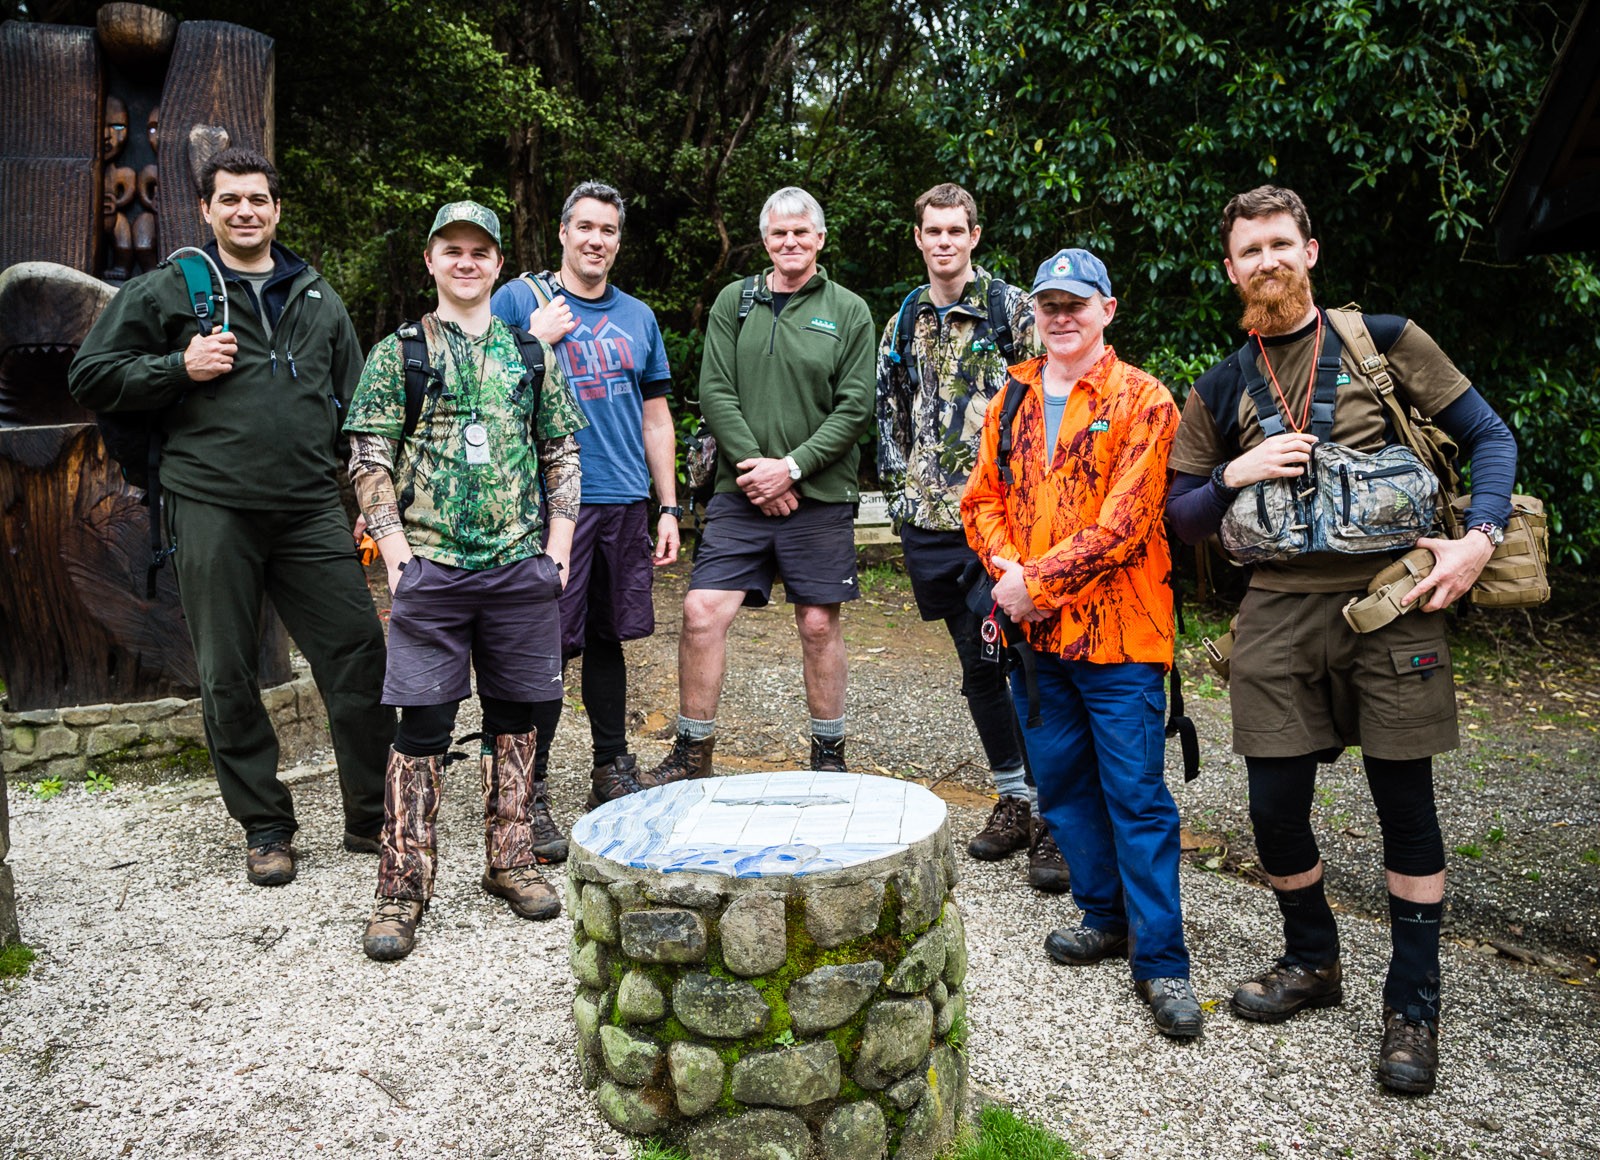
As part of the Deer StalkersHunts Course I recently spent the day in the Karamatura Park finding my way around.
As I have talked about before – understanding how to read a map and use a compass are vital skills to know before you head out into the bush. Without these, you have a very real chance of getting disorientated and ultimately lost.
We practised walking to a compass bearing, resectioning, meaning calculating where you are based on identifiable landmarks, and also headed off track to see how well we could fare heading through heavy bush with only a Compass Bearing to guide us.
Had a couple of interesting interesting developments worth mentioning –
Check your map – specifically, what Grid System it is using. I had my ETrex 30 with me, and quickly realised that my grid reference was different to the map grid. Double checking, we spotted the map was on the old grid, and therefore required me to change the GPS Setting to match it. It was about a 20 second fix – but threw us for a bit. Coincidently – I got asked exactly the same question by someone that night via Email. Same fix.
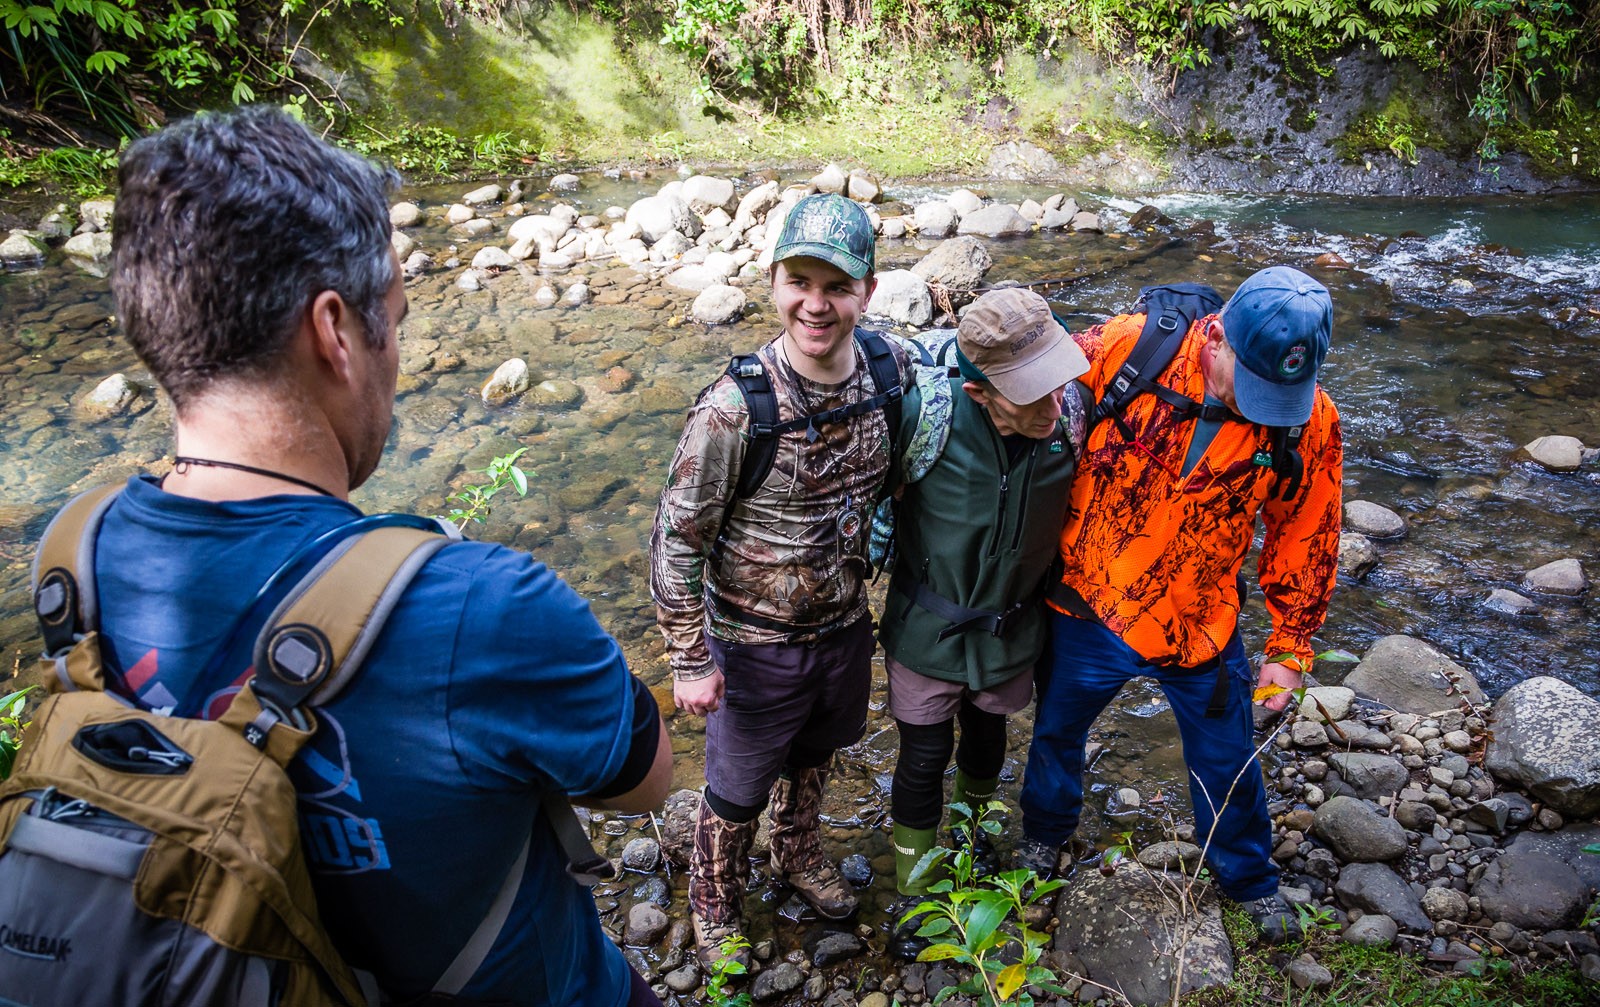
An overview of River Safety finished the day out – again something that I think a lot of people heading out into the bush overlook – NZ has some fairly gnarly rivers that can rise without a whole lot of provocation – so being able to judge and cross them is very important.
I spent Sunday morning getting the X-Bolt sighted back in as preparation for a group hunt coming up next week.
I have just had a Hardy Gen 4 Suppressor put on it and therefore, it’s POI had shifted. Combine that with the fact that I had also just lapped and reinstalled the scope rings and so I knew the zero would shift. It had.
A couple of shots at the 25m let me know it had dropped a bit, so a couple of clicks up and we were good to go. So I thought. Switching to the 100m, and I was off the paper! Way too high as it turns out. I slowly took the dial back down into something resembling a group.
The Hardy Suppressor has made a hell of a difference. Really reduced the sound (obviously) – but also really reduced the amount of kick. A 7mm-08 isn’t the highest recoiling gun in the world, but now it’s getting close to being something I could plink away on all day (though a 22 is still going to be cheaper).
I managed to blow the neoprene cover off the end of the suppressor in one round, which is really just the result of me not paying enough attention between shots to the end of the barrel.
Another point of interest was the massive difference in groups between the Highlander and Norma ammo – you can see it on the photo on the right up top. Left is Highland, right is Norma Nosler. I would be happy to call that weird one on the right group a flyer… ruined a perfectly good group!
As is in my nature, I am making up my own targets – it was interesting to note – the black boxes made it virtually impossible to see impacts. However, the lines worked out well – I have printed them so each line is 1 click on the Z3 – i.e. 1/4 MOA. This means I can essentially look at the impact, and simply count across any required adjustments. It made re-zeroing the scope very easy.
I am still trying to get comfortable behind the rifle. I have just switched from a bag, which was too low for me, to a bipod, but just trying to get my natural point of aim sorted. Nothing that more range time won’t fix, I am sure.
I have just started reading “The Shooters Guide to Rifle Marksmanship” by Peter Lessler – which specifically focuses on practical shooting, already picked up a few points so I am keen to get back out and practise. Has anybody else read his book?
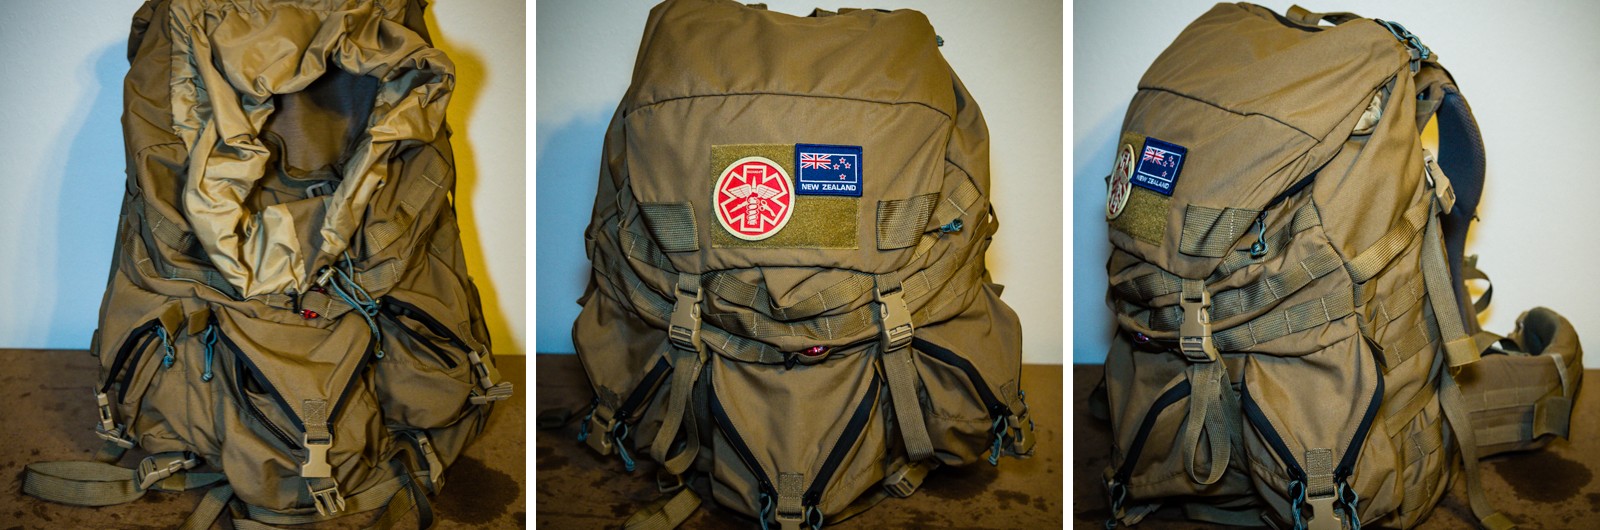
Some of you may remember my earlier article about the Mystery Ranch Crewcab – a great modular pack that fit’s the Mystery NICE Frame system – well – here is another. The Mystery Ranch Mountain Ruck.
While I really love the Crewcab for its versatility, I also wanted a simpler pack for when I just wanted to throw a pile of stuff in a ‘sack’ and carry it. As I always do, I read up heaps online, and came across another of MR’s packs – something that would go onto my existing NICE frame, and give me a simple way of carrying a load. The Mountain Ruck.
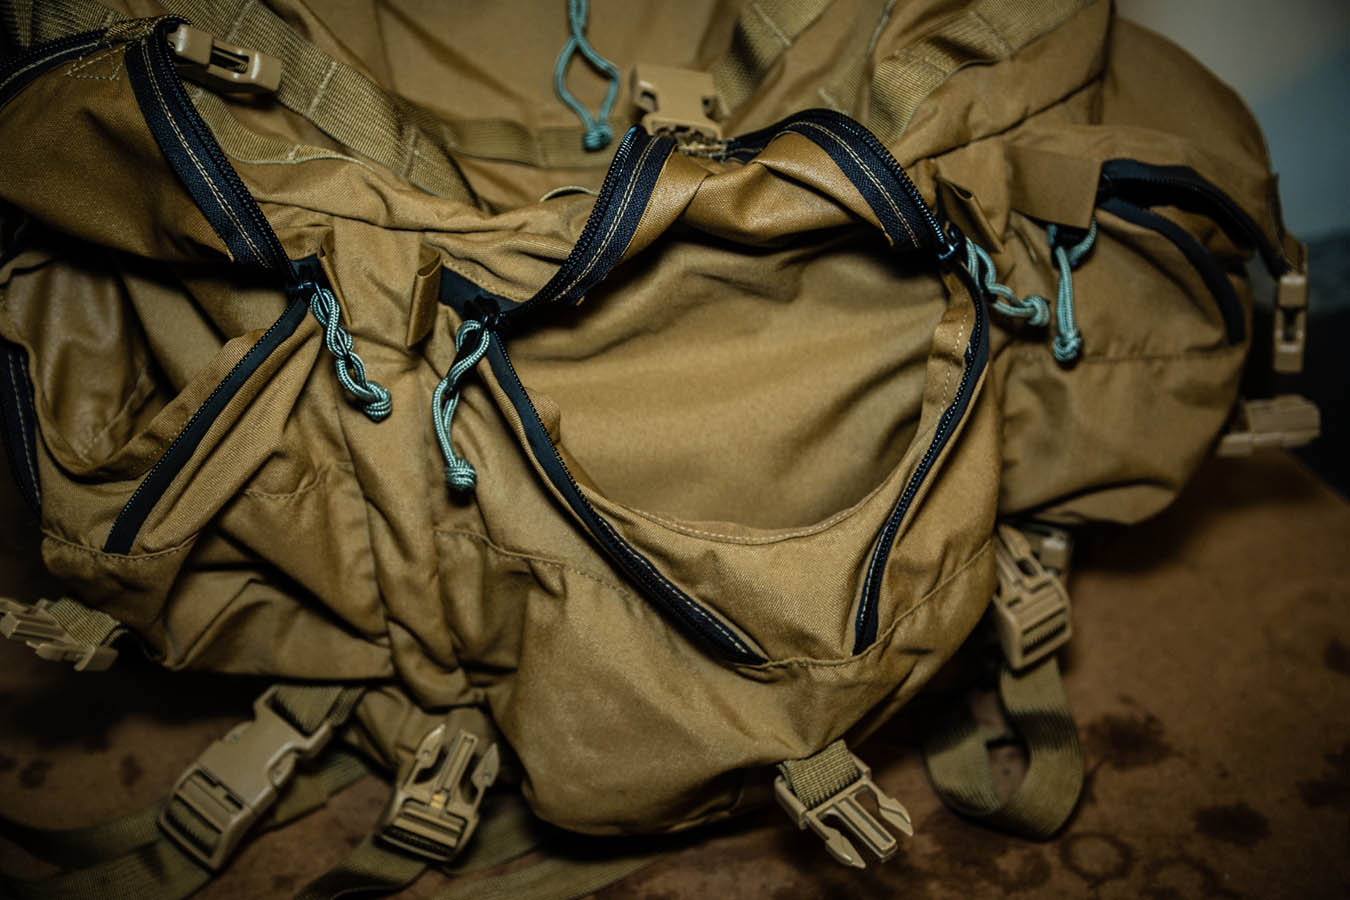
It’s not hard to spot that the Mountain Ruck is heavily influenced by the ALICE Pack, a part of the system the US military used for a long time. It’s pretty simple – one large central pack with multiple external pouches – one large one in the middle, and two smaller ones on either side.
Big pockets, lots of storage.
The smaller external pouches are ideal for those items you want to get hold of quickly – in my case, I am often storing my tarp, cooking gear and lunch in the external pouches. The pouches are MR’s ‘rip’ open type – meaning you can easily get into them, even with gloves on. Nothing is worse than getting to a site in the rain, then having to unpack the bag in the rain, just to get some shelter up. I can dump the pack, grab the tarp out and get some cover up, then worry about anything else.
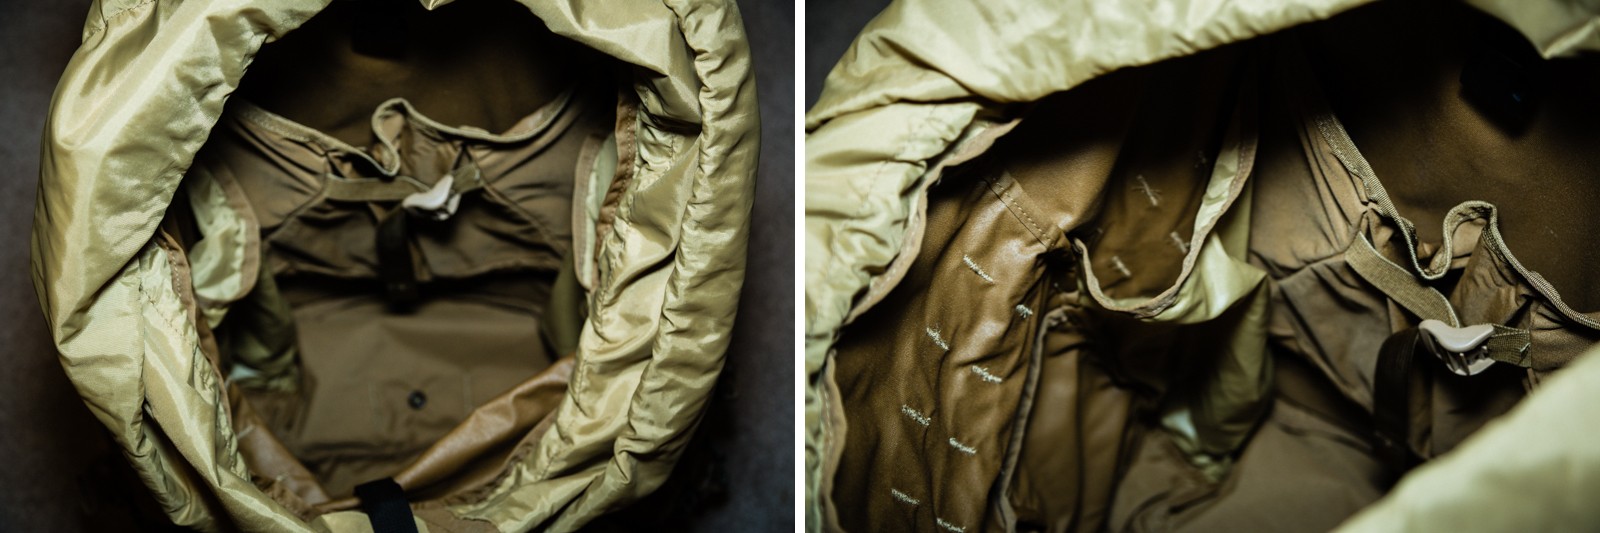
Once I have some shelter up, I can open up the pack to reach the internals – inside the pack are three more pockets – one larger one at the back that will hold a hydration pack (or a radio if in military use) and two side pockets, that I use to hold my hammock bag and often a small tripod.
The main area of the bag is certainly capable of holding more than I am ever going to want to have on my back. The MR site says 4800 cubic inches – which works out to around 78 litres. You have a double ended zip on the top rear of the pack – which is ideal for routing your hydration tube (or radio aerial) out of. On top of that, you have 8 litres in the outside pockets and if you are really hankering for more space, you can clip n the Daypack Lid for another 15 litres again. More than enough.
Of course, me being me, that isn’t – so you can also strap on more pouches to the MOLLE webbing on the pack and the hip belt as well. In my case, this means a IFAK I can tear off, and my Hazard4 Camera pouches for my SLR and Lens.
Because I really needed yet another pack. Honest.
The Mystery Ranch Mountain Ruck has been a very cool addition to my pack options. Did I really need it? No. Not really. The Crew Cab would happily carry as much. But the main thing is the simplicity of this pack. It is really just one large internal space that I can fill up, unlike the transforming Crew Cab, that has piles of carrying options, and a million and one straps to do it. For most plain tramping, the Mountain Ruck is the go-to. Hunting, it’s still all about the expanding Crew Cab.
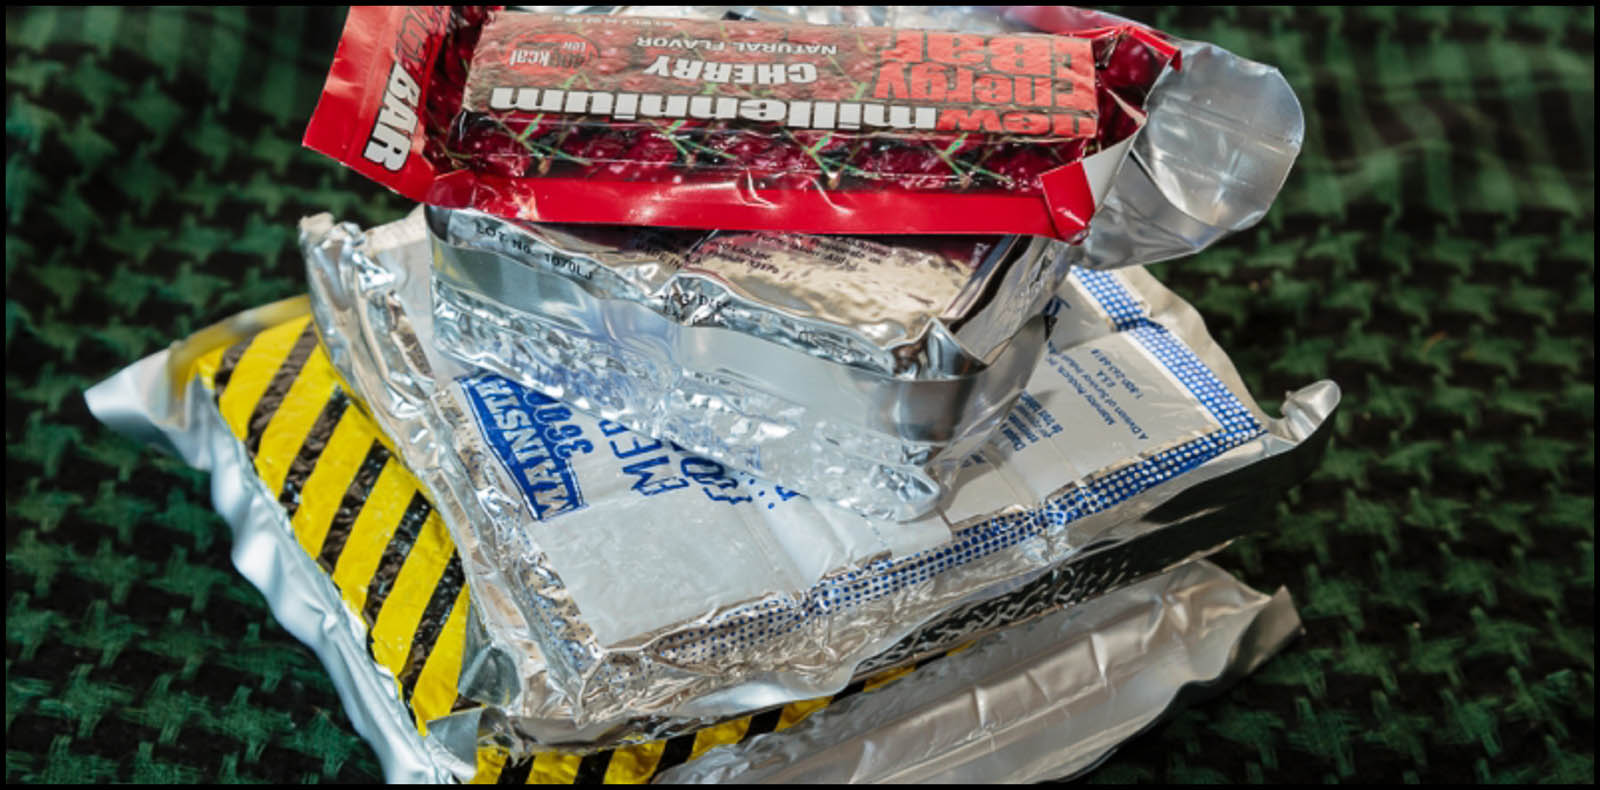
Survival Bars are the common name for foil-packaged, nutrient dense bars made to last for a long time and provide the required caloric food intake in survival situations.
Often, these are what you will find packed in off-the-shelf survival kits.
As a matter of interest, I was keen to compare a couple of options out there, in regards to cost, nutrient profile, and of course, taste…
Background – Survival Bars as Food
Personally, my interest more leans towards the bushcraft and self-reliance, the ability to provide for yourself in this world – more a case of ‘thrive, not just survive’ – but it never hurts to have a plan in place.
I do have a BOB1 that has all the basics in it, including some food – but generally, this food a medium-term lifespan, which then needs to be checked and changed out regularly. Could it be more worthwhile swapping out with some long life (often 5 years) bars?
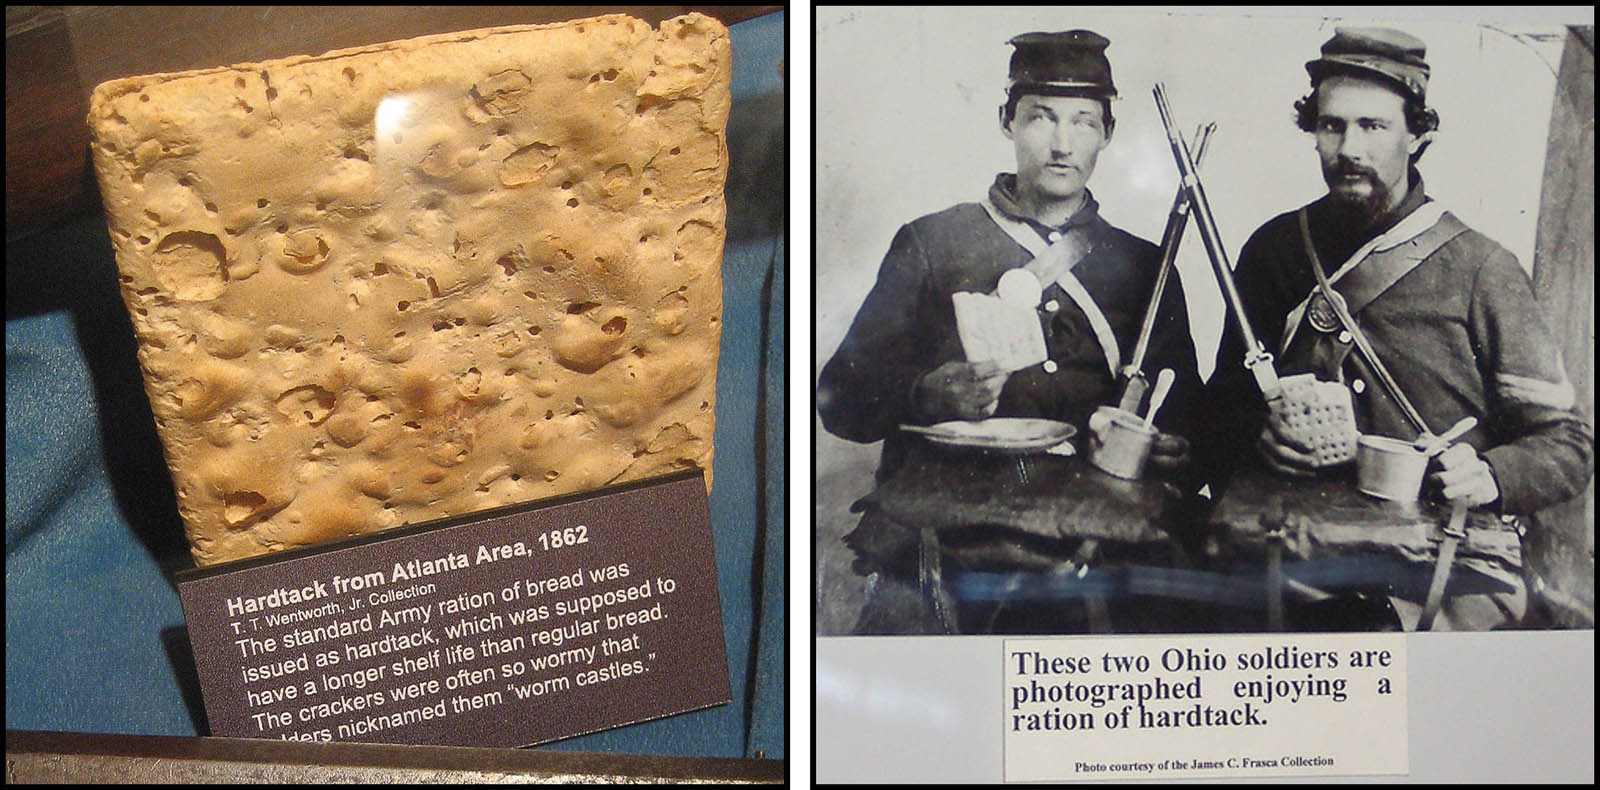
Hardtack dates back to the American Civil War and it is probably safe to say this was an ancestor to modern-day survival bars, essentially it was a flour and oil mixture that was used in military circles to feed soldiers and designed to never go off. Hardtack is basically unleavened bread. Wheat Flour (it’s principle ingredient) contains more than 10% protein, as well as Vitamin B and people can live and have lived for quite a while on only bread and water. Raw flour can be hard for people to digest, but in the form of hard bread, pilot bread or Hardtack – it is edible.
Nutritional Value (and requirements)
Remember the Rule of Three;
Three minutes without air
Three days without water
Three weeks without food
The first question then becomes – do you even need survival food? Or does it become more of a morale issue? Do you think you could, if pressed, actually make it through a couple of days without food? More than likely. However, most of us are used to not going hungry, and the mere thought of missing a meal can induce fear. The reality is though, most of us can live with a significantly reduced calorie intake – some of us may even have a little ‘inbuilt’ reservoir that we can draw from.
One worthwhile thing to note here though is that the rule of 3 is often based on a low caloric output. That is, you are in a situation where you are generally reducing the amount of work you do, even to the point of being stranded in a life raft. If you were still highly active, and burning off the calories then you would need to find food to keep up your energy levels. In that case, these bars may not be enough.
Many of the survival bars get their name from the ‘recommended’ 1200 calories intake per day or 3600 for a 3 day period. The bars are designed to deliver this amount of nutrition in a long life product. These survival bars have the basic building blocks of flour and oil but with vitamins and minerals added to reach the target RDI. Add some flavouring and vacuum seal it in foil. Mmm-mmm good. Much like Mc-Donalds, if read the back of the packet they sound like they are the perfect food.
I put together a quick comparison of the commonly available options below. Personally, I think that if you are at the point that these things are the sole source of your nutrition, they are all going to be much the same.
Most survival bars are advertised as ‘does not require water’. Essentially, this is because of two things – they are both low salt (sodium) and low protein. Salt increases thirst because it alters your blood ‘thickness’. The human body runs within very sticky limits, and if you increase sodium, your body increases your required water intake (thirst) so that it can dilute your blood out until the kidney can process the excess. Protein requires water to break down. Again, because water is used in order to do that, you will get thirsty. However, just because they won’t make you thirsty, doesn’t mean you won’t want some water to make them more palatable, which leads us to…
Tasting – Why it pays NOT to have nice tasting rations
A common complaint online is that these bars aren’t exactly gourmet eating. However, in a survival situation, food is to be rationed. So it actually makes a little sense to not have more-ish tasting bars. However – for a taste comparison – check out the video.
The reality is, if you are getting these bars with a 5-year lifespan just so you can pack them and forget about them, you are being lazy. If you are packing a Survival Bag, you should be regularly going through it and checking its contents, replacing medicines, double checking the contents and generally be maintaining it. Replacing a couple of food bars every year really isn’t that much of an ask.
If you are not fixating on having the term ‘Survival Bar’ on them, another option worth considering is NZ’s One Square Meals. My partner Alice actually ended up ‘surviving’ on these for a couple of days when her gas cooker failed on night one of a 3-day tramp on the Te Araroa Trail. Although it wasn’t exactly survival, Alice essentially ate only the OSM Bars and beef jerky she had. Em’s Power Cookies would be another option to consider. Of course, these bars are going to have a much shorter shelf life.
How about Meal Replacement Bars? Thanks to the fitness industry getting so big and wanting to provide people with the ‘magic formula’ for losing weight by replacing food with laboratory designed nutrition, there is now a plethora of bars and shakes out there designed to replace meals. Go to a muscle/supplement shop and you will be amazed at the options out there. These are all designed to do exactly the same as these survival bars – and will often be even better designed in regards to a high energy expenditure situation. Check the expiry dates on them – but again, most will last a long time.
None of these bars would really be my first choice as food. I can see the point of having them in a go-bag or something where you needed small, and generally unplanned emergency. But the reality is, I won’t be stashing them at home or in the ’emergency food’ packs. Hell – I would go so far as saying that if you found yourself having to rely on these for any major amount of time, your planning has failed, and you are likely to be facing bigger issues.
At home, we have piles of canned food, foil packaged dehydrated food (Ova-Easy Eggs for example) – and a pile of other stuff that will not only fill us up, both in regards to nutrition and also having something the resembles food in our stomachs. My Bug-Out-Bag has some One Square meals in it, some instant oats, and a tea bag. It’s mainly a morale thing.
If I am out hiking or tramping, part of the experience, to me, is cooking a meal – the process and time spent doing it, and the warmth and sense of ‘good’ that it provides – chewing on a bar just wouldn’t do it for me, no matter the weight savings.
‘Bug Out Bag‘ – also known as a 72 hour bag – a kit that has the basics in it, should you suddenly need to vacate your home in case of an emergency. ↩


")