

Each customers requirements are different. Though, we have a few regular requests we have from customers. Often, they want someone to confirm the zero on a rifle, and provide some ballistic data for them as well.
We receive rifles in parts (i.e. scope not mounted) – through to rifles that customers have been using for years, but just keen to confirm and check before heading away on a bit trip.
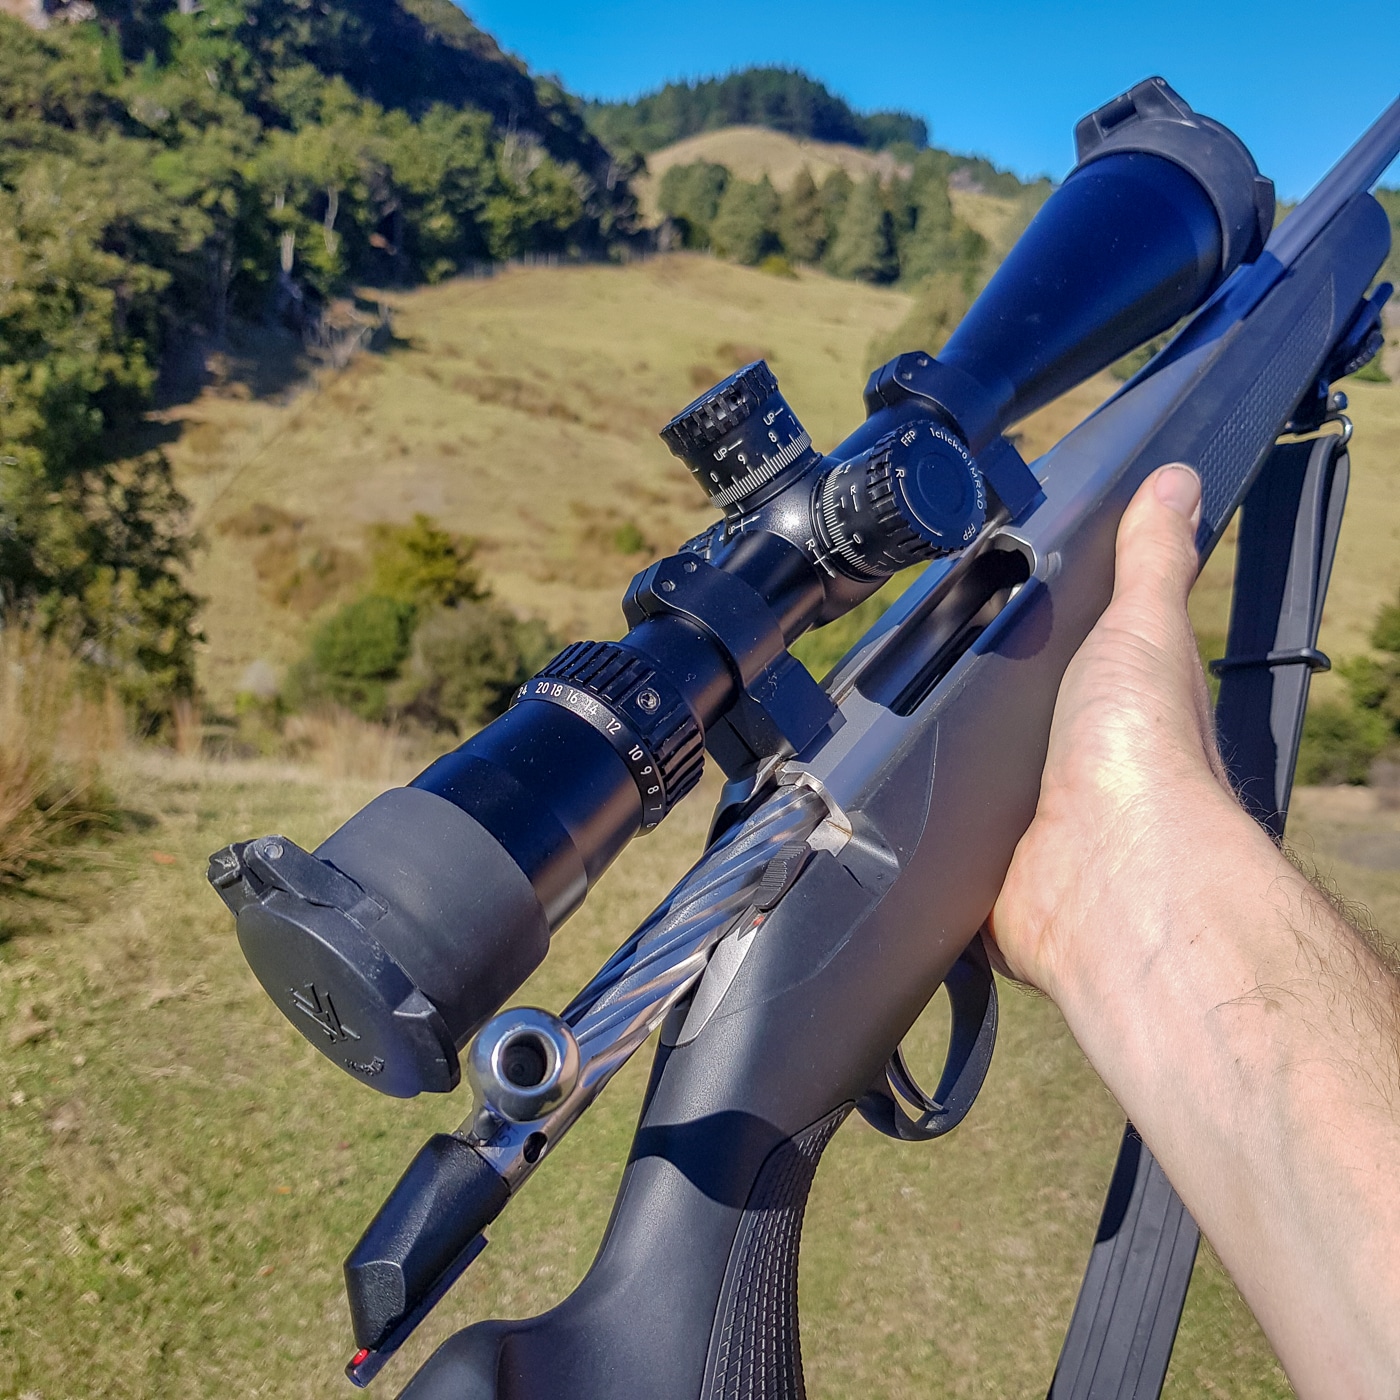
This particular rifle was the customers primary hunting rifle, and, while they had already mounted the scope (a rather nice Nikon FX1000, more about that separately) they wanted to have the zero confirmed, and wanted me to chronograph and develop some ballistic tables for them. They are using factory ammo – and essentially wanted to get some more accurate information, beyond the ‘box’ info.
I picked up the rifle and headed out to Balnagown Hunting – a private game estate in Auckland that we are also able to do some shooting on.
Conditions and Data
When setting up a customers rifle, I tend to gather as much information as I can, some of it won’t be used, but, it’s good to have and it all gets kept on file, should we need to refer back to it someday.
I quickly confirmed the rifle and scope were level and that the screws were torqued correctly. If we have the customer there, we then set the scope up to them – but – as this customer just had me take the rifle away – I left the eye relief as is (there is no point just setting it up for me) and proceeded to check the zero.
All of the shooting for the day was done ‘through’ the Labradar Chronograph – I have found there can be a wide difference in velocities when it comes to factory ammo – both within the same box and across different batches. I had been given a couple of boxes of ammo from the customer, and, since they were continuing to use this ammo, shot a variety of round out of all of them.
Noting down the environmental conditions throughout the day, we captured not only the zero but also the conditions the rifle was zeroed in. This becomes particularly important when a rifle set up in, say, Auckland, heads down to the South Island for some mountain hunting. Different temperatures and altitude will affect the POI, and this becomes even more important when hunting to further out distances. It may only be a click or two, but in precision, it counts.
Zero
I much prefer to have a customer zero their own rifle. There is a variety of reasons for this.
Firstly, I feel a zero should represent the system, not just the rifle. Hence, I don’t like the idea of zero’ing a rifle on lead sleds or the like. Sure – it gives you a ‘mechanical’ zero – but unless you plan on taking the sled/rests out into the field with you, it’s not a true ‘zero’ in that, when YOU shoot it, it wont be shooting the same as it did on the range. Therefore, I suggest to people that the zero their rifle in as close to the same setup as they would when hunting/competiting.
Sure, you might say – but I will get better groups shooting off a captive rest front and rear.
Well, maybe, but that’s also then giving you a false impression of how well you can shoot that rifle. That can lead to overconfidence, which, ultimately, could lead to you taking a shot you shouldn’t have and wounding an animal. Sorry. No ego boosting group photos around here. Keep it honest.
Also, being left-handed, I tend to know that I am likely one click to the left, compared to a right-handed shooter, or, they are one click to the right compared to me.
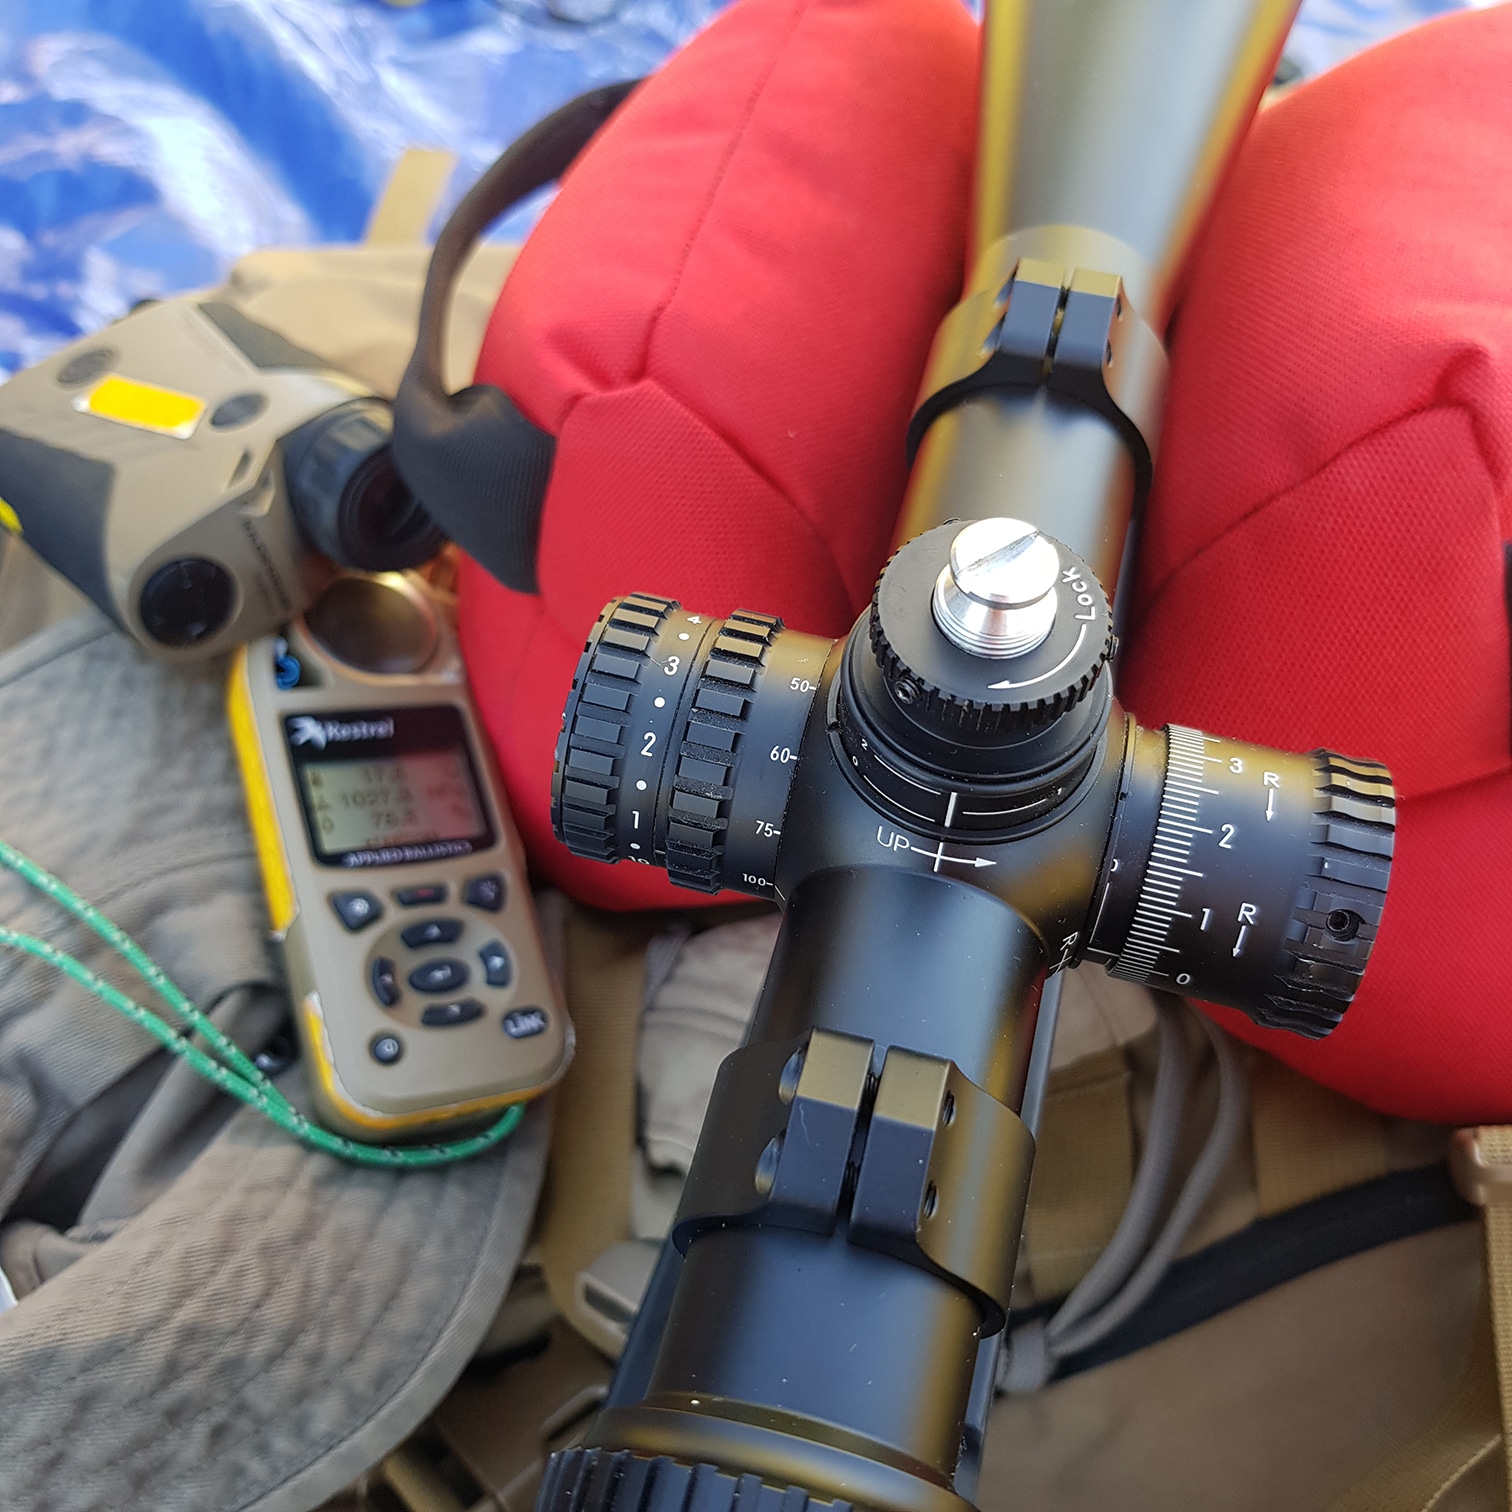
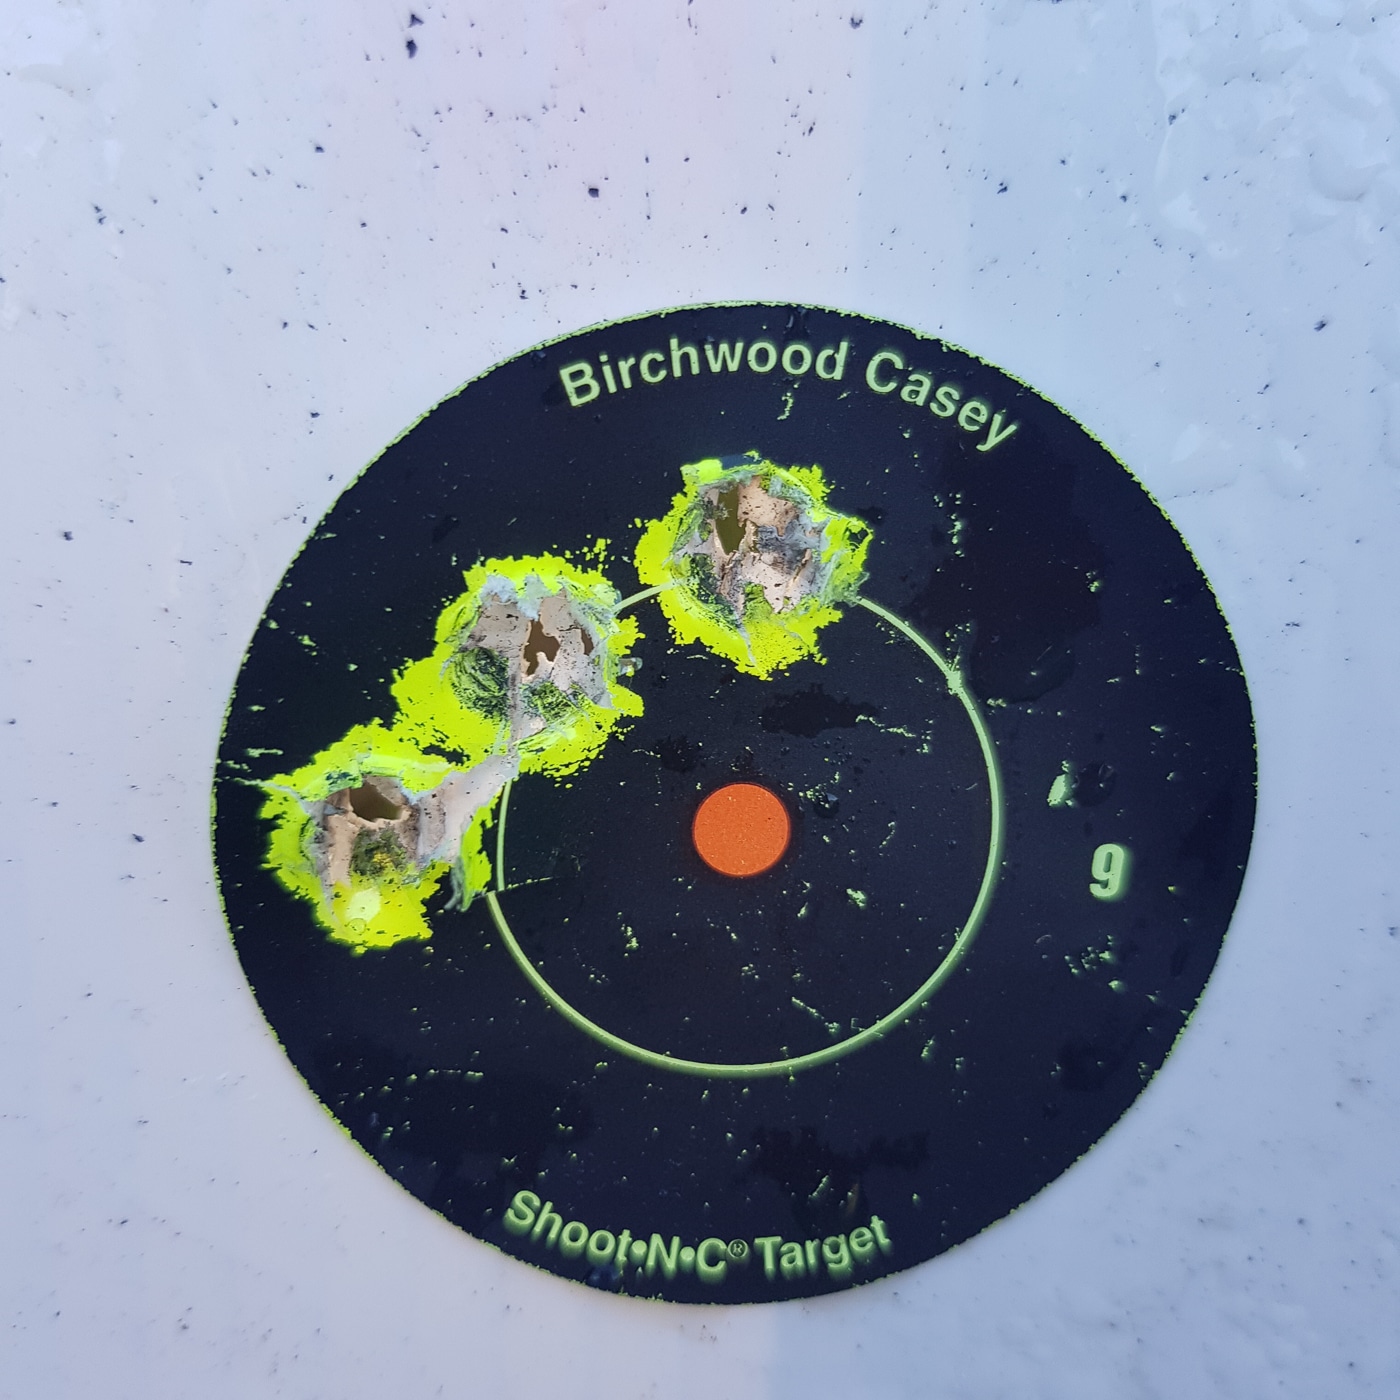
In this case, after an initial group, an adjustment (photo) I decided to come down one click more but left the one click to the right off – the owner is right-handed.

Final zero was set to 100 meters, but, the customer had discussed his preference for a 150-meter ‘walking zero’. A discussion around this basically came down do an ‘observational’ point blank range zero function, so, in order to make use of the scope (and the ballistic charts) I zeroed the rifle to 100 meters, but, included a sticker right next to the elevation turret so he can quickly go from the ‘range’ zero to ‘walking’ zero and back again. In addition, I included a calculated point blank zero adjustments for him as well.
I often find, but talking things through with a client, you find out more about their thinking and can offer alternative suggestions improving on what they are already doing. It’s not about having one right way to do things, it’s about understanding their thinking and their existing methodologies and working in with them.
Chrono
Surprise, surprise (well, not really) the box velocity out of a different gun was different from the customer’s actual velocity.
While not huge, there was about a 50fps difference (lower) than what it said on the box. At distance, with a ballistic chart, that would have equated to a low shot.
In the end, we put 20 rounds (high because the average velocity was the focus for the setup) over a chronograph. Interestingly, the SD was around 14fps – which – over a couple of boxes of factory ammo, was actually surprisingly low. I have seen much worse out of what would be considered ‘better’ ammo from the same company.
Ballistic Tables and Report

Part of the process was producing a set of ballistic tables for the customer.
This includes a basic ‘drop chart’ and more comprehensive chart with wind corrections and a comprehensive report that also includes a quick reference for differing atmospheric conditions including temperature and air pressure.
In addition, we put together a report about what we did, with some tips and tricks on how to get the most out of the firearm.
Thanks for sorting out the ballistics on my rifle mate. A job well done!