Home Blog Page 32

Magnetic Declination – Compass Adjustments

0

Did you know there are ‘three’ Norths?


Magnetic Declination – What is it?

On this beautiful planet of ours, we have the Geographic North Pole (where Santa lives), Magnetic North Pole – which is where a magnetised compass needle will point towards and for some maps, Grid North. The difference between these two points is referred to Magnetic Declination, or often, just Declination.

TOPO50 maps are created utilising Grid North. Compasses point to the Magnetic North Pole. This can be a 20-degree difference.

See a potential issue here?

To complicate matters, the Magnetic North changes, dependant both on where you are, and when you are. Mainly, Magnetic North is determined by the earth’s molten outer core. Localised magnetics rocks, kilometres beneath can affect things, but primarily, it’s the magma that determines where the compass needle points. Being molten, it shifts over time, and as a result, the Magnetic Declination is also always changing.

Luckily, on all of LINZ’s Topo50 maps in current production, the Magnetic Declination is clearly marked on the bottom of each map. NOTE: This declination varies from map to map, location to location – for example – in Auckland you are going to have around 21 deg and Wellington is going to be closer to 24. It might not ‘seem’ that much difference – but over a distance, a couple of degrees quickly adds up.

Magnetic Declination – How to compensate

Now that we know that the map we have in our hands is using a different reference for north than our compass is, how do we translate between the two?

Mostly, you will need to take the difference indicated from Geographic North (generally referred to as ‘grid’ north) and magnetic north. But do we add or subtract from our figure?

An easy way to remember is this – if you are taking a bearing ‘off’ the map – you take the number off to get declination. If you are putting a bearing you have made with your compass ‘onto’ the map – you add the figure.

  • Off = subtract
  • On = Add

For example – according to your Topo50 map (indicating a 22.5 deg declination like above) you need to be heading from your current position at a bearing of 46°. Take the 46, subtract 22.5 (taking a measurement off the map) and you have a magnetic bearing of 23.5°.

Alternatively – taking a bearing of 98° off an identifiable mountain in the difference, we add 22.5 (putting it ‘on’ a map) to give us a grid bearing of 120.5°.

Magnetic Declination – is there an easier way?

Why yes. There is! Instead of having to add or subtract declination each time you convert from grid to magnetic or vice versa when using the compass and putting ‘the red in the shed’, aim the compass needle to the declination required on the outer ring of the bezel.

So, in the example above, you take a grid bearing of 46° Grid, twist the bezel on your compass so the direction of travel indicator is 46°, then turn yourself until the red compass needle is pointing to 22.5°.

Even easier? Get a compass with Declination Adjustment on it. Some of the higher end compasses will have the ability to rotate the outer part of the bezel, usually with the use of a small screwdriver, to permanently ‘dial in’ an areas Declination Adjustment. This means that you simply take the bearing off the map in the usual way, put the ‘red in the shed’, and go.

Caveat: We are discussing several different ways to achieve the same thing. The potential for confusion in communication arises because not everyone does things the same way. It is vitally important then, then whenever you give a bearing out, that you follow it with either ‘grid’ – meaning you have taken it off the map, or ‘magnetic’ meaning you have taken it off the compass.

37° Grid and 37° Magnetic could lead you in two very different directions.

Further Reading

Declination around New Zealand 

My top ten (plus 4) Bushcraft Essentials

0

It’s really easy to load yourself up to the point where you struggle to lift the pack anymore. But what are the Bushcraft Essentials, what do you really need as a bare minimum?

I have certainly been guilty of this, especially when I want to take all my camera gear out with me.

There are many such lists out there – ranging from the 10C’s of Survivability to all manner of lists.

My list goes a little beyond the ‘bare essentials’ required to survive. But in my opinion, the more important ones are up the top.

My Bushcraft Essentials:

  1. The knife – many things can be made with a good cutting tool. The general consensus is that a fixed blade knife will give you more strength and a wider range of abilities than a small pocket knife. I will generally carry my larger SVORD on my hip, and my Victorinox Pocket knife in my pocket (the Victorinox Pioneer is nearly permanently in my pocket as part of my EDC).
  2. A simple level 1 first aid kit – a system small enough to permanently carry in your pocket. I carry a small zip-lock bag with some painkillers, antihistamines (or your own personal medication), sticking plasters, alcohol wipes and a large wound dressing (gauze with a bandage attached). I carry a larger, more capable kit on the pack, but this smaller one lives permanently in a pocket.
  3. A tarp/shelter sheet/poncho… Something that you can rig up to provide a bit of shelter, should you need to. Yes, you can always build a debris shelter, but why not make things a bit easier on yourself? I carry the Pathfinder Poncho as a multi-use item.
  4. Cordage. Some people prefer Paracord because it can be stripped down and the internal lines used, others prefer Bank Line, but essentially, something that you can use to tie things up down or sideways. Always carry extra – yes you can make cordage out of items in the bush, but again, why not make things a little bit easier on yourself?
  5. A PLB. The theory being (which tends to get back up by reality) that a PLB (personal locator beacon) will get you located and picked up with hours of setting it off. Why don’t you carry one again?
  6. A  canteen and nesting metal cup… something to carry water in, and something to boil water in. Ideally, you should also have something to store the clean water in. I tend to carry a roll-up plastic water bag, my Titanium Mug and a water bottle.
  7. SureFire. Carry a method of guaranteed fire starting. I always carry lighter, and for 99% of the time – that, and some tinder (some Esbit Fuel cubes) is all I am going to need. As a backup – I will have Fire steel & some Vaseline-soaked Cotton Wool buds.
  8. A Compass… and learn how to use it. Button Compasses are small, light, and a pain to use. Get something decent. Ideally with a mirror in it – then you can use the mirror for signalling as well. My pick – the Sylva Expedition S.
  9. A Light source… I generally carry two – a headlamp, and a small torch in my pocket. In my case – it’s actually 2 of the 4Sevens Mini 123’s – one with a
    Fenix Headband holding it. Also – carry spare batteries.
  10. A heavier cutting device. This could be a folding saw (lightest option), or potentially an axe or Machete (or my SVORD Golok). This is used for wood processing. While your main knife should be able to cut a lot down and can be used for Batoning if you need – something a little bigger will save you a lot of time and energy.
  11. Some food. I always carry something with me – beyond my planned food. In my case, it’s a ‘One Square Meal’, a coffee sachet (mainly for comfort) and a pack of instant porridge. A little bit of nourishment, but a lot of a morale booster.
  12. A Whistle… it’s a lot easier blowing into a whistle than trying to continuously yell for help.
  13. Gloves. Protect one of your most valuable assets – your hands.
  14. Notebook, reference books – not really essential – but great for learning. I carry a couple of mini-guides, while I am still learning how to identify the flora and fauna of NZ.
I plan on doing some more in depth reviews/articles on specifics of what I carry in the next couple of weeks – this is really just a good overview for the subject.

Great video from one of the experts – Dave Canterbury

[fvplayer src=”http://www.youtube.com/v/RPjGIheVi4w”]

The rule of three – Survival Priorities

0

While it’s important to have the proper equipment on you when the need arises, it’s even more important to know how this equipment fits within the Survival Priorities that arise in a survival situation.

 As a simple guide, the rule of three lets you put your needs in order of importance. And they are:

Survival Priorities 1 – 3 seconds without blood, 3 minutes without oxygen

Meaning – your first priority is first aid. If you are about to bleed out, go into serious shock, or drawn, all other survival aspects are moot. As you will be dead. Of all the Survival Priorities, this is your first.

First and foremost, sort out your personal well-being – stabilise yourself. If you are seriously cold, or hot – then you need to stabilise your temperature – this could mean wrapping up, getting a fire going, but ultimately it means shelter –

3 hours unprotected in cold or heat

You are going to die of exposure, way before you die of thirst or hunger – once you have dealt with any serious first aid issues, you need to get yourself somewhere the protects you from the weather – this could be cover from the rain and wind, or even finding some suitable shade from the sun, depending where you are geographically. Hyper and Hypothermia are equally dangerous. Get some shelter. This could be a natural feature (if you are lucky) – or it could be something you need to construct with available materials – it’s at this point having some basics like an emergency blanket, or even better, a small tarp or poncho is going to come in handy.

3 days without water

Longer than people often think. However – also important to note that this is going to be highly dependant on where you are, and how much exercise (and therefore sweating) you are going to be doing. Obviously, if you are losing lots of water (think sweat, urine, vomiting) then this level increases in importance – however – what is important to note – is that water is more important than food.

3 weeks without food

Despite the fear that we are going to go hungry when it comes to Survival Priorities, most of us can/could live on a severely reduced calorie intake. Therefore, food actually comes quite low from a survival standpoint. Most times you are likely to be in a survival situation for a matter of days max – which is plenty of time to organise shelter, water and a method of purifying it (fire). Once all of that is sorted, then, you can get all Bear Grylls on it and start looking for weird things to eat. Remember though – not everything out there wants to be eaten – and poisoning is going to end things a lot quicker than starvation is. So don’t eat it if you can’t identify it.

Signalling

One important factor that should be considered once the basics are tucked away is signalling.

It is all very well being tucked up nice and cosy in a debris shelter with a stash of water and food, but why not also make it easy for your potential rescuers to find you?

The key idea in regards to survival rescuing is creating something that doesn’t seem natural – that is – something that is going to stick out in the environment you are in. Combine these features – eg, colours and movement – stick the hi-vis clothing on top of a tall stick that will be blown about in the wind – it compounds its attention drawing potential.

Key ideas would be:

  • Firstly, set off your PLB – you do have a PLB on you, don’t you?
  • Signal Mirrors – ideal for signalling mirrors – also remember – the mirror in a sighting compass can be used, anything shiny.
  • At night, lightsticks, as well as the beacon / SOS, feature now on many torches will highlight your position – just make sure it isn’t covered – i.e. under the shelter with you!
  • Whistles – especially if you know searchers are close, a whistle is a lot easier than having to yell constantly.
  • Your survival blanket or hi-vis clothing should be display predominately – fluro doesn’t exist in nature (much) so will stand out.
  • Fire! Consider a signalling fire – even a campfire is going to help in many situations.

SOS Survival Training Overnight Course

0

It’s nice to know, that IF something should go wrong in the great outdoors (and there is plenty that can) – I have the survival training to be able to make do with what is presented to me.

With this in mind, I have been keen for quite a while now to do a survival course – and the opportunity recently presented itself thanks to Stu at SOS Survival Training.

The course

Stu offers an overnight survival training course, where:

“You will receive professional training that develops your ability to survive in the NZ bush, using only the resources nature provides and your own resourcefulness.

You will be led through step-by-step the process of building natural shelters, how to light fires, collecting and purifying water, making traps and snares and preparing wild game for cooking.

When the training time is up you will spend the night on your own or in a pair under a natural shelter you constructed earlier in the day. You will be expected to maintain your survival fire throughout the night.

This realistic survival scenario will be achieved will minimum equipment to test your new-found skills.

This program is not designed to test physical toughness, but to increase your knowledge through experience.”

Stu spent nineteen years in the Royal New Zealand Air Force where he became the Senior Instructor of the RNZAF Survival Training Center  responsible for  training staff in survival training for RNZAF Flight crew personnel. With a pile of other experiences and knowledge under his belt, he is extremely well qualified to provide survive training in the bush.

untitled (5 of 5)

Our party of four, consisting of 3 participants; Jeremy and Joe (two arborists), myself (weekend warrior) and Stu. We met up out towards Kumeu where Stu has a large amount of bush terrain available for conducting the survival training. We headed down to a semi-permanent tee-pee structure when he explained what we could expect for the weekend.

We were presented with our survival gear – part of the challenge was making do with somewhat minimal equipment. A belt which would carry our survival knife, canteen and cup, and basic survival kit, which included fire making tools, survival blanket, paracord and a poncho. In addition we were issued a map, which was to be used for the navigation section on the second day. No tents, no sleeping bags, certainly no gas cooker and french press.

Off we head

With our kit sorted, Stu lead us down the path to an area where he demonstrated the basics of creating a natural shelter, also known as a debris shelter. This is what we were going to be building ourselves, and sleeping in.

After a bit of practice, we headed off into the area where we would actually be staying for the evening, all along the way, Stu was pointing out useful plants and trees, and generally imparting some of this gained knowledge. As a bonus, having Jeremy and Joe along (both arborists), a pile of information regarding New Zealand’s trees was delivered.

Upon arriving at our destination, we first had a lesson on fire building. My one tip – dry tinder! Despite Stu actually telling us to collect and try to dry some tinder while we headed towards our spot, he was the only one to actually do so – this meant getting a fire going using only gathered materials and a fire-steel was very difficult, and I resorted to a Vaseline soaked cotton wool bud out of the survival kit. Processing firewood (my Svord 370BB fairing very well with batoning), getting everything ready and getting it lit was all covered.

Once that was done, we all went off in our own directions to create our shelters for the night. In hindsight, I built mine in a bit of a low spot  but I was close to a lot of debris and resources, so didn’t have to walk far to gather everything I needed. After a couple of hours of building, and collecting firewood, we rejoined to talk about food.

Or, more correctly, trying to catch food.

In a survival situation, food is actually not at the top of the list of priorities. However, once you have first aid, shelter, fire, signaling and water sorted, its not a bad idea to think about what you are going to eat. In our case of survival training – it was trying to catch something – creating some snares and nets.

untitled (4 of 5)

A bit more time gathering firewood (it takes more wood than you would expect to keep warm all night), and it was nighttime – so we headed off to a nearby stream to see what we could catch for dinner. Stu pointed out that the required snares to catch ratio was something like 30:1, meaning in a true situation, you need to put out a lot of traps and effort, to often catch very little.

An, entertaining, if not overly fruitful expedition later, we returned to camp, ate our catch (a couple of Freshwater-Crays), and headed back to our shelters to light the fires and try to get some sleep.

Sleep. Kinda.

Well, essentially, the night was spent worrying the fire was going to go out, drifting off, then waking back up when the fire nearly did go out, and you started getting cold.

Interestingly, I didn’t find the ground all the much uncomfortable, I attribute that to sleeping on a futon most the time, however, my feet did get cold. At that is what kept waking me up. However, the fire did it’s job, and waking up particularly cold at 4am in the morning, I brewed myself a nice hot cup of water, and snatched another half hour of sleep.

Dawn came, and surprisingly, I felt relatively OK. I had survived a night in the bush without my warm down sleeping bag!

We all gathered at the main camp, discussed our night, and were already planning improvements to our shelters!

After dousing the fires well, and saying goodbye to our shelters, we headed off, ready for the next part of our Survival Training – navigation.

I have already done some navigation training – but this was a great change to practice, and we were presented with a great challenge – leapfrog bearing navigation, through some ridiculously thick New Zealand Bush. Think along the lines of so much supplejack that you end up crawling through a web of it. We took turns heading out, waiting for the person with the compass to tell us if we were heading the right way, then leapfrogging to make progress. After quite a bush-bashing mission, we actually managed to get relatively close to our intended position – our initial camp.

We headed back to the tee-pee, where Stu gave us a quick debriefing, then a quick demonstration on building a signalling fire, and a solar still.

With our heads full of information, and fairly tired bodies, we headed back to the truck, and out of the bush.

We survived!

untitled (3 of 5)

I think, for me, the greatest aspect of it all was being able to practice some of the theory that I have read, in a safe, monitored Survival Training situation. Despite being surrounded by bush, and therefore immersed in the scenario, I came away with the feeling that Stu had also been keeping a good eye on everyone, right through the night. It was good to be able to put some of my learnt theory into practice – and I already want to get back out there to do it again.

For this trip – I left the camera at home – as I wanted to primarily participate, rather than stand back and take photos – but I will be heading back out sometime soon to take a pile of snaps and video – trying to capture some of the wealth of knowledge that Stu has to share on survival training.

What Beer is that? – The Beginnings: Ale & Lager

0

What Beer is that? – The Beginnings: Ale & Lager

I thought I would start to put together a couple of articles describing the differing options when it comes to Beer.

A lifetime ago, the staples would have been Red, Brown or Gold, then we started getting fancy. Ice, Valima, mystery flagons of brown liquid, then over time we get older and it becomes Corona’s with a Lemon in the neck, Pure’s (common, I am a Aucklander) and at some point I realised I didn’t really like the taste of most beer and switched over to the Wheat Beers.

However, if you are into your beer, then now is one of the best times to be around. I get confused. So to reduce the amount of time I spend looking slightly confused at a wall of craft (and faux craft) beers at the store, I thought I would read up on the varieties and what they mean.

Before I get into the subtleties – lets start with the basics – Ale and Lagers.

All beers are made as ales or lagers; ale and lager are the two main branches (classifications) of the beer family tree and are closely related branches at that. Ales are the older, distinguished, traditional brews of the world, predating lagers by thousands of years, whereas lagers are a relatively modern creation, less than 200 years old.

The branch of the beer family tree — ale or lager — corresponds to the type of yeast used to ferment the beer. You have ale yeast and lager yeast, and these types of yeast, in turn, typically dictate the temperature at which the beer is fermented. Ales are traditionally fermented at warmer temperatures, while lagers are typically fermented at cooler temperatures.

The cooler fermentation and aging temperatures used with lager yeast slow down the yeast activity and require a longer maturation time. The cold environment inhibits the production of fruity aromas (called esters) and other fermentation byproducts common in ales. This process creates the lager’s cleaner taste. Long aging (or lagering) also acts to mellow the beer.

Ales

Brewed with top fermenting yeast at cellar temperature, ales are fuller-bodied, with nuances of fruit or spice and a pleasantly hoppy finish. Generally robust and complex with a variety of fruit and malt aromas, ales come in many varieties. They could include Bitters, Milds, Abbey Ales, Pale Ales, Nut Browns, etc.

Ales are often darker than lagers, ranging from rich gold to reddish amber. Top fermenting, and more hops in the wort gives these beers a distinctive fruitfulness, acidity and pleasantly bitter seasoning. Ales have a more assertive, individual personality than lager, though their alcoholic strength is the same.

You can say that ales generally

  • Include more robust-tasting beers

  • Tend to be fruity and aromatic

  • Include more bitter beers

  • Have a pronounced, complex taste and aroma

  • Are enjoyed warmer


Lagers

Lager originates from the German word lagern which means ‘to store’ – it refers to the method of storing it for several months in near-freezing temperatures. Crisp and refreshing with a smooth finish from longer aging, lagers are the world’s most popular beer (this includes pilseners).

A lager, which can range from sweet to bitter and pale to black, is usually used to describe bottom-fermented brews of Dutch, German, and Czech styles. Most, however, are a pale to medium colour, have high carbonation, and a medium to high hop flavour.

You can say that lagers generally

  • Include lighter-tasting beers

  • Tend to be highly carbonated or crisp

  • Tend to be smooth and mellow

  • Have a subtle, clean, balanced taste and aroma

  • Are served fairly cool

Shooting Hearing Protection

0
Safety gear, including safety glasses and hearing protection, rest on a bench near the shooting range during a Skeet and Trap shoot at Joint Base Charleston - Air Base, S.C., July 11, 2012. The Airmen participated in a Skeet and Trap shoot for the Single Airmen Initiative Program which aims to build camaraderie among Airmen and leadership and increase communication and understanding. (U.S. Air Force photo by Airman 1st Class George Goslin/Released)

What level of protection do I need?

As much as you can get. To be blunt. Part of Firearms Safety is also wearing appropriate PPE1 when required.

By law

The Health and Safety in Employment Regulations 1995 requires that no employee is exposed to noise above the
following levels:

  • LAeq8h of 85dB(A); and
  • LPeak of 140dB

LAeq8h85dB(A) means the level of daily noise exposure normalised to the average eight-hour working day. Noise level exposure must not exceed the A-weighted sound energy of 85 decibels over an eight-hour period.

A-weighted sound energy measurements ensure that the testing equipment reflects how humans hear noise.

LPeak140dB is the highest frequency unweighted (pure sound) peak sound pressure level. Any noise, even if it is for a short time, must not exceed 140dB because this can cause instantaneous hearing damage.

Now, we are technically not ’employees’ when shooting2 – but it’s an interesting thing to note – that we could never be exposed to the noise levels at work, that some shooters voluntarily expose themselves to during recreation.

But how loud is a firearm?

Obviously, this depends a lot on the particular firearm – a suppressed 7mm08 is very different to a braked .50 cal.

Heres the important bit – regardless – exposure to noise greater than 140 dB can permanently damage hearing. Almost all firearms create noise that is over the 140-dB level. A small .22-caliber rifle can produce noise around 140 dB, while big-bore rifles and pistols can produce sound over 160 dB.

Firing guns in a place where sounds can reverberate, or bounce off walls and other structures (i.e a range), can make noises louder and increase the risk of hearing loss. Also, muzzle brakes or other modifications can make the firearm louder.

If you are assessing noise levels, remember that the decibel scale is logarithmic, which means every increase of 3 dB doubles the sound level, and at that level it will take only half as long to damage your hearing.

People who do not wear hearing protection while shooting can suffer a severe hearing loss with as little as one shot if the conditions are right.

A list of firearm volume levels

With a few highlights –

FirearmdB SPLpk
Colt AR-15 – 5.56 X 45mm (.223)158.9
Ruger 10/22143.4
Glock 17 9mm163
Remington 870 12 Gauge159.7
Winchester Model 70 7mm Mag166.5

So. Loud. Understanding that guns are loud – how do I now protect my hearing?

Earplugs, earmuffs

Earplugs, earmuffs, hearing protection all work in a similar manner – they cover (or fill) the ear canals and reduce the amount of sound that can enter the ear, protecting the fragile bones and structures within.

However, there is a wide, wide range of hearing protection out there – much of which isn’t actually suitable for shooting.

So – how do we tell if what we have is enough? Simple. Check its rating.

All hearing protection in NZ should come with a rating marked on it. Not saying it all does, but it should.

The problem is, even the highest rated protection, likely still isn’t enough.

How does the rating system work?

Noise LevelClassSLC80 dB Reduction Range
Less than 90 decibels110 – 13
 90 to less than 95 dB214 – 17
95 to less than 100 dB318 – 21
100 to less than 105 dB422 – 25
105 to less than 110 dB526+

Here is the rub. Not even a Class Five (the highest level of hearing protection) really brings the noise levels down to what would be considered ‘safe’ levels – and – the other issue is, a lot of the exposure levels are based around exposure over time, not the peak impulse that we experience with a gunshot.

In short. Nothing under class five is really worth considering – and even then, you might want to double plug.

How about combining earplugs and earmuffs?

Sound is a little tricky. So is attenuation. You don’t get to just add the reduction of both the muffs and the plugs if wearing both.

However, as a general rule, earplugs will add another 3-5 db reduction to the muffs ratings.

I personally have both.

But, what about hunting? Or. Is a suppressor enough?

Its only one shot though!

No. Wrong wrong wrong – the damage is permanent. And cumulative. Even though that ringing goes away – you still have damaged your hearing at some level. So that ‘occasional’ shot you take a couple of times a year hunting – really is doing you damage in the long term. Stop kidding yourself!


  1. personal protective equipment 

  2. though some of us actually are 

My Mighty Garmin Fenix 3 Review

0

The Backstory

To get you up to speed – I would suggest you pop over and read a couple of posts…

  1. http://gearlocker.nz/practising-navigation-garmin-tactix/
  2. http://gearlocker.nz/scratched-already-watch-faces/
  3. http://gearlocker.nz/an-update-on-the-garmin-tactix/

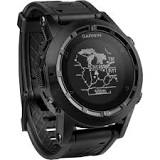
Essentially, after my rant about the failings of the Garmin Tactix and some discussions with the guys at Garmin, they suggested that I return the Tactix and in exchange, they would send out a new Fenix 3 for me to try out and compare.

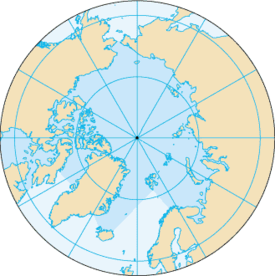
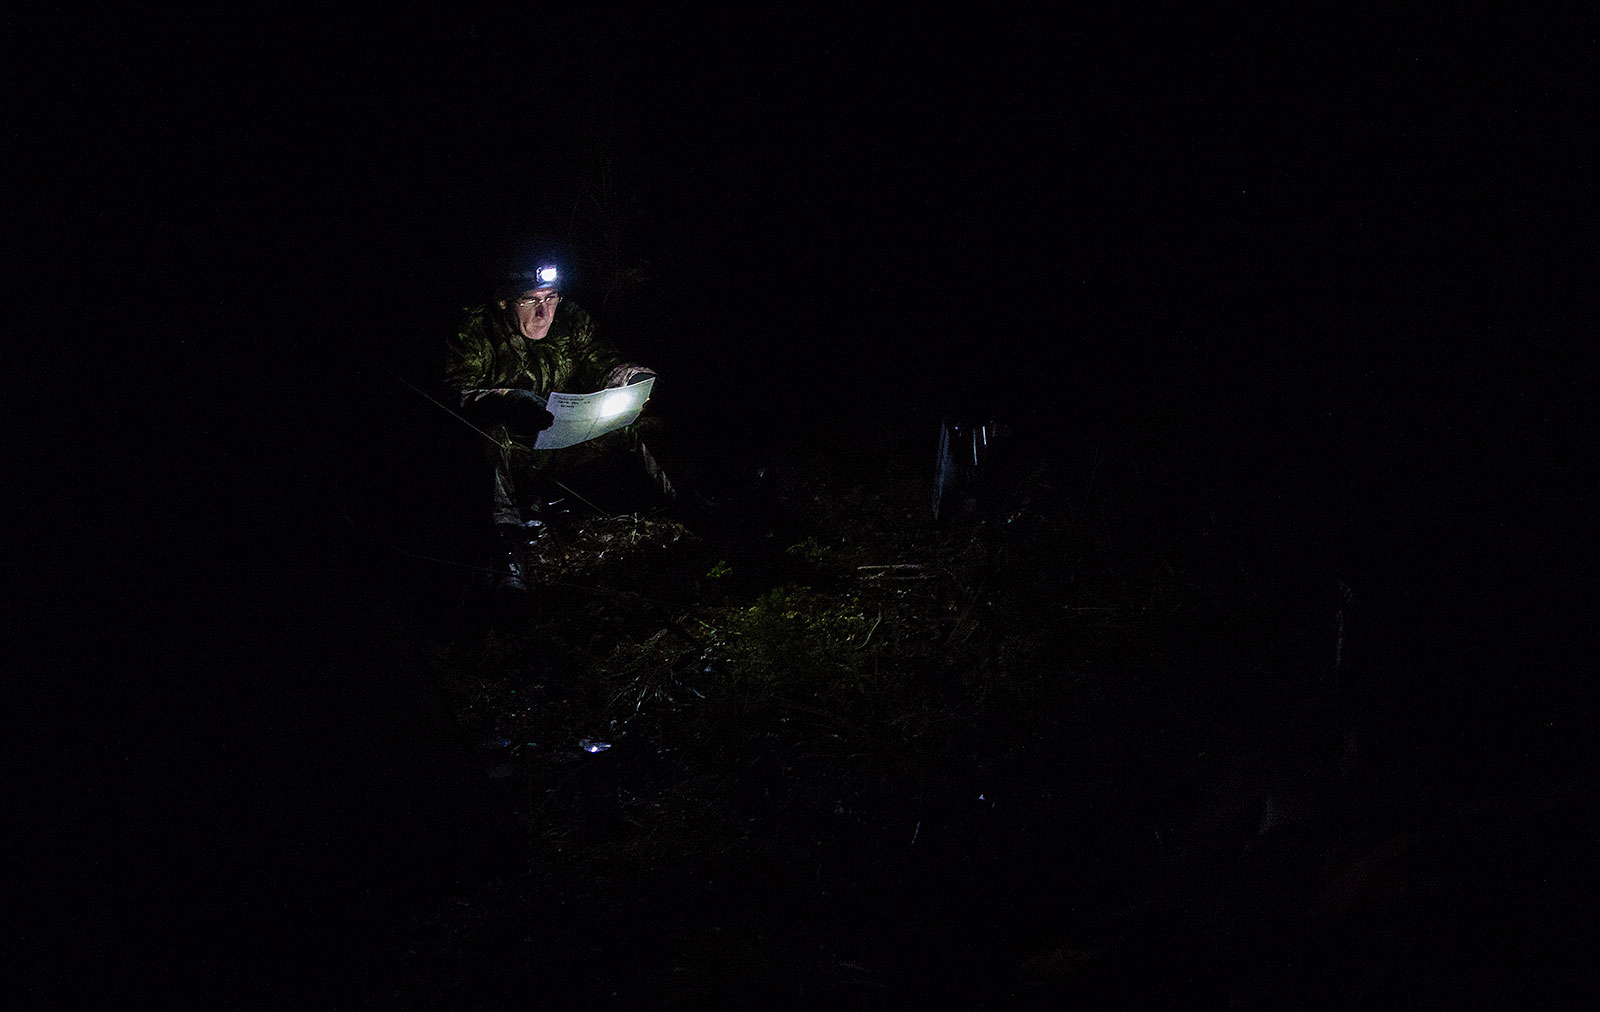
In short, I had been having problems with the Tactix getting a GPS lock in the Kaimanawa ranges – kinda an issue when you are trying to replace your handheld GPS with a watch. After wandering around for hours trying to get some coordinates out of it, it finally got a lock and told me where I was. About half an hour after I had stepped back onto the road and was heading back to the truck. To say I was disappointed would be an understatement.

It’s not like it had never had a lock. Previous trips, while slow, had eventually got me some location information, but this time was enough to break any remaining faith I had in the system.

The Garmin guys concluded I must have had a faulty unit – certainly, the Hunters Club lads have had only good things to say about the unit. So, in good faith, I sent it back with the attitude of taking a fresh look at what is essentially the latest version of the concept. I am glad I did!

[fvplayer src=”https://www.youtube.com/watch?v=9HF0TdpcNiw” splash=”https://i.ytimg.com/vi/9HF0TdpcNiw/hqdefault.jpg” caption=”fenix 3: Getting Started”]

An overhaul. A step up.

Now, there is no need for me to give a massive, in-depth feature review of the Fenix 3 – DCRainmaker has already done an awesome job of this over here. However, I will cover a couple of points that have been relevant to me.

The Form Factor

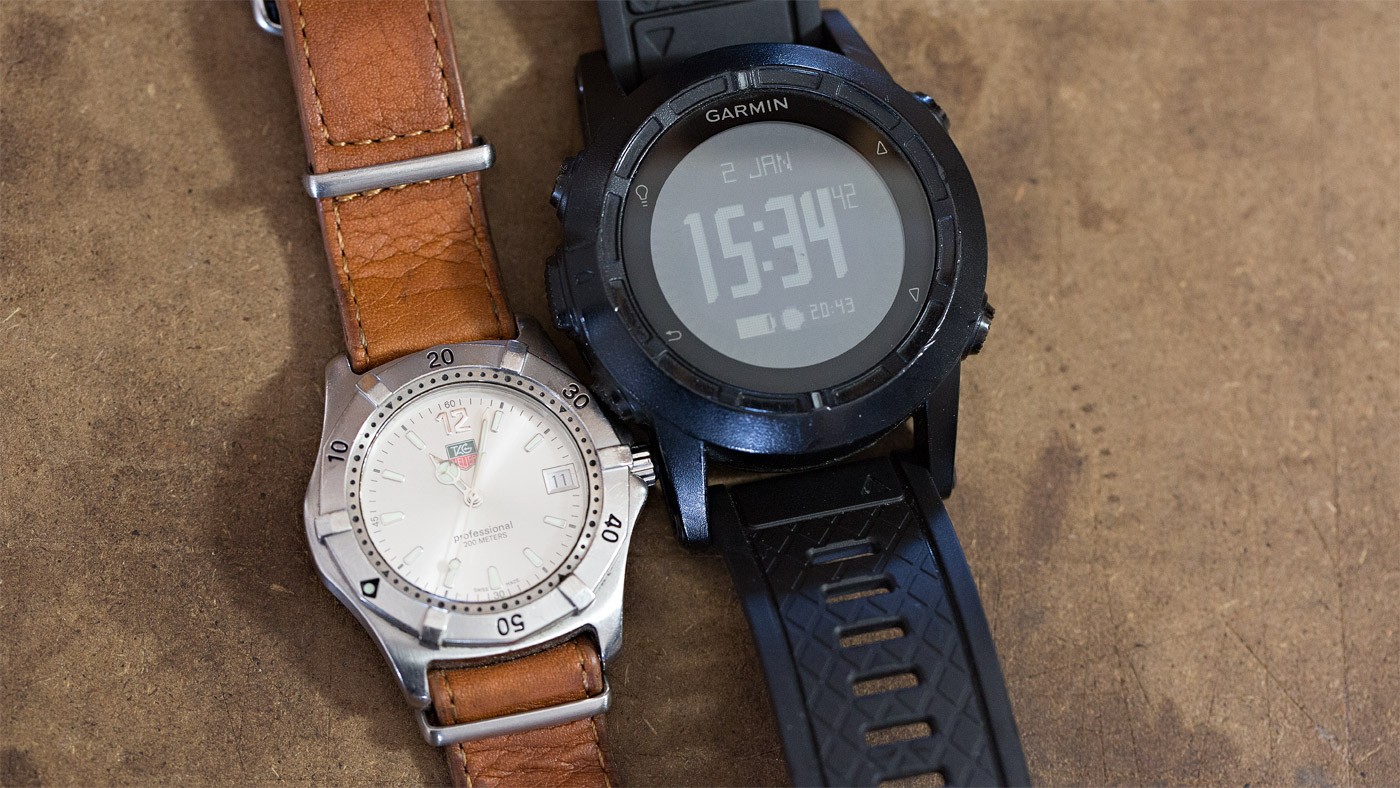
To put it simply – this is a nicer looking, and nicer feeling watch.

download
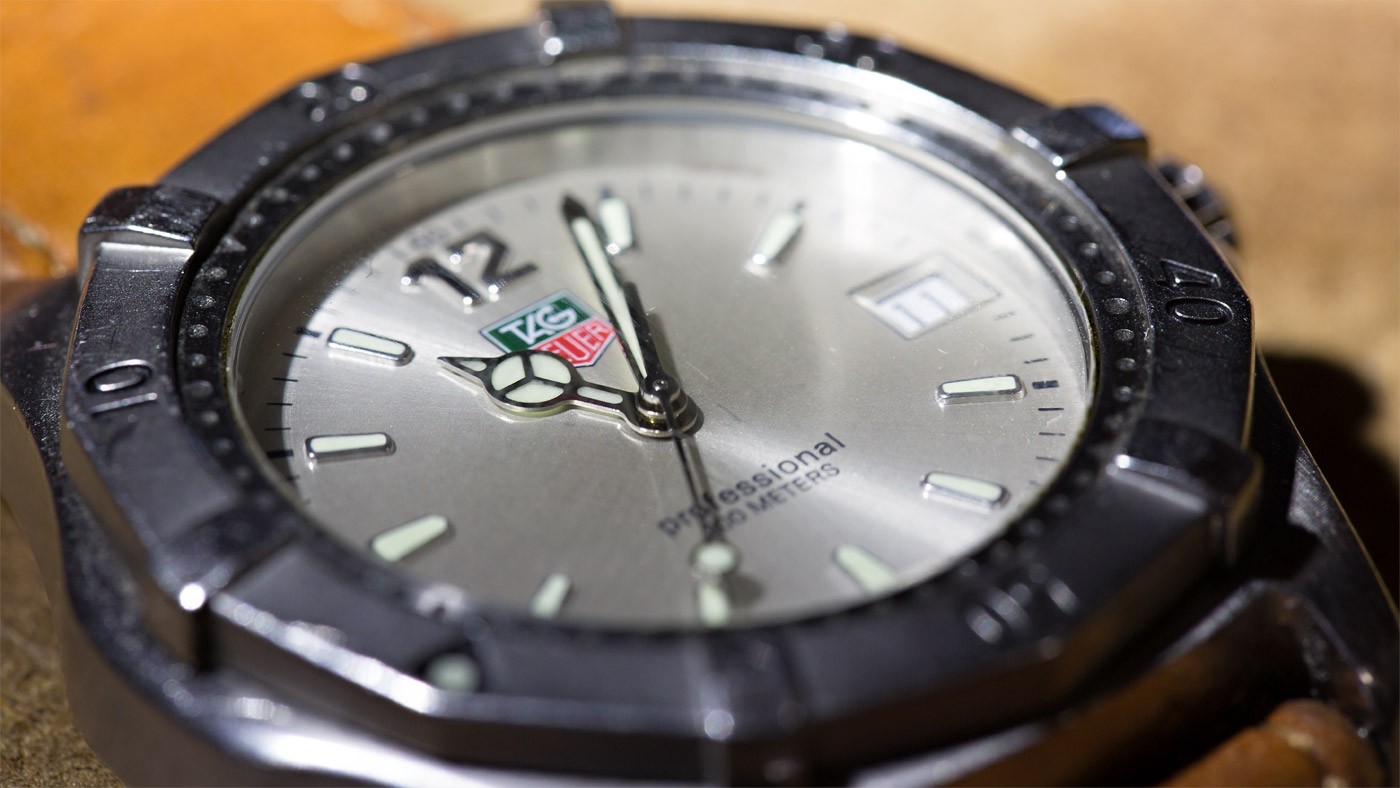
The Garmin Tactix was very hard edges. Boxy even. This was in large part, no doubt, by design. It’s meant to evoke the feeling of the military. It also ‘felt’ like it was huge. Especially when comparing it to my TAG or really, any other watch in the world. It was something you soon go used to, but still, it was a large, heavy watch.

The newer Fenix has a background of civilian use, so has a slightly softer, rounded look going on. This also gives it the feeling of being a smaller watch and while not the lightest of things, it also comes in just under 10 grammes lighter than the Tactix. The strap is more shaped and the whole package just has the sense of being a more finished, refined product. Sure, I loose some of the more military in nature features – the non-reflective face for example – but there is nothing that I have missed. Overall, I can say that I much prefer the Fenix 3 as a watch I wear every day compared to the Tactix.

GPS and GLONAS

When I started reading about the Fenix 3, this was really the main thing that excited me. GLONAS.

In short, GLONAS is the Russian GPS system – it adds in a pile of additional satellites that the unit can get a GPS lock off and like in my eTrex30 that features the system, I believe it gives you a much quicker ability to get a fix and start pulling down information. Knowing that this was running in the watch made me a lot more comfortable about getting a lock in the bush with it.

Battery Life

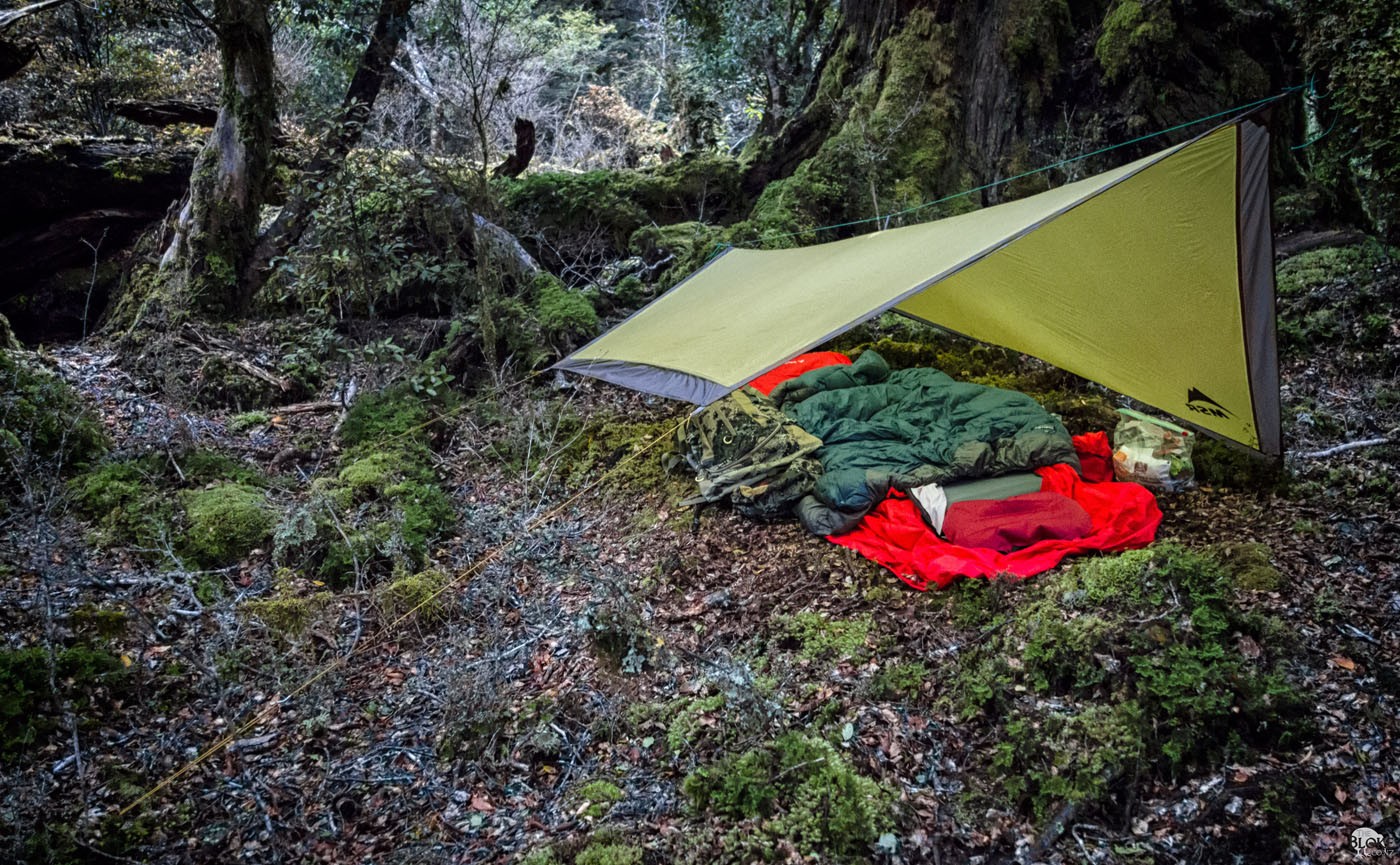
In short, the battery life on the Tactix sucked. Battery life on the Fenix 3 essentially means I have now been wearing it constantly and just have to remember to plug it in now and then. I.e. I don’t really have to manage it. Sure, if I was trying to run the GPS on it constantly it would drain quickly (I believe it’s about 20 hours in full ‘power’ mode). But that simply isn’t how I use it. At most, I am going to have it on in the bush while stalking. That is around two, three hour sessions in a day. Most of the time it isn’t on and I just briefly turn it on then off again when I want to confirm where I am on a map.

Battery life, when not in GPS mode is a matter of weeks. Depending on how many other features you run. As I will cover below, I have most of these turned off – so don’t really have to think too much about charging the unit.

Sapphire Face (as an option)

One option which I didn’t get in the end (I tried to convince Garmin, believe me, I did) – was the Sapphire faced version. The top of the line edition boasts a Sapphire face and a metal strap. The strap would go in the draw immediately and never come out again (it doubles the weight of the watch), but the Sapphire face does interest me. Especially because I put a scratch in the face of the Tactix somehow. Bush bashing I am assuming. We shall see how this face lasts for me. I will certainly be letting you know if I manage to scratch it anytime soon.

In Use

Now, as a preamble to this section – I am not (nor likely) using 90 percent of what this watch does. I had a very specific use for it and so far it has been doing it well. I don’t use it to track my sports details – I have played around with zone heart rates and so on before, but having that much data on my day to day life just doesn’t interest me. I had is counting my steps and daily calorie burn for a couple of days, but again, never plan on using the information, so turned it off and finally, yes, you could call it a ‘smart watch’ – in that it will run some apps and notify you when you get a message on the phone, or it rings, or all sorts of things. Again, nice for a couple of days, then turned it off – it all uses a battery and bluntly, I am at the point where I am over my phone breaking my train of thought ever thirty seconds with some kind of notification. It’s not conducive to focus or getting things done – but that is the subject for another time.

GPS and Navigation

This is the core and primary reason I wear this watch. Combining the GPS unit with something I was already wearing made total sense to me. Especially considering how I use my GPS.

I have never been overly keen on using the maps on the GPS units. To use them, I would need a screen big enough to replace a printed map and that is going to weigh heaps and drain the battery. Instead, all I want from the GPS unit is either a TOPO50 grid coordinate so I can find my location on a map and plan from there, or, a simple little directional arrow telling me which way to go. I am not micro navigating, so it only needs to be a ‘general direction’ and the ‘bug’ feature on the watch is ideal for just that.

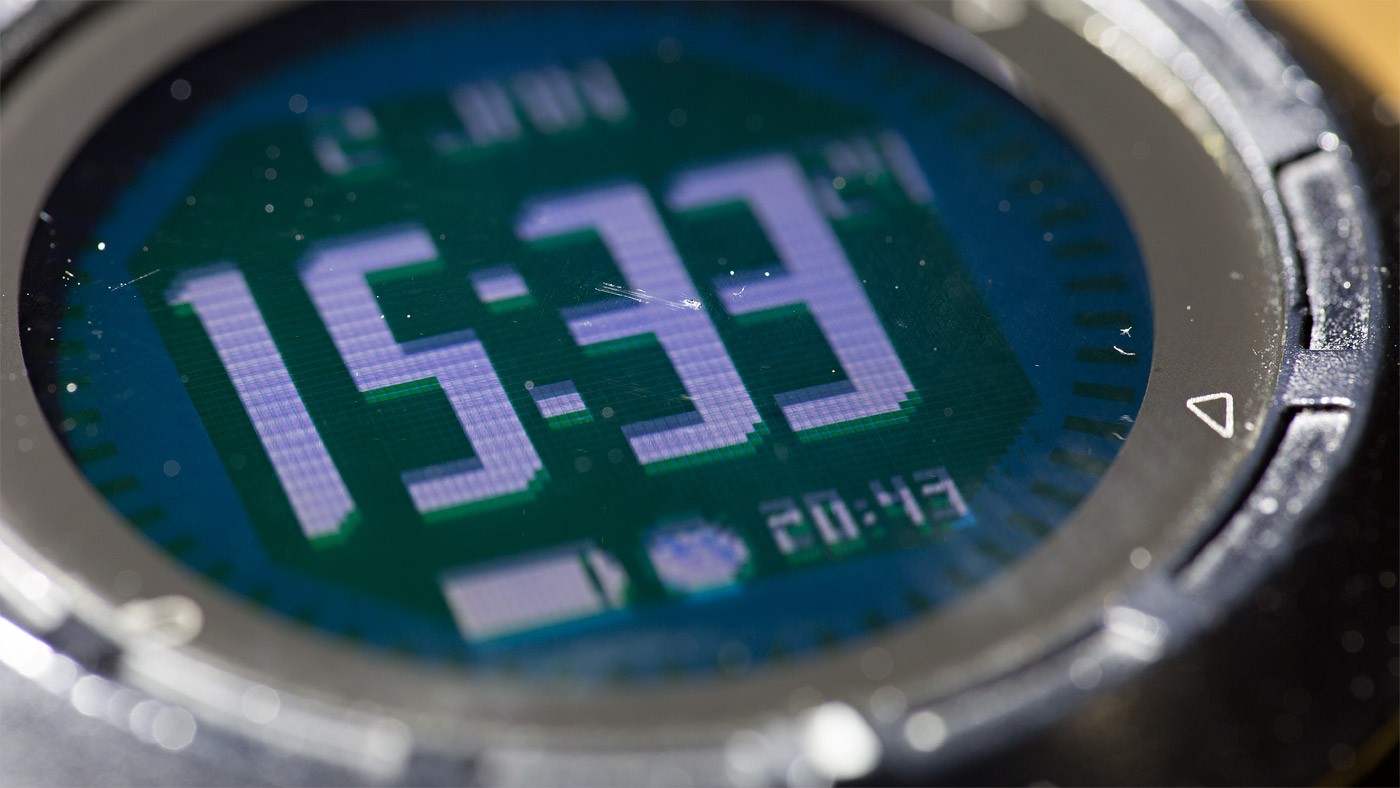
You can customise the shown fields on the watch to suit how you want to use the unit. In my case, for basic navigation, I have a large TOPO50 grid reference at the top and elevation and time below it. This provides me all the information I need right on the face of the watch and nothing else. Simplicity. I like it!

Where am I?

The only thing that annoyed me a little (but this is more the nature of the watch) – was how the Grid Coordinates would disappear when you lost the GPS lock if using the UltraTrac mode. In UltraTrac the unit pings the satellites every couple of minutes – massively increasing battery time, at the expense of accuracy. For what want it for, this would be fine, but unfortunately, if it loses connection, the grid coordinates also disappear, rather than remaining until an update. I understand why this happens – as you could actually be a little way off from where the coordinates were last accurate, but for me – this wouldn’t matter. What happened is that I would regularly look down to the watch so see no information – and I would have to ponder if it was the UltraTrac or the unit had actually lost a connection under the canopy.

In the end, I switched it to the full-time mode – I still have enough battery to last me a whole trip and I get the reassurance of always having the data (and apparent connection) handy. This also meant that the track recording was more accurate – entertaining when you get back home and look at all the walking in circles you did while stalking in the bush.

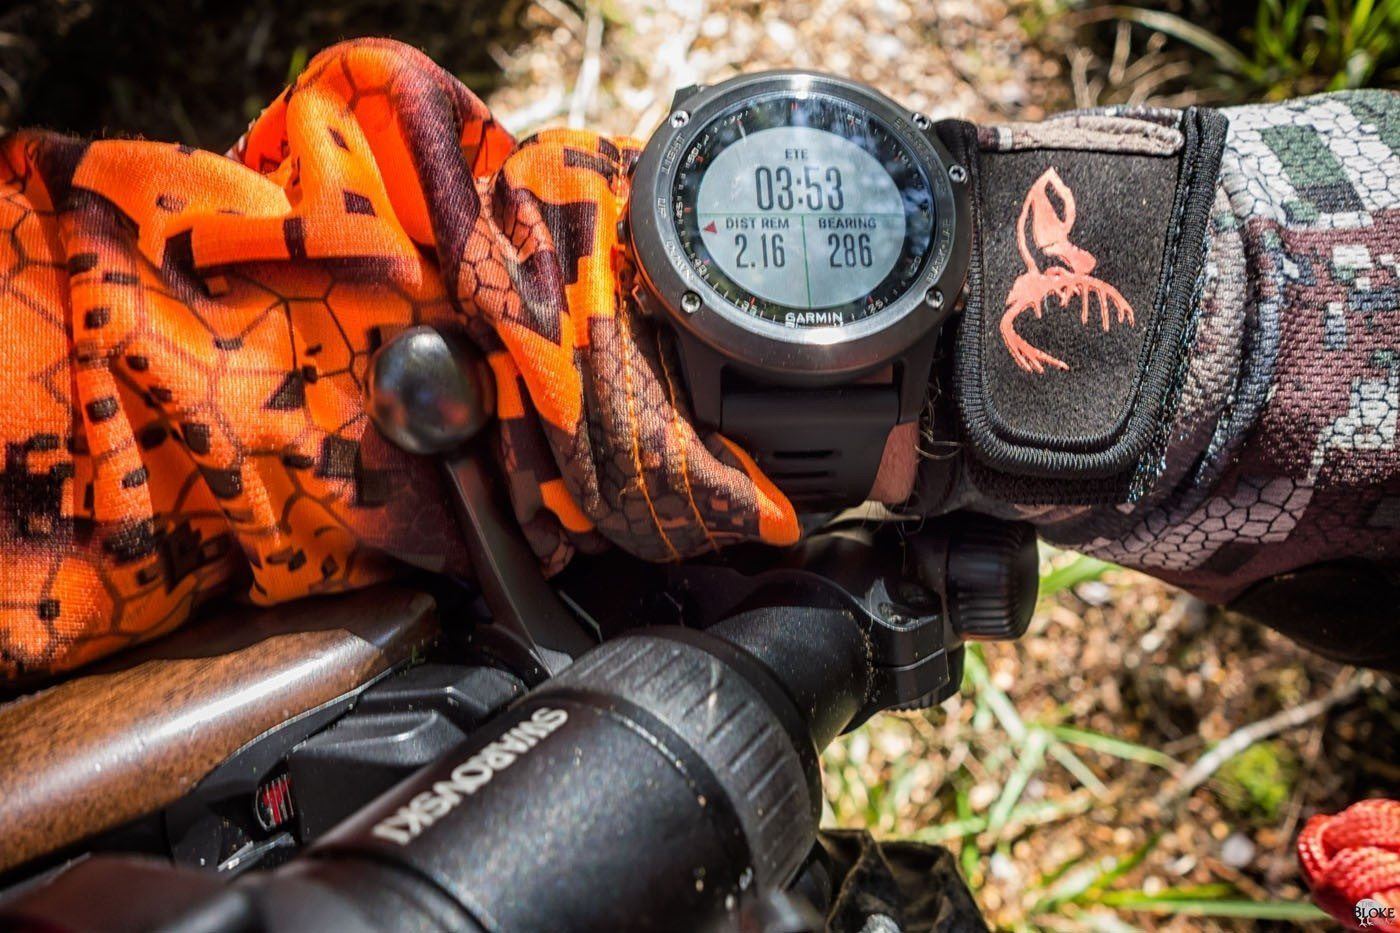
Get me to where I want to go!

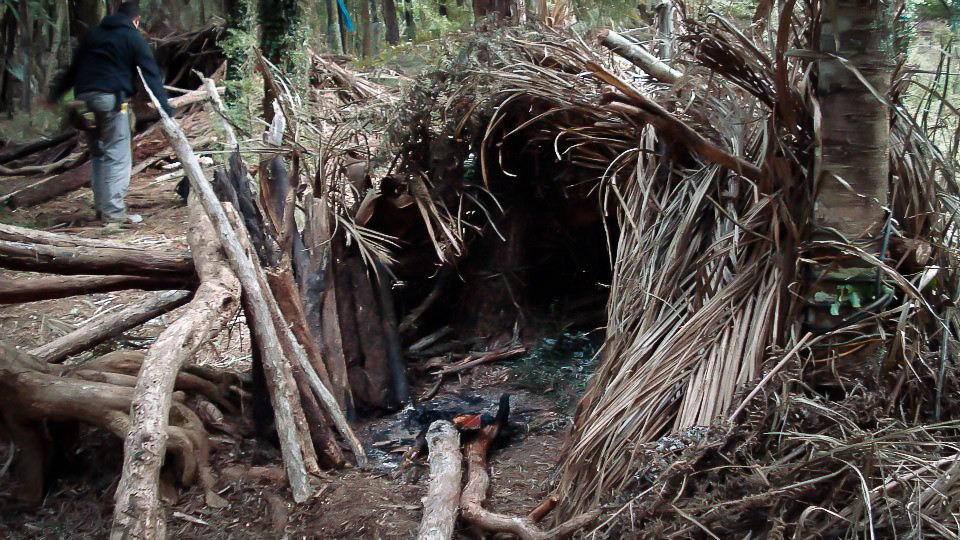
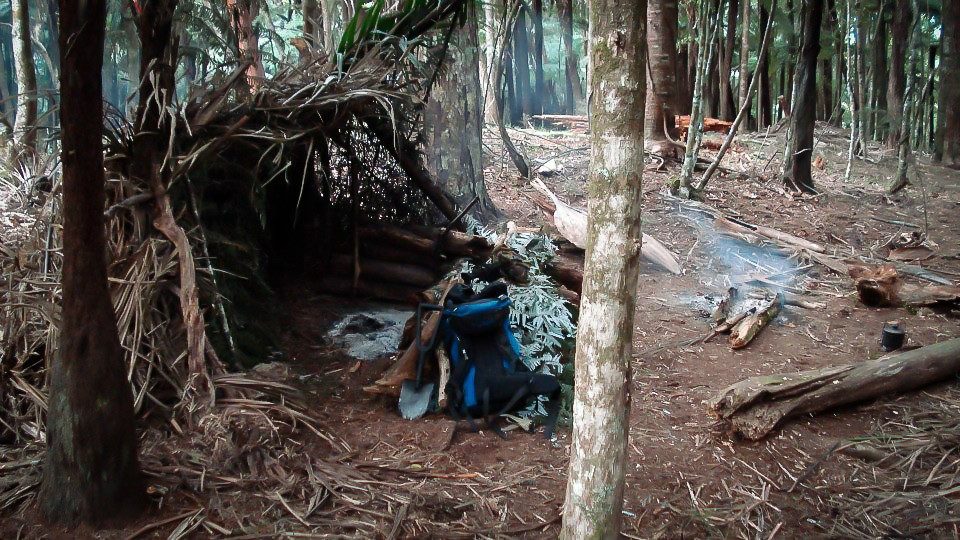
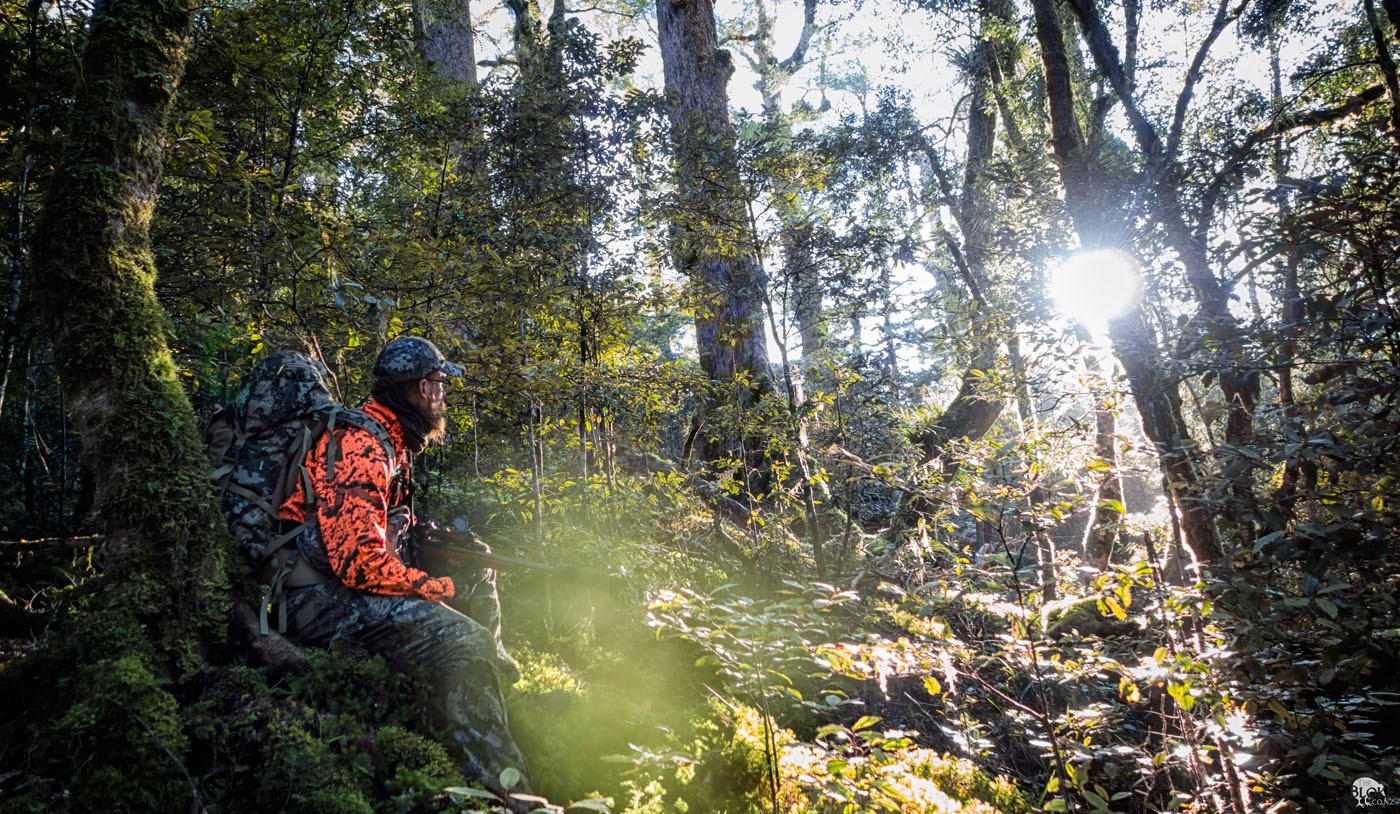
The nature of Solo Stalking can be frustrating. While it’s often enough to simply follow a rough heading or natural handrail (like a ridgeline) – sometimes you want to end up somewhere specific but have no definitive plan on how to get there.

See the little red arrow on the watch face above? That’s the bug. It tells me what direction I need to be going in order to eventually arrive at my selected destination. This particular data field set also tells me how long that will take based on my average speed, how far away it is and should I want to – the bearing I could follow on the compass I also carry. However, in practice, the compass stays in the front pack, and I just occasionally look at the watch in order to make sure I am still heading in the general direction I want to be going. Again, simplicity at it’s best!

The bug stays on the screen no matter what ‘page’ you are on. So I can instead have an elevation and date of time (and sunset) on the screen, know where I am heading, know if I am roughly on the same altitude band where I am seeing all the sign and also know how much longer I have before I need to start thinking about where I am going to camp for the night.

Getting back to the start

The final feature I have found myself using, which is not something I thought I would, is the ‘trackback’ feature. Simply put, this reverses the path you have walked in and gets you back to where you started.

After a couple of days out in the bush, I wanted to simply get back on the main track I walked in on and return to the truck. Where I was had a small hunters track heading into it and by its nature, there were multiple times where you would take a couple of steps in the wrong direction and be off the track. This doesn’t really matter because you are still heading in the right direction, but even a game trail can enable you to travel much faster than having to pathfind through the unbroken bush.

Utilising trackback keep me on the established track. It knows you ultimately want to get back to the ‘starting point’ – so just provides a quick reference if you step off the trail. To within meters. I would zoom in to test the system and sure enough, find out that I was only five or so meters off the track – hidden behind a fallen tree, for example. This became a massive time saver for me – because the established track just enabled a quicker walk out.

Sold on it. The Tactix I previously had comes across as the first generation, this, a refined second (or third, I guess). Regardless of whether the Tactix was faulty, the Fenix 3 has features and ergonomics that leave the Tactix for dead.

As I previously stated, I am using very little of the capacities of the watch. But it has allowed me to achieve what I wanted to – reduce some weight and space by leaving the handheld GPS unit at home. This is what I was hoping it would do and it is performing excellently at it!

It’s not the cheapest of watches, but it has given me what I wanted, a GPS, a timepiece, temperature record and stopwatch. There are some things I would change functionality wise – but that is more a result of a different way of thinking about usage rather than any shortcoming of the watch itself.

Sika Hunting – Kaimanawas – May

0

untitled-(1-of-5)

Very important supplies.

First rule of any Sika Hunting trip – have enough coffee.

A couple of weeks ago I was asked by Frank from the North Auckland Deerstalkers if I would interested in heading out with him for a couple of days in the Kaimanawa Ranges hunting Sika Deer. The opportunity to tag along with someone with Franks level of experience was very appealing, so I quickly said yes and started planning the trip with him.

It was also a good chance to head out for a few days and test a pile of new gear I had – from electronics to clothing – it meant I could give a couple of items a decent extended test. I always enjoy testing new gear!

untitled-(2-of-5)
Well done guys. Way to be responsible with your firearms.

The Plan

We decided to head down on the Sunday, walk in, set up camp, then spend the next 3 days Sika Hunting, returning on the Thursday.

The Kaimanawa ranges is just out of Taupo, so setting off first thing in the morning a 4 hour drive got us to the end of Clements Mill Road – the most common method of access the ranges. Clements Mill Road is a 21km gravel road that is used year through by hunters to access multiple points with the ranges. In our case, we were heading right along to the end of the road. From there we headed out along the Hinemaiaia track – turning off and then heading along one of the many streams that cross all over the Kaimanawa Ranges. It was then a case of finding a suitable campsite for the next couple of days.

We found a suitable spot and set up camp – Frank using a Huntech Bivvy and myself in the Blackbird Hammock. It was two very differing setups – both equally home in the situation. Towards the end of the trip where we were threatened by rain, Frank also threw up a large tarp the went across both our sleeping setups – providing us a pile of room to cook/eat/live under in the evenings. While it didn’t rain too much in the end, it reinforced the benefit of having a decent sized tarp to exist under. I have a Huntech Tarp that I may through in for the future – though would also be keen to find a lighter solution.

untitled-(4-of-5)
Blackbird Warbonnet Setup

untitled-(5-of-5)
Huntech Bivvy Setup (not currently available)

Slow going

After setting up camp we set out for the first of many stalks while Sika Hunting.

All I can really say, is that Frank can move really, really quietly in the bush. It was really just a case of myself trying to keep up without stepping on every single branch in the forest. It was great to start to get a feel for the speed (or slow) required for a stalk. Moving through the forest like that is fatiguing both physically and mentally. You are essentially on point the whole time – looking, listening, just being highly attentive.

untitled-(9-of-13)
Seems the mushrooms beat us to this one.

Each day we looked over the maps, trying to ascertain what areas would be good to stalk in. Half the challenge was finding areas that weren’t too closed in with Peppertrees; giving us the best chance of being able to see the Sika before they either smelt or heard us. The reality is, when it comes to stalking, the odds are stacked in their favour – their sensitive ears and noses often detecting us long before we knew they were there. We were whistled at quite regularly, reminding us that they were there, and motivating us to keep on going and try to be quieter, smarter and get the jump on them.

untitled-(7-of-13)
Get up before dawn, stalk until nightfall, plan the next day, repeat.

I spooked a couple one day – realistically, they heard me long before I had a chance to creep up on them – I was alerted to their presence by 3 white bums heading very quickly away from me. Dang it! Again to loud!

Shrooms!

The wonderful thing about the stalking, is that the whole time you are trying to creep up on these guys, you are surrounded by some fairly raw native NZ bush. Each step would hold a new vista as increases or decreases in altitude, windfall and terrain would bring bands of different flora and fauna. I think I might have to do a Fungi identification course – just to put some names to some of many varieties you would see each day.

untitled-(10-of-13)
Thaxterogaster Porphyreum, apparently.

untitled-(5-of-13)

Gear Under Review

Between my many different projects, it’s actually sometimes hard to get out and test some of the gear I get my hands on. I have started enlisting the help of a few mates and took along a pile of new kit with me to test out while out in the bush Sika Hunting. While there will be separate reviews for many of these items – a couple of quick notes –

untitled-(6-of-13)
Powertraveller Solarmonkey Extreme and Garmin Fenix

One of the big winners of the trip was the Garmin Fenix – though it takes ages to acquire satellites (compared to my E-Trex 30) – when it got up to speed, having a navigation device on my wrist was awesome – one day I essentially let it guide me back to camp – it landed me right on top of the spot, no issues. It was also the first time in a long while that I have had a digital watch, so also having timers, temp readouts, altitude info was also a nice new change. The Solarmonkey didn’t get used as much as expected – but charged the watch and camera as needed.

untitled-(13-of-13)
Tarp treated with Nikwax TX Direct

I had reproofed the tarp DWR before heading out – and was please to see the water beading straight off the sides after some rain. It’s essentially to the point where everything is getting a treatment before heading out. Even new gear seems to benefit.

The Skellerup Ashleys absolutely shone! No wet feet for the whole trip – and comfortable for bush bashing up and down ridges and hills. The only thing I would say is that my feet did get a bit cold, which they tend to do. So I will be investing in some good, heavy socks in the near future.

The Hunters Element Kit – Hydrapel Trousers, Prime Shirt and Rugged Bush Coat all worked well. Got a bit hot – but the nature of robust clothing means they simply can’t breath as well as some of the technical jackets. I do need to ‘encourage’ them to put out some more blaze product though. Love the camo, but covered it with a blaze vest for most the time!

One thing that really failed me though, was my Mystery Ranch Crewcab. When I say failed, I really mean was not suitable for – because while it folds down into a ‘daypack mode’ – the frame is still too large to be trying to bush bash with – the edges catch everything you pass under.

untitled-(12-of-13)
Skellerup Ashleys and Hunters Element Hydrapel Trousers

Also, the Cordura is noisy when rubbing against the many branches and bushes you need to work your way though – and the harness system itself creaks. So. Maybe awesome for patrol in Afghanistan, not so good for bush stalking in NZ.

The Ribz Frontpack I normally wear was another challenge – while I prefer to wear the newer orange version, it’s noisy – providing several equipment interface issues – namely – the rifle rubs against it, and makes a fair bit of noise. I am either going to go to the camo, quiet version, or take a really serious look at what gear I really need to carry on my front.

It means there is going to be a daypack shootout in the future – and it also means I may look at comparing a couple of big backpacks for carrying everything into camp for. Even when gear doesn’t work as expected-  it gives me plenty of ideas on how to improve systems.

The other interesting observation – was how quickly the blued steel on the X-Bolt developed rust spots. I know it happens – I didn’t expect it to happen within hours of getting wet. Thankfully, the Silicone impregnated cleaning cloth I take out with me did it’s job perfectly. More details shortly.

Though we didn’t get the chance to skin anything, the Knives of Atlanta Hunter I took out with me worked excellently in food prep and general cutting duties. A quick hone on the belt mid trip kept it nice and sharp.

So, awesome couple of days. I have the bug now, and will be heading back out (likely in Spring now) to try and bag myself one of the ‘Ghosts of the Forest’. Many thanks to Frank for inviting me along!

The Kaimanawas

0

The Plan

The Sugar ClubIt’s always some kind of adventure when I head out – I realise, despite my own suggestions to others, I always tend to head out with a pile of new, untested gear to try out. I guess I have certain levels of ‘risk’ I allow for and never really push too far.

We recently had a ‘weekend off’ – the little girl was graciously looked after for us for a couple of days by my parents1, so the missus and I headed into town on Friday for a night at a hotel and a visit to the Sugar Club. Peter Gordan was acting as head waiter and as previously, the food was phenomenal. My pick was the Ricotta, but the Venison Rendang was also awesome – think Tom Kha Gai, but with tender venison. I know, the description will probably horrify any ‘foodies’ reading this – but the meal was awesome, the view phenomenal and the Manhattans (Bookers) masterfully made.

Saturday Breakfast was a meet up with a mate for what essentially consisted of a Bloke / Precision Shooter Business meeting, then a lazy day at home. Sunday, another meeting in Hamilton on the way down to the ranges.

untitled-134020151004October-04,-2015

New Gear

boundary-pack-veilAs is normally the case, I had a pile of new gear and systems to test and evaluate. Full reviews/thoughts will follow. But in short…

Continuing on the theme of reducing weight and hunting with camp on my back, I had the new Hunters Element Boundary Pack – a 35L pack, veil camo and ‘brushed tricot’ styled silent fabric. This pack worked well. Bit smaller, so easier to maneuver with in the bush. I also had their Hydapel Gloves, a much quieter (and full fingered) replacement for their overly noisy soft touch gloves.

untitled-133320151004October-04,-2015

Happy to report, unlike the failure of the Garmin Tactix to get a lock under cover, the Fenix 3 functioned flawlessly. The only issues I had being more my philosophy of use not meshing with the intended design – but more on that soon. Basically though, I have found the replacement for the eTrex30! I would pick GLONASS has made all the difference.

Cold? Yeah. Enough.

I have also been experimenting with a bivy and sleeping bag. The weather forecast was for showers (though they didn’t eventuate) – so I put up the MSR E-Wing, layed out the Vaude Bivibag with the Thermarest NeoAir XLite and Alpine Blanket in it had a feed, hopped in, and slowly got colder and colder.

I have been experimenting with a Bivibag, really just because I like the idea of just dropping it wherever you decide to sleep and being set. Also, while a tarp in minimal in nature, I would really like to just sleep out under the stars, but still have some small amount of weather resistance going on for the down sleeping kit. The problem is the size of the bivi. It’s just not big enough, primarily in length. I prefer to have the NeoAir on the inside of the bivi – it’s lightweight, but a little fragile and once inside the bivi, my feet end up pushed up against one end, and my head nearly on the other. I realised, in the middle of the night, that the bivi was actually compressing the loft of the down bag, reducing it’s effectiveness. While you could normally expect the bivi to add a degree or two of warm, it was actually reducing the efficiency of the down significantly – so much so that I ended up on top of it, warmer.

I didn’t freeze, as the temps only got down to 4 deg. But it was cold enough that I woke a couple of times and threw on an extra layer.

So, I either ditch the bivi and just go back to sleeping under a tarp, or look for a bigger bivi bag, without it getting into one person tent size.

untitled-133220151004October-04,-2015

All in all though, it was a good trip. Lots of sign, but didn’t see any actual deer. They were there, are relatively close, but just sneakier than me this time!

Longer reviews on all the gear is under-way. I just have more articles to write than time at the moment!


  1. god send – mothers day, fathers day, where is grandparents day? 

Watch faces. Or, why my Garmin is already marked.

0

Scratched already? About watch faces.

It’s not like it’s even a ‘cheap’ watch – but the face on my Garmin Tactix already has a scratch in the middle of it.

_MGL0022_RX100

Yup. Right there, in the middle.

No. I am not particularly careful with it. It’s an outdoor watch, with features like a compass, GPS and barometric pressure on it – I don’t really think it was designed to only be a dress watch. It’s been bush bashing and beyond – but yeah, nice little nick right in the middle of the face.

Buy why then, does a watch that is at tops a year old look older than my Tag, which must be close to ten years? That’s dust on the face of the tag, btw… there isn’t any scratches – despite several dings in the body itself.

_MGL0023_RX100

It’s all in the face – acrylic, mineral or sapphire?

The cover on a watch face is known as the crystal. It protects the dial. There are three main options here – depending on cost/budget – acrylic, mineral and sapphire.

Acrylic crystal is an inexpensive plastic that does not prevent scratches, but allows scratches to be buffed out.

Mineral crystal is glass, which is composed of several elements that aid in resisting scratches (it is seven times harder than acrylic crystal). It is generally found on more expensive watches.

Sapphire crystal is the cover of choice for premium watches. It is the most expensive type of crystal and is three times harder than mineral crystal. It is made of an extremely durable synthetic material that makes it shatterproof and scratch resistant (not scratch proof). Some have a non-reflective film to prevent glare.

The Garmin Tactix is mineral, the Tag, Sapphire. Yes, the Tag cost about twice the price. But it has lasted more than twice the time with marking.

Is this a complaint? Not really – it’s all relevant to cost/return. But a group of us were discussing why all our Garmins had marks on them. This is why.

_MGL0024_RX100