Home Blog Page 6

The Battle of the Grains: Brown Rice, White Rice, and Alternatives Like Rye and Barley

0

That leads me to the perennial dilemma: brown or white rice? Each has its unique history, benefits, and potential drawbacks. And what about their grain cousins like rye and barley? Understanding the pros and cons of each option is crucial. Join me as I explore which type of rice, or perhaps an alternative grain, might be the best addition for someone looking to bolster their diet without going overly carb-heavy.

Incorporating Rice into Protein-Rich Meals

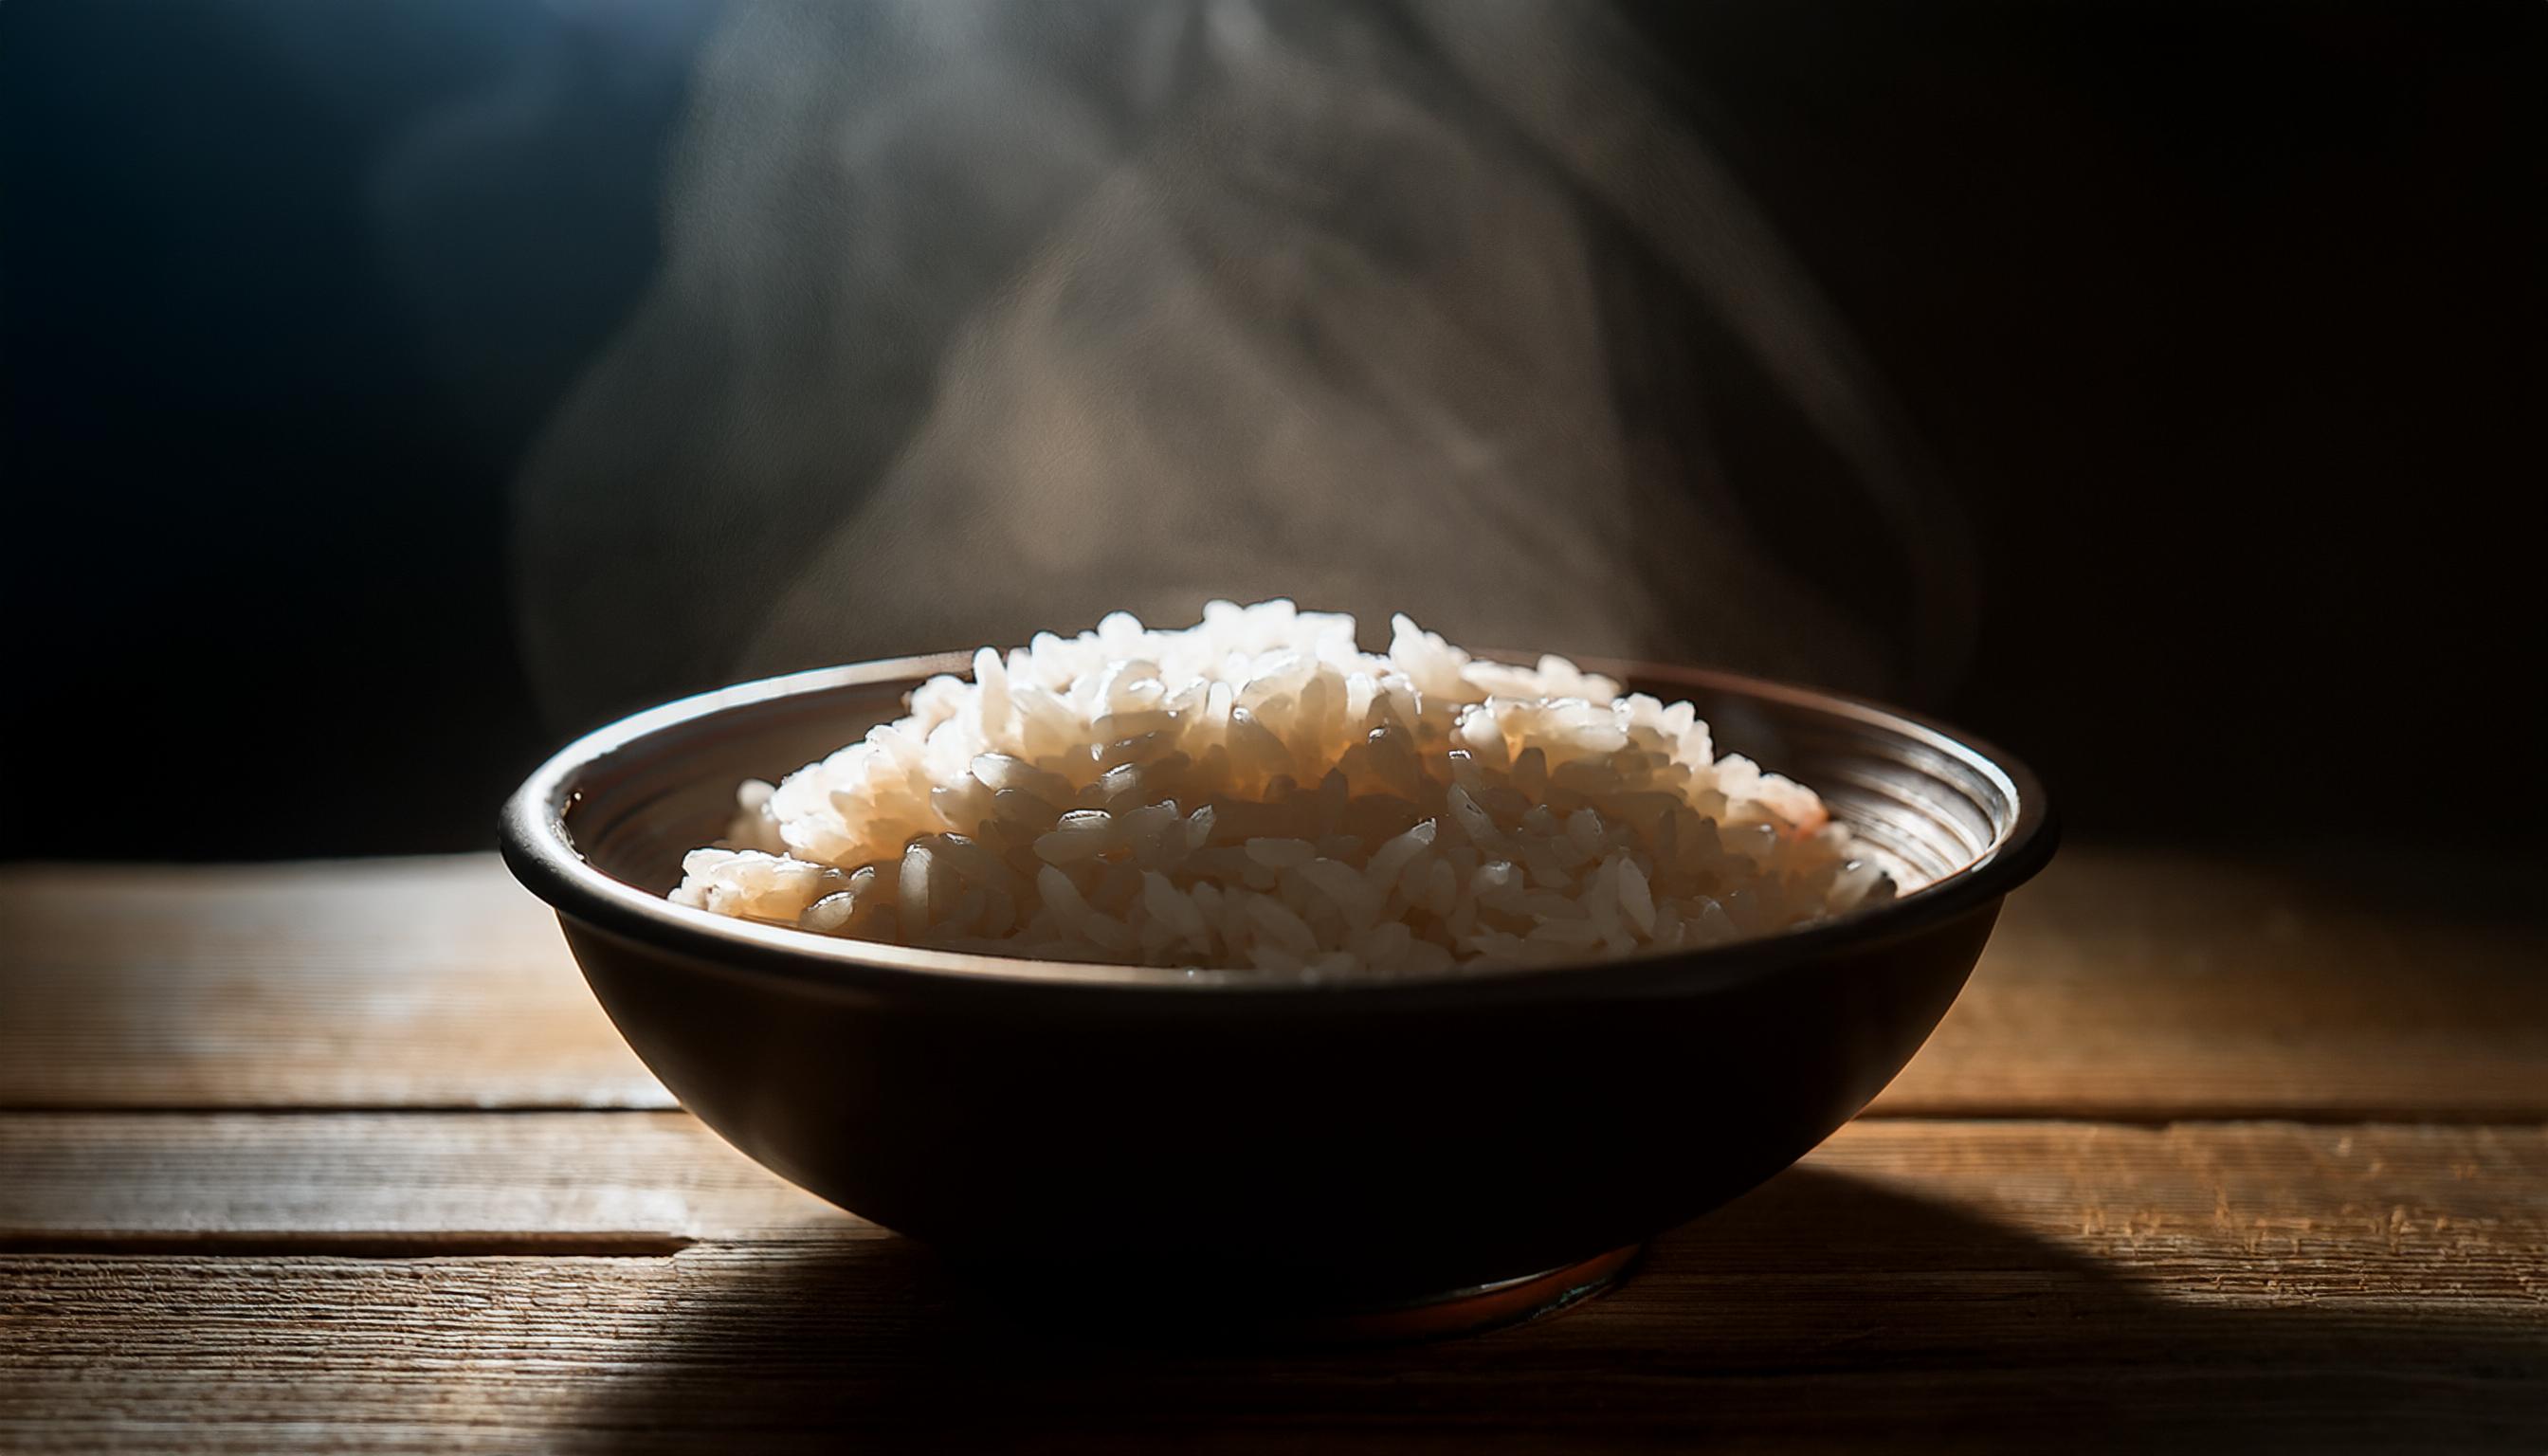
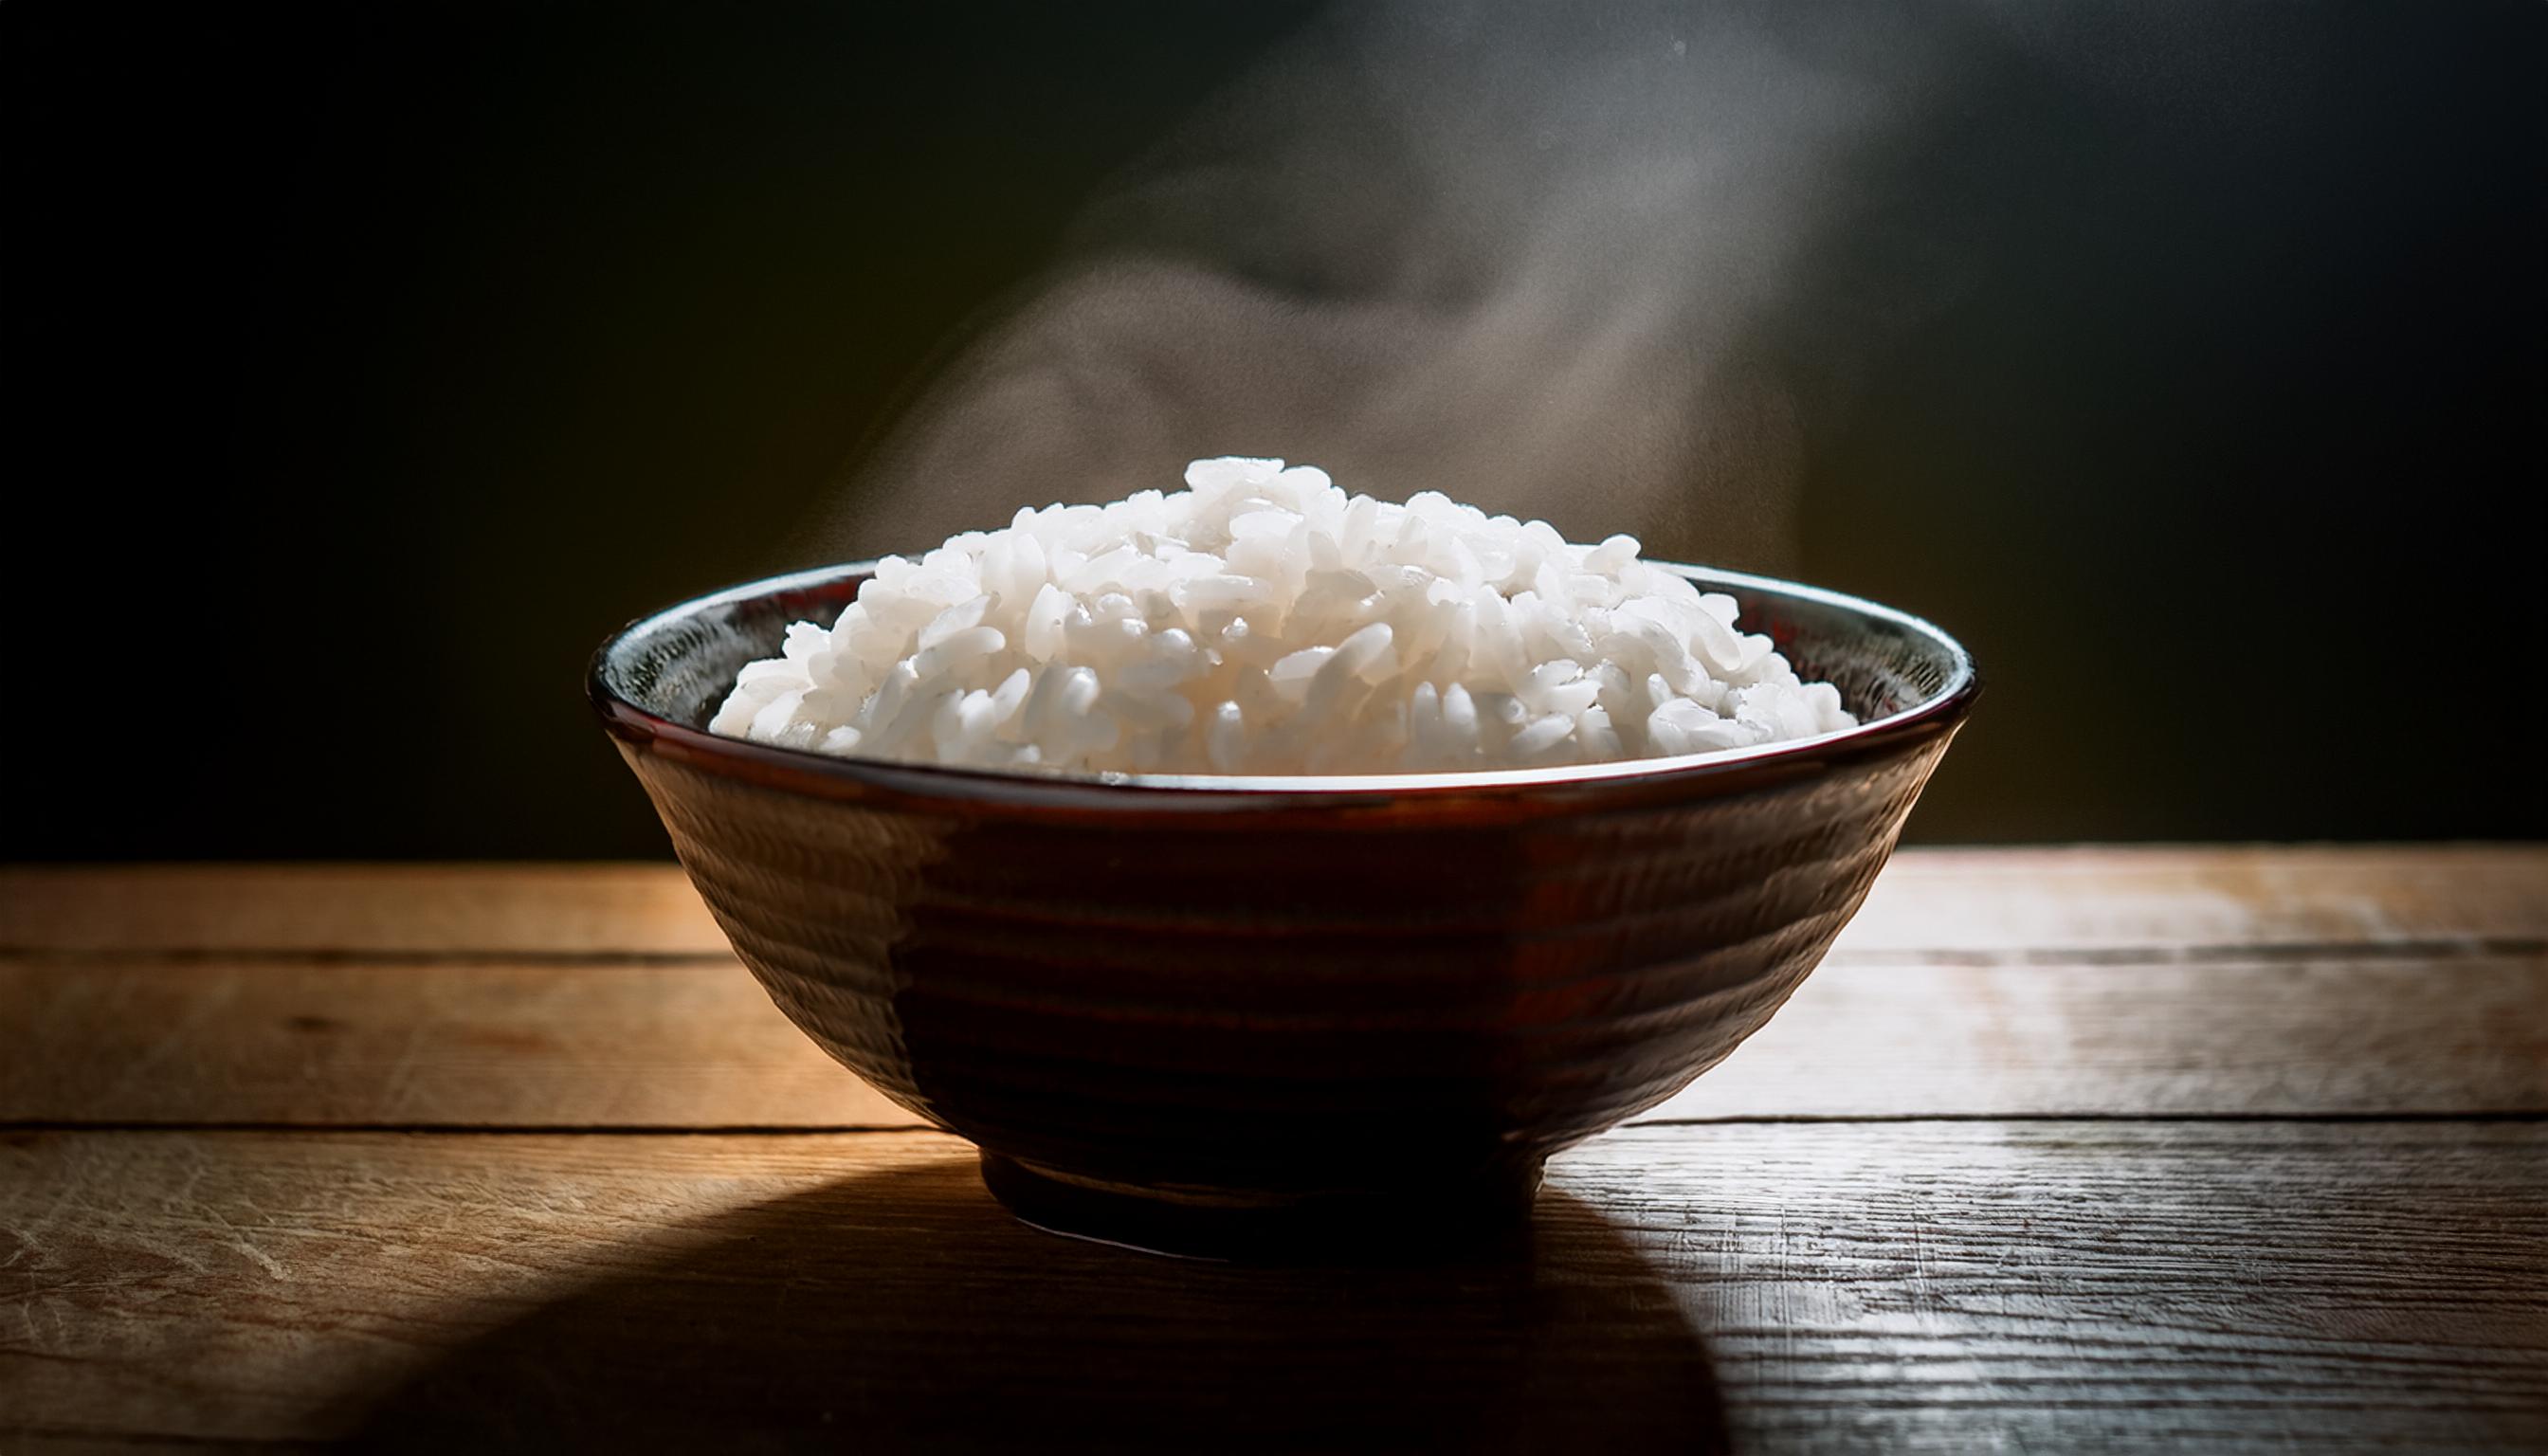
As I started reintroducing rice into my diet, I delved into how best to incorporate it into meals that align with my protein goals. Initially, I was drawn to white rice’s simplicity and quick-cooking nature. It was easy to prepare, and with a pinch of salt and a drizzle of olive oil, it transformed into a comforting base for my meals. Yet, I couldn’t ignore the allure of brown rice with its earthy undertones and significantly higher fibre content. 

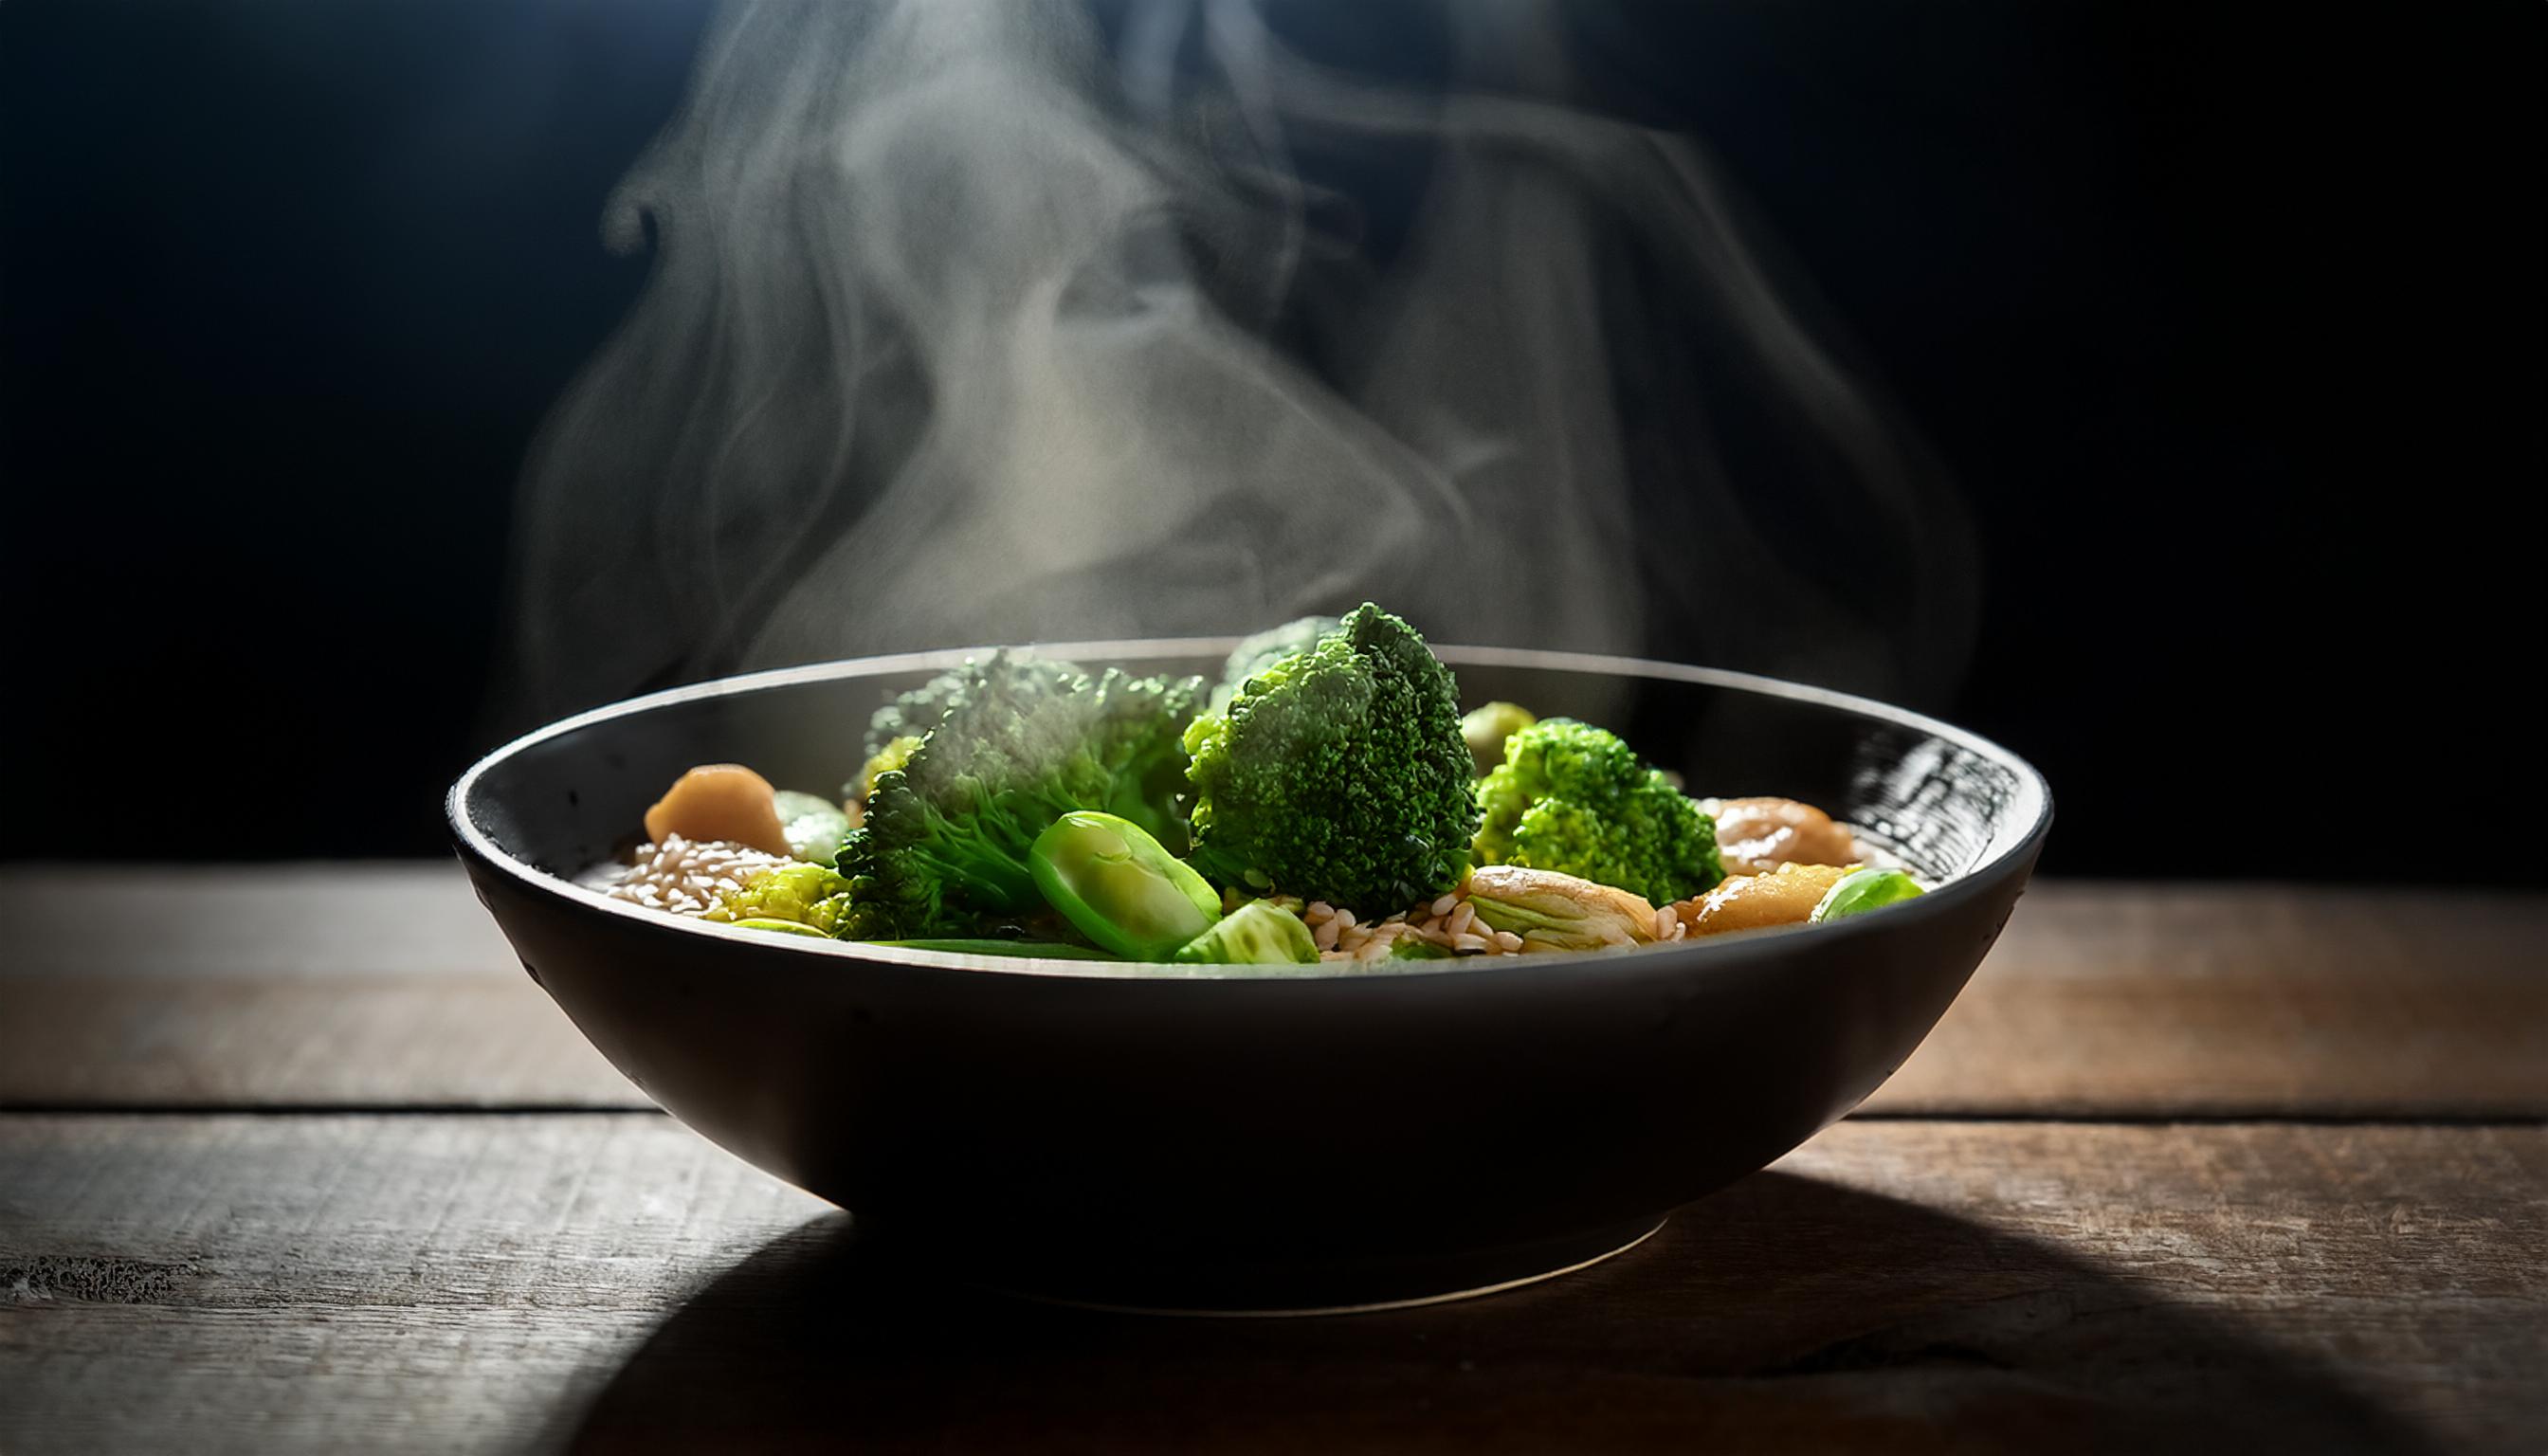
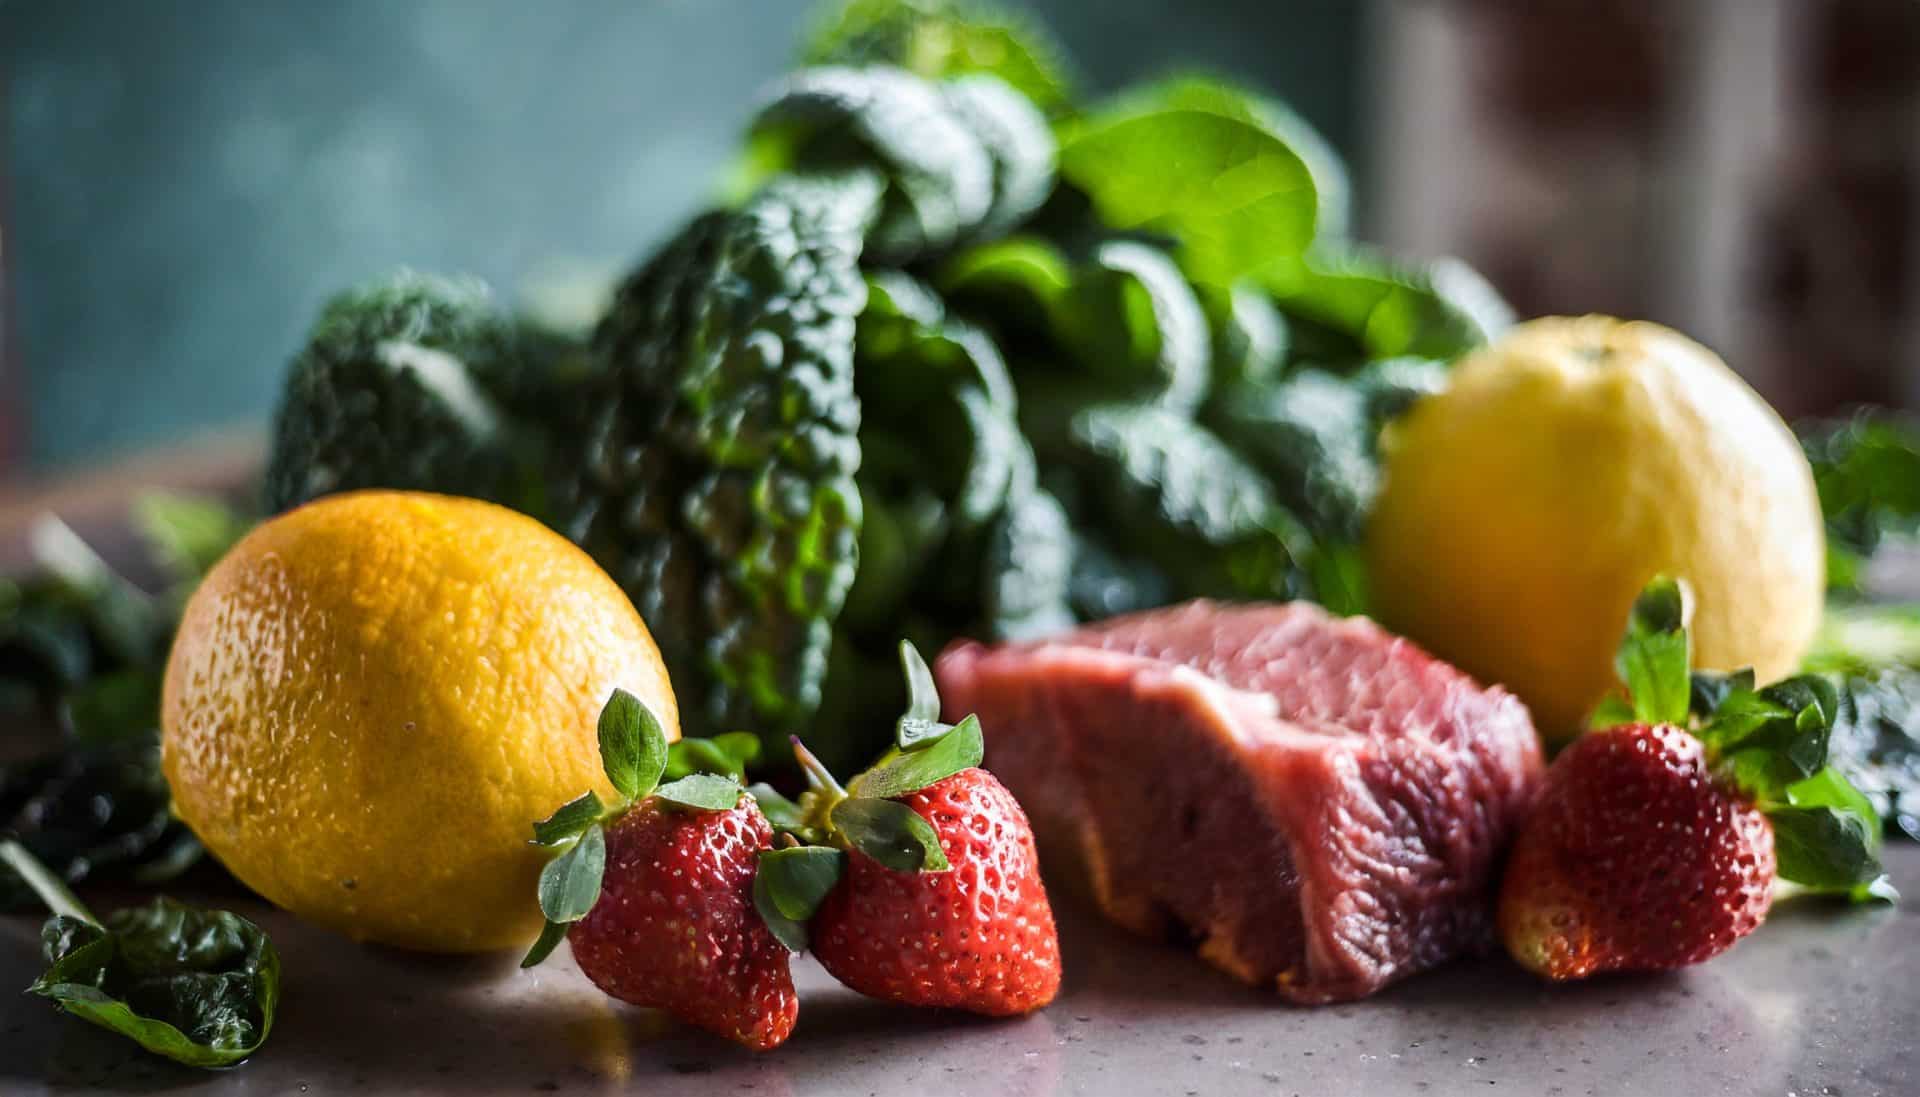
One of the simplest ways I found to integrate rice into a protein-rich meal was by pairing it with lean meats like grilled chicken or turkey. This combination provides a satisfying mix of proteins and carbohydrates and ensures a balanced intake that supports muscle recovery and energy levels. I often added steamed broccoli or sautéed spinach, which not only introduced a variety of textures but also helped round out the meal’s nutritional profile. 

An eye-opening revelation for me was discovering how well rice pairs with legumes. Combining brown rice with black beans or chickpeas created a dish that was both hearty and full of flavour, not to mention packed with plant-based protein. Spices like cumin and paprika, alongside fresh herbs, transformed these simple ingredients into a culinary delight. This method became a staple, particularly for lunch, offering a perfect balance of energy and sustenance without the heaviness often associated with carb-laden meals. 

I also experimented with stir-fries. I combined white rice with a medley of proteins such as prawns, tofu, or beef strips using white rice as a base. Adding in vegetables like bell peppers, snap peas, and carrots provided the necessary micronutrients and a satisfying crunch. Stir-frying the ingredients in a minimal amount of sesame oil, ginger, and garlic infused the entire dish with a fragrant aroma that quickly became a household favourite. 

Integrating rice into protein-rich meals was akin to rediscovering an old friend. It proved versatile, adapting effortlessly to different cuisines and palates, whether the robust flavours of Asian stir-fries or the comforting bowls of rice and beans. This flexibility allowed me to enjoy my meals and ensure they aligned with my dietary needs, promoting both energy and satiety.

Comparing Nutrient Density: Brown vs. White Rice

Regarding nutrient density, brown rice edges white rice in a few key ways. The defining difference between the two lies in their processing: brown rice retains its bran and germ, whereas white rice’s bran and germ are removed. This seemingly simple distinction has significant nutritional consequences. 

Brown rice is a whole grain with more fibre, vitamins, and minerals than its white counterpart. It’s higher in magnesium, phosphorus, and B vitamins. Fibre, in particular, stands out as a winning trait of brown rice, aiding digestion and promoting a feeling of fullness – a crucial factor in balancing your intake without overloading on carbs. 

White rice, however, is not devoid of benefits. It is often enriched to replace some of the lost nutrients, making it a decent option when prepared this way. White rice has a softer texture and subtler flavour, making it more versatile and agreeable for those who might find brown rice’s nutty taste and denser texture less appealing. 

Ultimately, the decision between brown and white rice should align with your nutritional needs and taste preferences. If you’re seeking a modest boost in fibre and micronutrients, brown rice is the superior choice. However, if you prioritise a grain that complements a variety of dishes without overwhelming the palate, enriched white rice remains a viable, nutritious option. I mean, despite what people might like to allude to – it’s not the case that Brown Rice is vastly superior to white.

Carbohydrate Content and Glycaemic Index

Reflecting on the glycaemic index (GI) is essential when considering the impact of different types of rice on blood sugar levels. The glycaemic index measures how quickly a carbohydrate-containing food raises blood sugar levels. Foods with a high GI can cause rapid spikes, which may concern those mindful of their blood sugar stability, like me. White rice, with its GI of 72, is considered high. This means it can lead to a quicker and more significant increase in blood sugar levels compared to brown rice, which has a GI of 50. 

After listening to Layne Norton’s insights, I realised that the structure of my diet does not need to be rigidly low-carb. Instead, I can fuel my body efficiently without causing drastic blood sugar spikes by incorporating a balanced amount of rice into protein-rich meals. Brown rice, with its lower glycemic index, seems to be the better option. Its intake leads to a slower and more gradual rise in blood sugar levels, which aligns better with my goal of maintaining energy levels without experiencing energy crashes. 

Another intriguing discovery was that cooking rice the day before and storing it in the refrigerator overnight can reduce its GI. This simple method could be a game-changer for those keen on managing blood sugar levels. It essentially transforms even white rice into a more blood sugar-friendly option. I find this particularly useful for meal prepping, as it allows me to prepare large batches of rice while mitigating its glycaemic impact. 

Considering these aspects, while white rice has the convenience of quick cooking and a softer texture, the higher GI gives me pause. Brown rice, despite requiring more cooking time, offers more stabilising blood sugar levels and provides sustained energy. This attribute, combined with its higher fibre content, makes it a more appealing choice for those who do not want to compromise on their health goals while reintroducing carbohydrates into their diet.

Phytic Acid

In my journey towards a healthier lifestyle, I discovered that brown rice and various whole grains contain phytic acid. This little compound, often overlooked, can bind itself to essential minerals like zinc, calcium, iron, and magnesium. As a result, it can hinder our body’s ability to absorb these crucial nutrients effectively. It’s quite a revelation when you think about it. 

Phytic acid resides in the bran of the grain. Interestingly, when we process white rice, we strip away the bran and, with it, the phytic acid. It’s one of those rare moments where refining food might present a hidden advantage. Reflecting on this made me realise the complexities of our food choices and how they impact our nutrition.

However, this isn’t to say that white rice outshines its whole-grain counterparts nutritionally. The bran and germ removed during refining also contain essential nutrients like fibre, vitamins, and minerals. While reducing phytic acid might enhance mineral absorption, it can also mean missing out on these valuable elements. Balancing our diet with a mix of whole and refined grains can sometimes be the key to allowing us to benefit from their unique advantages. 

Alternatives to Rice: Exploring Rye and Barley

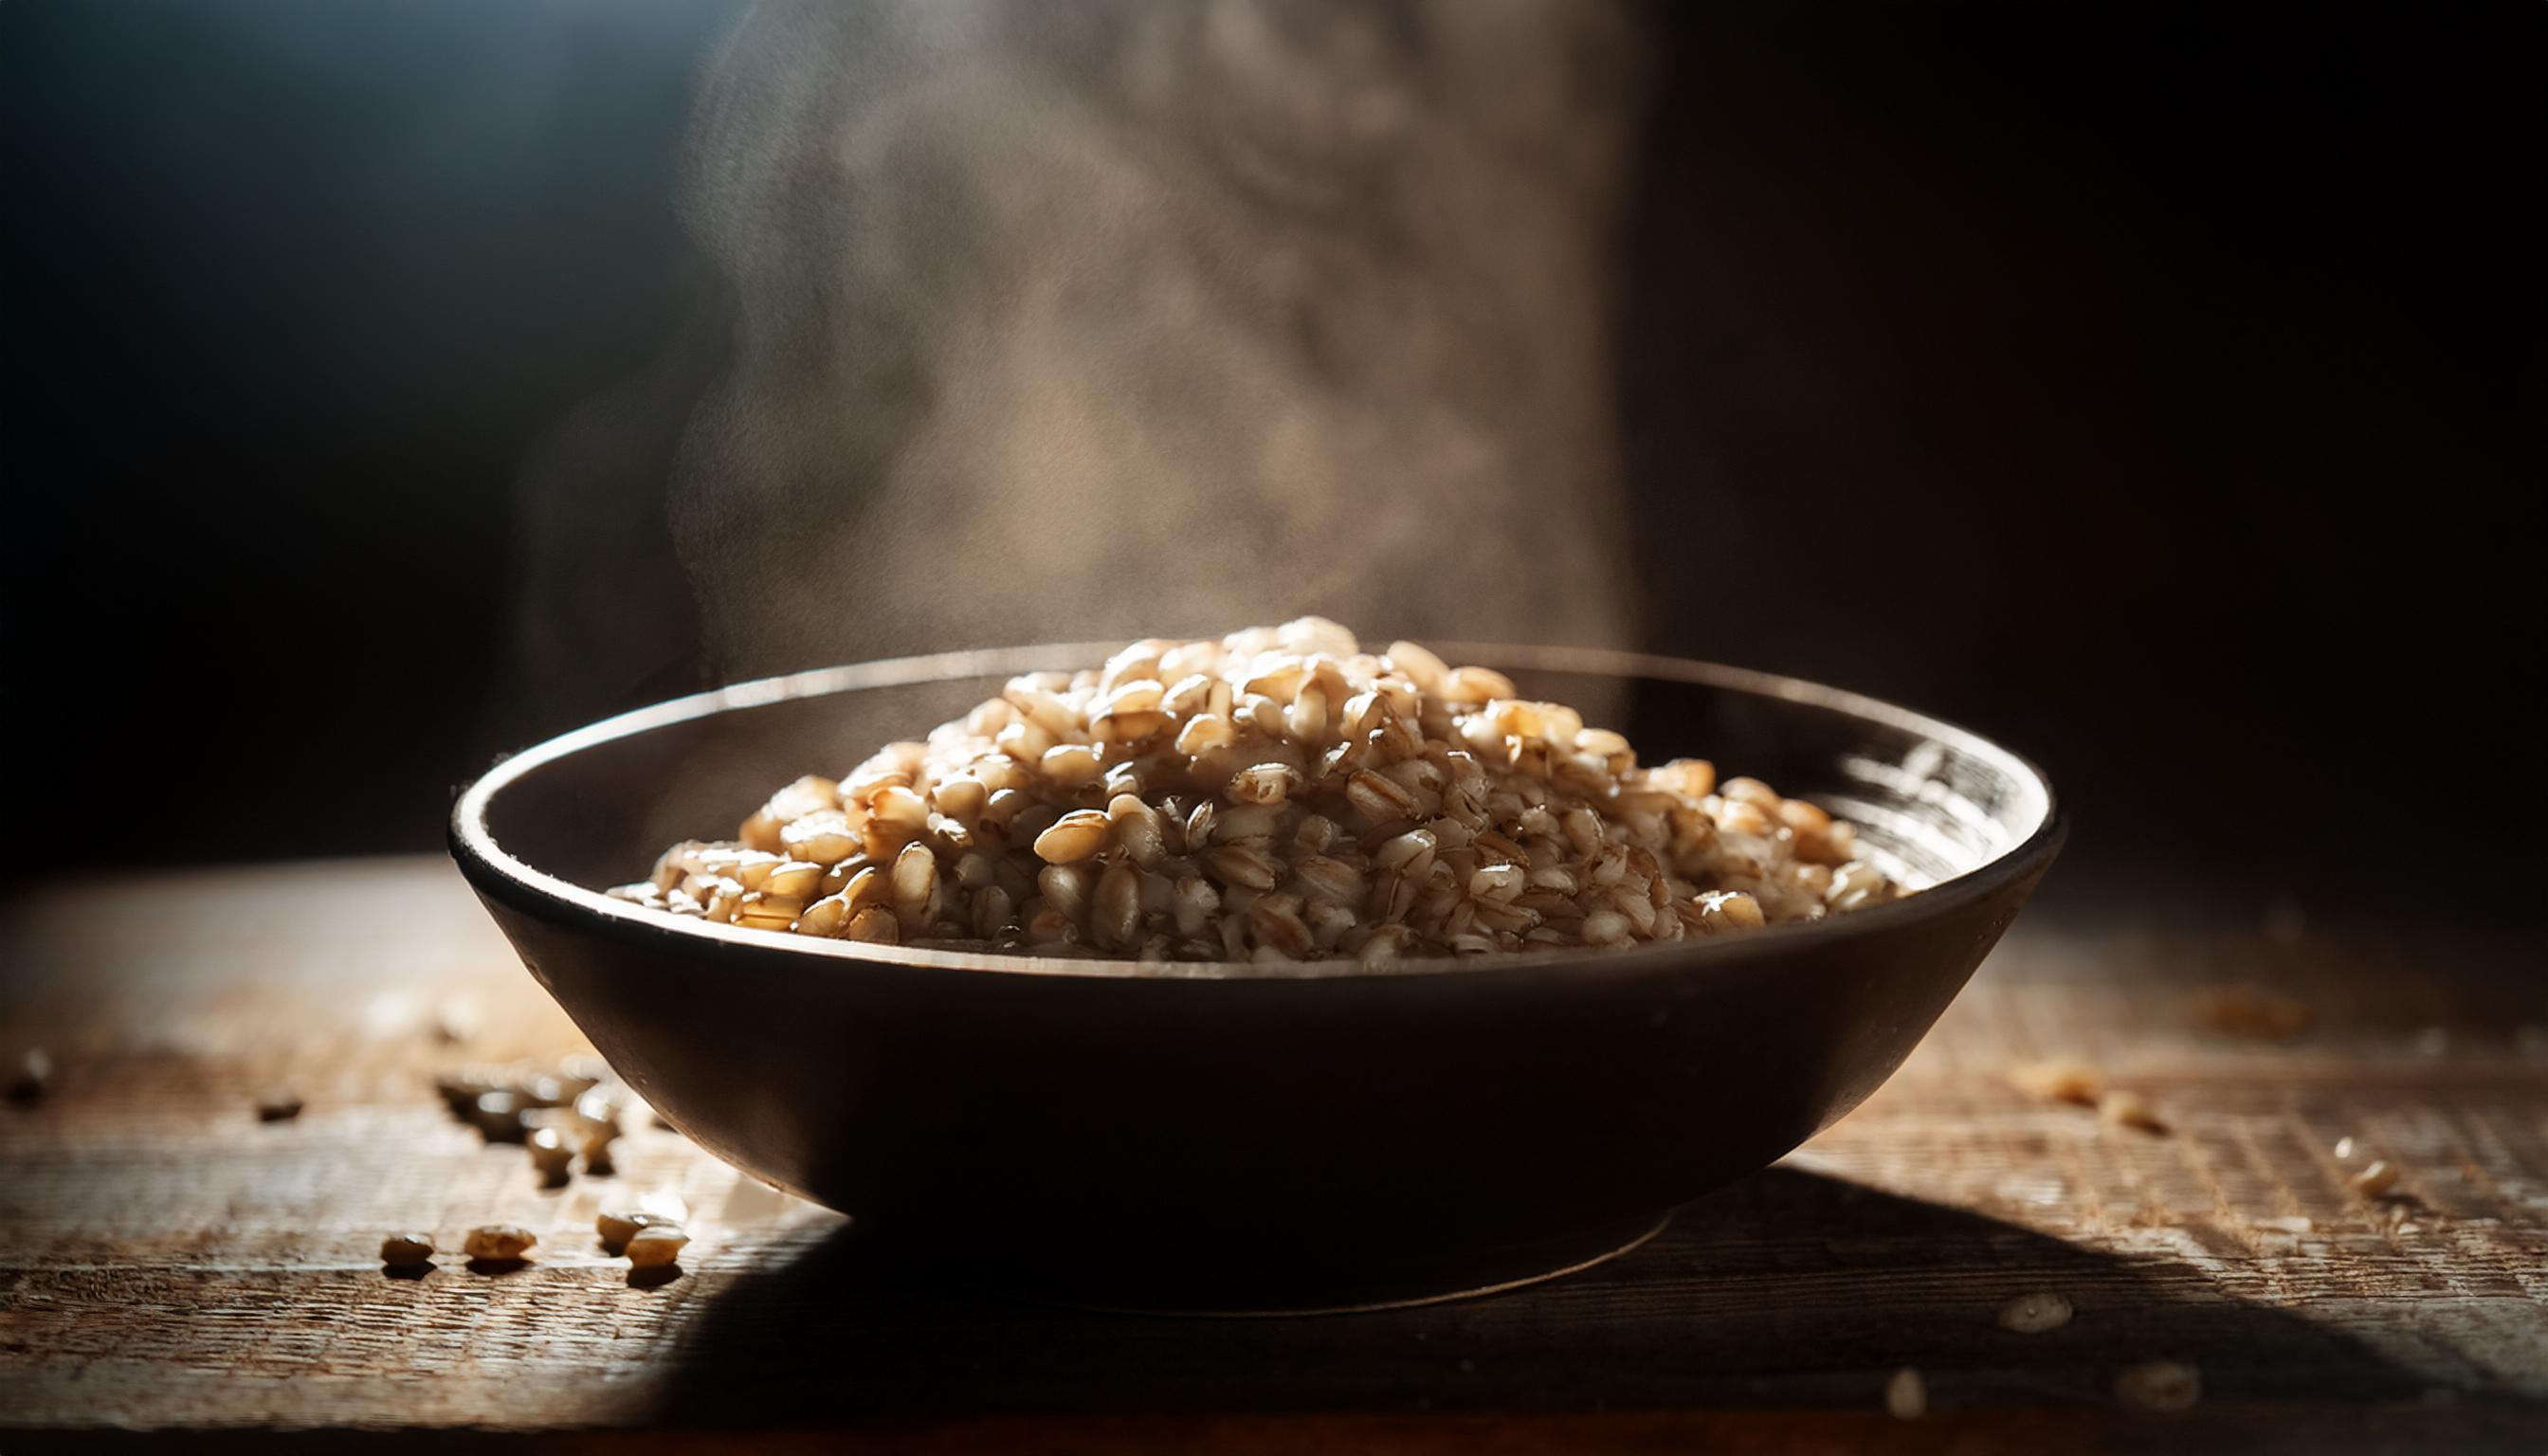
While rice remains a staple in many diets, exploring alternatives such as rye and barley can add variety and nutritional benefits to your meals. Rye, known for its dense, hearty texture and deep flavour, is often used in bread and can be a great substitute in grain-based salads or soups. Conversely, Barley is slightly chewy with a nutty taste and is ideal for soups, stews, or even as a risotto base. 

One of the critical benefits of rye is its higher fibre content compared to brown and white rice. This can aid digestion, promote satiety, and help regulate blood sugar levels. In addition, rye is rich in antioxidants and several essential minerals, including manganese, selenium, and phosphorus. If you’re looking to reduce carbs but still want a grain that keeps you feeling full, rye could be a suitable alternative. 

Barley also boasts impressive nutritional credentials. It is packed with soluble fibre, which is known to help lower cholesterol levels and improve heart health. Barley contains a spectrum of vitamins, such as B vitamins, and minerals, including magnesium and selenium, making it a nutrient-dense choice. Barley’s versatility is another advantage—it can be used in various dishes, from hearty casseroles to light salads, offering a balance of energy and nourishment. 

Integrating rye and barley into your diet can provide a broader range of nutrients and flavours. It’s not about entirely replacing rice but complementing your meals with different grains to achieve a balanced and diverse diet. Experimenting with these alternatives may offer health benefits and culinary delight, making your protein-rich meals more exciting and fulfilling.

Energy Levels and Satiety: Brown vs. White Rice

In my journey of reintroducing carbs, I discovered that energy levels and satiety play a massive role in my daily well-being. Brown rice, with its intact bran and germ layer, offers a more complex, slow-digesting carbohydrate profile than its white counterpart. This means it releases energy gradually, providing a steadier fuel stream throughout the day. I’ve noticed that meals incorporating brown rice keep me fuller for longer, which is a significant advantage when trying to avoid the temptation of mid-afternoon snacks. 

White rice, while often more accessible to digest due to its refined nature, can cause quicker spikes in blood sugar levels. This can be a double-edged sword, depending on your needs. White rice could be beneficial if you’re looking for a quick energy boost before a workout. However, the subsequent drop in blood sugar might lead to energy crashes, something I’ve learned the hard way during busy workdays when sustained energy is crucial. 

Satiety is another crucial aspect to consider. The fibre content in brown rice not only aids digestion but also helps achieve a feeling of fullness. I’ve found that integrating brown rice into my diet has significantly reduced my need for large portions. On the other hand, white rice, lacking this fibre, may require more to achieve the same level of satiety. This can be particularly disadvantageous if you’re monitoring your calorie intake closely. 

Ultimately, the choice between brown and white rice hinges on what you need from your meal. Do you need sustained energy and prolonged satiety? Brown rice might be your best bet. Are you looking for quick fuel and easy digestion? White rice could suit your needs better. I’ve found a balance by incorporating both into my diet, using brown rice for most meals while reserving white rice for specific situations where rapid energy is a priority.

Nutritional ComponentBrown Rice (per 100g)White Rice (per 100g)
Calories111 kcal130 kcal
Carbohydrates23.0 g28.0 g
Protein2.6 g2.4 g
Fat0.9 g0.3 g
Fibre1.8 g0.4 g
Glycaemic Index5072

Do Eggs Raise Cholesterol? Discover the Latest Scientific Insights

0

The evolving story of eggs and their impact on cholesterol levels underscores the importance of staying abreast of the latest scientific consensus. While once demonized for their cholesterol content, eggs are now recognized as a nutrient-rich food packed with essential vitamins, minerals, and antioxidants. While moderation is still key, emerging research suggests that dietary cholesterol from eggs may not have the detrimental effects previously thought.

Eggs are high in dietary cholesterol

Dietary cholesterol does not have as significant an impact on blood cholesterol levels as once thought

Moderate egg consumption does not significantly impact heart disease risk in healthy individuals

white and beige eggs on tray

Understanding Cholesterol: The Basics

Cholesterol has often been painted as the villain in the narrative of modern health, but let’s take a minute to understand this essential molecule. Cholesterol is a waxy, fat-like substance found in every cell of our bodies. It’s vital for producing certain hormones, vitamin D, and substances that help digest foods. Without cholesterol, our bodies would be left powerless in crucial biological processes. However, the balance and type of cholesterol—LDL (low-density lipoprotein) versus HDL (high-density lipoprotein)—determine its impact on our heart health. 

Growing up, I remember hearing the dreaded warnings about high cholesterol from family members. The fear was palpable whenever a loved one returned from a doctor’s visit with a high LDL count. But understanding cholesterol isn’t just about numbers on a lab report; it’s a nuanced story that has evolved with our growing scientific knowledge. 

In the past, we were advised to avoid dietary sources of cholesterol, like eggs, at all costs. This perspective stemmed from early studies that directly correlated dietary cholesterol and blood cholesterol levels, hence the demonisation of foods high in cholesterol. However, contemporary research reveals a more complex interaction between dietary cholesterol, saturated fats, and overall health. It turns out that how our bodies absorb and regulate cholesterol involves more than just the intake from our meals—factors such as genetics, activity levels, and even other diet components play crucial roles. 

Scientific understanding of cholesterol absorption shows that bile acids and specific receptors in our intestines are heavily involved in the process. For example, dietary fats can influence how much cholesterol is taken into the bloodstream. Yes, cholesterol is essential, but balance and timing are everything, like many things in life. After years of following outdated guidelines, I had to navigate it, especially when trying to adopt a healthier lifestyle. 

The good news is that we’re now armed with better information. We know more about managing cholesterol levels effectively without unnecessarily eliminating nutrient-dense foods like eggs. Keeping up with the evolving scientific consensus isn’t just a professional duty for health practitioners—it’s a crucial part of anyone’s journey towards better health.

https://www.youtube.com/watch?v=8ctDyQDIWAc

Good Cholesterol vs. Bad Cholesterol: What’s the Difference?

When I first began understanding cholesterol, I found the distinction between “good” and “bad” cholesterol puzzling. It’s like trying to differentiate between friends who bring out the best in you and those who steer you down the wrong path. In simple terms, low-density lipoprotein (LDL) is often dubbed the ‘bad’ cholesterol. This is because high levels of LDL can lead to the buildup of fatty deposits in your arteries, making them narrow and less flexible. Imagine driving through a street littered with debris—clearly, it’s not a smooth journey! 

On the other hand, we have high-density lipoprotein (HDL), the ‘good’ cholesterol. Think of HDL as a diligent housekeeper, sweeping away the excess LDL from your bloodstream and ferrying it to your liver for disposal. The more HDL you have, the lower your risk of heart disease. It’s akin to having a robust and reliable ally who ensures the harmful elements are kept at bay. 

70% of people do not experience a significant increase in cholesterol after consuming eggs

I remember discussing this with my doctor, eager to understand how my diet impacted these cholesterol levels. We explored various foods and their effects. Interestingly, while I initially focused solely on lowering my dietary cholesterol intake, I soon learned from emerging research that it’s not just the cholesterol itself but the types of fats accompanying it that matter more. For instance, foods high in saturated and trans fats, like fried snacks and processed meats, do more damage by raising LDL levels. In contrast, foods rich in unsaturated fats—like avocados, nuts, and olive oil—help boost HDL levels. 

This evolving understanding of cholesterol underscores the necessity of staying updated with the scientific consensus. It’s easy to fall prey to outdated beliefs. Yet, with consistent learning and an open mind, managing cholesterol via diet can become less of a bewildering task and more of an enlightening journey.

The Evolution of Dietary Guidelines on Eggs

Thinking back to my childhood, I vividly remember the mixed messages about eggs. Some insisted they were a breakfast staple, a powerhouse of protein and essential nutrients. Yet, by the time I reached my teenage years, the message from health experts seemed starkly different. Eggs, it was said, should be consumed cautiously due to their cholesterol content. This rollercoaster of dietary guidelines reflects the evolving scientific understanding of cholesterol and its link to heart health. 

In the mid-20th century, initial studies began to associate cholesterol with cardiovascular diseases. As a result, eggs, with their relatively high cholesterol content, were placed under scrutiny. The dietary guidelines of the 1970s and 1980s often recommended limiting egg consumption to minimise heart disease risk—a guideline that led countless individuals, including myself, to view eggs with a mix of suspicion and guilt. The fear of cholesterol became deeply ingrained in our dietary psyche. 

30% of people, known as hyper-responders, may experience a moderate increase in total and LDL cholesterol

However, the turn of the century brought about significant shifts in this narrative. Advances in nutritional science began to paint a more nuanced picture. Research indicated that dietary cholesterol does not impact blood cholesterol levels as much as previously thought for most people. Studies highlighted the complex interplay between different types of cholesterol and revealed that foods high in saturated and trans fats substantially increased cardiovascular risk. 

In response, dietary recommendations evolved. The 2015-2020 Dietary Guidelines for Americans no longer stipulated an upper limit for dietary cholesterol, acknowledging that eggs could be included in a balanced diet. This echoed my journey towards reconciling my love for eggs with my health concerns—moderation and balance became the guiding principles. 

Yet, it’s essential to stay up to date with scientific consensus. The 2020-2025 guidelines, while not imposing strict cholesterol limits, still encourage a mindful approach to dietary cholesterol intake, especially for individuals with specific health conditions. Eggs are not demonised, but they are also not given carte blanche. This balanced view resonates deeply with me and many others striving to make informed dietary choices in an ever-changing scientific landscape.

shallow focus photography of brown eggs

Egg Nutrition: More Than Just Cholesterol

When I started paying close attention to my diet, I was astounded by the number of conflicting opinions about the humble egg. One moment, I read that eggs were tiny nutrition powerhouses; the next, I was warned they were ticking cholesterol time bombs. It felt like being on a seesaw, but my fascination with this versatile food led me down a rabbit hole of research and discovery. 

As I delved deeper, I realised that eggs are far more than just their cholesterol content. Did you know that an egg is packed with essential nutrients? Each is a little bundle of goodness containing high-quality protein, vital for muscle building and repair, and a potent mix of vitamins and minerals. From vitamin D, which supports bone health and immune function, to choline, crucial for brain health, eggs offer many benefits. 

Perhaps what impressed me most was the presence of antioxidants like lutein and zeaxanthin in the yolk. These nutrients are particularly beneficial for eye health, helping to reduce the risk of cataracts and age-related macular degeneration. So, when you think about it, excluding eggs from your diet due to cholesterol concerns might mean missing out on these valuable health benefits. 

selective focus photography of three brown eggs near white ceramic bowl

Conclusion: Do Eggs Raise Cholesterol?

Throughout my life, I’ve always been fascinated by the ever-shifting landscape of nutritional science. Regarding eggs, the narrative has been as scrambled as a breakfast omelette. I remember when the mere sight of a yolk would send shivers down the spine of anyone wary of cholesterol. The conversation has evolved today, urging us to look beyond the simplistic idea that eggs are outright villains in the dietary battleground. 

Let’s step back and reflect on the abundant research that’s painted a more nuanced picture. For instance, several recent studies suggest that dietary cholesterol in eggs does not significantly impact one’s blood cholesterol levels. A systematic review and meta-analysis of randomized controlled trials found no strong association between egg consumption and heart disease. What a revelation this was for me! I could enjoy my morning scramble with a bit more peace of mind. 

A meta-analysis of 17 studies found no significant association between egg consumption and heart disease

Yet, it’s not all sunny side up. Experts still advise moderation. Given the high cholesterol content in eggs, it’s wise to balance them with a varied diet. Foods loaded with saturated and trans fats pose a more considerable risk to our health than the humble egg, which I had to continually remind myself of. 

One critical voice in this evolving dialogue is Dr Yu-Ming Ni, a specialist in the field whose insights underline the need for randomized trials to ascertain the effects of egg consumption on cholesterol concretely. Keeping abreast of the scientific consensus means accepting that our understanding is, and always will be, a work in progress. We must be willing to change our views as new evidence emerges. 

In this journey of understanding eggs and their place in our diets, one truth remains—being informed and adaptable, rather than rigid, will always serve us well. As we parse the layers of ever-shifting dietary guidelines and scientific studies, remember that our relationship with food is deeply personal. Whether you choose to include eggs in your diet, staying updated with scientific findings is your best ally in making healthful choices. And for me, that’s one of their most empowering narratives.

NutrientAmount per Large Egg (50g)
Calories70
Protein6 grams
Total Fat5 grams
Saturated Fat1.5 grams
Cholesterol185 milligrams
Carbohydrates1 gram
Sugar1 gram
Vitamin A270 international units (IU)
Vitamin D41 international units (IU)
Choline147 milligrams
Selenium15.4 micrograms

How to Use Emergency SOS via Satellite on Your iPhone: Your Guide to Life-Saving Technology

0

This capability is more than just a fancy add-on; it’s a reliable and easy-to-use function that can make a critical difference when you’re in a dire situation, far from the reach of traditional cellular networks. Imagine a sudden car breakdown in the middle of nowhere, a hiking mishap miles off the beaten path, or any other scenario where help seems a distant hope. Having this technology tucked in your pocket can be a game-changer. 

“In the past, just a split second lapse in judgement during outdoor adventures could mean the difference between life and death. Thanks to innovations like Emergency SOS via satellite, help is just a few simple steps away.”

The tales of lives saved and crises averted thanks to this feature are inspiring. More importantly, every iPhone user should be familiar with and ready to utilize it. Let me walk you through what makes it invaluable and how to set it up to ensure you’re always prepared for the unexpected.

Introduction to Emergency SOS via Satellite

I marvel at how technology has improved our safety, especially when we’re most vulnerable. While I don’t own an iPhone, I’ve followed the growth of the iPhone 14, particularly its life-saving Emergency SOS via satellite feature. Imagine hiking in a remote area with no mobile service. A sudden accident leaves you injured and unable to move. It’s a scary thought, but with a few button presses, you could call for help within moments, all thanks to this feature. 

Emergency SOS via satellite is specifically for when regular cellular networks don’t work. Using satellite technology, your iPhone 14 can contact emergency services even in remote locations. It’s a significant advancement that provides extra security and peace of mind for adventurers, outdoor lovers, and anyone in remote areas. 

Knowing how to use this feature could be life-saving. It lets users quickly share their location and a live transcript with emergency services, giving responders precise information to act fast. The feature also sends your exact location, medical ID, emergency contacts, and answers to important questions automatically, making the rescue process smoother. 

Plus, this service is available in many countries, from the U.S. to New Zealand, so you can feel safe in different parts of the world. Apple’s big investment in this technology shows how important it is, reflecting its strong focus on user safety. For iPhone 14 users, this isn’t just a feature; it’s a lifeline built into their device. By learning about this feature, you’re empowering yourself to handle emergencies with confidence and resilience.

Which iPhone Models Support Emergency SOS via Satellite?

One might think of an iPhone as another tool for staying connected, snapping photos, or browsing the latest viral trends. However, the iPhone 14 series and the iPhone 15 models are equipped with a feature that transforms them into genuine lifelines during emergencies: Emergency SOS via satellite. This feature is available on the iPhone 14, iPhone 14 Pro, iPhone 15, and iPhone 15 Pro, ensuring those critical moments when traditional cellular service fails do not end in despair. 

To harness the full potential of Emergency SOS via satellite, running your iPhone on iOS 16 or later is essential. Apple has intricately designed this system to function seamlessly across various terrains and situations, from European capitals’ bustling streets to the American wilderness’s remote corners. Supported countries include Australia, Austria, Belgium, Canada, France, Germany, Italy, Japan, Luxembourg, the Netherlands, New Zealand, Portugal, Spain, Switzerland, the United Kingdom, and the United States, making it a global asset for travellers and adventurers. 

By leveraging accurate GPS positioning and satellite technology, these iPhone models can connect users to emergency services even when cellular networks are out of reach. It’s more than just a technological marvel; it’s a testament to Apple’s commitment to user safety. The infrastructure supporting this feature is robust, backed by a whopping $450 million investment, ensuring that your iPhone has your back wherever you are. 

Step-by-Step Guide to Activating Emergency SOS via Satellite

Activating Emergency SOS via satellite on your iPhone is straightforward and can be a lifesaver in critical situations. Here’s how you can set it up and ensure it’s ready when you need it most: 

1. Access the Settings App: Begin by opening the Settings app on your iPhone. Scroll down and tap on Emergency SOS. This section contains all the features related to emergency assistance. 

2. Add Emergency Contacts: In this menu, you can add emergency contacts. These people will be notified if you ever use the SOS feature. Ensure that the contacts you choose are trusted individuals who can provide immediate assistance or relay information to emergency services. 

3. Enable Satellite SOS: Look for the option to enable Emergency SOS via Satellite. Toggle this feature on. You might need to go through a quick set-up process that ensures your phone is ready to use satellite connectivity when needed. 

4. Access the Demo: For iPhone 14 users, Apple provides a demo to familiarise yourself with the satellite SOS feature. Using this demo to understand how the feature works is advisable before you find yourself in an emergency. Navigate to Settings again, and under Emergency SOS, you’ll find the demo option. Engaging with this demo can build confidence in using the actual feature if required. 

5. Practise Activation: Emergency situations can be stressful, so practising this feature’s activation is crucial. To activate Emergency SOS via satellite, hold down the top two buttons on your iPhone until the emergency screen appears. From here, follow the on-screen instructions, which might include answering a few critical questions about your situation, similar to an emergency protocol conversation with a dispatcher. 

6. Familiarise with Location Services: Ensure your location services are enabled. During an emergency, the SOS feature will send your geo-location coordinates to emergency services as well as your emergency contacts. This information is crucial for rescuers to pinpoint your location, especially in remote areas. 

With these steps complete, your iPhone is equipped to offer lifesaving assistance through its advanced satellite technology. Remember, familiarising yourself with these steps beforehand can make a significant difference when every second counts.

Enhancing Your Safety: Complementary Apps and Features

While the Emergency SOS via satellite feature is undoubtedly a game-changer, it’s important to remember that combining it with other safety-oriented apps and iPhone features can significantly boost your overall preparedness. Consider apps like “Find My,” which allows friends and family to know your whereabouts and provides an additional safety net. The “Health” app is another underrated tool—it can store your medical ID, which first responders can access even if your phone is locked. 

Beyond these apps, integrating your iPhone with accessories like the Apple Watch can further enhance your safety. The Apple Watch’s fall detection and crash detection features have proven invaluable in emergencies, and it can send alerts and your location to emergency contacts. These features work seamlessly with the Emergency SOS, creating a comprehensive safety network that ensures timely assistance. 

Configuring your emergency contacts in the “Contacts” app can make a critical difference. These contacts are automatically notified when the Emergency SOS is activated, giving your loved ones a real-time alert during emergencies. A few moments to ensure your emergency details are up-to-date can save precious seconds during a crisis. 

Lastly, it may be worth exploring third-party apps dedicated to personal safety and emergency situations. Apps like “bSafe” and “Red Panic Button” offer various features, from location sharing to sending pre-recorded distress messages. Such tools, combined with Apple’s built-in features, fortify your preparedness, giving you and your loved ones peace of mind. 

By harnessing these complementary apps and features, you create a multi-layered safety net, transforming your iPhone into a pivotal tool for maintaining personal security. The ingenuity lies in the technology and how we integrate and utilise these tools to safeguard our lives. While I don’t own an iPhone, having such a reliable support network at your fingertips is undeniably reassuring.

Conclusion: Empower Yourself with iPhone Emergency SOS via Satellite

Knowing that our phones, which we carry everywhere, can provide a lifeline in desperation is truly empowering. By leveraging technology and connectivity, Apple’s Emergency SOS via satellite brings an invaluable level of security and peace of mind, particularly in critical situations where every second counts. 

I don’t own an iPhone, but I appreciate its advancements in enhancing personal safety. Imagine being stranded in a remote location with no cellular coverage; the comfort of knowing that you can still reach out for help through a streamlined, satellite-based communication system can be life-changing. It’s not just about the technology itself but the assurance it offers. 

I encourage all iPhone users to take full advantage of this feature. Familiarise yourself with the steps to activate it, understand its capabilities, and even practice using the demo available in your phone’s settings. Being prepared and knowledgeable means you’re one step ahead in protecting yourself and your loved ones. 

Incorporate the use of complementary apps and features, such as Fall Detection and Crash Detection, to further bolster your safety toolkit. These additions neatly integrate with the Emergency SOS functionality, ensuring multiple layers of protection wherever you go. 

Ultimately, the value of the iPhone’s Emergency SOS via satellite lies in its potential to save lives by bridging the gap when traditional communication channels fail. Apple’s investment in this technology reflects its commitment to user safety and demonstrates the extraordinary possibilities when innovation meets necessity. Empower yourself with this knowledge and stay safe; your life or the life of someone you care about could depend on it.

Bruising in Brazilian Jiu Jitsu: Prevention, Treatment and Long-term Effects

0

Bruises are temporary, but the lessons learned on the mat last a lifetime.

Unknown

The Science Behind Bruising

Have you ever wondered why a bruise changes colour? That’s it’s healing process. It goes something like this: 

  • Stage 1: Red. The bruise is fresh. The blood appears red because it’s still carrying oxygen.
  • Stage 2: Blue or Dark Purple. A few hours in, oxygen is no longer supplying the blood cells. Without the oxygen, the blood turns a dark blue or purple.
  • Stage 3: Green. A few days in, the body is at work breaking down and reabsorbing the blood. A chemical called biliverdin is produced at this stage, which is, you guessed it – green!
  • Stage 4: Yellow or Brown. Bilirubin is the final chemical produced during the bruise’s colourful journey. For the final stage, your bruise would be yellow or brown.

Our bodies are, indeed, outstandingly sophisticated machines.

The Relationship Between Bruising and Combat Sports 

But why is bruising so common in combat sports like BJJ? Here’s the deal—combat sports, by their very nature, involve a lot of body contact, which increases the likelihood of bruising. When you’re rolling on the BJJ mat, it’s essentially a battlefield where blood vessels are on the front line. One wrong move, one tight grip, or one heavy tumble, and bam – you’re bruised. 

Also, let’s not forget that every athlete’s body responds differently. Some of us might bruise easily, while others may walk away from a sparring session with barely a scratch. It’s not necessarily a sign of weakness or a deficiency – it’s how your body is wired.

If we have had a session that involves a lot of gripping – I know there will be minor, fingertip-sized bruises around my triceps. Yes, you want to avoid pinching skin, but I also consider it quite normal to have some marks left if someone is trying to hold onto your arms while manipulating your weight around you.

Diet and Its Impact on Bruising

Have you ever wondered if your food impacts how easily you bruise or how quickly those unsightly blue and purple patches heal? Well, let me tell you—it does. Providing our bodies with the necessary nutrients can dramatically speed up recovery from bruising, while certain other foods can make us more susceptible to them.

The Nutrients Your Body Needs 

First, let’s highlight the good guys—those essential dietary components that can do wonders for bruise recovery. These include Vitamins C, K, and B-12, all of which play roles in the health of our blood vessels and clotting. Here’s the lowdown: 

Vitamin C is like a personal bodyguard for your blood vessels, helping strengthen the walls and the cells inside. Citrus fruits, strawberries, and spinach are great C-sources, but capsicins? They’re bursting with the stuff! 

Ever heard of Vitamin K? No? Well, let’s get acquainted. Vitamin K aids in clotting—basically, it’s your body’s on-hand medic, rushing to the site of a bruise to begin patching things up. Kale and spinach are Vitamin K powerhouses, but if you fancy something sweeter, prunes are a go-to!

Now, Vitamin B12—this chap is all about the formation of red blood cells. It is found in foods like shellfish, dairy, and my all-time love, beef! B12 not only helps produce more of these little warriors but also keeps them healthy to speed up recovery times.

These days, I get a lot of leafy greens, fresh fruits and red meat into the system – Vitamin K might be something I try out with implementation – but – at the same time, I know the bruises are only around for a day or two before disappearing – so I am comfortable the body is dealing with them quickly enough.

Shaking Hands with the Bad Guys: What to Avoid 

As with every story, there are some villains in the mix. In combat sports, these come in the form of substances that can worsen or prolong healing time.  

The first suspect? Alcohol. Yup, your post-match pint could be slowing down that bruise recovery. Alcohol dilates the blood vessels, increasing bruising and potentially making the discolouration more apparent! So, you might consider swapping that pint for a glass of water or a fruit smoothie after your match. 

Next on our list is salicylic acid. Ever noticed how you bruise more easily when you’re taking aspirin for that nagging headache? That’s because aspirin has salicylic acid, which interferes with clotting processes. Don’t panic—I’m not telling you to abandon your headache reliever completely. Just be aware that regular use can make you more prone to bruising.

The Effects of Age on Bruising

If you’ve been part of the Brazilian Jiu Jitsu world for a while, you’ve probably noticed that as you age – your bruises start keeping up with the times as well. They seem to appear more frequently and stick around for longer. Don’t worry; you’re not imagining things. It’s not your mind playing tricks on you because you just hit the big 4-0 – there is a scientific basis to this phenomenon. 

Why the Elderly Bruise More 

So why do we old boys seem to bruise more than you whippersnappers? As people age, their skin becomes thinner, losing some protective fatty layers that cushion the blood vessels against injury. It’s as simple as that. As you age, your body’s cushy protective layer says its goodbyes, leaving you more prone to bruises. Besides, the blood vessels themselves become more fragile and are, hence, more likely to rupture. 

Slow Healing with Age 

But it’s not just the frequency of bruises you need to worry about—why do our bruises seem to linger longer as we age? That is due to the body’s repair mechanisms slowing down with age. Think of it as a once enthusiastic worker who’s now nearing retirement. It does the work – yes, eventually – but with less pep. This slower healing process means that your bruises take their sweet time to disappear, leaving you with longer memories of your fantastic falls and throws in the Brazilian Jiu Jitsu arena. Just look at a kid to see how much age affects healing rates.

Staying Healthy and Active 

It makes you think it’s all downhill from here, right? But here’s the kicker – it doesn’t have to be. Age might be a significant player in the bruising game, but it’s not the sole actor. Nutrition, overall health, and fitness levels also play their roles. Eating the right food (discussed in previous sections), staying active, and maintaining a healthy lifestyle can help you fight these age-induced changes. So, ironically, the very fact you are getting more bruises from training, can help with the healing process of bruises!

Treating Bruises

There are numerous steps you can take to treat your bruises when you initially get them, and you can even accelerate their healing with some tried and tested home remedies. These simple steps and remedies can help manage the discomfort, reduce the visibility of the bruise, and speed up the healing process. So, without further ado, let’s dive into the details. 

First Aid for Bruises 

Alright, you’ve just rolled off the mats and discovered a not-so-lovely new bruise blooming. What’s the next step? Well, follow the classic R.I.C.E treatment: Rest, Ice, Compression, and Elevation.

  1. Rest: Give yourself a break! Your body needs time to start the healing process, so avoid any activities that could cause further injury.
  2. Ice: Wrap an ice pack in a cloth or towel and place it on the bruised area for about 15-20 minutes. This helps to reduce swelling and numbs the sore area.
  3. Compression: Wrap the area with a bandage. It’ll help to curb the swelling, but remember not to wrap it too tight — we don’t want to cut off blood circulation.
  4. Elevation: Try to elevate the bruised area above heart level. You’re essentially helping your body to minimise swelling by encouraging blood flow away from the affected area.

Home Remedies to Speed up Healing 

Now sparkling and back at your abode, what can you do to hasten the bruise healing process further? Just check our handy-dandy home remedies: 

  1. Vitamin C & K: These vitamins are champions in healing skin. Vitamin C aids the production of collagen, which helps with skin repair, whilst Vitamin K improves the body’s ability to clot blood, thereby reducing continued bruising.
  2. Pineapple & Papaya: These fruits contain enzymes (bromelain and papain, respectively) that help to break down blood clots and, thus, facilitate the healing of bruises.
  3. Arnica: This is a homeopathic topical cream, often used to reduce inflammation, relieve pain, and speed up the healing process.

Remember, these home remedies are not one-size-fits-all solutions. So, pay attention to your body. If you notice any unusual symptoms or the bruise does not start fading after a couple of days, consider seeking medical attention.

Arnica or Voltaren?

That’s the million-dollar question. Arnica or Voltaren? Both are popular choices for treating bruises, but which stands out? 

Arnica, a plant native to high-altitude regions in Europe and North America, has been used for centuries for its medicinal properties. And let’s be honest, folks — anything that’s stood the test of time deserves our attention. It’s used in creams and gels that you apply directly to your skin to help reduce swelling and speed up the healing of bruises. 

Voltaren, on the other hand, is a brand name for a popular non-steroidal anti-inflammatory drug (NSAID), diclofenac. It’s employed worldwide — from the field to the mat, from sprains to strains.

So, who’s the champion in this showdown? 

Unfortunately, or fortunately, depending on how you look at it, there’s no clear-cut winner here. What works best will depend on each individual, their body’s response, and the severity and type of the bruise. 

Regardless of your champion cream or gel, consistency. It matters less what you choose to use and more that you consistently apply it. After all, your bruise isn’t going away after one application, so why should your treatment?

Ultimately, an established routine of care and attention will make a difference. Consistency in action — even in bruise treatment — can yield significant results. 

When to Seek Medical Attention

When engaging in combat sports like Brazilian Jiu Jitsu, it’s vital to understand when a bruise is just a bruise—and when it’s a cry for medical attention. Sure, we all love a good war story to share, but ignoring severe symptoms could lead to serious health issues. – Remember, we’re warriors, not doctors! 

So, when should you seek medical attention? Let’s lay it out: 

  • Size: If the bruise is large or rapidly increases, it’s a good idea to check it.
  • Location: Have you taken a hit to the head, neck, or eyes? Even a ‘minor’ injury to these areas can be severe. Don’t fob it off.
  • Pain: All bruises can hurt, sure! But if the pain doesn’t subside or worsen, that’s not a great sign.
  • Swelling: A slight swelling can be normal. But uncontrolled swelling? It’s time to see a doctor.
  • Other symptoms: Feeling dizzy, faint, or nauseous? Are you experiencing vision trouble or difficulty moving a joint? Yep, you’re probably not surprised – see a healthcare professional.

How to Spot Potentially Dangerous Impacts 

Let’s face it – Brazilian Jiu Jitsu is an intense sport. You’re going to take some hits. And while the occasional bruise or minor injury is par for the course, other impacts need attention. – So, how do you tell the difference? 

Pay special attention to: 

  1. Blows to the head: This can cause everything from minor concussions to severe brain injuries, so it’s never something to shrug off.
  2. Hard stomach impacts: These can cause internal damage, especially to your spleen or liver.
  3. Direct hits to joints: It can cause potential dislocation or injury to ligaments and tendons.

Remember, the goal here isn’t to alarm you – it’s to arm you with knowledge. Combat sports are physical and intense, and understanding the risks can keep you safe and healthy. – Because isn’t that what a true warrior wants?

Long-Term Effects

Admittedly, being a regular in Brazilian Jiu Jitsu classes can often translate into sporting a colourful array of bruises. All that grappling and rolling can lead to interesting discolourations – trust me, I’ve been there. But what does this mean for you in the long term?

The Elephant in the Room: Chronic Bruising Isn’t So Charming 

Repeated bruising, especially in an intense sport like BJJ, might raise eyebrows. The main concern with bruising isn’t so much the eye-catching colours or even the occasional wince when someone gives you an enthusiastic pat on the back. Instead, it’s what this repeat injury might be doing to your body beneath the surface. Over time, the small blood vessels, or capillaries, beneath your skin can weaken due to regular damage. This could potentially lead to prolonged healing times and – if not given enough time to heal – an increased risk of more severe injuries. 

Impact on Blood Flow and Nutrient Supply 

Consider this – regular bruising or capillary damage can disrupt blood flow to that area. Remember, your blood is vital in supplying nutrients and oxygen to your body’s cells and removing waste products. So, when blood vessels are damaged, this essential service can be hindered, impacting your healing and recovery process.

Is it all Doom and Gloom? 

Not at all! While it’s crucial to take precautions and care for your body, the risks don’t make our beloved BJJ any less appealing. The key is to give your body the necessary time to heal, remain mindful of your body’s signals, and, by all means, please don’t ignore persistent bruises or swelling. And remember, regular check-ups with a medical professional or a sports therapist won’t hurt either – well, not as much as a BJJ chokehold anyway!

Empowering Yourself with Knowledge and Care

Knowledge is power, as they say. Put simply, now that you know the ins and outs of bruises, you’re in a better position to prevent—and react to—them. 

To recap: 

  • Bruises are a common consequence of contact sports like Brazilian Jiu Jitsu— they’re essentially injuries to your blood vessels.
  • Diet and age can play a substantial role in how quickly you bruise and heal. Keeping a healthy lifestyle with a balanced intake of essential vitamins and nutrients is crucial.
  • Your body’s reaction to bruising changes as you age. Those who are ‘more experienced’ might find that we bruise more easily and heal slower. Fortunately, staying active and healthy can help manage this process.
  • Treating bruises can be effectively done at home with first aid and some handy remedies. Yet, knowing when things might be a bit more severe and seeking medical help becomes necessary.
  • Finally, continuous bruising can lead to long-term effects — from nutrient supply disruption to tissue scarring. Yet, don’t let this scare you off the mat! As long as you take care of your body, your Brazilian Jiu Jitsu journey shouldn’t be hindered by these minor setbacks.

But now comes the most significant bit—how you use this information. Implementing the right dietary changes, preventing bruises, and knowing how to react when they happen are all vital for your health and your sport. 

So, remember: cool down, elevate, compress, repeat! 

Lastly, I can’t stress this enough: listen to your body. It’s often more adept at informing you about an issue than any doctor! Listen to its whispers so you don’t have to hear its screams. Let’s strike that perfect balance on the mat—between power and caution, knowledge and application. After all, isn’t that what Brazilian Jiu Jitsu is all about?

How Barefoot Shoes Changed My Life in One Year: Strength, Comfort, and Adventures

0

Reflecting on this year, my perception of shoes has shifted. Today, I reluctantly wore traditional sneakers for a photoshoot. My toes felt cramped and sore almost immediately. Even my partner noticed my unsteady gait after a few hours, contrasting my usual grounded stride. 

“I don’t know if my toes have splayed out or if I’m just more aware of pressure from narrow shoes. Regardless, I welcomed getting back into my barefoot shoes as soon as possible.”

This awareness has brought benefits. My legs have grown stronger, something even the guys at BJJ have noticed. While my feet still get cold in winter, it’s not as intense. I am more aware of my lower body, flexing and stretching while standing still.

Embracing the Barefoot Revolution: My Journey Begins

When I first discovered the concept of barefoot shoes, I was intrigued but also a bit sceptical. After years of being told how essential proper arch support and thick soles were, walking around with minimal cushioning and support seemed almost reckless. However, the more I read about the benefits of barefoot footwear—enhanced proprioception, improved foot strength, and a more natural gait—the more I felt compelled to try it. 

So, in August of 2023, I switched to barefoot, minimalist shoes. I started with two pairs of Vivo’s, a brand highly recommended by various barefoot enthusiasts. Initially, I used the inserts provided with the shoes, especially during the transition phase, to give my feet time to adjust to the new experience. 

At first, walking in barefoot shoes felt quite different. I was acutely aware of every pebble and texture beneath my feet, which was fascinating and slightly uncomfortable. My muscles and tendons were engaging in ways they hadn’t before, and I could feel my posture and balance slowly shifting. Despite the initial awkwardness, I quickly noticed improvements in my overall foot health. The arches of my feet began to strengthen, and the chronic foot pain I had been experiencing started to diminish. 

As the months passed, I relied on the inserts less and less. My feet had adapted to the increased demands placed upon them, and I began to appreciate the natural flexibility and responsiveness that barefoot shoes encouraged. By winter, I only used the inserts when temperatures dropped significantly, and I needed the thermal protection they provided while standing on cold concrete floors. 

The journey wasn’t without its challenges—there were days when my feet felt sore and tired, and it required a commitment to listen to my body and allow time for rest and recovery when needed. But as I stuck with it, I found that the benefits outweighed the initial discomfort. Not only did my feet feel stronger, but I also began to notice changes in my overall physical alignment and well-being. It became clear that transitioning to barefoot shoes was one of the best decisions for my long-term health.

Switching to barefoot shoes can benefit overall foot, toe, and leg health

Traditional Shoes: A Cramped Reality Check

Wearing those traditional sneakers was eye-opening, to say the least. I felt like my feet were trapped in stiff, narrow boxes, a stark contrast to the freedom I’ve grown accustomed to with my Vivo’s. The cramped feeling wasn’t just uncomfortable; it was almost unbearable after spending a year in minimalist footwear. I frequently adjusted my feet, trying to wiggle my toes to reclaim some semblance of space and balance. It reminded me of when I thought tight, structured shoes were the norm, but now, they just seem archaic. 

What struck me most was the disconnection from the ground beneath me. Traditional shoes, with their thick soles and cushioned insides, create a barrier that dulls sensory feedback from the feet. This lack of ground feel affected my balance significantly. My partner even noticed my gait was off, less stable and more forced compared to my usual natural stride in barefoot shoes. It’s fascinating how quickly our bodies can adapt to and appreciate the benefits of more natural footwear, to the point where anything else feels unnatural and even detrimental. 

Reflecting on this experience, I realise how much my perception and awareness of footwear have shifted. My toes have likely splayed out more, and I’m certainly more conscious of any constriction or pressure that traditional shoes impose. The difference is palpable, reinforcing my commitment to wearing barefoot shoes for the long haul. After all, once you’ve tasted freedom, there’s no turning back.

Leg Strength Gains: A Year of Subtle Training

Besides my regular weight training regime that includes split squats and other leg-focused exercises, I have noticed distinct changes in my musculature that seem directly linked to wearing barefoot shoes. My calves, in particular, feel firmer and more engaged during daily activities, giving me a sense of newfound stability. 

Interestingly, this hasn’t gone unnoticed. Some of my BJJ training partners have commented on my enhanced leg strength and balance—a factor I attribute partially to my footwear. The nature of barefoot shoes insists that every step requires more effort from your lower body, subtly intensifying the workout without you even realising it.

This constant, low-level exercise seems to have a cumulative effect. Over time, my legs have adapted to the increased workload, resulting in stronger muscles and a more alert and responsive lower body. I’m more in tune with how I move, and perhaps most importantly, I’ve become more grounded—literally and figuratively. The journey of strengthening my legs through minimalist shoes reflects a broader process of continually working towards better health and more mindful living.

Wearing barefoot shoes can improve balance and gait

Cold Resistance: Winter in Barefoot Shoes

One unexpected perk I’ve noticed is a higher tolerance for cold weather. Previously, winter was a battle against freezing feet, but now it’s much more bearable. It isn’t that I don’t feel the cold; rather, my feet seem to have adapted to it better. I used to dread stepping outside in jandals during those biting months. Now, I can slip into them for a quick trip to BJJ without feeling like I’m walking on ice

However, I’m pragmatic about the limits of barefoot footwear in extreme conditions. While my feet might not get as cold as they used to, I am exploring options like barefoot boots for more demanding settings. For instance, with a mid-winter hunting trip on the horizon, more protection from the elements would be welcome. I envision a sturdy pair with thermal inserts providing the needed warmth while allowing the natural foot movement I’ve come to enjoy. 

It’s fascinating how these shoes have made me more attuned to my body, especially how it responds to different climates and terrains. The feeling of connectedness to the ground, even in colder conditions, has its own charm and utility. I’m more active in keeping my feet warm through movement, and this conscious engagement has been surprisingly beneficial. While I’m prepared to adapt further, the essence of barefoot shoes—enhancing my natural stride and responsiveness—has made the winter months less daunting.

Feet may become more resilient to cold temperatures with regular barefoot shoe use

Durability

The Vivo Primus Trail II FG is on the bottom, and the Geo Court III is on the top. The slightly harder FG sole shoes have minimal wear (maybe a little over the toe ‘tip’), while the softer sole on the Court is showing a bit more. Remember that this is a year of just wearing the two different pairs. By their nature, we are talking softer material than many other shoes – harder and they couldn’t be as flexible.

Why I Love Barefoot Shoes: A Year in Review

One of the most profound transformations I’ve experienced is a heightened awareness of my feet. With each step, feeling the ground beneath me has brought me closer to my body, enhancing my overall connection to every movement I make. It’s not just about wearing shoes; it’s a lifestyle change that emphasises the simplicity and elegance of natural movement. 

The benefits have extended beyond my feet and legs. I’ve noticed improvements in my posture and balance, two aspects of physical health that had often been neglected. Walking and standing now feel like activities that actively engage my entire body, subtly working muscles that traditional footwear left dormant. The shift towards minimalist shoes has added a new dimension to my physical activities, whether everyday walking or attending BJJ sessions. My body feels more liberated, and an undeniable sense of freedom comes with each step.

That said, the journey hasn’t been without its challenges. Adapting to barefoot shoes required time, patience, and a willingness to embrace initial discomfort. There were moments of significant strain, especially during the first few months. However, recognising that these moments were steps towards a stronger, more resilient body kept me committed. The reward has been well worth the effort—a year in, I feel more dynamic and grounded than ever. 

Looking ahead, I’m excited about further exploring the world of barefoot footwear. The idea of trying out barefoot boots has piqued my interest, especially with a mid-winter hunting trip on the horizon. The combination of minimalism and the need for practical protection in rugged terrain presents an intriguing challenge. Finding the right balance will be essential, but I am confident in the benefits that barefoot shoes have already proven to provide. 

As I reflect on this past year, one thing is clear: switching to barefoot shoes has been one of the best decisions for my physical health. I encourage anyone curious about minimalist footwear to take the plunge. The journey might start with discomfort, but it leads to a more intimate connection with your body and a profound sense of well-being.

Kids and Weight Lifting: Safe and Smart Ways to Get Started

0

Take care of your body. It’s the only place you have to live.
– Jim Rohn

It got me thinking. For years – I had heard that weightlifting for kids was a definite no-no. But – as I have also learnt, it’s not all about heavier and heavier weights; having my kids do some safe, controlled and fun lifting with me appeals more and more. But – what is the latest thinking in regards to kids lifting?

Understanding the Myths: Is Weight Lifting Safe for Kids?

For many years, there’s been a persistent myth that weightlifting can impede children’s growth. This belief has made many parents hesitate when their youngsters are interested in strength training. However, modern research has put this notion to rest. When approached correctly, weightlifting can be a safe and highly beneficial activity for children.  

One major concern has been the potential harm to growth plates, those crucial zones of developing tissue at the ends of long bones. However, studies indicate minimal risk of injury to these growth plates with the right guidance and technique. Instead, weight lifting promotes healthy bone development and can significantly reduce the risk of osteoporotic fractures in later life.  

It’s important to understand that weightlifting for children isn’t about urging them to lift heavy weights beyond their capabilities. It’s about teaching body awareness and coordination and enhancing their overall strength. Moreover, it’s crucial to tailor strength training to fit their needs and developmental stages rather than having them follow adult routines.  

Quick summary: Weightlifting is safe and beneficial for children when done correctly, with the right supervision and technique. Dispelling the myth that it stunts growth opens the door to recognising its advantages.  

So, if weightlifting isn’t harmful to kids, one might wonder, what are the actual benefits for young lifters?

The Benefits of Weight Lifting for Children

When my 9-year-old first expressed an interest in joining me during my weightlifting sessions, I couldn’t help but feel a mix of pride and concern. I wasn’t alone in this; my nephew was showing a similar interest, requesting his parents for some barbells. This led me down a path of research, consultation, and experimentation—ultimately opening my eyes to the myriad benefits this activity can offer young enthusiasts. 

Firstly, engaging in weight lifting can significantly enhance muscle strength. For children, this doesn’t mean bulging biceps but rather developing functional strength to improve their performance in various sports and daily activities. Improved muscle strength also contributes to better posture and reduced risk of injuries, enabling kids to navigate physical challenges easily and confidently. 

Another significant benefit is the boost to metabolic rate and increases in lean body mass. With childhood obesity becoming a pressing issue, structured resistance training can serve as an effective countermeasure. Regular weight lifting helps burn calories more efficiently and contributes to a healthier body composition, promoting a fit lifestyle from an early age. 

Heart health and improved cholesterol levels are often benefits we associate with adults, but children are not exempt from these advantages. Strength training exercises support heart function and can help maintain healthy cholesterol levels, fostering overall cardiovascular health from childhood well into adulthood. 

Moreover, weightlifting plays a crucial role in bone health. During the growing years, bones continually develop, and weight-bearing exercises stimulate bone formation, increasing bone density. This becomes a robust foundation for a child’s skeletal system, reducing the likelihood of fractures and bone-related issues later in life. 

Ultimately, strength training under proper supervision and with the right techniques can be immensely beneficial for children. Not only does it build physical strength, but it also instils discipline and a sense of accomplishment. Seeing this in my own child and nephew has convinced me of weightlifting’s positive impact on young minds and bodies. 

So, how do you determine the right age for a child to start lifting weights, and what are the key factors to consider? In our journey, let’s delve into these questions to understand the best practices for kids and weightlifting.

Appropriate Age to Start Weight Lifting

A common concern among parents is determining the right age for their children to begin weightlifting. After all, it’s a big step from playground antics to more structured physical activity. Generally, the optimal age to start strength training is around 7 or 8. However, this isn’t a steadfast rule. The critical factor is the child’s maturity level, both physically and mentally. Are they able to follow instructions? Can they maintain focus and demonstrate the desire to learn and apply proper techniques? If so, they might be ready to safely embark on this journey. 

Highlighting some recommendations from experts and paediatricians, children should be able to understand and execute the proper form, which is crucial in preventing injuries. It’s much more about the right movements than the amount of weight lifted. Initial sessions should be light, focusing on skill development rather than power. Remember, children are still growing at this age, and it’s essential to ensure their training supports healthy development. 

This leads us smoothly to our next consideration: ensuring the environment in which they train is fun and safe. Ready to discover how to create such an environment?

Working with you – how can you incorporate their workout into yours?

My main issue, starting off, was a concern that my workout would be compromised by having one of the kids with me (yes, selfish, I know, but it’s something I do for myself, so there we are). It wasn’t long before I realised that incorporating them into my workout didn’t just benefit them and brought new energy and joy to my own routine. Seeing their enthusiasm and curiosity turned my solo sessions into a shared family activity. We started by planning our workouts together, setting achievable goals, and keeping things light-hearted.

And no – I don’t reload the bar each time. For example – with squats – I would squat with my barbell loaded up, and she would take a smaller plate in each hand and squat that way. Bench press – realistically, I was ‘spotting’ about 75% of the weight – but that gave me a cheeky back workout and made her feel strong because ‘she was lifting so much weight’.

One key strategy was to integrate activities they enjoyed into our workout. For instance, if we were doing squats, I’d challenge them to see who could keep the best form. We’d turn bicep curls into a game of who could balance a book on their head while lifting. These little adjustments made the sessions much more engaging for them. 

The unexpected part was how these shared sessions enhanced my own workout. I found myself more motivated and accountable, knowing that they were looking up to me. It also pushed me to perfect my own form and technique, as I wanted to set a good example. Our workout time became a mix of fun challenges and educational moments, strengthening our bodies and bonds.

The atmosphere of these sessions was filled with laughter and encouragement. We devised mini-challenges, like who could hold a plank the longest or perform the most well-executed squats, which added a playful competitive edge. What I noticed the most was how these interactions subtly shifted our dynamic; I became not just a parent and a mentor but a workout buddy. It was as though the gym became our little sacred space where we grew stronger physically and emotionally. 

Integrating their workout into mine didn’t just benefit my routine; it seemed to elevate the entire experience. We learned together, celebrated each other’s progress, and navigated the hurdles of fitness hand-in-hand. These shared moments formed the backbone of our workout regime — a blend of camaraderie and mutual growth. But as with any physical exercise, preparation is key, which brings us to the vital steps of warming up and cooling down. How can we establish these essential habits in our young lifters to ensure they stay safe and enjoy their fitness journey?

Warm-Up and Cool-Down: Essential Steps for Young Lifters

Starting any physical activity without a proper warm-up can lead to injuries, especially for young lifters. Before your child picks up a weight, engaging them in a comprehensive warm-up routine is crucial. A good warm-up increases blood flow to the muscles, prepares the cardiovascular system, and enhances joint flexibility. This can be as simple as a 5-10 minute session of dynamic stretches and light cardio activities like jogging in place or jumping jacks. Incorporating movements that mimic the exercises they will be performing later can also prime their muscles and minds for the workout ahead. 

After the workout, a cool-down phase helps gradually bring the heart rate back to normal and reduces muscle stiffness. Encourage your child to perform static stretches for at least 5 minutes, focusing on the major muscle groups they worked out. Cooling down is essential to aid recovery and reduce the risk of muscle soreness—a step often overlooked but highly beneficial, especially for young lifters still growing and developing. 

Warming up and cooling down are crucial components of a safe and effective weight-lifting routine for kids. Integrating these practices helps your child prepare their body for exercise and recover more efficiently afterwards. But what comes next? How can you ensure they learn the right lifting techniques safely and effectively?

Teaching Proper Form and Technique

When introducing children to weight lifting, one of the most critical aspects to emphasise is proper form and technique. Many adults can recall seeing gym-goers with poor form, potentially leading to long-term injuries. When kids begin their weightlifting journey, ensuring they learn the correct techniques from the start can make all the difference in the safety and effectiveness of their workouts. 

I remember my first weightlifting session. I was enthusiastic but lacked the guidance needed to understand the importance of technique. That experience taught me the value of proper instruction. For our young lifters, using lighter weights or a broomstick to simulate a barbell can be a great way to practice form without injury. Children have the advantage of learning and adapting quickly, so starting with the basics helps set them up for success. 

Visual aids can be extremely helpful in this learning process. Demonstrating the exercises yourself or showing them videos of the correct technique can give children a clear model to emulate. Encouraging them to watch and mimic the movements can turn learning into a fun and interactive activity. Feedback is also key; gently correcting their form and celebrating their improvements fosters a positive learning environment. 

Another valuable tip is incorporating games and playful approaches to keep them engaged. For instance, you could turn a squat into a “frog jump” or a plank into a “superhero landing.” This makes the exercise enjoyable and instils proper technique through repetition disguised as play

Ensuring good form and technique from the outset will build a strong foundation for young lifters, reducing their risk of injury and promoting a lifelong appreciation for fitness. So, what’s next on this journey towards strength once the form is drilled in perfectly?

Supervision and Keeping Kids Safe

The importance of supervision cannot be overstated when it comes to children engaging in weightlifting. Young lifters require vigilant oversight to ensure they perform exercises correctly and use appropriate weights. This isn’t just about having an adult present; it involves someone knowledgeable about the proper techniques and the physical demands of various exercises. Ideally, a qualified personal trainer or coach should be available to monitor their progress and provide immediate feedback and corrections. 

I’ve found that having a structured and well-supervised environment helps children feel more secure and confident. When my nephew and my child started showing interest in weights, I dedicated specific times in our routine for supervised training. This ensures their safety and builds a strong foundation of good habits early on. 

But what exactly does good supervision look like in practice? It’s about more than just watching; it involves actively engaging with the child, demonstrating proper techniques, and making necessary adjustments. For example, when teaching a squat, I stand beside my child to model the movement, correct their posture, and offer encouragement. 

Reflecting on their individual progress and tailoring the supervision to match their unique needs can make all the difference. Seeing their growth and understanding that they’re performing correctly can be incredibly rewarding for both the child and the supervisor. However, supervision is just one aspect of the equation. How do we ensure they are ready and capable of lifting weights? What exercises should they start with?

Using Bodyweight Exercises as a Starting Point

Before diving into the world of weights, it’s crucial to consider the foundational strength that bodyweight exercises can provide for children. Bodyweight exercises, such as push-ups, squats, and planks, offer a safe and effective way to build strength without needing equipment. These exercises help children learn to control their own bodies, which is an essential skill for any future weightlifting they may pursue. 

Starting with bodyweight exercises allows young lifters to become aware of their body mechanics and proper form. This is incredibly beneficial as it sets the groundwork for more complex movements involving weights. Simple routines focusing on these exercises can also build a child’s confidence as they see themselves getting stronger and mastering new skills. 

Moreover, bodyweight exercises can be easily tailored to fit the child’s current fitness level, making them accessible and less intimidating. As they grow stronger and more capable, the intensity can gradually increase by modifying the exercises. For example, progressing from wall push-ups to floor push-ups or adding variations like plyometric jumps to their squats. 

It’s equally important to inject fun and accomplishment into their routines. Turning exercises into games or challenges can keep them engaged and motivated. By making the experience enjoyable, we help foster a positive relationship with physical fitness that will serve them well into the future. 

Building a strong foundational strength through bodyweight exercises lays the perfect groundwork for advancing to weightlifting. But how can we ensure our young lifters continue to progress safely while maintaining their enthusiasm? One critical element in this journey is focusing on the gradual increase in intensity and complexity of their training — let’s delve into the importance of progression and patience next.

Progression and Patience: Advancing Safely

The key to advancing your child’s weightlifting routine is progression and patience. I’m reminded of the early days when I joined a local gym—how eager I was to lift heavier weights, only to be reminded repeatedly by my trainer to focus on form and gradual improvement. The same approach applies to children, perhaps even more so. 

Start with lighter weights and ensure that your child masters the technique before increasing the load. This gradual progression not only helps in building strength but also reduces the risk of injuries. One of the exercises my son and nephew enjoy is the goblet squat—it’s simple, effective, and allows for easy weight adjustments. Initially, they started with just a water bottle, eventually moving to a light kettlebell as they became more confident. 

In addition to physical progression, emotional and psychological readiness also plays a significant role. Celebrate their achievements, no matter how small. Whether completing a set with perfect form or increasing the weight slightly, positive reinforcement goes a long way in keeping them motivated.

So, how do we ensure that this positive experience with weight lifting extends beyond just the physical benefits? Let’s explore how to navigate the social aspect of weight training, particularly dealing with peer pressure and competition.

Dealing with Peer Pressure and Competition

Here’s the tricky one. 

WHY are they wanting to lift weights in the first place?

It’s essential to understand why children express an interest in weightlifting. For some, it might be a natural curiosity; they see their parents working out and want to join in. However, for others, the reasons might run deeper. Body image concerns can start surprisingly early, influenced by media, peers, or even casual comments from adults. A child might feel ‘too small’ or ‘not strong enough’, spurring a desire to change their physique.

I have previously had my nine-year-old discuss a desire to ‘lose weight’. She isn’t overweight. After a few discussions about that concern, she wants to know if it will help with her Jiu Jitsu. A much better place to be coming from.

Moreover, social dynamics play a significant role. If a child is being bullied or feels overshadowed by peers who seem bigger or stronger, they might turn to weight lifting to assert themselves and build confidence. In this context, it’s crucial for parents and guardians to have open conversations about body image and self-worth, ensuring that the desire to lift weights stems from a healthy place. 

Understanding their motivations can help in guiding them appropriately. Are they lifting weights to feel good and have fun, or are they reacting to external pressures? Recognising these nuances helps set a positive, supportive atmosphere for their fitness journey.

Capturing the Art of Brazilian Jiu Jitsu: Essential Photography Tips for SLR and Smartphone Users

0

https://thebloke.pixieset.com/willmachadocompetition

Stepping onto the mats as both a Brazilian Jiu Jitsu (BJJ) practitioner and a seasoned photographer, I’ve often wondered, why not combine these two passions? With years of photography experience and a deep interest in BJJ, it seemed only natural to start capturing the essence of this intricate martial art. So, I set out to get some photos for my website and to immerse myself further in an activity I truly enjoy. 

In this article, I will share my journey into BJJ photography and offer some practical tips for SLR enthusiasts and those using their phone cameras. Whether you’re a seasoned shutterbug or a beginner looking to snap some dynamic shots, you’ll find something useful here. 

Photography is the story I fail to put into words.

Destin Sparks

From capturing a match’s fluid movements to getting close to the intricate details of techniques, BJJ offers many photographic opportunities. Let’s delve into how to perfectly frame that fierce armbar or the subtle camaraderie between training partners. 

  • Choose the Right Equipment
  • Understand the Lighting
  • Perfect Your Timing
  • Experiment with Angles

Understanding the Unique Challenges of BJJ Photography

BJJ photography is like many other forms of sports photography. It demands an understanding of the techniques and the subtleties of human movement and emotion. One of the primary challenges you’ll encounter is the fast-paced and unpredictable nature of the matches. In BJJ, the tide can turn in mere seconds. 

Another challenge is the typically low-light environment of most gyms and competition venues. This requires a solid grasp of your camera’s settings to avoid blurry images and ensure proper exposure. Flash is often not an option, as it can distract athletes and disrupt the flow of the match. 

BJJ also involves a lot of groundwork, so you’ll need to get creative with your angles. Capturing the essence of a submission or the intensity of a sparring session requires you to often be on the mat, moving around to get the perfect shot. This can be physically demanding and potentially hazardous if you’re unaware of your surroundings. Always be alert to avoid interfering with the athletes. 

Lastly, capturing the essence of BJJ—the techniques, the camaraderie, the struggles, and the triumphs—requires patience and an eye for detail. You’ll need to immerse yourself in the sport and build a rapport with practitioners to get genuine, candid moments that reflect Brazilian Jiu Jitsu’s spirit.

black nikon dslr camera on brown wooden table

Choosing the Right Gear: SLR Versus Smartphone

Embarking on the journey of BJJ photography, the choice between an SLR and a smartphone can feel akin to selecting your technique on the mats – each has its own advantages and unique challenges. The crisp, intense detail captured by a high-end Digital SLR camera, such as my old but trusty Canon 5D MKIII, can truly bring the raw emotion and power of a match to life. With interchangeable lenses, you can adjust your focal length to capture close-up submissions and wide-angle shots of the entire mat, each from dynamic angles. The versatility of prime and zoom lenses means your creativity knows no bounds.

However, don’t underestimate the power of the device often nestled in your pocket. Modern smartphones, with their increasingly sophisticated cameras, are formidable foes to traditional gear. My Canon may be the high end of professional gear (for its time), but the ease of slipping a smartphone from your pocket and shooting in an instant can sometimes be the edge you need. 

Mobile photography apps now offer manual settings that rival some DSLR capabilities. Imagine adjusting exposure, shutter speed, and ISO on your phone, allowing you to craft the perfect shot even amidst the flurry of a fast-paced roll. Where to do lack is focal length ‘manipulation’—specifically, creating a narrow depth of field. However, AI manipulation in post is starting to remove that issue as well (though still not as well).

Nevertheless, the decision often hinges on your personal comfort and familiarity with your gear. Are you the seasoned photographer who thrives with the weight of a full sized camera slung over your shoulder, or do you find the spontaneity of a smartphone liberating? As with your BJJ journey, the perfect balance often lies in combining the strengths of each tool. The key is to understand the environment, anticipate the movements, and be ready to capture the essence of every gripping moment. Ultimately, it’s not just about the gear you wield but how you harness it to tell the story etched in every gripping exchange on the mat.

However, I am just going to say it—my Canon with a 50mm prime still looks ‘better’ than the S24—even with its ‘more megapixels’. So, how about having both, using both, or even more simply, learning to use what you have?

black camera lens on brown wooden table

The Exposure Triangle

At the heart of every captivating photograph lies the delicate interplay of three fundamental settings: ISO, shutter speed, and aperture. Together, these elements form what photographers lovingly call the Exposure Triangle. Think of it as a symphony where each instrument must be perfectly tuned to create harmony. ISO is your camera’s sensitivity to light—dial it up for darker environments, but beware of the grainy noise that may accompany it. Shutter speed controls the duration your camera’s sensor is exposed to light; a faster speed freezes action, while a slower one can paint motion. The aperture, the eye of your lens, regulates the amount of light entering—wider openings (lower f-stops) let in more light and blur the background, focusing on your subject with striking clarity.

Mastering Lighting in the Gym

Despite what your eye might tell you, once you start taking photos in most gyms, you are going to realise there is a lot less light in there than you thought.

Light is one of the key requirements for capturing detail in photography. A photograph is, after all, in essence, captured light. In practical terms, this can mean less noise (cleaner images)and faster shutter speeds (sharper images).

This holds especially true in the fast-paced world of Brazilian Jiu Jitsu. Capturing the subtle nuances of a grappler’s movements requires precision and clarity. To achieve this, understanding and manipulating light is paramount, whether you’re wielding an SLR or just your smartphone. 

First, consider the lighting conditions of the gym. Gym lighting can be notoriously tricky, often casting harsh shadows and creating uneven illumination. If you’re shooting with an SLR, leverage the ISO settings to bring more light into the sensor. However, be cautious—cranking up the ISO too high can introduce noise, degrading the quality. While I always try to use as low of an ISO as possible, a sweet spot typically lies between ISO 400 and 800, balancing brightness with image fidelity. 

ISO, in essence, represents the sensitivity of your camera’s sensor to light. Think of it as a light-gathering ability, akin to the human eye adjusting between bright sunlight and a dimly lit room. A lower ISO value, such as ISO 100, means less sensitivity, which is ideal for bright conditions, while a higher ISO value, like ISO 3200, increases sensitivity for low-light scenarios. However, this sensitivity comes at a cost—the higher the ISO, the more digital noise or grain your images may exhibit. It’s a dance of light and clarity, balancing the need for a well-lit capture against the preservation of smooth, noise-free imagery

For smartphone photographers, it might seem like you’re at a disadvantage, but modern phones have powerful sensors. Use the HDR (High Dynamic Range) mode if available to better balance your photos’ light and dark areas. Additionally, some apps allow manual control over ISO and shutter speed, offering a more tailored approach to tricky lighting. 

Another critical aspect is the direction of your light source. Always try to position yourself to maximise natural or artificial lighting to your advantage, keeping the subject well-lit and shadows minimal. Side lighting often adds depth and texture to the image, highlighting the physicality and motion in a grappling match. 

In BJJ photography, mastering light isn’t just about visibility—it’s about storytelling. Shadows can add drama, while highlights can focus on a decisive moment, a bead of sweat, the strain of muscle, or the fleeting expression of triumph. To this end, being observant and adaptive to the ever-changing light conditions can transform a mundane shot into a compelling narrative.

On my Canon, I tend to set it to Manual mode – which lets me fix the Shutter Speed and Aperture settings. As discussed next, these two settings allow me to focus on and ‘stop’ dynamic movement; then, I allow the camera to automatically set the ISO to get an ‘average’ exposure. This allows me to control some aspects of the shot but not worry about exposure for every shot and angle – something I wouldn’t have time to consider, given the speed of the changing shots in the gym.

Tips for Capturing Dynamic Movements

The shutter speed is the key to ‘stopping’ movement in Jiu Jitsu. While there is a place for smeared, blurred images artistically, most of the time, you will want to have a fast enough shutter speed to ‘freeze’ the action in place.

Shutter speed refers to the length of time the camera’s sensor or film is exposed to light. It’s a critical component in photography that directly influences motion capture and exposure. Measured in fractions of a second, such as 1/1000 or 1/250, a fast shutter speed allows for crisp, clear images of fast-moving subjects by minimizing blur, while a slower shutter speed permits more light to hit the sensor, beneficial for low-light situations but often resulting in a blurred effect if the subject is in motion. Balancing shutter speed with aperture and ISO settings, collectively known as the exposure triangle, is essential for achieving the desired photographic outcome, especially in high-action environments like Brazilian Jiu Jitsu.

Essentially, I am trying to utilise the fastest shutter speed I can, which, in conjunction with the Aperture I want to use (see below), will allow me, on average, to keep the ISO in a low enough band that I am comfortable working with.

person holding Canon DSLR camera

Framing and Composition in BJJ Photography

Finally, the third part of the exposure triangle is the Aperture. Aperture allows you to have only part of your image in focus, drawing attention to the subject.

The aperture is essentially the ‘pupil’ of your camera lens—an adjustable opening that regulates the amount of light entering the camera. It is measured in f-stops, which denote the size of the lens opening; a smaller f-stop number like f/2.8 indicates a larger aperture, allowing more light to penetrate, whereas a larger f-stop number like f/22 corresponds to a smaller aperture, permitting less light. 

Technically, the aperture not only controls the exposure but also directly impacts the depth of field in your photographs: a wide aperture (small f-stop) results in a shallow depth of field, where only a small portion of the image is in sharp focus, making it ideal for isolating subjects against blurred backgrounds. Conversely, a narrow aperture (large f-stop) produces a deeper depth of field, bringing more of the scene into clear focus.

This is a partially technical, partially artistic choice.

For example, you might use a larger aperture (smaller number) to throw the background out of focus and draw attention to the action. However – for a wider shot – you might want the spectators (and their expressions) in the background to remain focused so you can experience the interaction between the people rolling and the people watching. Use a bit of both!

Remember, though, that even though you might be tempted to use the largest aperture possible to get the smallest depth of field, it also means that you might end up with parts of your photo out of focus when you didn’t intend to, and an ‘out of focus’ subject (due to them shifting quickly) is likely a worse issue than a background that isn’t out of focus.

Highlighting Key Moments and Submissions

As the match unfolds, the mat becomes a theatre of human emotion and physical prowess. Capturing those peak moments—whether it’s the singular instant of a triumphant submission, the grit of a determined guard pass, or the explosive energy of a takedown—requires photographic skill and a profound understanding of the sport itself. Timing, here, is everything. One second too late, and you’ve missed the story; one second too early, and the narrative is incomplete. 

Burst mode is a practical tool that can distinguish between an average and extraordinary shot. This feature allows your camera or smartphone to take a rapid series of shots with one press of the shutter release. This increases your likelihood of seizing that crucial moment when a fighter locks in a choke or reverses a sweep. Practising with burst mode can help you become attuned to the rhythm of BJJ bouts, giving your instincts a photographic edge. 

But beyond technique, these photographs have an emotional dimension. They are not merely records of athleticism; they are windows into the spirits of the competitors. A victory isn’t just in the raised hand—it’s in the exhausted smile, the relieved exhale, and the respectful handshake. To truly highlight these key moments, you must be mentally and physically prepared. Know the fighters, study their styles and anticipate their moves. Such preparation is the bedrock upon which great photography is built. 

Don’t forget the power of different angles and perspectives. Capturing a submission from a low angle can accentuate the move’s dominance, while a high angle might better show the encounter’s spatial dynamics. Experiment with these perspectives to compellingly capture BJJ’s essence. Your creativity in framing these key moments amplifies their impact, making each shot a picture and a piece of art. 

Remember, each photograph is a slice of the intense, captivating Brazilian Jiu-Jitsu dance. You can immortalise these fleeting moments of skill, strategy, and tenacity through your lens. Seize that power, and let your shots tell the stories that words could never fully convey.

Post-Processing Your BJJ Photos

Post-processing is where the raw magic of your captured moments is refined and transformed into stunning visual narratives. Regarding Brazilian Jiu Jitsu (BJJ) photography, this phase is both an art and a technical craft, requiring a blend of aesthetic sensibility and software proficiency. Whether you’re a seasoned photographer with an SLR or someone with a keen eye using a smartphone, understanding the tools at your disposal can elevate your images from mere snapshots to compelling stories. 

Firstly, ensure you’re working with the highest-quality images your device can produce. For SLR users, this typically means shooting in RAW format, which retains all the intricate details and allows for extensive adjustments. Smartphone photographers may not have RAW capabilities, but modern phones have excellent resolution and dynamic range, making JPEG or HEIC formats a robust option. 

Editing Software 

Investing in good editing software pays dividends. Adobe Lightroom is a powerhouse for batch editing and organising photos, allowing granular control over exposure, contrast, and colour. If you’d prefer a free option, GIMP offers many capabilities that can rival paid software. For smartphone users, apps like Snapseed or VSCO provide impressive functionalities on the go. 

Basic Adjustments 

Start with basic adjustments: exposure, contrast, and white balance. Gyms often have challenging lighting conditions, and correcting the exposure can reveal details lost in shadows or highlights. Adjusting the contrast boosts the dynamic punch of your images, while a balanced white balance ensures accurate colour representation, so the white of the gi is crisp, and the mat retains its true hue. 

Advanced Techniques 

Dive into more advanced techniques to enhance your BJJ photographs. Clarity and sharpness are crucial for accentuating the textures of the gi and the determined expressions on athletes’ faces. Use the clarity slider to refine these textures without overdoing it, and apply sharpness selectively to retain a natural look. Cropping and straightening your images help refine composition, ensuring that key moments are perfectly framed. 

Filters and Effects 

While purists may argue against using filters, they can effectively enhance the mood of your images. Black-and-white filters can add a dramatic flair, highlighting martial arts’ intensity and timeless nature. Subtle vignettes can draw focus to the centre of your image, accentuating the grappling athletes. 

Consistency is Key 

Finally, consistency in your post-processing workflow ensures that your collection of images tells a cohesive story. Develop a signature style by consistently applying certain tones, contrasts, or crops. This streamlines your editing process and establishes a recognisable aesthetic for your work, making your BJJ photography stand out. 

In essence, post-processing is where your technical skill meets your creative vision. It’s here that you breathe life into moments frozen in time, crafting images that resonate, inspire, and capture the intricate dance that is Brazilian Jiu Jitsu.

Safety Tips for Photographers on the Mat

Being on the mat with combat athletes requires an astute awareness of your surroundings and a respectful approach to your shared space. As exhilarating as it is to be in the thick of the action, safety remains paramount. Here’s how you can keep yourself and others safe while capturing the intense world of Brazilian Jiu Jitsu. 

Stay Vigilant and Mobile: Always keep one eye on the rolling athletes. Their movements can be abrupt and powerful, necessitating quick reflexes to avoid collisions. Position yourself strategically and ensure you can react swiftly if an athlete heads in your direction. 

Respect the Flow: Understanding the ebb and flow of a match can provide you with the foresight needed to stay out of harm’s way. Recognise when a submission attempt is about to transition into a sweep or escape and adjust your position accordingly. Your familiarity with BJJ can significantly assist in predicting and reacting to these moments. 

Dress Appropriately: Wear attire that is non-intrusive and allows for free movement. Avoid loose clothing that could get entangled or distract the competitors.

Minimise Distractions: Ensure your equipment is secure and silent. Unnecessary noises or bright camera flashes can disrupt fighters’ concentration. If using an SLR, be conscious of the shutter sound and its impact in a quiet gym. 

Communicate Clearly: Build a rapport with the athletes and coaches. Let them know your presence and intentions. A simple nod or hand signal can communicate your position to them, helping avoid mid-roll surprises. 

Avoid the Line of Fire: Be mindful of the referee’s and competitors’ views. Do not obstruct anyone’s line of sight. Your goal is to capture the moment without inadvertently becoming part of the action. 

Use Equipment Wisely: If using tripods or monopods, ensure they are placed where they won’t become hazardous. Compact equipment can be moved quickly if necessary but must be stable. 

The Benefits of Toe Socks: Enhancing the Barefoot Shoe Experience

0

Who knew the secret to foot nirvana would be in socks that look more like gloves?

I have recently made the switch and can honestly say that my toes have never been happier nestled in my shoes. But what’s so particular about these socks? What advantages and benefits can they bring to your precious feet? If you’re ready to venture into unexplored terrain, join me as we delve into why you might benefit from a pair of these.

The Unique Features of Toe Socks: Unleashing the Freedom of Your Toes

Have you ever wondered why our hands have such freedom of movement and agility while our toes remain confined in a ‘one-size-fits-all’ compartment in typical socks and shoes? This is where toe socks genuinely shine. Picture each toe nestled in snug cases, providing each toe with individual space.

Essentially – toe socks feature independent toe sections for each of your digits. Though most have five, You get versions that separate only the big toe.

The Benefits of Toe Socks: Health and Comfort

Toe socks are no fancy fashion statement for the eccentric – they hold many health benefits you may never have considered. Have you ever been told to take a moment and stretch your legs? The same logic applies to our often-overlooked toes, too. Toe socks provide an exceptional chance for your toes to spread out and exercise their entire span.

Your Toes Deserve Space! 

Squeezing your toes into traditional socks is akin to trying to fit a square peg into a round hole. Let me tell you about the blissful feeling of wriggling your toes freely inside your shoes – it’s as relieving as slipping into a warm bath after a long day. And it’s not just about comfort – this freedom allows your toes to align naturally, nurturing their flexibility and balance capabilities.

I know, you are thinking – but I can wiggle my toes already! This might be the case. However, as I noticed my feet and toes starting to ‘relax’ and splay out a bit, some of my socks felt like compression garments on my feet. This is probably also a function of needing to purchase a size bigger in my socks, but the toe socks have removed this as an issue.

Beauty is Only Skin Deep, But Health Benefits Run Deeper 

Did you know our feet are jam-packed with nerve endings? By allowing your toes to move individually, toe socks also enhance blood circulation. Better yet, a healthier blood flow can promote faster recovery from physical exertion and potentially help reduce ailments like varicose veins. Now, that’s what we call multi-tasking! 

Keeping the Funk at Bay 

Yes, let’s talk about the ‘foot’ in the room. Foot hygiene isn’t exactly a session of afternoon tea talk, but it’s essential nonetheless. The material of toe socks helps wick away moisture, keeping your feet refreshed and dry and reducing the chances of any nasty fungus joining you in your new shoes. Take that athlete’s foot! Because there is material between each toe, it efficiently ‘mop-away’ the sweat between the toes.

Creepers Socks is a Canterbury-based, NZ Owned business run by a Physiotherapist who found he had an itch that needed scratching – Shaun (the founder) had already fallen for toe socks but wanted something with softer material – and came to the conclusion that a Merino mix was the way to go.

Indeed, my pairs have quickly become my mainstay for socks.

Well worth checking out over here – https://creeperssocks.co.nz/ – and – if you are keen on a pair – get 10% off!

How Toe Socks Complement the Barefoot Shoe Movement: A Perfect Partnership

Naturally, you might question how toe socks vibe with the barefoot shoe movement. It’s a valid curiosity— barefoot shoes and toe socks can seem like contrasting concepts. But here lies their harmonious connection.

Snugging it Right: Barefoot Shoes and Toe Socks 

The loose fit is one thing that stands out when you wear toe socks with barefoot shoes. Unlike regular shoes, where your toes are forcibly together, barefoot offers the luxury of space, but when coupled with toe socks, it’s like your toes are enjoying their five-star accommodation. The toe socks provide a gentle partition that allows each toe to exist in its own space. They move freely, breathe easily, and live happily! 

The Barefoot Experience: Amplified 

Wearing barefoot shoes is about embracing our roots and returning to the basics. It’s about letting our feet feel the ground and its textures – the smooth, the rough, the sharp, the soft. The toe socks act as a protective yet non-intrusive layer, enhancing the barefoot experience rather than hindering it. The feeling is akin to going on an adventure with your best friend! 

Stability and Balance: A Symphony of Two 

Barefoot shoes aim to provide your feet with an uninhibited range of motion. Adding toe socks to this mixture only heightens this feeling of mobility. The separate compartments for each toe facilitate a better grip, thus leading to improved stability and balance. Each toe becomes a supportive pillar, working in unity to create a formidable and well-balanced foundation. 

So, as it turns out, toe socks and barefoot shoes are not contrasting ideas. They prove to be a harmonious and formidable team, each amplifying the strengths of the other and, together, creating an experience that leaves an impression on your overall comfort and well-being. It might sound grandiose, but believe me, you’ll understand once you try it. So, fancy giving your feet a special treat?

Ah… there is a chance your partner will hate them.

You have Podophobia (feet) and Kaltsaphobia (socks), but nothing specific to Toe Socks! But for whatever reason, my partner seems to have a comical aversion to them. I do understand. We have all been very conditioned to what feet in socks are ‘meant’ to look like, and ironically, a foot in a sock that looks more like a foot without socks is a bit jarring at first. Novelty leading to revulsion? It probably doesn’t help that I have taken to foot wrestling with my toes as I have reconnected with my feet’ digits.

Let’s face it – toe socks are a bit like Marmite; you either love or hate them (or don’t give a s@#t at all). My partner falls soundly into the ‘hate them’ category; slight shudders are offered as mild protest each time I slide my feet into their respective toe compartments. It’s all done in good humour, though (I think).

But. Isn’t there a bit of a curiosity lurking within you? I mean, what if those comfy toe socks could change your world? Oh. She also prefers Vegemite. BTW.

Radix Nutrition – not your traditional freeze dried food!

0

Gidday, and welcome to another product review.  This time around I’ll be talking about some food from Radix Nutrition, made right here in New Zealand.  It’s a new product for the outdoors and camping market, it’s so new in fact, it’s only just beginning to hit the shelves.  I was sent a few samples to try out and give some feedback on which I was keen to do.  These are freeze-dried meals in a bag, where you simply add boiling water and stir, leave it for 10-15 mins, and scoop out and eat.  Great for fast and easy food on the run or when you have other things to do like hunting or setting up your camp.  All you need is a method of boiling water and a spoon.

Radix Nutrition

The Root(s) of Radix Nutrition

Radix is a Latin word for ‘root’, where the founders of Radix Nutrition believe that the root/base of good health starts from a good diet and quality nutrition.  This is absolutely true, and anyone who has tried to do any sort of exercise on poor nutrition knows how hard it is to function properly.  Radix Nutrition was founded in New Zealand four years ago by a small team of ex-pro athletes, Mike Rudling – Technical Manager (Cycling), Paul Rudling – Chairman (Sailing), and Matt Shead – Supply Chain Manager (Swimming).  In that time, tireless research has gone into delivering the highest standard of food in a quick and easy meal.  Radix now designs and manufactures high-quality nutritional products designed to enhance physical and mental performance through the optimisation of health.

Not your traditional freeze-dried food.

Those of you who are into the outdoors environment where weight and space in your backpack are at a premium will be interested in these products from Radix.  If you’re keen on being healthy or you have particular dietary requirements, you’ll be doubly interested.  Radix products are marketed as being Gluten, Preservative, and Additive-free, and with the exception of the breakfast range are Dairy free, while as many of the ingredients as practical are also Organic.

Both myself and my wife have to avoid certain inflammatory and FODMAP types of foods, so I’m keen to see how these meals stack up against the competition’s freeze dry meals which I’ve used for the last few years on my hunting and camping trips.  The recommended retail price for the One-a-Day and performance meals is $16 each, and the breakfast meals are $7.50 each.  It’s a few more dollars than the other brands of freeze dry meals I’ve used before, but you are getting a difference in the nutritional value as I’ve just mentioned and anything organic always costs more.  I won’t go into all the actual ingredients of the various meals, but once their website is up and running I believe you’ll be able to read everything in detail there.

Keen to try out some RADIX?

Visit Radix to order some Nutritional Goodness and get 10% off with our exclusive code – KERRY10 – just enter it at checkout.

Sizes and Flavours

The meals come in two sizes and assorted flavours.  I have here the ‘Organic Beef, Tomato & Oregano.” “Salmon, Spinach, & Lemon Grass.”  “Wild Venison, Pumpkin and Rice.”  “Vegan Sweetcorn Chowder”  and “Free Range Chicken, Mushroom and Rice.  The one-a-day pack is a single serve for a snack or light meal if your physical exertion is light to moderate.  The serving size is between 400-450gms and 1600-1800 kJ.  The performance pack is a single serve meal for a high activity level, with a serving size between 450-550 gms and 2300-2500 kJ.  The serving sizes and energy ratings depend on the flavour of meal you choose.

The packaging is simple and understated while being highly functional and BPA free.  The instructions and dietary information on the back are clear and easy to understand.  The design of the bag’s seams at the bottom allows for easy access to the food at the bottom, and there is also a resealable zip lock at the top of the bag in case you want to save some food for later or use the bag for something else afterwards.

I’ve found through some trial and error that all freeze dry meals tend to settle the powdery stuff at the bottom and the larger chunks at the top, so it’s a handy tip to invert the bag and scrunch it up and shake it to get it well mixed before ripping the top open.  It just seems to work better than just stirring after you add water.  Radix meals have an oxygen absorber sachet in the bag so make sure to pull it out first before adding the water.  While there is a recommended amount of water printed on the bag, I personally just add as much water as it looks right then a splash more.  I also like to leave it a bit longer than the 10 minutes instructed on the package in case there are a few chunks that are still dry in the middle, plus it’s usually still too hot after 10 mins!  Add a little more boiling water if needed then enjoy!

One a Day Packs

I’ve tried the Organic Beef, Tomato, and Oregano one-a-day pack already, and it tasted pretty good.  The major vegetable flavour I noticed was the pumpkin, and the secondary was probably the leek and celery.  The beef meatball was tasty, though still a little bit dry and crunchy in the middle even after leaving it to sit for 12 minutes, maybe 15 minutes would be a bit better, however, if you’re starving and cold, you’ll chow it down and not worry about it.  My stomach reacted favourably to it and I didn’t have any indigestion afterwards.

Made in Waiuku!

I was invited by James Bowstead, Radix’s marketing manager, to visit their small factory in Waiuku, Auckland.  I also met their small team of people working hard to produce new meals and fine-tune the ones they’ve already designed.  It was exciting to see a small Kiwi business with the potential to be a game-changer in the world of nutrition.  James and I had a chat for about 45 minutes where he outlined the focus and direction of the company and the work they are doing to make sure that every meal helps each consumer to reach their full potential, whether they be an Olympic athlete or hunter in the bush.

Every meal has been designed in conjunction with a nutritionist, utilising all natural whole food ingredients, with the focus on being organic where possible, and of the highest quality possible.  James showed me a picture of what goes into one of the meals, and every ingredient looks like you could literally pick it up individually and eat it on its own.  I had arrived near lunchtime, so James let me pick a meal and prepared it for me while we chatted.  I chose the Chicken Tikka Masala, while James had the Salmon, Spinach and Lemongrass.  While they ‘brewed’, I mentioned to him about the meatball one I’d had and that the balls of meat were still a bit dry in the middle.  He assured me that since that batch they had already improved the manufacturing process to eliminate that problem and make sure the meat rehydrated faster.  Sure enough, the chicken meatballs in my Tikka meal were perfect!

The Breakfast Range

James also sent me home with a few packets of the Breakfast range to try out.  With my job, I’m often eating on the fly, so I took a few with me to work.  They were simply delicious, very easy to prepare with cold water, and very filling, with none of the usual discomforts I would experience after eating normal cereal.  They also left me feeling fuller for longer with a good energy output.

Radix is in the process of bringing out some more products including a breakfast range, more varieties in the one-a-day and performance ranges including vegetarian, and autoimmune protocol and FODMAP compatible options.  You’ll notice the similarities between the one-a-day and performance ranges of flavours, the major difference is that a performance meal has been bulked out with organic rice for more carbs.

Check them out!

Check out the Radix Nutrition website and Facebook page for more information, and keep an eye out for more developments as they are rolled out.  The product ordering process is easy, and their efficient team will make sure you are satisfied.

Radix Nutrition – food for hunters and adventurers

0

Check down below for an exclusive discount code!

I have a mixed history with freeze-dried food. While it is no doubt a great option when weight is a consideration, you also resign yourself to the fact that after a few days on it, the stomach is going to be a little less than optimal, and your ‘outputs’ are either going to go to nil, or go to over-enthusiastic, to say the least. Neither option really is ideal for a hunting or tramping situation where you do really want your body to perform in an optimal state.

In addition, despite following the instructions to a tee (and I suggest you don’t – leave them to sit longer than suggested)) – many turn into a strange tasting, goopy mush. Often, the predominant flavour – is salt. No, I am not flat out bagging them all – we all quickly develop our favourites – and tend to end up getting the same one-or-two options each time.

However, we have to this point, been a little limited in regards to ‘high performance’ options for freeze-dried food – sure – you have had gourmet options – but that was more focused on a taste aspect, rather than the quality of ingredients of resulting nutritional profile.

Keen to try out some RADIX?

Visit Radix to order some Nutritional Goodness and get 10% off with our exclusive code – KERRY10 – just enter it at checkout.

Enter – Radix Nutrition

I originally heard of Radix Nutrition through Joesph (FlyingKiwi) – another contributor to this site, avid hunter, and an all-around nice guy. He turned up one day with a couple of packets to try out from this new company making freeze-dried food, but it all just seemed, well, a little different.

If you looked at the pack, it was minimalistic, with a simple sliver colourway and a heavy lean towards providing nutritional information on the package. The other odd thing, that there were ingredients like bone broth, coconut oil, chia seeds, and other, well, healthy-looking inclusions. Not a lot of chemical names I couldn’t pronounce were present, and if you visited the website, which was rather new at the time, you ended up with a lot of photo’s of overly healthy look sports-folk1 and it seemed that these guys were up to something a little different.

Main man Mike

Meeting Mike, the founder, head-honcho and brains of the operation, was an experience, and a very enjoyable one. Mike is one of those people you occasionally meet, that just seems so ‘into’ his work that it’s infectious. He is driven to produce the best nutrition in the most convenient way possible. His focus and genuine excitement for the innovations the Radix is making is very cool, and I was lucky enough to be given a personal tour of the new facilities in Hamilton.

Mike was also kind enough to answer some questions, and, true to his style – he didn’t just give me some throwaway answers, but obviously sat down and considered the questions, giving me quite the response! To be honest, they are so good, I have just included them in complete below.

A chat with Mike Rudling, CEO, Product Architect.

What Is The Origin Story For Radix?

Radix began from the desire to help people achieve more through nutrition – to make good nutrition easier. Nutrition is a fast-evolving and complex study that is confusing to many people and often poorly understood. Often, people are given advice that is too complicated and time-consuming to be implemented realistically into everyday life. Radix was designed to simplify and optimise every aspect of nutritional quality and convenience, creating the simplest solution for those looking to enhance health and performance.

What Was Your Background Prior To Starting Radix?

I have always been an athlete. I was a competitive swimmer from ages four to fifteen, and reached a national level in the UK, specialising in freestyle distance swimming. I had to stop when I injured both shoulders but discovered road cycling as a result. Pretty quickly, I realised that I loved it and wanted to pursue road cycling full time. I left school at seventeen and spent the next seven years competing professionally on the road, specialising in time trialling.

In everything I have ever done, my main passion has always been the pursuit of improving and optimising performance. It wouldn’t matter what it was, I always wanted to make it faster, more efficient, lighter, and simpler. In my training, I would consider every aspect of my plan, lifestyle and routines to identify areas of improvement. I would then implement changes and track the result. I learned a lot.

From early on, people asked me for advice as they tried to improve their own performance. I’d tell them what I learned, only to discover many people struggled to apply that information effectively. This was an important realisation for me. I realised that failure typically occurs not through a lack of knowledge, but in the failure of application. This problem seeded an idea.

At twenty-four I decided to retire from professional racing and to focus on the next thing, even though I was not entirely sure what that would look like. I wanted to address the difficulty of application, and this was a significant starting point for Radix and seeking out a complete and simple nutrition solution.

Why A Freeze Dry Food Company?

Radix doesn’t see itself as a freeze-drying company. We are a technology company focused on delivering customers the most effective solution technically possible, enabling people to enhance their health and performance through nutrition. In short, we want to make the application of nutrition easier. Freeze drying enables us to do this most effectively, but we would change methods if we discovered a better way.

How Does Radix Differ From The Other Existing Freeze Dry Companies?

Radix’s mission is to enhance human potential through applied nutrition. Everything we do must give an improvement in nutritional value, quality, efficiency, social responsibility and reduced environmental footprint. We drive towards these values every day.

We do not see any other companies in the world working on this problem in the same way and with the same values. For this reason, Radix is different from all other freeze-dried food manufacturers in almost every regard, even though our products can be used in the same environments.

What Advantages Does Freeze Drying Have As A Method Of Preparation For Food?

Freeze drying provides us with several main benefits. Firstly, it is the most delicate preservation method we can find to protect the integrity and nutritional values of food. It is worth noting that not all freeze drying is created equal. The term freeze drying describes the physical phenomena of removing water from a product in its frozen state. However, the quality of the actual processing is often poor in an industry that’s driven solely by low cost and minimal investment in equipment. We focus on maximising quality through tighter manufacturing tolerances and processing parameters that others in the food industry avoid because they cost too much or are too complicated.

Secondly, freeze drying forms an integral part of what we call the Radix Nutrition Architecture or RNA. Through this RNA approach, we are able to source the highest quality ingredients from around the world and deliver the customer an ultra-high quality, 100% natural product that can be used by anyone, anywhere in the world. We believe this is really powerful. I don’t believe this approach has been used before and it enables us to create a very powerful supply-chain that’s solely focused on providing exceptional nutrition to our customers.

Thirdly, freeze drying gives us a light-weight and convenient product that is easy to transport and simple to use. These values are important to us – they encapsulate simplicity. In fact, the drive for simplicity is central to our design discussions as we pursue our mission to enhance human potential through applied nutrition. We think that simplicity is key if a person is to integrate outstanding nutrition into a person’s routine or activity.

How Does Your Involvement With The Adventure/Extreme/Endurance Sports Shape Your Approach To Radix?

Working with people who push the limits of performance helps us shape and refine our products to create a more effective tool.

We are fortunate to work with people in the most incredible environments – people who are really pushing the body’s ability to function well and recover. People in these kinds of sports understand the importance of nutrition because they are so familiar with the consequence of an effective or ineffective recovery. As athletes, a big part of their job is to maintain and optimise their bodies as hardware, if they are to perform. It is a real pleasure to work with people who understand this and approach performance through the paradigm of gains and incremental improvements.

When we discuss product performance with these groups, it leads to truly fascinating insights that you just wouldn’t normally expect. Every detail is considered and refined in the pursuit of performance gains. You name it and it comes up: weight reduction, packaging volume, nutritional values, improvements in digestibility, increasing calorie and nutrient density. It is all fascinating. With our new factory, we are looking to grow our product development team and work through an exciting product roadmap.

What Are Some Common Mistakes You See People Making When It Comes To Planning Their Nutritional Needs For Sports/Trips?

Misunderstanding the role of nutrition. Most people still evaluate food on flavour and calories above healthfulness and functionality. Healthy food is not a nice-to-have, it is a must-to-have for the body to function well and look after itself. Failing to understand this leads to people harmingß their short- and long-term health and performance.

But that’s not to say that flavour should come at the expense of healthfulness! Nutritious food that supports the mind and body with the nutrients it needs always tastes great. You just need to make smart choices. This is where Radix offers a significant and unique advantage. Previously, in remote and challenging environments people have had to use ration packs and traditional freeze-dried meals that provide little nutritional value and carry ingredients that are detrimental to health and performance.

Another problem is when people create a nutritional plan based on calories. This is a very poor approach and misses the larger value of nutrition in all its elements. I believe it is a significant failing when people prioritise the focus on simple calorie requirements and expenditures. This approach is popular probably because it is easy to measure and make sense of, and I am disappointed when I see nutritionists teach this approach to students, athletes or patients. Few people are short of calories, but many lack nutritionally.

What Are The Key Differences Between The Different Ranges Available From Radix?

Our ranges are differentiated by ingredient types, macronutrient compositions such as protein, fat and carbohydrate contents, as well as other aspects of the product performance – things like rehydration, weight and pack size. That being said our core design focus is always to provide the highest nutrient density to our customer in their given scenario and environment.

The Wellbeing range is a smaller serving size for those not undertaking significant physical workload. The Performance range is larger meals, featuring increased protein and carbohydrate content. These meals are aimed at supporting a higher physical workload with a more traditional macronutrient makeup. The Expedition range was designed in response to customer feedback, to provide the highest nutrient-to-weight ratio possible with a focus on supporting metabolic energy production through fat adaptation. The range has also been designed to require less water to rehydrate, thus reducing cooking time and fuel consumption. We believe this also keeps water available for drinking, to replace their fluid requirements. The Expedition breakfast range was also designed for cold-water rehydration. This is advantageous to the military and mountaineers who need a nutritious main meal portion but do not want to stop to heat water. Again our focus is on providing the most effective tool.

What Is Your Favourite Meal In The Range?

I prefer the expedition range, in particular, the Chicken Curry, Beef Palusami and the Apple and Cinnamon breakfast. I almost live off these! They save me so much time during the week and I prefer to follow a diet that is higher in fat and protein and lower in carbohydrates, around an intermittent eating routine.

Radix’s mission is to enhance human potential through applied nutrition.


The Company Forms

Radix is growing. Originally based down in Waiuku, the company moved to much larger production facilities in Hamilton – at the same time significantly upgrading the equipment and processes available to them. Innovation seems to be a big push for Mike – streamlining the process, but also improving the process – resulting in a better product for the customer.

Better process, better result

One thing that Mike mentioned, which I found rather interesting – is that Radix Nutrition works a little different than some of the other companies – in that all the ingredients are freeze-dried before putting them together – and it’s the process of adding boiling water that cooks and combines the food just before eating – compare this to cooking all the food, then freeze drying it already cooked – and you begin to understand why the Radix Product, despite no additional colourings or flavourings, looks better before you add water, retains more colour throughout the process and, just seems to carry a more complete flavour profile once cooked. In addition, Mike explained that because many of the ingredients are freeze dried at the source, the nutritional profile of the ingredients remains intact, and therefore the resulting food is better for you.

Awards

It’s not just us that have noticed either – Radix has quietly been getting rave reviews from all over the place – key things seem to be nutrition (unsurprisingly) but also taste – ranking on average higher than any of the incumbents. Check out this review over at Wilderness Magazine – or – the latest Rod-n-Rifle Magazine that features a freeze-dry-shootout.

They are winning packing awards, process awards – all sorts. For a company that is ‘relatively’ new to the marketplace – they are getting noticed. When you get to experience the drive that Mike and the company have though, it doesn’t seem that surprising.

Keen to try out some RADIX?

Visit Radix to order some Nutritional Goodness and get 10% off with our exclusive code – KERRY10 – just enter it at checkout.

Just add salt

Having eaten quite a few of these meals now, if I had one comment, it would be that some of them, to my pallet – could do with a bit of salt, and, mentioning this to Andrew, the marketing manager – the response was simply – ‘yes – and you can add some’. I guess this is a valid point – you can add seasoning, you can’t take it away.

Though, I have to ponder; it’s more a case of me being used to more sodium in the meals, than it actually needing more – and I am sure that my tastes will adapt over time. Failing that, I always carry a little container of salt with me anyhow – so it easy enough to just add a pinch once the meal has re-hydrated.

Just what is Freeze Drying?

Freeze drying is the removal of ice or other frozen solvents from a material through the process of sublimation and the removal of bound water molecules through the process of desorption.

The steps in Freeze Drying are as follows…

  • Pretreatment / Formulation
  • Loading / Container (Bulk, Flask, Vials)
  • Freezing (Thermal Treatment) at atmospheric pressure
  • Primary Drying (Sublimation) under vacuum
  • Secondary Drying (Desorption) under vacuum
  • Backfill & Stoppering (for a product in vials) under partial vacuum
  • Removal of Dried Product from Freeze Dryer

Let’s use a handy video to explain –

[fvplayer src=”https://www.youtube.com/watch?v=PxwgB-uFiR8″]

Further Reading


  1. i.e. triathletes, adventure athletes and mountaineers