Home Blog Page 36

Hunters Element Base Layer

0

With the changing seasons, I decided to re look at my base layer, so that when I get hot I can strip down to a layer that’s still a camo layer, opposed to my black thermals (In summer I have thin camo shirts & tops but nothing for warmth rolling out of winter).

I prefer to travel light & although best practice is to wear multiple layers, I find I get warm pretty quickly & so prefer to carry an extra thermal for safety in my day bag rather than have to stop to constantly remove layers.

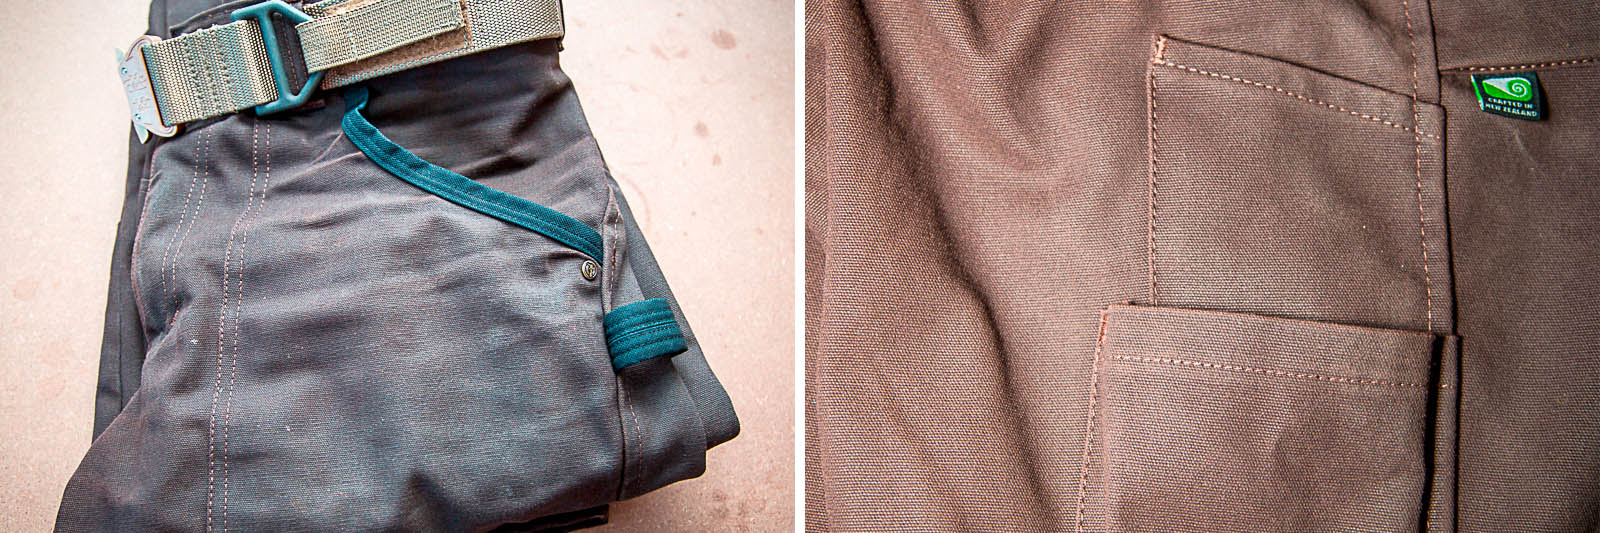
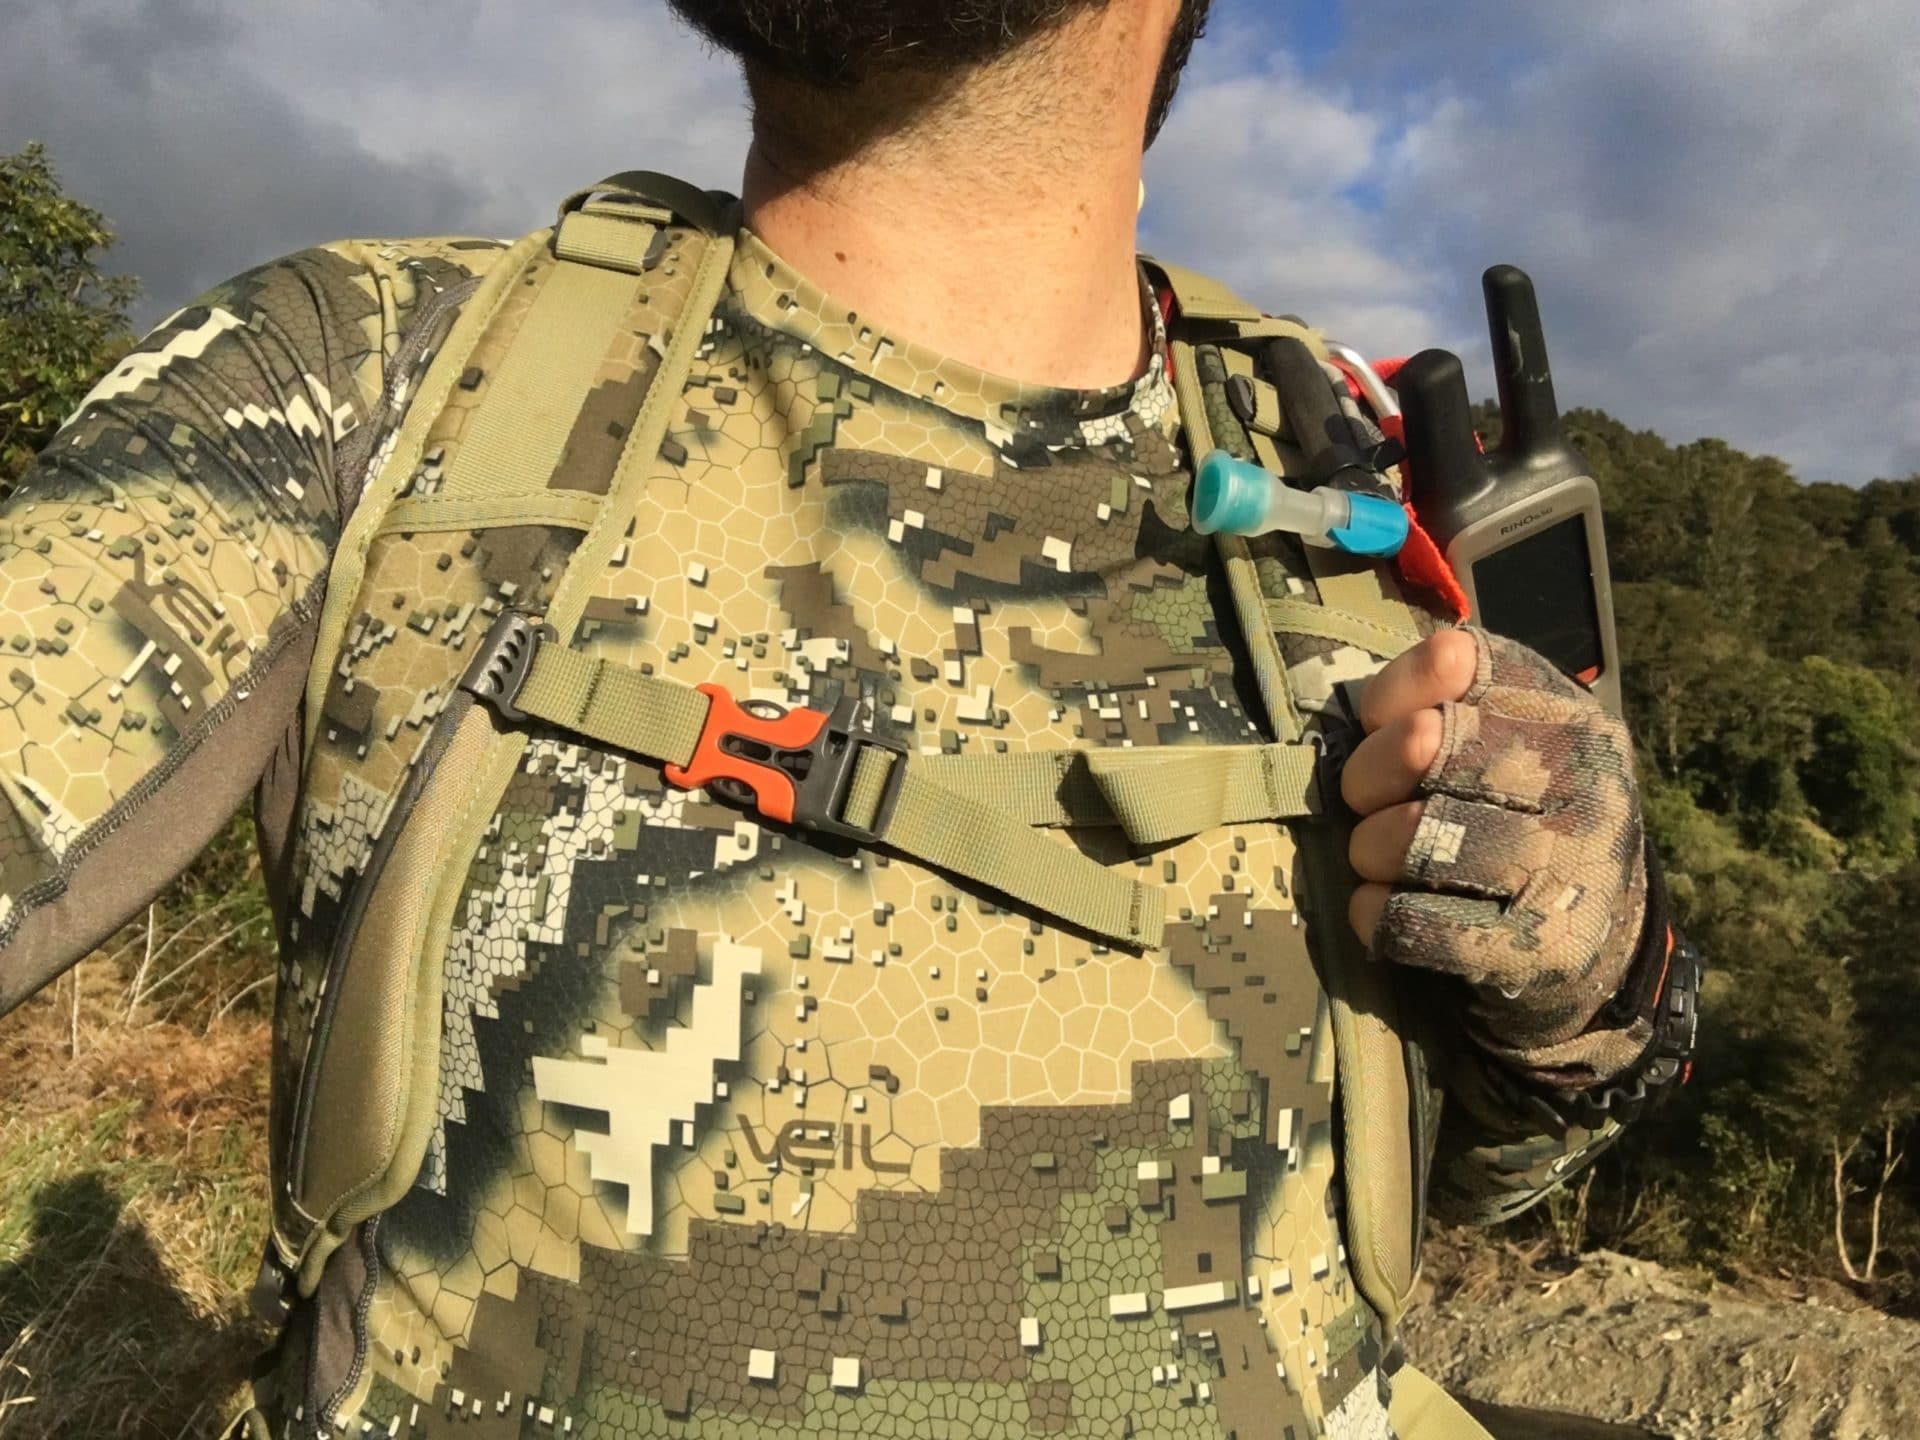
I also customized my bush shirt adding underarm zips to help regulate airflow. Looking at the market I was surprised to find only a few camo base layer options, and best of all locally – Hunters Element had a great combo for my next trip – the blizzard top & leggings were on order & I was excited to get out into the bush to put them through the elements.

I chose only my bush shirt & shorts for a recent trip to the Urewas with my new blizzard base layer. Up & out pre dawn I was surprised how warm the cool touch fabric was, they certainly do hug the body as per description, it was great under my shorts as I had no resistance of fabric between my legs, stalking and moving agilely was effortless, plus I hoped I still had some protection from stinging nettle…

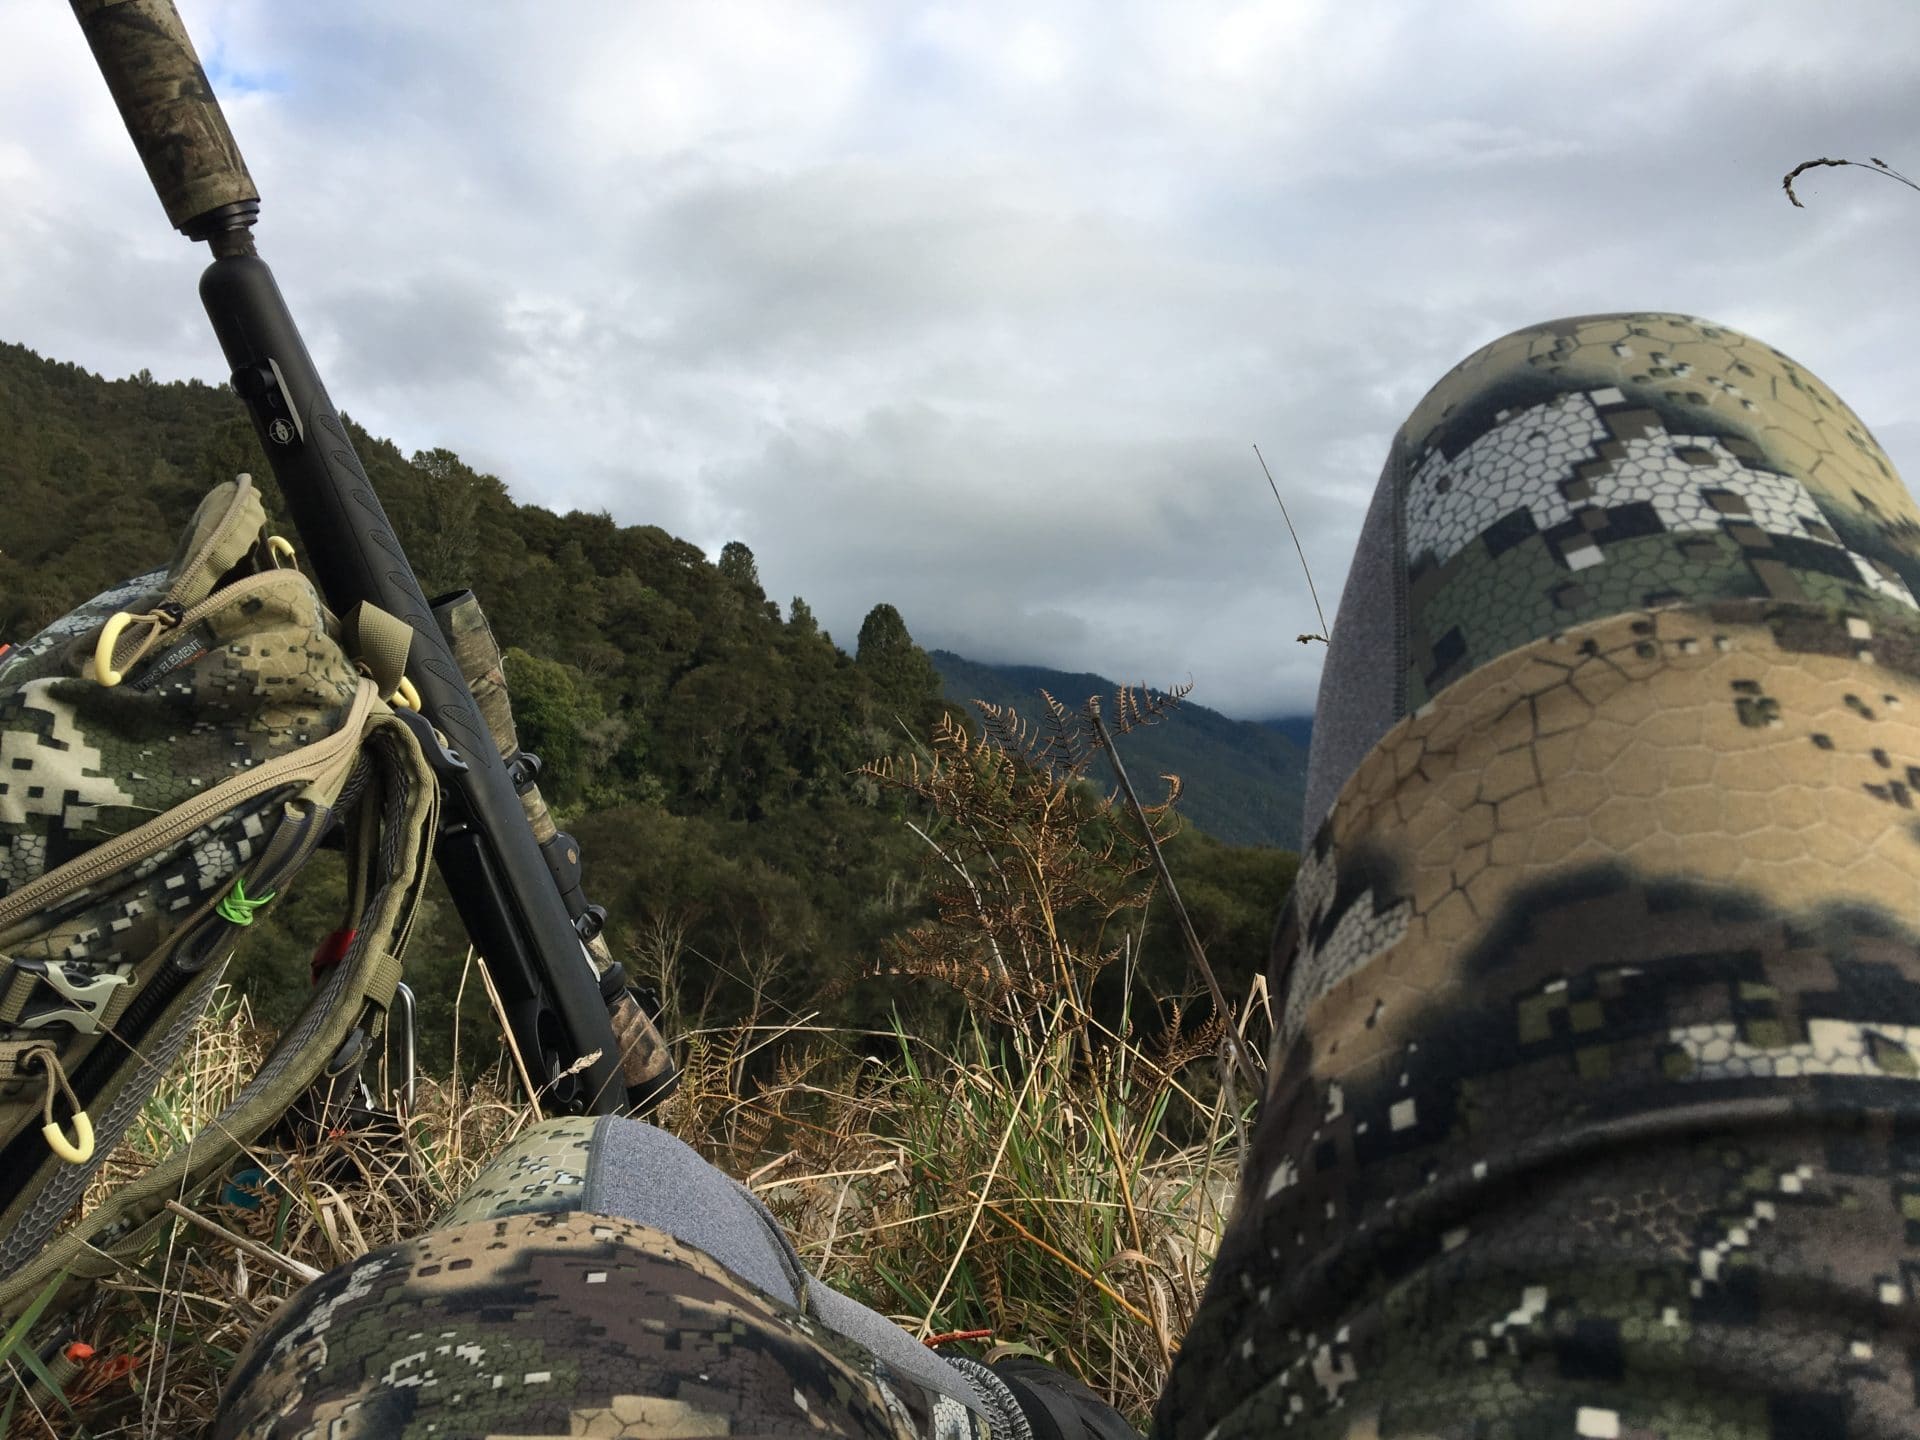
After 4 days in the bush, I certainly loved my new base layer and have worn them on 2 hunts since. Basically, they are excellent. Keeping my body temperature level after a hard slog up a mountain, traversing ridges or walking through streams. When stopping for a break I never felt cold too quickly or felt like the ultra clingy fabric was too clingy, to be honest at first I cursed the ultra snug fit wanting to roll up the sleeves as I do with my thermals…but I quickly realised I didn’t need to.

In fact, the one time I did manage to inch the fabric up my arm, I was rolling it back to its original position & suddenly a lot more comfortable. Its hard to explain in words how it kept my body temperature level…I’m just gun leave it to technology & quote the garment specs… “Body Mapping Technology”. In fact, I felt like spider or Superman in the fitted garments, it was like another layer of skin. Really comfortable, totally unrestrictive & noise free. However I would avoid wearing the leggings under pants, I tried it & the fabrics surface texture did seem to make a noise at the knee, to be honest, tho – if I was wearing pants, it wouldn’t make sense to wear these…they are definitely for the shorts hunter!

What I also loved was the quick drying fabric, I decided to give the top a wash one night back at camp, spinning it dry I hung it up & I didn’t even need to wrap it in clothes to put under my sleeping bag overnight, as I often do with my thermals to make sure they’re dry in the morning. Pretty bloody impressive.

I cant really fault this layer as an option for the hunter who wants a camo double skin. but I can tell you sadly I was no Superman against the stinging nettle, which stung right through that second skin like a b!@*#. Suffice to say I avoided stinging nettle for remaining trips. The only other niggle was the leggings have started to pill, wondering if perhaps I did something wrong in the wash process – I’m not sure & will investigate with H.E.

These will be my go to base layer going forward & I’m dead keen to try them out in harsher colder climates to see if I can get away without wearing thermals at all…will keep you posted.

shot

JJ

Specs

Heat control technology.Designed to regulate the bodies temperature at

Designed to regulate the bodies temperature at base level, the Blizzard is extremely warm in harsh conditions and cool and forgiving in the heat.

Flat lock seems / High wicking / Fitted cut / Muscle Compression / Body Mapping Technology / Sizes S-4XL / Available in Desolve® Veil™ Camouflage.

VRTBR – Premium Outdoors Clothing from the Nordics.

0

[fvplayer src=”https://vimeo.com/276595906″ splash=”https://i.vimeocdn.com/video/709230464_1280x720.jpg?r=pad” caption=”VRTBR_Intro_1080″]

Looking for the perfect clothing system

As you should all know by now, I am constantly looking for better ways to do things.

I think I have found my perfect field shooting trousers and boots1 but wanted some decent wet weather gear.

I have been on the hunt for the ultimate wet weather jacket for a while now. I own several, have tested even more, but struggled to find one that did everything I wanted it to (and primarily didn’t wet out fast). I had been contemplating biting the bullet and getting in some Artyrex LEAF to use, but, there were a few little things that really appealed in the VRTBR offering.

For me, this is actually for field shooting first, and hunting second – due to time constraints and projects underway – I can see myself spending a lot more time at the range than hunting in the near future. Which is fine – through clients wanting Precision Rifle Training, Hunter Courses and more – while I don’t get out into the field as much as I would like to atm, I do spend a fair bit of time in the elements (and hope to do so even more!)

First impressions really do make a difference.

I mentioned recently2 that, while packaging doesn’t ‘matter’ in the large scale of things, it certainly impacts on first impressions. Such was the case again as I received a much-anticipated package from Denmark.

VRTBR, a Nordic3 design and hunting apparel company, has been on my radar for a few years now. I originally heard about them through THLR’s (Thomas) Videos and the further through my involvement with Vertebrae, their ‘sister’ company and also spotting some early samples at the Stager Booth at the Sika Show.

I am going to do a series of articles on the separate parts of the system, and a hunting garment system it most definitely is but thought I would get down some initial thoughts in the meantime.

VRTBR [/ˈvɜr təˌbreɪ/]

So, just who is VRTBR anyhow?

VRTBR is the result of a joint project between Denmark and Norway – between (among others) Malene Nielsen and Kenneth Skorpen – it’s a great combination of design and function – Malene bringing the design ideas and along with Kenneth (and his military background) and a group of testers – making sure any introduced elements worked together in the field.

Production is done by a family-owned business in northern Italy.

Clothes that fit

I think it’s time we were allowed to wear clothes that not only functioned well but actually also fitted well. I mean, no, the animals we are hunting couldn’t care less about how we looked in the bush, but, like it or not4 a whole lot of your existing hunting gear is based on fashion – whether you have the latest digital camo patterns, or have gone the other way and hunt in the ‘traditional’ Swandri and Stubbies5 – we all have a particular look that we fit into.

I like to fit into my pants as well. This was something I commented on when reviewing the Hunters Element Hydrapel pants – it was a nice change to wear a pair of trousers that didn’t feel like they were designed to fit everyone, regardless of your actual body type – i.e. boxy, loose, shapeless pants.

So, when you open a package of technical clothing6 that also manages to look like gear that you would happily wear into a night in town, without looking like a ‘hunter’ you know you have something special in your hands.

In addition, with good form, comes function – I have already noticed, that while the pants are ‘tighter’ than I am used to – it also means that anything in the pockets is held against the body – and therefore doesn’t make any noise. This is applicable for both the cargo pockets and the thigh pockets in the pants – I can have, for example – a lighter, knife and small torch in the pocket – and not have them bang against each other and make any noise.

We are seeing more of this kind of product on the market now – Sitka, KUIU, First Lite, now Hunters Element and Stoney Creek are quickly catching up with technical garments that have gone beyond the traditional fleece top and shorts that many hunters would have grown up with. It’s great to have so much choice now!

Materials, marketing and more

The outer jacket and pants are made out of a laminate utilising eVent Alpine as the waterproof membrane. This particular membrane (and remember, like Goretex – there are multiple levels in every system) boasts a 20m water column (that’s 20,000mm if comparing) and a 20,000 g/m2 breathability rating.

Now, I would have no doubt, like any material that has a quieter outer layer on it, that outer layer will eventually wet out (hold water) a bit and reduce the breathability rating. However, like I think is actually the case with many people complaining about their jackets not work – it’s more a case of you starting to sweat and having that trapped in there than it is a case of actually getting wet from the rain. Of course – this is why we have pit zips.

Their fleece and base layer is made out of Polartec Materials – Power Stretch Pro and Power Wool respectively.

More on all of thise when I start looking at the individual pieces.


  1. for now, at least… 😉  

  2. while unpacking the Vortex Razor AMG 

  3. meaning there are people involved from Norway and Denmark and likely other countries in that region 

  4. consciously or not 

  5. did you happen to notice both of those terms are brand names? 

  6. and this stuff is built to be used outdoors 

Re-Waterproofing your Raingear

0

The reality is, even the most expensive of jackets need regular maintenance to keep them in top shape.Re-waterproofing your gear regularly keeps it working at it’s optimum.

Most people have experienced their jacket ‘wetting-out’ at some stage – that point where the jacket doesn’t seem to shed water anymore and starts soaking it in.

This is caused by a combination of things – the DWR wearing out (what this article is about), Dirt, Insect Repellant, Blood (for the hunters) and many other things. This tends to make the jacket feel clammy and wet.

The outer layer wets out, stopping the jacket from breathing like it should. Your perspiration can’t escape, gets trapped, and makes you feel like you are getting soaked. You are. In your own sweat.

This is a good sign that it’s time to do some maintenance to the DWR finish on your jacket.

This ties in with maintaining core temperature while out in the bush, hot or cold, but ensuring you jacket remains ‘dry’ and clean, breathing like designed.

Durable Water Repellent

To prevent wet-out, technical jackets get treated with and ultra-thin covering called DWR. This is a polymer that gets applied to the outside layer of fabric. This lowers the surface tension of the outer, causing water to bead up and roll off instead of soak in.

When you get a new jacket, this DWR coating is in new condition. After using it for a little while, especially when worn under a pack or something that will be rubbing against the jacket, this layer wears off. The speed of which depends on many factors – amount of use being one of the biggest.Re-waterproofing your gear restores this layer.

Wear points – like the shoulders, across the chest and waist where the pack straps join, and the back are the top spots for wear. This is where the fabric is rubbing on fabric, and soon removes the thin DWR coating the manufacturer applied.

Cleaning the Jacket

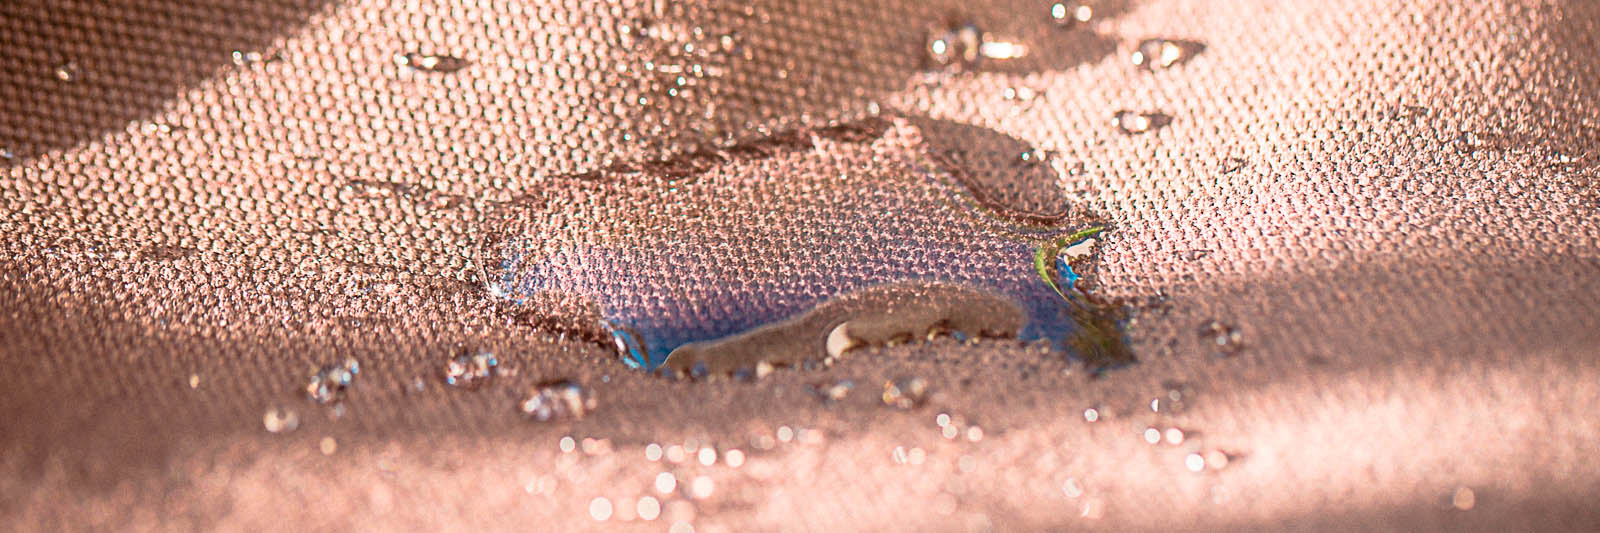
The first step in getting the jacket back to new is cleaning it – a buildup of dirt, sweat and other materials are likely reducing the breathability of the jacket.

Don’t just dump it in the washer with the rest of your clothes.

Most washing detergents are going to leave a film on the jacket – this can attract water and cause the jacket to wet out. Most manufacturers are going to have their own suggestion on the product to use. I have used NikWax’s Tech Wash – I purchased it a while ago on a recommendation from the guys at Living Simply, and have used it on many items over the years.

Using it is simple – make sure the washing machine doesn’t have any major residue left in it from the last wash, put in your jacket(s), and wash. Follow the instructions.

The Dryer

Once you have washed the jacket, you may find all it needs is a spin in the dryer. While most people are nervous at the idea of putting their technical jackets in the dryer, it actually re-actives the DWR layer, and you might find that it’s all you need to get the jackets back to ‘new’.

In my case though, I wanted to get a step further, so I decided to reapply a DWR coating.

Spray or wash through?

There are two types of DWR treatment available on the market, spray on, which gets applied through a pump style bottle, or wash through, that, you guessed it, gets put into the washing machine with the garment.

I only had a spray on treatment the weekend I decided to retreat the jacket – so used that, however, as you will notice in the video, there are still a couple of spots that could do with another spray – no major. Next time though, I would be interested in using the wash through, then spraying onto of the high wear areas (pack straps) to get the best of both worlds.

How did it go?

Very well. Though my Hunters Element XTR was still fairly waterproof, it was starting to soak in a bit – especially in the forearms and across the chest where the pack straps were constantly rubbing on it. After having a long talk with Robert from Hunters Element about their Hydrafuse Packstealth Fabric, I decided to retreat it.

As you will see in the video, initially, through a lot of water was running off it, some was hanging around and eventually wetting out. I think it’s very important to note that the way and amount of water I was putting onto it, is somewhat beyond rain. I would say closer to standing under a garden tap or waterfall. Which is not something we normally do with a jacket. Yes, it wets out, but so would any jacket – my Ridgeline Monsoon would be sodden (it also needs retreating, badly).

[fvplayer src=”https://www.youtube.com/watch?v=vIyiLzaR0HA&t=3s” startend=”3-” splash=”https://i.ytimg.com/vi/vIyiLzaR0HA/hqdefault.jpg” caption=”Re-Waterproofing your outdoors gear – DWR Testing”]

Anyhow, washed it, sprayed it, a lot more beading. I need to spray a little more onto the chest area – right where the chest strap normally sits – this is a high wear area – so it makes sense that the DWR is a little worn there.

All in all, very happy. Still keen to get a wash through, and put the jacket through that – I think the combination of the wash through and spray on would be ideal.

So, in summary – it’s easy to renew your DWR on your jackets. Worth doing, and realistically, required maintenance on even the fanciest of technical outdoor garments.Re-waterproofing your gear should be part of your regular equipment maintenance.

Mark Bridgman – Sika Show, Sika Foundation, Hunters and Habitats.

0

[fvplayer src=”https://vimeo.com/181675559/” splash=”https://i.vimeocdn.com/video/590355599_1280x720.jpg?r=pad” caption=”MarkSika”]

A man of many talents, many projects and plenty on his plate. Mark Bridgman is the man behind the Sika Show as well as being heavily involved in Hunters and Habitats and the Central North Island Sika Foundation.

Mark also has an extensive background in reloading – and we will likely get him on again in the future to talk a little bit more about the ‘black art’.

This is a great interview, as I state at the begging, even, and maybe, importantly, urban/metro hunters need to be just as involved as our rural counterparts in the management and maintenance of the herds that we seek to hunt. This then extends out to the environment that they live within.

Chilli & Lime Jerky (or Biltong?)

0

Meat. Spices. A little sugar.

I have been making batches of dried meat for a little while now. We bought a Sunbeam Dehydrator a while ago, essentially so we could start experimenting with dehydrating food in order to cut down on weight while tramping. Of course, jerky became an obvious experiment.

I hadn’t made any for a while, and thought, since I had promised to include a bit more food on this here site, jerky would be a good start.

What is it, really?

My normal recipe (if you can call it that) has involved soy sauce, sugar, chilli and whatever other herbs and spice I felt like at the time. I thought I should try something different and found a recipe online that involved both a wet and a dry cure. Looking at the recipe now, and the differences between jerky and biltong, another dried meat method, I may have ended up making something that sort of straddles the two. Vinegar is often used in curing biltong, and it is cut more like the biltong would be, but the dehydration process is closer to jerky, rather than air drying, like biltong normally would be.

Regardless, the result is a tasty, chewy meat snack. Great for the trail, or any time really.

Step One – the wet cure

Cut the meat up. In this case, I just used some rump steak, but really, any lean meat is suitable. I was experimenting, so didn’t make much – normally, something nice and think is the preference. Again, depending on how you like it cut, and the final texture you want. You can cut with the grain to have a chewier version, or against if you want it to fall apart easier. Experiment!

The wet cure was (roughly)

  • 1 Cup White Vineagar
  • 1/2 Cup Brown Sugar
  • Salt and Pepper
  • 1 ‘Shot’ Rye Whiskey

The amounts are going to differ, depending on your personal preferences – remember – taste it before you put the meat into it. You might like it sweeter, or saltier. Mix it all up in a bowl, turn the meat into it, make sure it’s all covered nicely, then cling wrap the container and put it in the fridge for 24 hours.

Beef Jerky 2

Step Two – the dry cure

When you remove the meat from the fridge the next day, you might notice that it is essentially already partly ‘cooked’ or, cured. This I think is what makes it more akin to biltong than jerky, but whatever. Semantics. Take it out, pat the meat dry. Now, its time to make the dry cure.

  • The zest of one lime
  • Chilli Flakes
  • More Salt and Pepper
  • More Brown Suger

Again, add to taste – I used a hot chili, and lots of it, and backed off on the second lot of salt. Once it’s all mixed up in a bowl, toss the meat in it. Try and get a good even coverage.

Beef Jerky 3

Then, it’s into the dehydrator. Different machines have different settings and may require more or less time, but essentially, I put mine on before I went to bed, got up in the morning, checked it, stopped it there. Turn it out into a container, and I suggest you try to leave it another 24 hours before you eat any.

jerky 4

So, how did it turn out? Bit of a funny one, this one – it was the first time I had used a vinegar cure and it was almost a little too ‘tart’ for me. Although in the end what it had was a high explosion of flavour – and I think my reservations came from the fact that I was used to a more subtle taste. It was still good though. We ate it all. Looking forward to getting some more meat and experimenting with even more flavors.

Smoked Roast Chicken on a Weber Smokey Joe BBQ

0

The Grill

Grilling up a good feed on a bbq is one of the most satisfying things in life.  It tastes that much better when you’ve slaved away for hours getting it just right.  Slow roasting a good piece of meat is one of my favourites, and I’ll share my not so secret method in the next few minutes.

I was converted to charcoal barbequing about a year ago by a family member.  If you have the time, as it takes a bit longer than a gas bbq, it imparts a lovely smoky flavour to the meat that you just don’t get from gas.  Plus you get extra bloke points because it requires more technique than just firing up a gas bbq.  Kinda like shaving with a cut throat razor rather than a safety razor.  I purchased a Weber Smokey Joe last summer, and it’s been a great success.  I got the smallest in the Weber range as I wanted something I could throw in the back of the 4×4 and take hunting and camping and to the beach etc.

[fvplayer src=”https://www.youtube.com/watch?v=kwwNR-14uZw” splash=”https://i.ytimg.com/vi/kwwNR-14uZw/hqdefault.jpg” caption=”Smoked Roast Chicken on a Weber Smokey Joe BBQ”]

Here’s what you’ll need to get started roasting a whole smoked chicken.

  • Charcoal bbq
  • Fire starter cubes
  • Charcoal or Briquettes. I recommend the hardwood variety
  • Wood smoke chips of your choice. I prefer hickory as a good all-rounder, and the large chips last a bit longer than sawdust
  • Chimney starter – to get the charcoal heated up really good and hot. Once you’ve used one, you’ll never do it any other way
  • Disposable aluminium drip tray
  • One whole chicken, or two if you desire
  • Assorted seasonings and general kitchen stuff
  • Some cold beverages

Thaw the chicken in its bag overnight on the kitchen bench.  It’s best to be room temp when you bang in in the bbq.

Put your bbq in a safe place where it isn’t a fire hazard and small kids, and pets can’t get to it.  Have a bucket of water on hand too just in case.  Wear shoes to protect your feet.  Hot cinders have a habit of falling on the ground, and your feet have a habit of finding them.  A protected foot gathers no burns.

Put a cube or two of the fire starters in the bottom of your chimney starter.  Fill your chimney starter with briquettes or coal to about 2/3rds or ¾ full.  Light the starters from underneath and place the chimney somewhere safe on stones or concrete or dirt.  It will leave a black soot stain so don’t put it somewhere you want looking pretty afterwards.  A good place is just to stand it inside the bbq if it fits, my Smokey Joe was a bit small.  It usually takes about 10-15 minutes to get up to temp, so in this time you can get the chicken ready.

Open the chicken bag and rinse the bird off.  Place the chicken on a board or plate.  Drizzle it with olive oil and rub the oil all over the chicken.  Prepare your seasoning – I used salt, pepper, paprika, and thyme, but it’s really up to your imagination and preference.  You can even just cook it au naturale if you like, but I recommend at least oiling it first to prevent burning.  Stuff the bird with stuffing or a couple of segments of lemon if you wanna get fancy.  Experiment a little.

Right, your charcoal should be good to go by now.  An even coating of white ash on the briquettes is a good indication, and it should all be red hot.  It’s important to get this step right, because if it hasn’t gotten hot enough to get that coating of white ash first, it’ll give your meat a horrible gasoline flavour, especially if it’s charcoal.  Your guests won’t want to come back for seconds, and they’ll probably quietly flick their firsts to the dog.  Empty the hot briquettes into the bbq taking care not to burn yourself.  Pick up any cinders that fall on the ground with some tongs.  Rake the briquettes into piles on the sides of the bbq as you don’t want direct heat for this stage.

Put the meat grill onto the bbq.  Place the chicken straight onto the grill in the centre away from the direct heat of the briquettes.  Scatter a good handful of the wood chips onto the briquettes evenly around the bbq.  Place the lid back on the bbq, checking that the bottom vent is fully open and the top one-half open.  Leave for 15-20 minutes to get smoked all over.

Remove the lid and grab your aluminium tray.  The tray catches all the fat and juice from the chicken which you can use for a tasty gravy, plus it keeps the bbq clean and stops fat fires.  Pop the chicken onto the tray and check the briquettes aren’t getting too cold, rake together as necessary.  Replace the lid and leave for an hour while you enjoy a cold beverage, then come back to check it.  Rake the coals again if necessary, you’ll find that if they’ve gotten cold, just removing the lid should get them glowing again.  Spoon some of the liquid in the tray over the chicken if the skin is looking dry.  Pop the lid back on again and leave for another half hour or until cooked to the desired tenderness – it should fall off the bone.  Experiment with the vents on your bbq to get desired results with the heat, if you’ve got a bbq thermometer about 160-180°C would be ideal.  Use the broth in the tray to make a tasty as gravy while the chicken rests on the bench.  If you don’t want so much fat in it, just spoon it out or use a slice of white bread to soak it up like a sponge.

Another variation I like is to do two chickens, eat one hot and let the other cool and pop it in the fridge.  You can pick away at it over the next few days and use it in sandwiches or salads.

It’s a bit of an art getting everything just right, but that’s all part of the fun, and you’ll get good at it after a few times.  The taste is absolutely worth it!

Smoked Ribs

Do all of the steps as above getting the bbq lit with coals in, but maybe a few fewer briquettes as you don’t want it too hot.  You can put a nice dry rub on the ribs the night before and leave to set in the fridge, but make sure they’re room temp before BBQing.  Smoke the ribs in batches for about 15 mins each.

You’ll need an oven on low heat or a slow cooker for the next step, or you can use an aluminium tray in your bbq if it fits them all.  Make up a tasty broth to slow cook the ribs in – plenty of good recipes online.  Make sure there’s a good amount of liquid in there – you don’t want them getting dry.  Cover with tin foil or a lid and cook on a low heat for 5-6 hours.

In that time, enjoy a cold beverage and make a saucy glaze for the ribs, again there’re great recipes online.  I like mine with bourbon and a bit of kick to it!  Check the ribs after about 4 hours to make sure they don’t dry out and turn them if necessary.  Have another cold beverage.  About 30 mins before you’re ready to eat, get your bbq up to a decent heat but not too hot otherwise the glaze will just burn.

Chuck your ribs straight onto the hot grill, basting the glaze on thinly at first and turning periodically so they don’t burn, but get a nice caramelization on them.  On the last basting a few seconds before you pull them off the grill, give them a good thick layer of glaze.  About 30 secs sizzle twice each side is a good point to start, again it’s up to your preference, but don’t be stingy with that glaze and don’t let them dry out!!  Cover with tin foil to rest for a bit and serve, then listen to all the appreciative noises from your guests.

Handy Tip:  Chuck the meat grill into hot water as soon as you’ve finished grilling.  That sticky glaze becomes a SOB to clean off if it hardens on the grill.  After your meal, it’ll be heaps easier to clean after soaking in the water.

Keep experimenting and tweaking the process, you’ll come up with something unique and tasty of your own no doubt!


Cactus Outdoor Trade Supertrousers – Superhero Pants!

0

aotearoa

Trade Supertrousers – the kind of pants Superman would wear, if he was doing some part-time work as a contractor on a worksite.

I wanted a pair of pants for bush-bashing – something that would take a beating, but also have a couple of additional pockets to carry my EDC along with additional gear that I like to have handy when out in the bush.

The Pants

The Trade Supertrousers are made out of canvas, specifically, a 12 oz. polyester/cotton canvas with an acrylic coating. Think heavy, old-school tarp or tent.

Designed for ‘the trade’ – they have a pile of pockets on them; your normal front and rear pockets, coin pocket in the front right pocket (fits the pocket-knife  lighter and torch perfectly), as well as a pocket with domed closure on your left thigh (fits an iPhone nicely) and double pockets on the right (wallet, small notepad and large folder). This is finished off with a hammer loop on the left leg – I have found this also holds a Golok against the leg nicely.

Trousers

These are made heavy, with beefy stitching and reinforcing on the pockets. They will last.

They are also stiff to start with. I am still in the process of breaking my Supertrousers in and am going to treat them somewhat like unsanforised denim. In the meantime though, it feels a little bit like wearing a tent. Maybe not the best of choices in the middle of summer, but well, they also make shorts!

The Canvas

The word canvas comes from the 13th Century Anglo-French canevaz and old french canevas. It is also possible that they are both derivatives of cannapaceus, which in Latin means “made of hemp“. Duck Canvas (more tightly woven fabric) is derived from the Dutch word for cloth, doek.

The canvas they use is designed to be rain resistant – I did a bit of quick testing, which shows that it does bead water, instead of instantly wetting out. However, they are not rain pants – and it has been suggested that a little additional treatment can make them a lot more weather resistant. I will probably treat them at some stage with a spray or wax.

bead

While there a million new miracle materials out there with highly breathable waterproof materials becoming the standard in the outdoors community, I would still be a little nervous taking my high end Gore-Tex over-pants out bush-bashing.  Or for that matter, near a fire. Sharp objects and fire – two things that require a material a little more hardy.

I guess the other argument would be to just toughen up, wear the stubbies out into the bush, and deal with the inevitable scratched legs that will result. But why?


The Company

The Trade Supertrousers are made by Cactus Outdoor  a Christchurch based company who have been making some bulletproof equipment for professionals for many, many years. They put a lot into their goods – selecting the best materials for the job, and designing and manufacturing everything here in NZ. They take a lot of pride in what they produce and it shows.

  • Internally bound seams for water resistance, added strength, and reduced wear on the seams
  • Reinforcing at high wear areas
  • High density webbing reduces buckle slippage
  • Fabrics selected for specific uses
  • YKK zips – still the best
  • Nylon duraflex buckles – light, strong, and durable
  • 1000 denier external edge binding – for strength and abrasion resistance
  • Quality woven labels
  • Reinforced eyelet construction to help stop eyelet failure
  • Double layer bases and reinforcing at the bottom of the harness on our bigger packs

Even down to the rivets they use – just check out the details on the trousers!

Detailing

I am currently wearing them in, and plan on taking them out maintaining bait lines in the Waitakere Ranges – so I expect them to get a lot of use. I love the idea of purchasing goods that a going to last a long time, made locally, and made with a little more thought and care than many mass produced goods.

I also have an eye on several of their other pieces of gear, so expect more reviews soon!

Hunters Element Foxtrot Boots

0

I have had the Foxtrots for several months now and have had the opportunity to wear them out bush bashing, tramping and tracking.

Each time I put them on, I am amazed as how light they are for a boot – but they still maintain the amount of support and protection I expect and require out of off track footwear. While I had considered a pair of Canvas Jungle Boots for stalking in warmer temperatures – the Foxtrot means I get a pair of waterproof boots that has the comfort of a pair of sneakers.

The rubber toe and heel protects the Cordura against scuffing and while, like any shoe is, they lose a bit of traction on wet rocks (I am yet to really find a sole that doesn’t), they boots make easy work of muddy climbs and dodgy tracks.

Initial tests lead me to some concerns that the boots were leaking. However, in all fairness, the water was getting in through the gaiters at the top of the boot. That’s where all boots leak from, waterproof or not. I am still working on getting my gaiter system sorted.

Because they are a fabric boot, and the waterproof membrane is under Cordura, the boots will hold a little bit of water once wet and like any boot, they take a while to dry out. However, for stomping across streams on a stalk I have had no real issues.

If I was planning on heading up high country, I might consider a slightly heavier boot. The extra support could be useful in more alpine environments with a heavier pack. However, I know that extra protection would mean more weight – my Meindl boots in comparison feel like snow boots and weight two, if not three times as much. For the majority of my hunting (and bush time in general) – the Foxtrots are a much more comfortable and sane option.

[fvplayer src=”https://vimeo.com/118324917″ splash=”https://i.vimeocdn.com/video/505379601_1920x1080.jpg?r=pad” caption=”Hunters Element Foxtrot Boot Review”]

One thing I would like to have on them are some lace locks. I like to have a looser footbox, then tighten the boot back hard against the heel – locking it in place. While I can do this with a couple of surgeon knots on the laces, on my Meindls, I have locking eyelets on the boot itself. No major though and easy enough to find a solution too.

I did experience a little bit of toe rubbing when wearing boot liners only. The simple solution was my normal tramping socks, which help my foot fit just that little bit tighter.

Waterproof Jackets not as good as they used to be? This could be why.

0

Wet

Fluorocarbons – PFOS, PFOA and things that keep you dry.

Water repellent treatments work by lowering the surface energy of a fabric so water beads off instead of wetting out.

Waxes, Oils and Silicones all are used to achieve this – but also are all affected by oils – such as those coming off our skin during use.

Fluorocarbons, particularly PFOS (perfluorooctane sulfonate) and PFOA (perfluorooctanoic acid) are effective at effective at repelling both water and oil – so for a long time were used by outdoor equipment manufacturers to create waterproof systems.

However, a couple of years ago, data related to the potential health and safety concerns emerged in regards to both PFOS and PFOA. They are both now considered a ‘likely carcinogen’1.

Greenpeace called for their ban2, and NikWax campaigned to get rid of them3.

DSC_1260

Newer, safer, but better?

So, manufacturers have been moving away from the PFOS and their ilk. Generally this has meant shorter chain chemicals – they break down faster in the environment and cause less (reported) health effects. The downside? They don’t work as well. They are getting better, but they don’t work as well.

But wait – aren’t there new, better materials coming out all the time?

Gore Tex, Event, there is a newer material coming out every couple of months at the moment – all promising faster, better more breathable and more waterproof.

Remember though – there is two parts to a waterproofing system – the fabric (Gore Tex, Event and all) which is what effects breathability and the DWR coating, which is what keeps the water out of the fabric in the first place. Yes, the materials are getting better.

There is plenty of ongoing experiment and testing – but fundamentally, we had to take a step backwards and are still catching back up.


  1. carcinogen is any substance, radionuclide, or radiation that is an agent directly involved in causing cancer. This may be due to the ability to damage the genome or to the disruption of cellular metabolic processes. 

  2. http://blog.stepchange-innovations.com/2013/07/greenpeace-puts-pressure-on-outdoor-brands-to-phase-out-fluorocarbon-chemistry/ 

  3. http://www.grough.co.uk/magazine/2013/12/17/outdoor-boss-warns-uk-industry-of-gathering-storm-over-waterproofing-chemicals 

What is the best bipod to get?

0

[fvplayer src=”https://vimeo.com/259722158″ splash=”https://i.vimeocdn.com/video/688248707_1280x720.jpg?r=pad” caption=”Bipod Overview – 1080 – No Titles”]

Bipods, bipods and more bipods.

There is a lot of choice out there in bipods – and new manufactures seem to be coming onto the market every day with even more options.

However, like I seem to be constantly saying, it’s important to start with the end goal in mind, and work backwards, rather than get caught up in marketing hype and end up with something that is cool, but maybe not what you are actually after.

Hunting, target shooting, what?

So. The big question is, is this for hunting, is this for target shooting? Likely it’s for a bit of both – but what is the priority? Lightweight hunting bipods are available, as are heavier, but more stable target/tactical bipods. And while one will work for the other purpose, you often find that you sacrifice something when going to either end of the spectrum.

Of course, it’s hard to go wrong with a Harris Bipod. Though, as I suggest – there are a few modifications/add-ons that in my view are pretty much essential.