It was with this in mind that I thought I would head off into the Waitakeres for some basic off-track navigation practice.
It’s also a great time to test out any new gear you might have – prior to heading away overnight (or longer) where you may need to rely on those items. Better to have them fail when not too far from home, than when you are a day or so into the bush.
Heading into an area with plenty of existing trails is a good way to practise in a relatively safe environment. I am not suggesting you do this with no training at all, but as long as you understand the fundamentals and use the existing tracks as buffers – it’s a great way to push your off-track navigation skills.
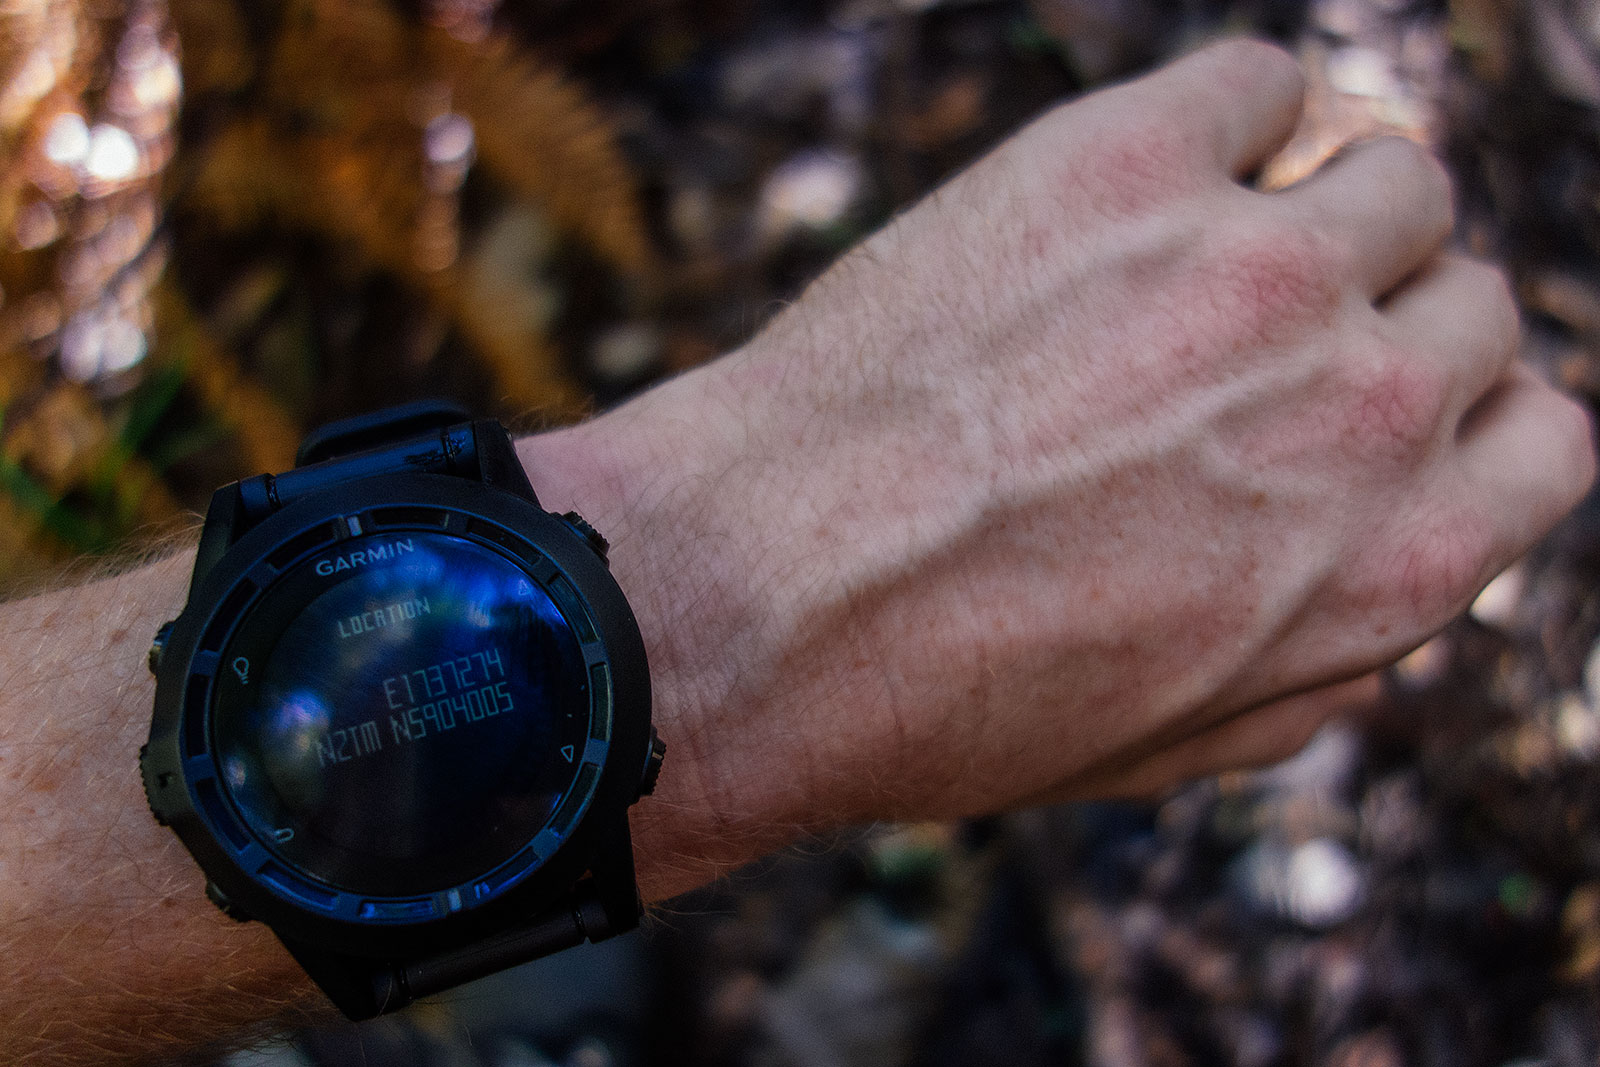
Knowing where you are.
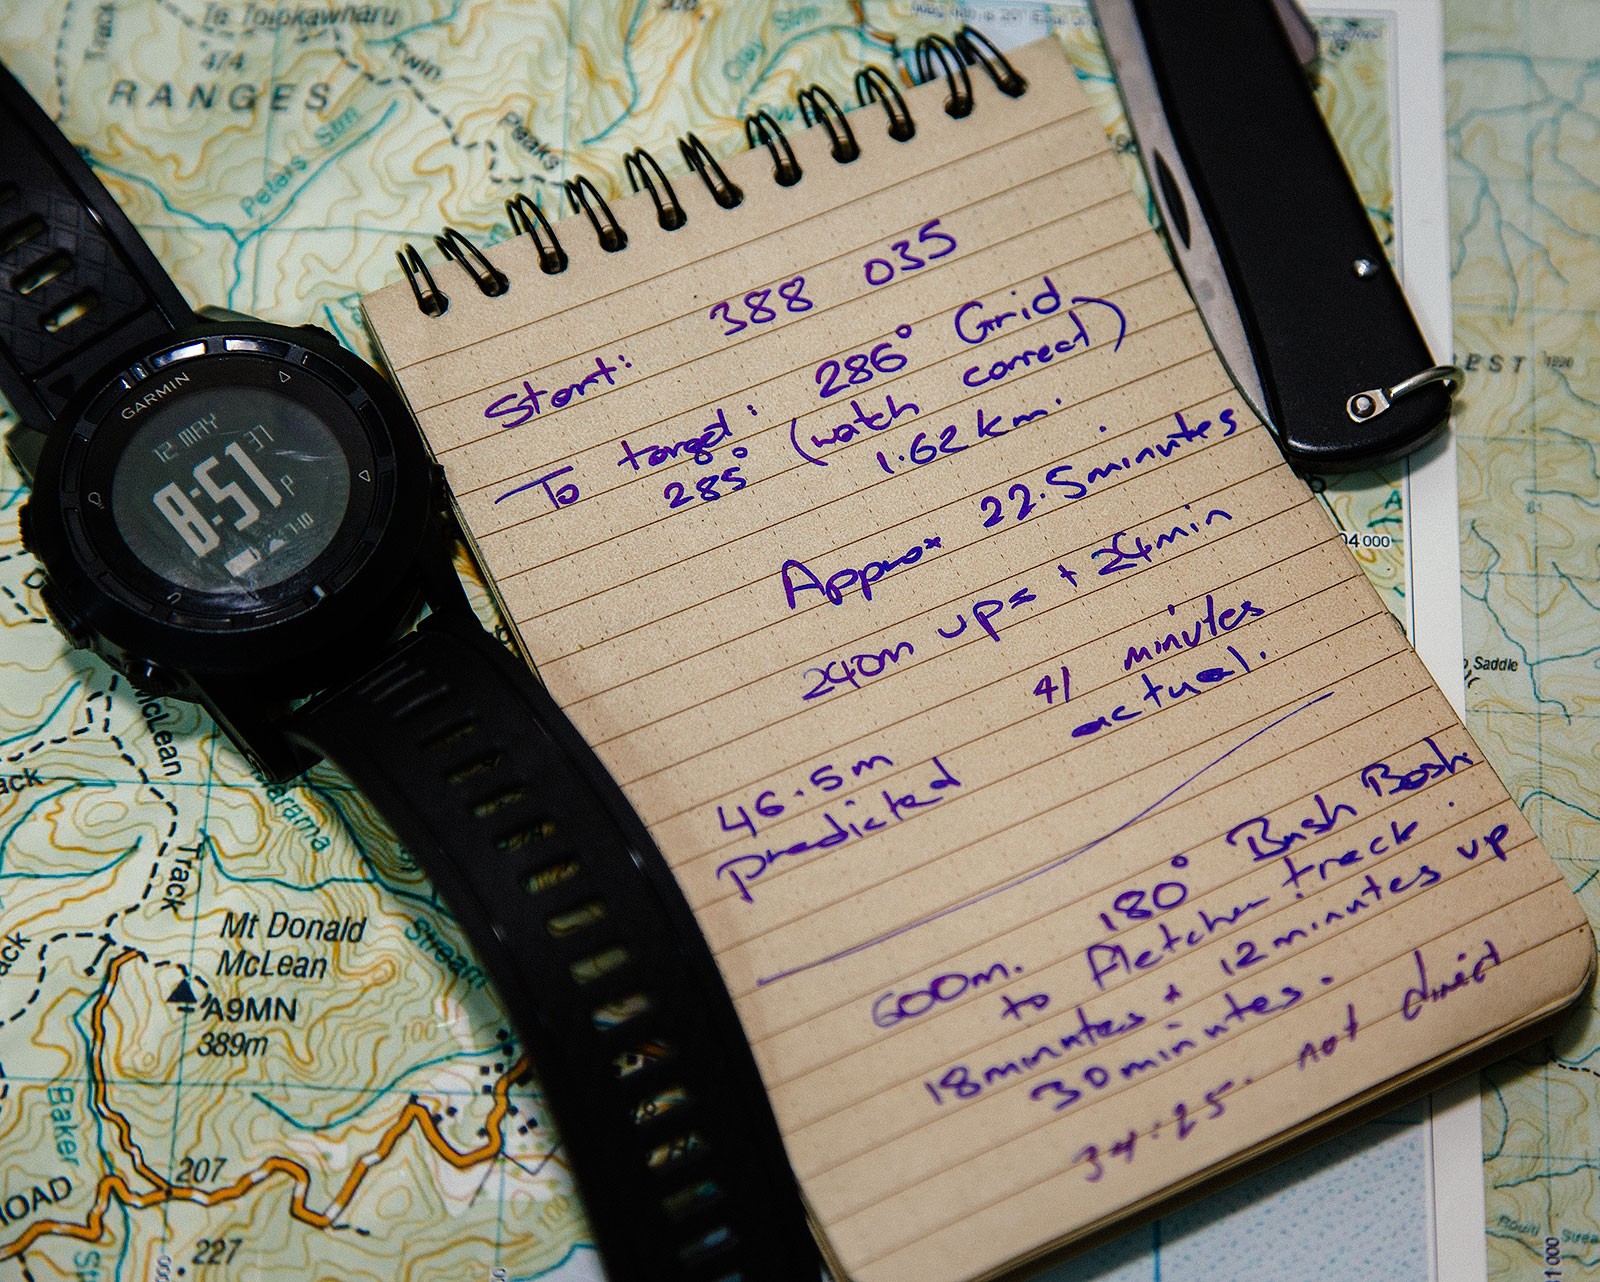
For example – in my case, I wandered up to a point I had been previously with the Deerstalkers during their Navigation Session. I had already plotted the point on the map where I started and the point I was heading too. This section was on track, which I generally travel at 4km/hour on. Add in 1 minute for the 10m ascent, and I had 46.5 minutes predicted time.
If I was a bit fitter (working on it) – I would have been bang on. But I didn’t stop the clock for breathers, so took a little longer than planned. I can live with a 5-minute variance though.
Knowing where you are going
From my known point, I then plotted a path from the track I was on to another – it was a very easy task really – as long as I headed 180 grid – I knew I was going to hit a track – it was really just going to be a matter of how long it would take me, and where I would come out.
Bush bashing can be done several ways – if you need to be super accurate, you can leapfrog from point to point, ensuring you come out bang on where you need to, or, in my case, I only needed a general direction – so while regularly referring to the compass, I essentially took the easiest path. Which still required a few hands and knees crawling at points.
Practise Practise Practise
The day was meant to be a bit of a recovery trip after a particularly gruelling gym session on Friday – I just wanted to get the legs moving again – so was only a couple of hours out in the bush. It all adds up though, and as you become more and more confident in your off-track navigation, you can push further and further out, until one day, you realise you don’t need tracks at all. Have fun!
A while ago, as I started getting back into the outdoors I decided I wanted to get a good bush knife. Always on the lookout for New Zealand Craftsman, I soon came across Bryan Baker and the Svord range of blades.
Brian got into making knives in 1983. Over 30 years ago he started making blades in a shed out the back of his parent’s farm. Now, though still on that farm, his business has grown significantly in size.
In the modern age of mass production, it’s nice to hold something that had been handcrafted and hand finished by someone who knows his craft inside out.
Talking to Bryan I (spontaneously) decided I would also like one of his Goloks (to be reviewed separately). He came back to me and said that he could make me a matching pair. The handles were made out of African Wenge Wood. I jumped at the offer and a short time later headed out to the shop to pick them up.
I also picked up a couple of his Peasant knives at the same time – again – another review shortly!
High Carbon vs. Stainless Steel
Knife steel is one of the subjects like Fords vs. Holdens – the owners are going to defend whatever it is they have to the bitter end. Also, simplifying it down to High Carbon vs. Stainless Steel can be very misleading – there are different grades within those names, different tempering methods and different knife profiles that all lead to variations on how hard things are to sharpen, how long they keep that edge and how easy it is to dull them again. All that’s before we start talking about laminates!
Go online and you will find people telling you the High Carbon or Stainless is harder and a pile of conflicting information. I have found High Carbon to be easier to sharpen, though once Stainless is sharp, it can stay sharper longer. Regardless, if you are carrying a decent knife into the bush, you should also at a minimum be carrying a small stone or steel rod to keep the blade sharp after extended use.
Bryan uses Carbon Steel for the simple fact that he believes it to be the best. As he would point out, the traditional Samurai Sword, Woodworking Tools, Sashimi Knives, all use Carbon Steel. It gives the best edge and is easiest to sharpen.
He also adds Nickel in order to give the knife a high impact resistance. This is why the knives may turn a little blue if washed under hot water.
The Rockwell C scale is the method used for determining hardness. The test involves forcing a diamond-tipped rod into a blade and recording the resistance met. Plain high-carbon knives are usually Rockwell C51 to C53; stainless-steel knives are often C56 to C58 and sometimes higher. As noted, this is only part of the equation though – as it doesn’t describe things like brittleness, toughness or resiliency.
Carbon Steel & Patina
Bryan uses a High Carbon Steel on all of his blades. One thing that Carbon Steel is going to do is Patina.
Patina is the covering that can happen on metals, it’s what makes Copper turn green. This happens as the surface of the metal oxidises; normally as a result of exposure to air and moisture. In the case of carbon steel, this patina is black staining that appears on the surface. It’s a form of surface rust – but one that actually works to protect the metal from further rusting once in place.
If you want a highly polished, clean looking knife, then carbon steel isn’t for you. You can clean them up, but really half the fun of these knives is letting them develop a unique signature patina. In fact, the patina can even speed up by applying a variety of products (orange juice, tomato sauce, a potato) to the knife directly.
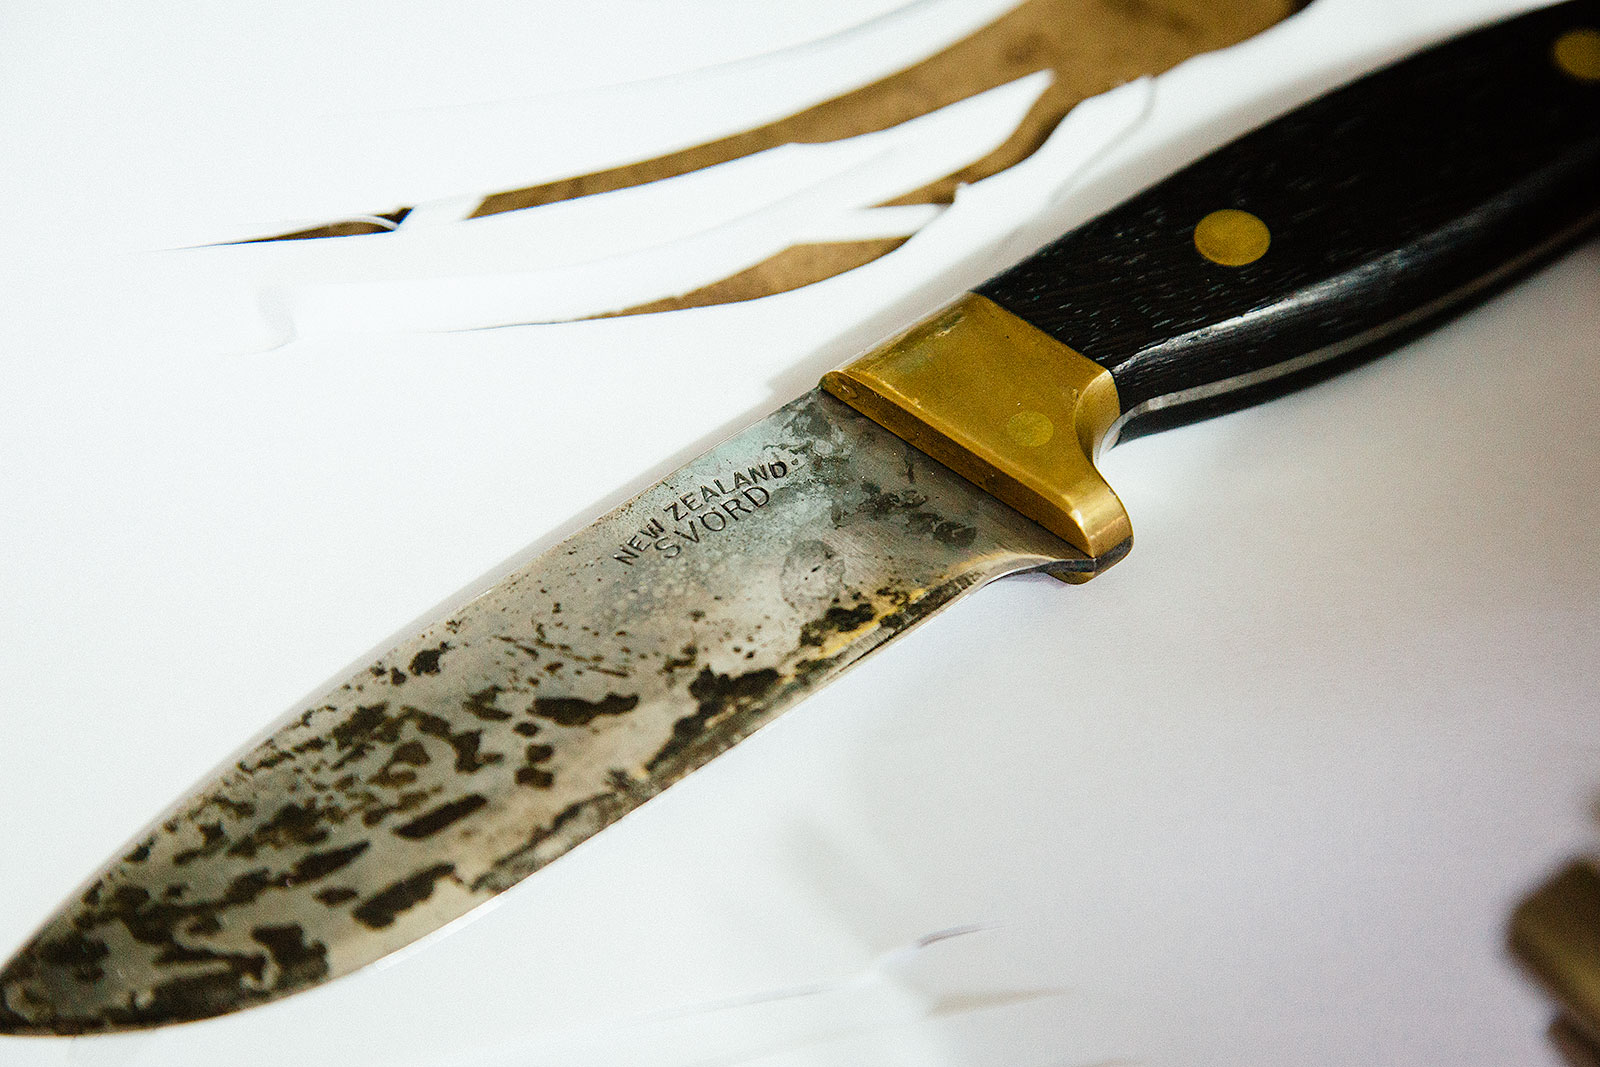
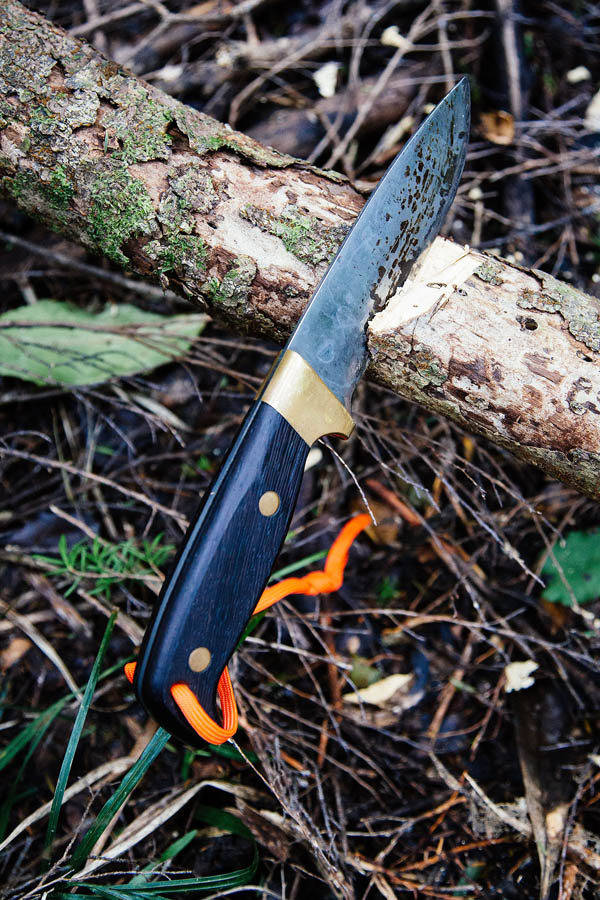
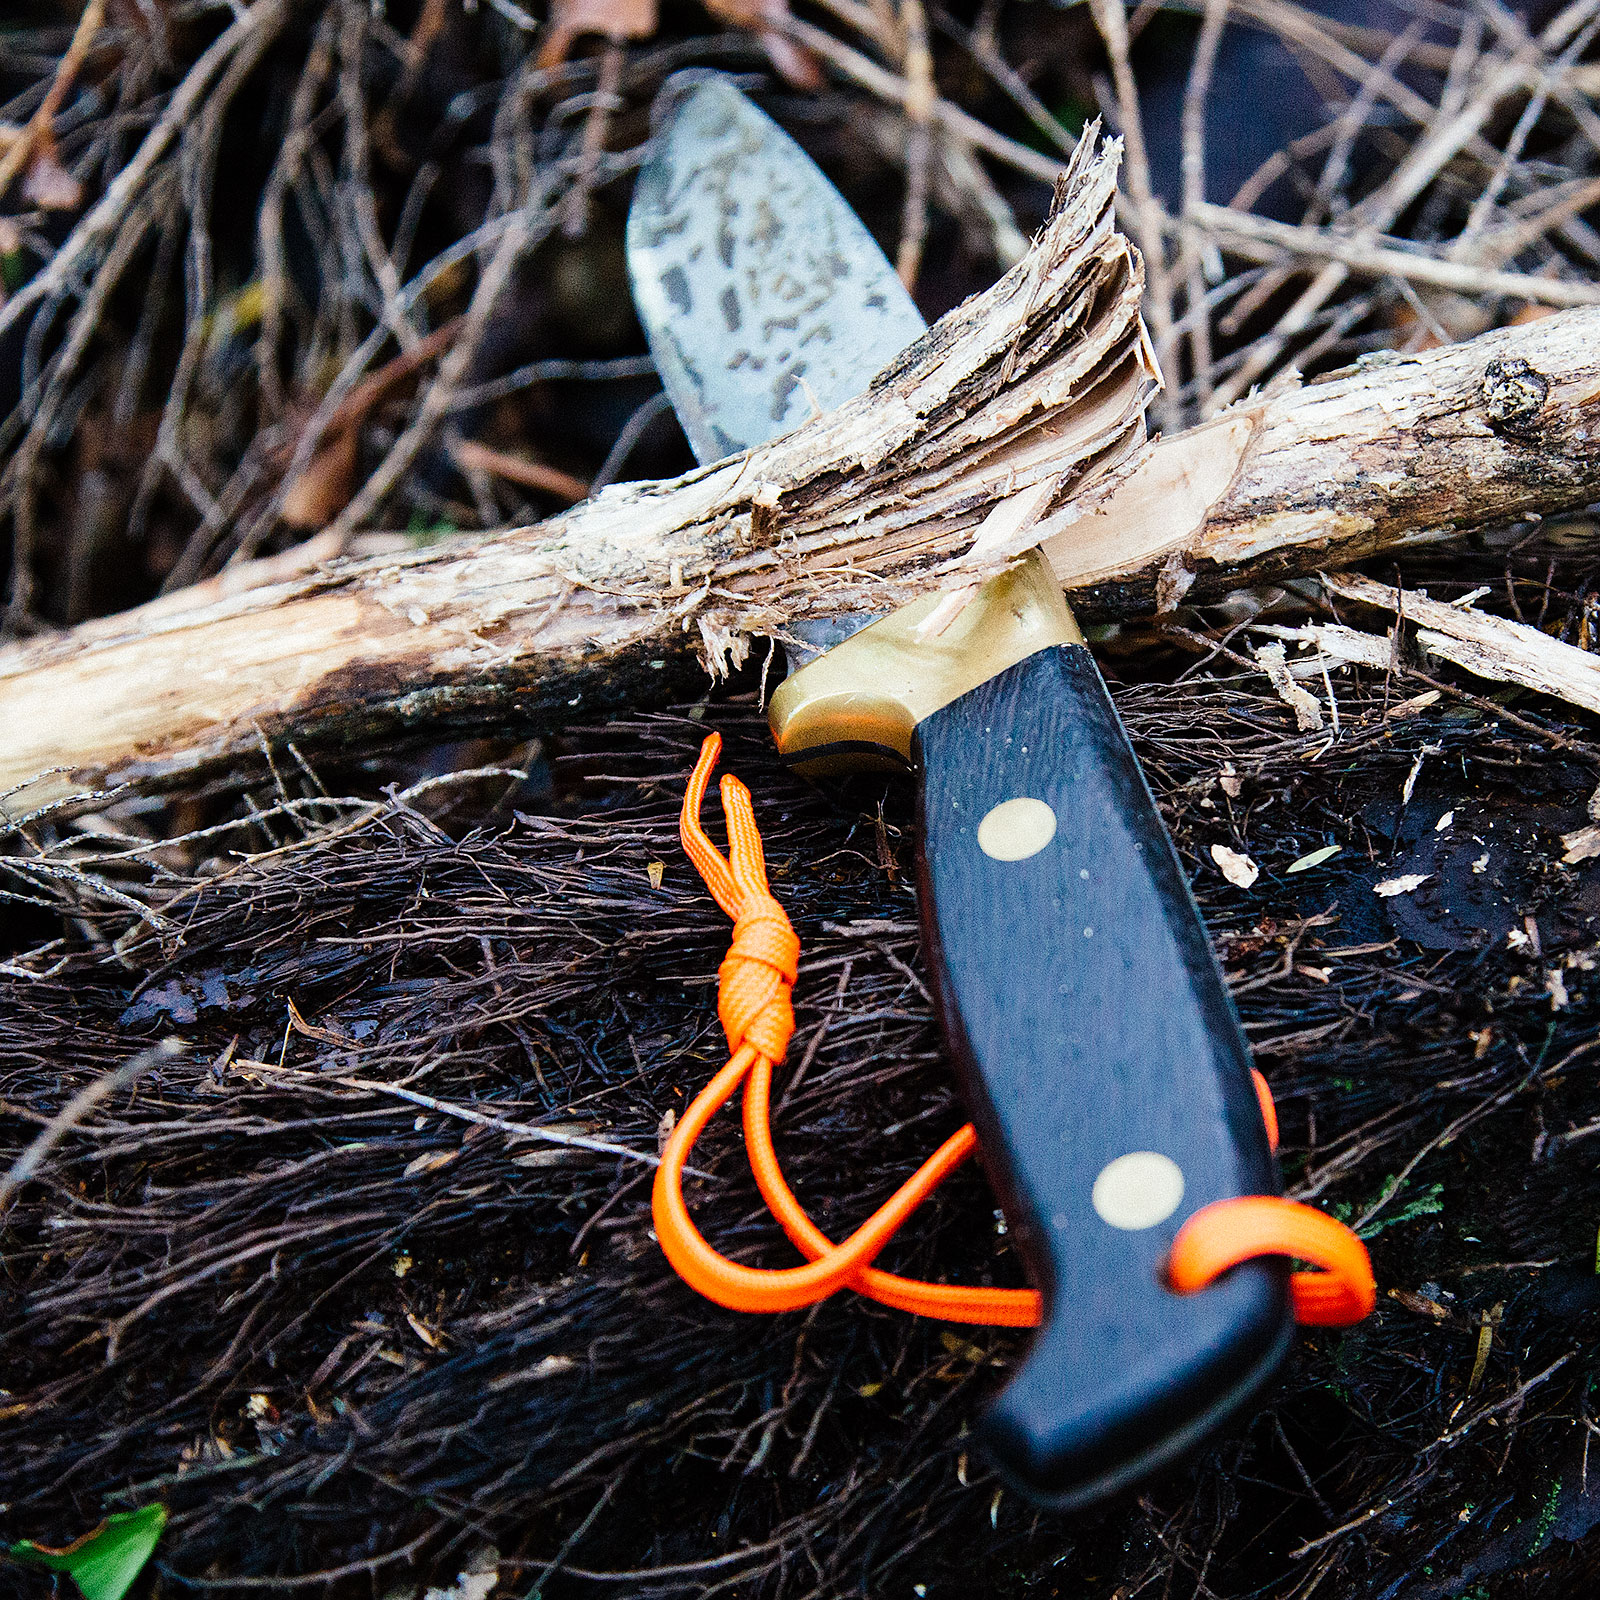
The picture above is my 370B – the patina is the result of a night during a survival exercise where we had to build a debris shelter. That patina was caused by Punga juice! The blade isn’t damaged – it’s still razor sharp (people like to cut paper – so that is also my cut paper photo).
Left-handed. Sheaths.
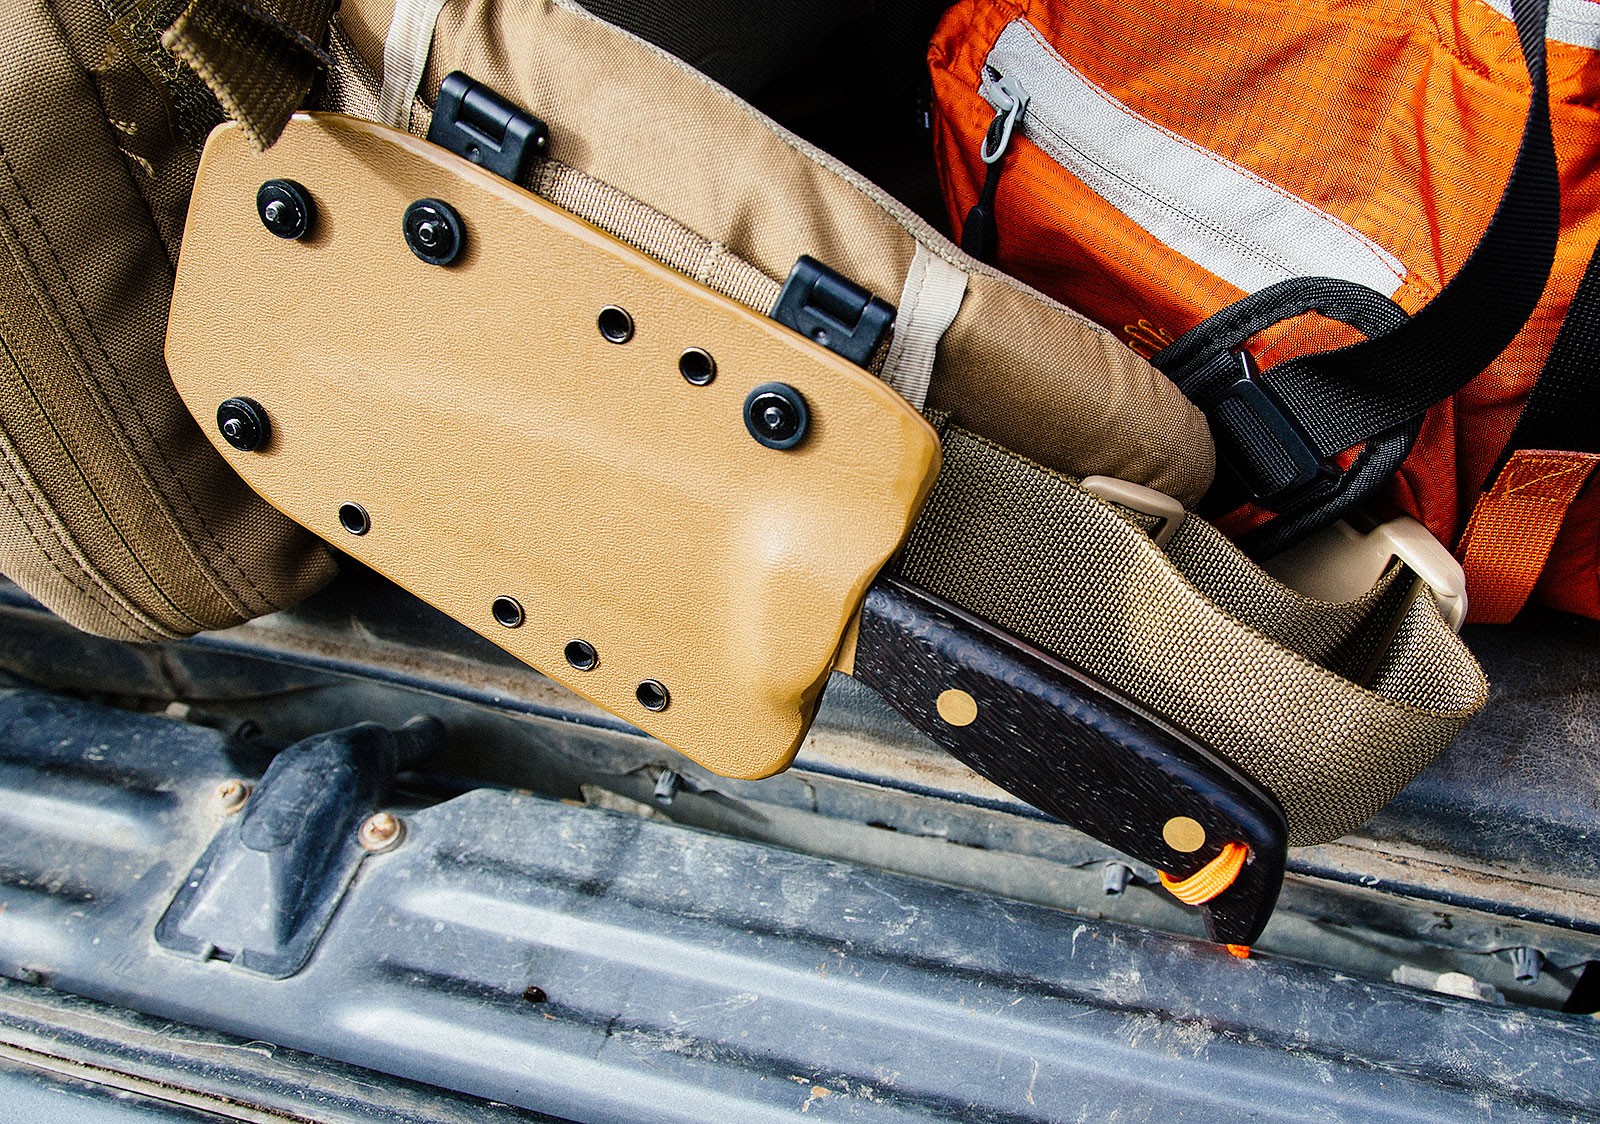
While the Svord 370B does come with a nice leather sheath, I am left-handed, so it made it a little useless for me.
I decided to make myself up a Kydex Sheath. Imported the required materials in, spend a couple of hours making it up and done! Hip-mounted ‘Ranger Style’ sheath. I just mounted it using a couple of quick release Molle Straps and was away.
The Blade
The Svord 370BB is a full tang drop point 124mm blade. Overall the knife is just under 250mm long. Brass rivets and guard with an African Hardwood (custom) Handle. I have added the paracord lanyard (blaze is good in the bush). 178 grams in weight.
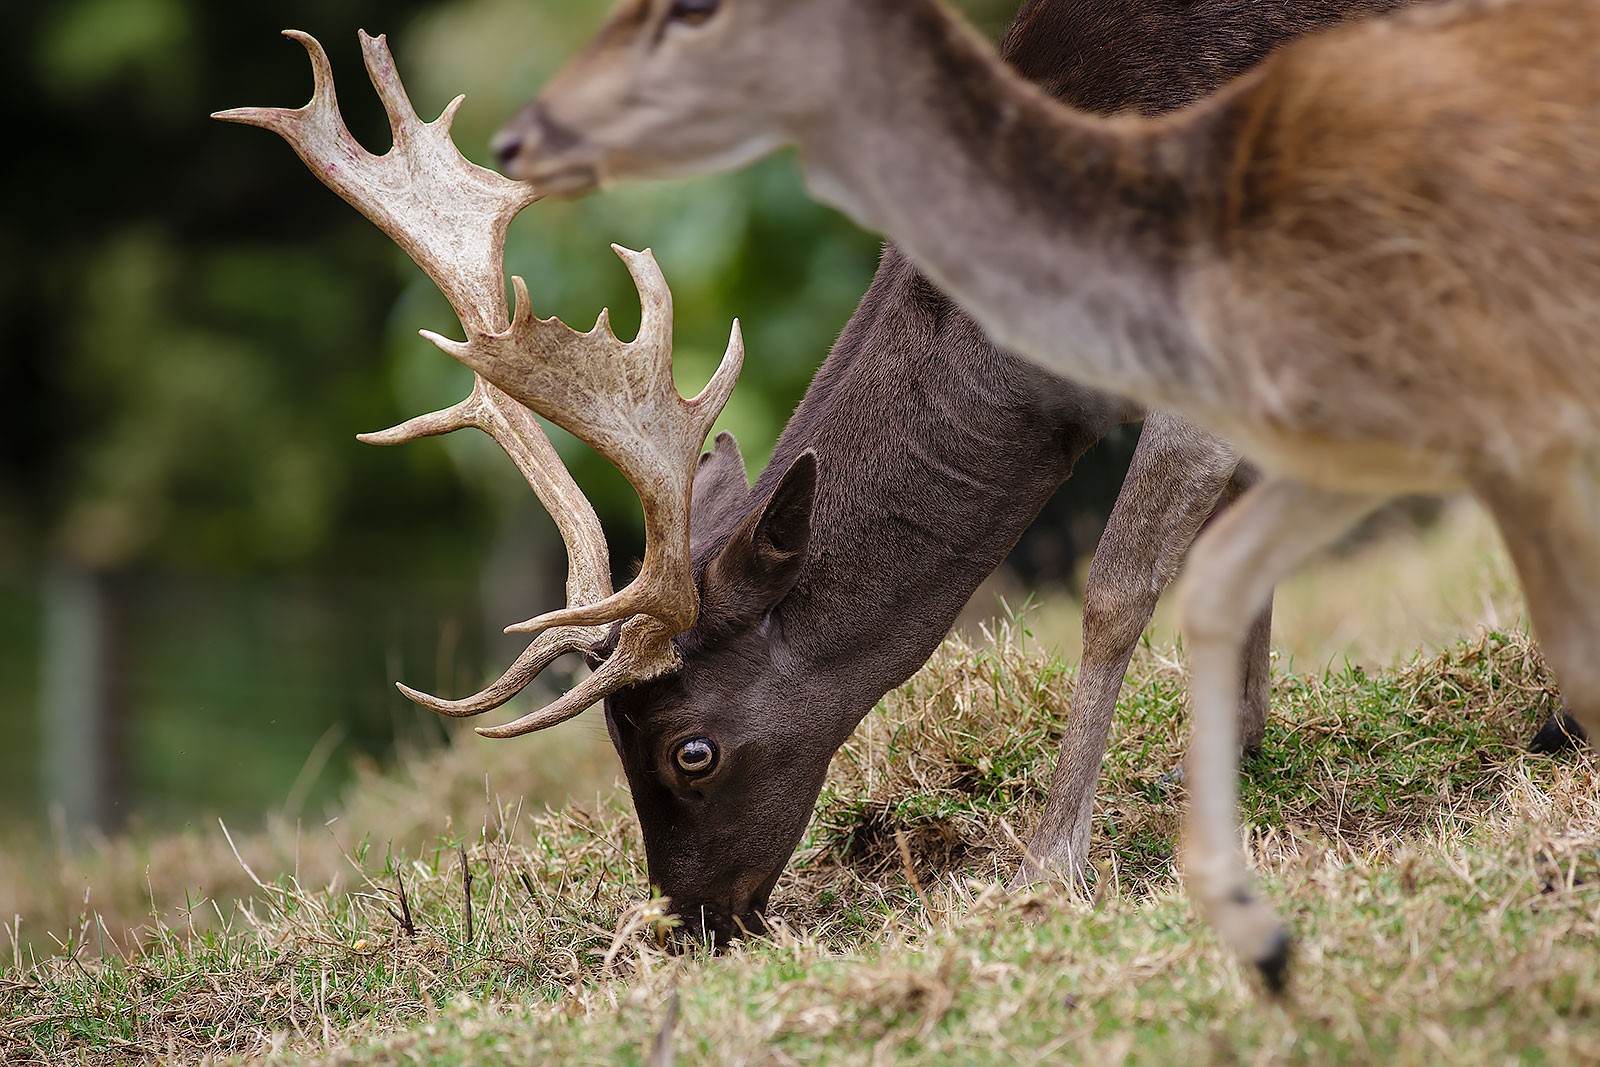
Bryan hand sharpens his deluxe blades into a convex edge. This essentially means the blade edge (and bevel) is rounded to the point.
It is said (and again, everyone has their own opinion) that the convex blade creates a stronger and longer lasting blade. It also means you need to be a little more careful sharpening them, but Bryan delivers them honed to a razor’s edge, so you normally only need to strop them to keep them sharp. Read up on sharpening with sandpaper and a mousepad if you want a pile more info on one way of converting a bevelled edge to convex.
Performance – can it dice?
All of this is fairly irrelevant if the thing can’t cut. However, cutting certainly isn’t an issue for the 370BB. Brain’s edge is razor-like. I don’t know if there is a standard set of cuts you are meant to do for a review – but I thought I would wander out into the bush and get a couple of nice shots and cut some things up at the same time.
You really shouldn’t be using your knife as an axe. Because that’s what an axe is for. However, if you need to, the Svord 370B can certainly be used to hack away at a tree or a branch. It could take a long time, but the knife will do it. Size-wise, this isn’t the same as a Golok or Gurkha knife – so it’s not really designed for the job. But it will happily do it.
Feathersticks? Sure. Don’t really know why you would ever need to make one in the NZ bush – there is generally plenty of small tinder available anyhow – but yes, it will do it.
Batoning? Yeah. Guess so. Again. We are in NZ, look around, plenty of smaller wood to burn. But if you really want to take to the back of your knife with a hammer go ahead. It’s spine maybe not as wide as it could be for the task – but then, carry an axe if that’s really what you are into.
Gravy-beef Cutting
Oh yeah, now we are into the fun stuff.
We recently got adopted by a cat. Second time it’s happened.
Instead of feeding it dry biscuits and mystery meats, I decided to get hold of some gravy-beef and do what my parent’s used to do – cut up and feed the cat meat.
As an added benefit – it’s a great chance to try different knives for cutting, skinning and de-silvering meat.
The Svord 370BB handles the job well – especially the cutting. Remember – this is the same knife I have just bashed around in the bush – and it cut through the meat with no issues.
It was a little bit big in the hand for the job – compared to the smaller Wusthof knife I have, but certainly would be up to the task of skinning out an animal. I generally carry a smaller pocket-knife on me anyhow – so the combination would cover most things.
Halfway through cutting up the Beef I thought I would give it a quick strop – a couple of runs on a denim strop with some green compound on it – back to razor blade sharpness! It’s an easy knife to keep sharp – provided you give it a bit of regular TLC.
So, In Summary
Is the Svord 370BB The ultimate bush knife? I don’t know. Haven’t tried them all. Feel free to send me yours to compare. However, it does set a very high standard.
Beautiful looks, razor edge, patina’s in the most wonderful way. This, paired with a smaller pocket knife is going to cover 95% of all tasks you might need in the bush. Take a saw to cut through some bones and you are complete. It’s a knife I have now had for a few years, and it’s one that will be handed on as well.
The privilege of owning and using firearms carries with it a number of responsibilities i.e. to store, maintain, transport and use firearms safely at all times. As firearms licence holders we have some very serious responsibilities every time we pick up a firearm and can, by law, be held personally responsible for our actions or inactions (e.g. failing to adequately secure a firearm). There was a hunting tragedy last year, with the fatal shooting of a young hunter at close range by his hunting companion, who failed to positively identify what he was shooting at. These days the consequences of this sort of negligence can lead to a fine, loss of licence and possibly a prison term.
With the roar here again and large numbers of hunters in the bush it is timely to review the safety guidelines that allow us to enjoy our hunting and return home to our families safely. When we sat our firearms licence tests (some of us may struggle to remember back that far) we learnt the Seven Basic Safety Rules and these must be applied every time you handle a firearm. Try to make them habits that you do instinctively and insist that others do the same. If you cannot recall these or are unsure of their meaning, get a copy of the Arms Code from your nearest Police Station and go through it again.
Treat every firearm as loaded.
Always point firearms in a safe direction.
Load a firearm only when ready to fire.
Identify your target beyond all doubt.
Check your firing zone.
Store firearms and ammunition safely.
Avoid alcohol or drugs when handling firearms.
As hunters here are some extra guidelines to keep you safe while hunting.
When hunting with companions, only the person in front has a loaded firearm and they must restrict their arc of fire depending on the position of their companions. Do not try to hunt parallel to a companion, you will soon lose sight of each other in the bush and end up in a confusing and dangerous situation.
If members of a party are hunting individually, always hunt in separate, agreed, designated areas and never enter someone else’s area. Always look out for hunters from other parties though that may be hunting the same area.
Always assume movement, sound, colour or shape is another hunter until you prove otherwise. This will focus your mind on ensuring that it is not a person, rather than immediately assuming it is an animal.
Look very carefully with your eyes and through your scope or binoculars to positively identify what you are looking at. Your brain can play tricks on you in the heat of the moment and you may convince yourself that you are seeing what you want or expect to see.
Try to sight at least the head, neck and shoulder of the target animal at the same time, to confirm target identification and place the shot in a vital area.
Wear high visibility clothing so that other hunters can see you. This should contrast with the environment and the animals you are hunting. Blaze orange is one of the best and is readily available. A cap and a vest that can be worn over any other clothing should be considered a minimum coverage area. If you are carrying an animal or a set of antlers tie some high visibility clothing or plastic over part of them.
Emotions can override rational thought in the heat of the moment (e.g. buck or stag fever) so learn to recognize this and counter it.
Attend a training course if you are inexperienced. An NZDA HUNTS hunter training course is a great way to learn everything you need to know to hunt safely and improve your chances of success.
Remember, it is always the responsibility of the shooter to clearly identify their target, regardless of whatever strategies other hunters may or may not use to be seen. No meat is better than no mate!
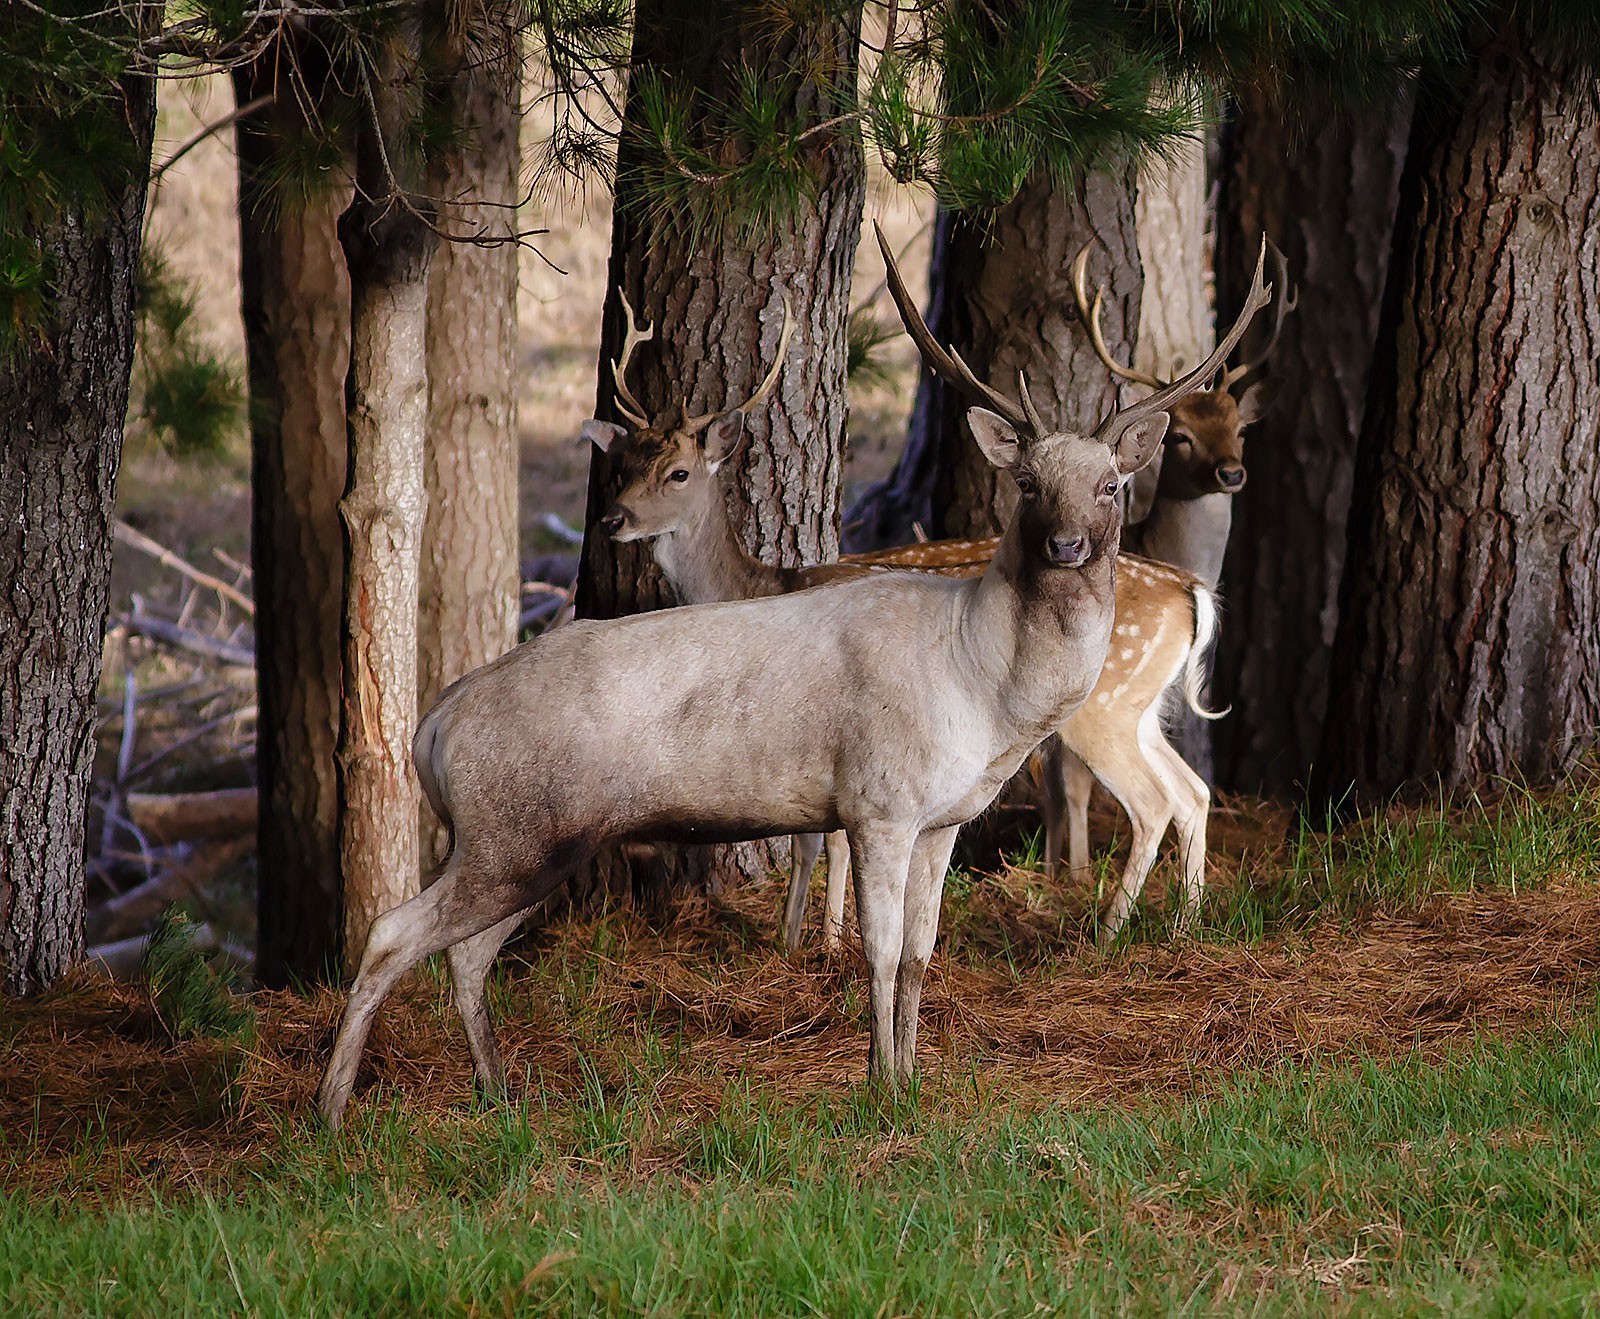
Following up from my trip up to Balnagown with the camera, Richard suggested I head back up with The Missus to stay the night in the hut and hear the deer roar. It was a great excuse to head out overnight for a bit of time with my partner, and experience something new (it’s my first roar). Right about now we are heading into ‘peak roar’ – and from the moment we got there, we knew it was going to be a bit of an experience.
The experience for everyone
On the way up we caught up with Richard and his client for the day – a young guy (with a decent beard and an awesome Valiant) who had been out with Richard for the day getting himself an animal. If I understand it right, they had got a deer, cleaned it and put it in the chiller, then in true Richard style – headed back out to check out the animals some more. Richards enthusiasm for it all is contagious. He has a pile of knowledge and is keen to share it.
The particular client he had was still in the process of sorting himself a firearms license – but he was able to head out with a Richard and score himself a nice animal after a decent stalk and walk away with the experience. I am sure he will be back.
After a coffee and some excellent Lumberjack Cake (thanks Stephanie), Richard took us out to the hut, made sure we were settled, planned the next day, chucked us a new spotlight to try out and left us too it.
Loud evenings
I, unfortunately, didn’t get many night photos. But what I really should have done was taken up a decent audio recorder. I must have spent close to an hour standing outside just listening to the bullfrog like croak of the Fellow Deer all around us.
Richard’s hunting block is awesome in that it is also a bit of a natural amphitheatre. A big bowl that reflects all the sound of the deer through the bush blocks down into where the hut is located.
We had nearly 360 degree roars going on. Animals grunting, the crashing together of large sets of antlers, the separate calls of the Doe and Fawns. With the spot light we had on us, we could sweep the countryside and see all these green eyes glinting back at us from the distance.
Wandering
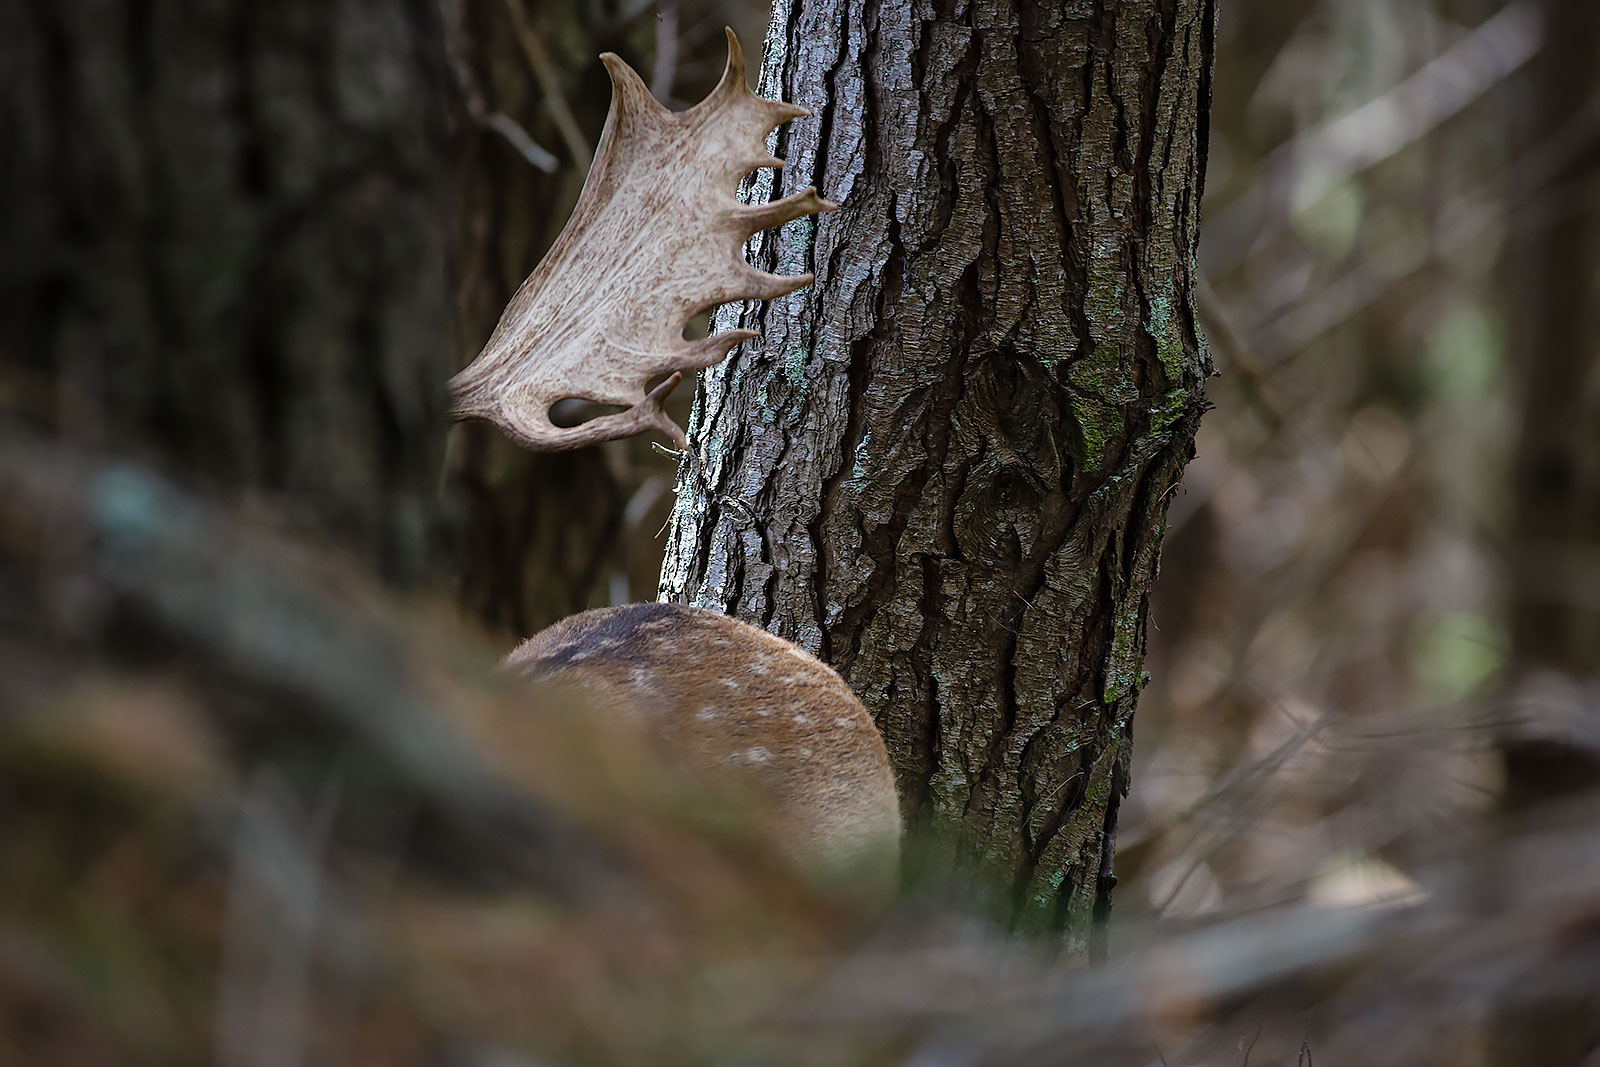
After waking up a couple times during the night to the sound of very deep, throaty roars from the distance, we had a feed and then a quick walk around. I was reminded how fast the animals disappear when you head out on foot. More than once, I waited, trying to spot anything in the bush in front of me, only to step off and realise I had an animal within meters to my side. They might be loud, but they can also be very quiet when they want to.
I took the camera with me, but much like last time, it was many shots of the rear of animals as the bolted. I need to practise my stalking much more.
Learning to process a deer
I had expressed to Richard that I was keen to go through the process of skinning and gutting an animal again. We had covered it previously during the HUNTS course, but I wanted to get more hands on and just reinforce what I had learned. I am planning on heading out into the Kaimanawas in the next couple of weeks for a week of stalking Sika. So I wanted to be sure I has the appropriate skills, should I manage to take one of the ‘Ghosts of the Forest’ down. Anyone who knows me will appreciate I like to be prepared to go into things, so I figured this was the perfect opportunity to learn and practise these skills.
I think this is one of the great advantages of what Richard offers – if you want to stalk – you can head off into the bush block and do the hard yards. If you don’t have the time (not everyone can escape all week to hunt), fitness levels (older hunters, disabled hunters) or resources (gun, knowledge of areas) – then Richard can customise the hunt to you.
Entry and Exit wounds
In my case, I basically wanted an animal to process. So Richard was able to very quickly lead us to a suitable animal, which I dropped with the X-Bolt; Quickly learning a valuable lesson in the process – you need to be mindful of both entry and exit points on the animal. I hit it right in the shoulder. So it took a couple of steps back (I also learnt back means dead – it’s disabled, cant run and drops quickly) and dropped dead. Unfortunately, I should have let it get a little bit more on a right angle to me, as the exit would passed through the gut. A little-spoilt meat, but lesson learned.
While we waited for a few moments before walking up to the animal, we checked out a couple of other bucks, seemingly totally uncaring to the plight of their younger herd member close by, having a good old scrap on the hillside. Richard explained their behaviour – the walk, the back away, the challenge and the engagement. It’s great having someone so schooled in habits of the animals explaining the how/why and what of their behaviour. We grabbed the animal and brought it back to the hut to process.
Simple, effective tools
Honestly, I think Richard could process an animal with his bare hands. His father worked at the meatworks, showed him how to process animals at an early age and it’s a skill he has quite plainly honed over the years. While many a hunter initially goes out and buys the biggest baddest skinning knife he can lay hands on, Richard is quite efficient totally skinning and gutting the animal with, wait for it… his $8 pocket knife.
Richard went through the process with me from beginning to end. Passing on a pile of tips and tricks along the way. I walked away with a new skill set (that I am now keen to practise, an animals worth of meat and a very unique experience for both myself and my partner.
Weather you are getting into hunting (like myself) and want to develop and practise your skill-set before heading back county, you only have a short amount of time to get in your hunting fix or you simply want a unique experience (and maybe will only ever do it once), Richard and Balnagown is certainly a way to do it. I am already planning on heading up again. Even if it is simply to spend some more time up there with the camera observing the animals doing what the do. Hiding from me!
Water is one of the key survival priorities – it’s safe to say you will die of thirst long before dying of hunger. Compound that by generally engaging in a high level of exertion while out in the bush and your water requirements increase significantly. Staying hydrated is not only a good idea, but it can also become a matter of life or death.
Calculating our water requirements is critical in the planning stages of any trip. You need to have enough water to drip through the day as well as use for cooking and cleaning in the evenings and mornings. Factoring in extra intake because of the level of exercise – you can be looking at six litres of water per day plus. Considering that’s basically 6kg of dead weight, many people choose to take some water but also fill up along the way. Certainly, the appeal of dehydratedfood packs is not having to carry the water weight – it quickly becomes pointless if you are just simply transferring that saved weight into the water in your pack!
We are lucky in NZ that we still have a lot of access to fresh water. During my last trip to the south, one of the things I missed most returning home was the taste of the water straight out of the streams feeding the Copeland River. However, a lot of our streams and rivers are also surrounded by pasture – and the quickest way to introduce bugs and nasties to our waterways? Cattle. If you are anywhere near farmland, you shouldn’t be drinking water straight out of the source. If in doubt. Don’t. Why? Long names like…
Cryptosporidium and Giardia Lamblia
Don’t forget E-Coli. These three are the main bacteria found in water sources. Anyone can ruin your day. Or more correctly, ruin your guts, and ruin them for a long time. I have thankfully never suffered from any of them, and don’t ever intend too.
So, what we need is a simple way of treating any potentially suspicious water.
The traditional method is boiling. Which works if you are at camp, have the billy set up and have a bit of time. But what do you do if you are on the move and don’t want to stop and set up the Jetboil every time you pass by a stream?
The quicker methods available include chemical treatment, UV treatment and filteration.
Chemical Treatment
Chemical Treatment generally involves dropping something like ammonia or chlorine into your water, either in the form of a liquid or tabs, waiting for a bit, then drinking. While on the plus side, chemical methods are a fairly sure way of killing everything in the water they can also leave a taste to the water that ranges from subtle to horrible.
UV Treatment
For a long time, UV treatment has been my favourite. It’s effective, relatively quick and the old raver in me just likes playing with blacklights and water. However, it’s also a weighty solution, goes through batteries and costs more. I will do a bit of a cost comparison between options later
Filteration
Which leaves us with our final option and also brings us back around the product we are reviewing here today.
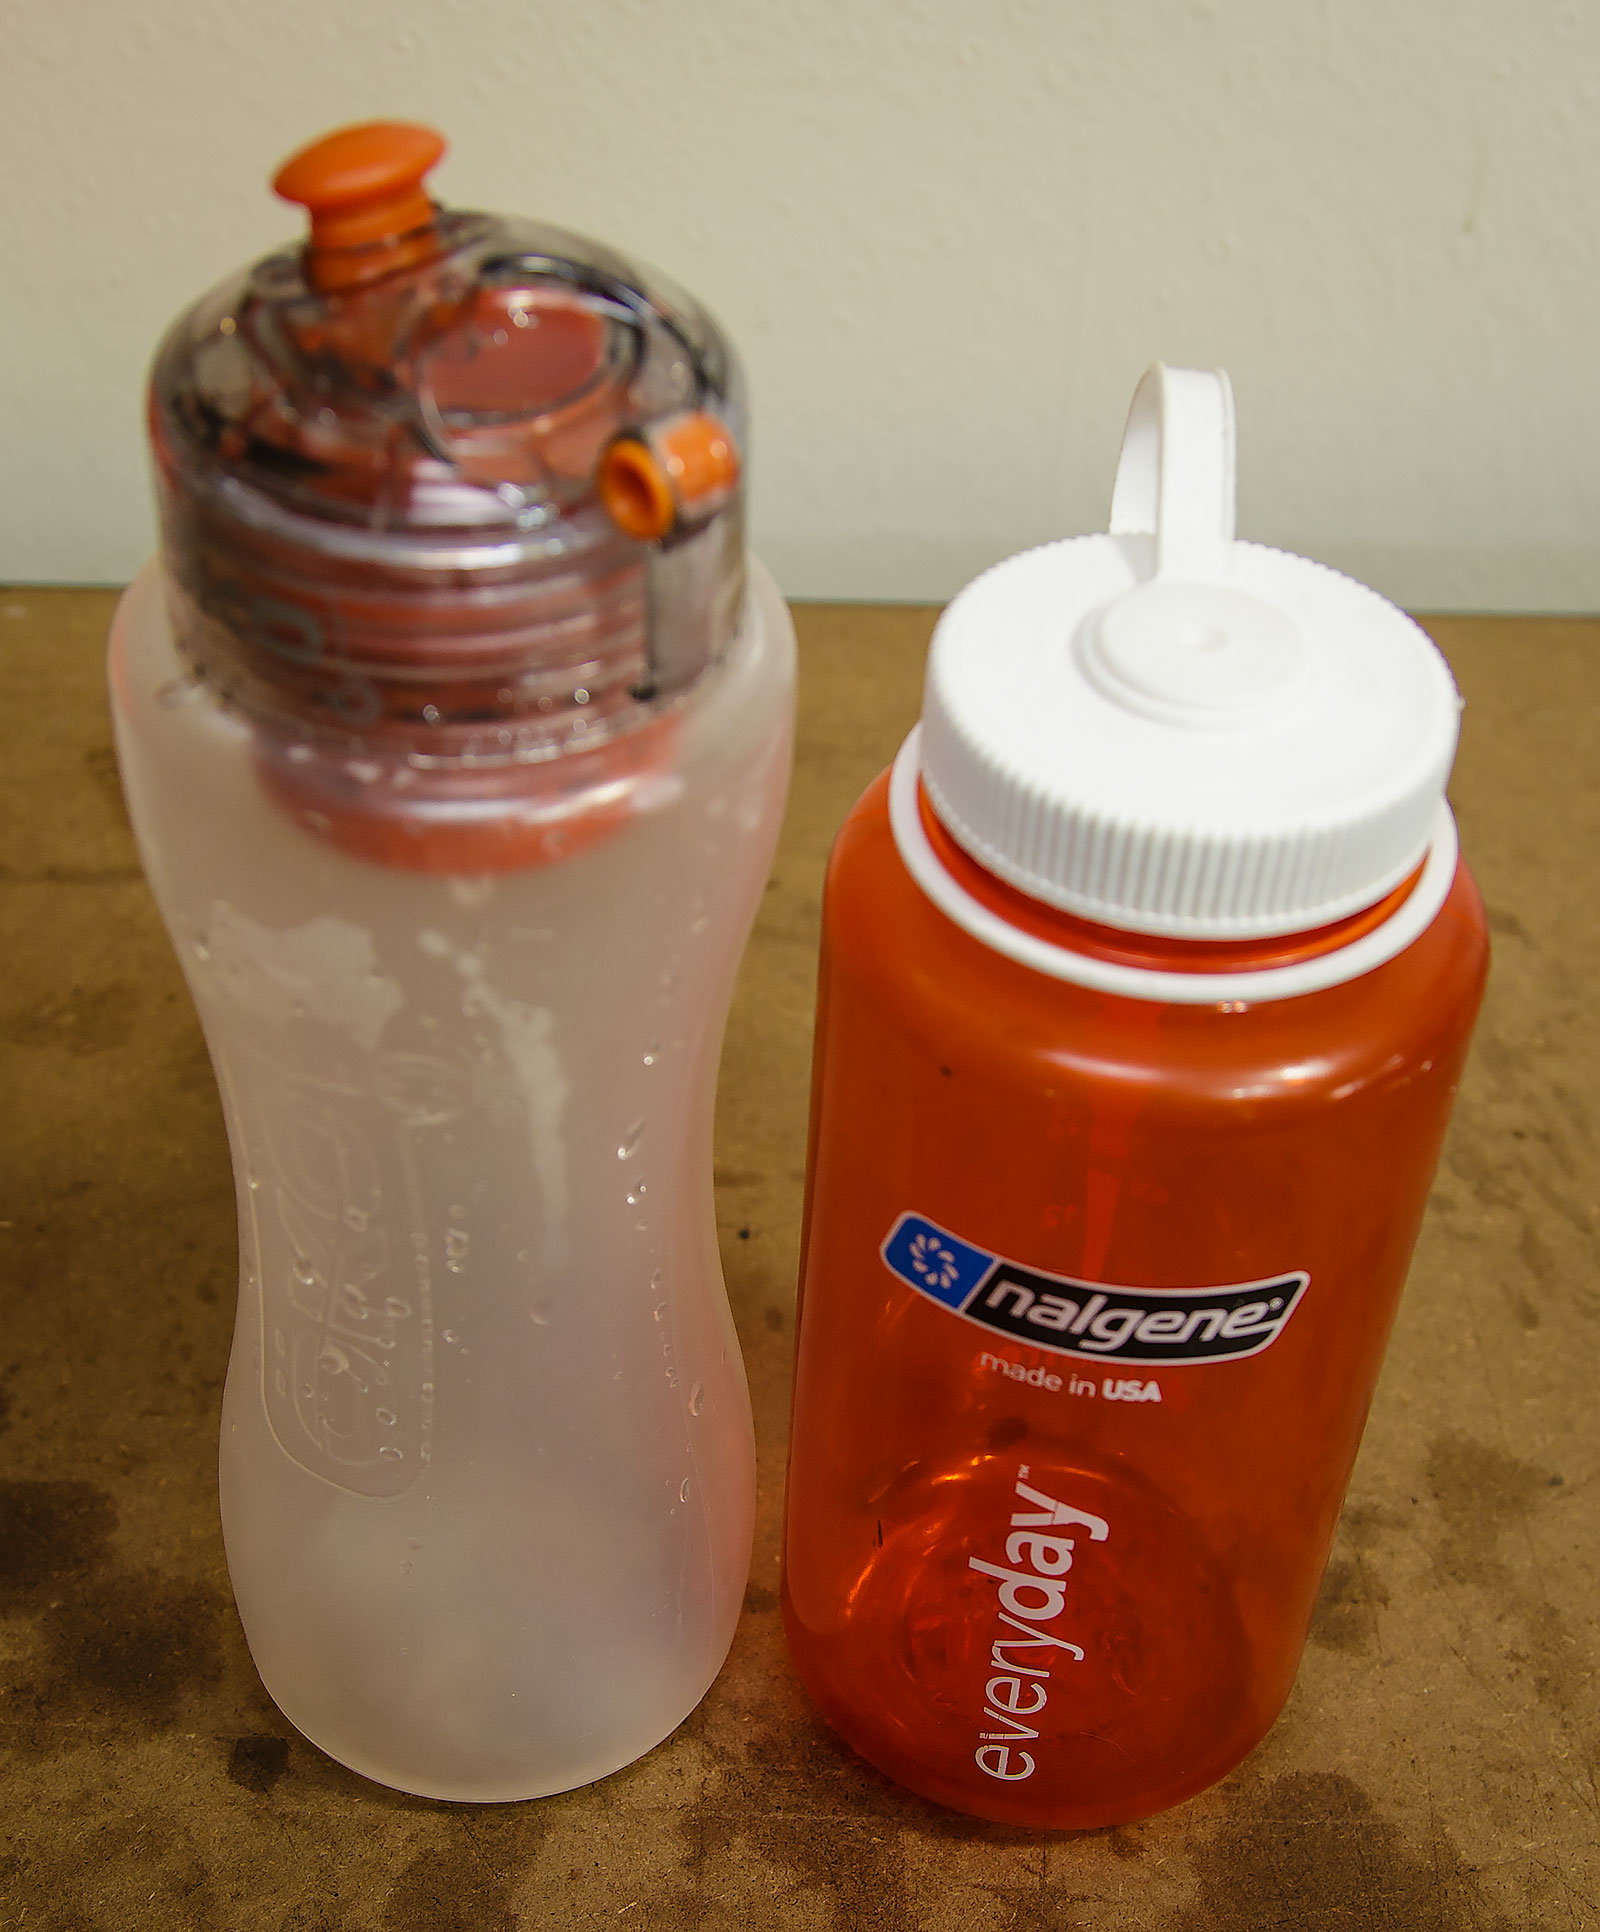
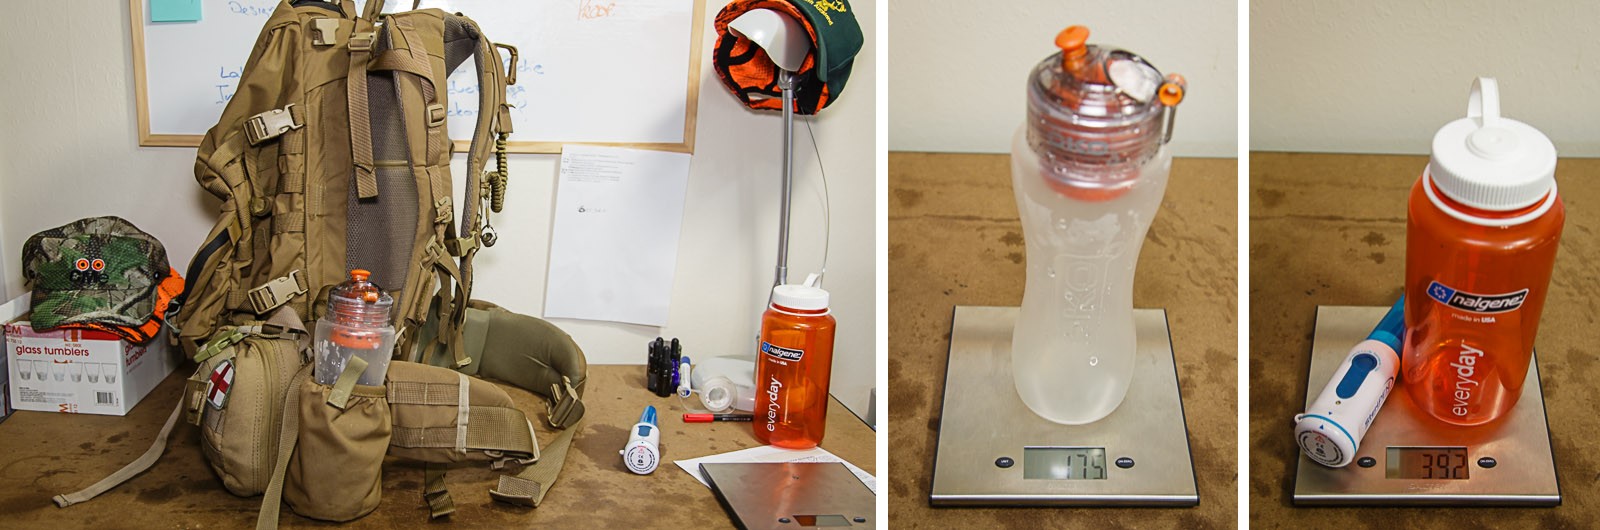
The OKO Bottle
This bottle incorporates the filter into the neck itself – so operation is as about as simple as it gets – fills the bottle up, close the top on it, sip away at the filtered (and safe) water.
The filter built into the bottle is a 2-micron filter, which wouldn’t normally be considered enough to filter out all the nasties you are going to come across in some water. However, because of the water, the filter is constructed any particles need to pass through a bit of a maze of sorts to get through – effectively reducing the filter size down to the realm of .5 microns.
This handy image gives you an idea of what exactly the filter is getting rid of. Bacteria is gone as well as Viruses and so is Chlorine, Lead and many other things. Realistically, it’s not filtering Arsenic. But if you are drinking water laced with Arsenic, you have other problems already. The filter is easily replaceable, and OKO suggests replacing it every 50 gallons for best taste – though it should be good for up to 100 gallons. That equates (in the 1 litre) to 375 refills. For my use, where it is essential for safety purposes, I will be replacing it roughly every 180 refills. The trick is, of course, to remember how many times you have refilled it. My suggestion – marker pen on the bottle itself. Every ten fills, put on a mark, after 18, replace the filter, start a new record. This will also will make the bottle unmistakably yours.
Comparisons to the existing system
So, the goal for me was to replace the existing system (and it’s weight) with a newer, quicker way of doing things. How does it compare?
Well, put simply, it’s under half the weight. The bottle itself is a little taller, compared to the standard squat and fat Nalgene, so it sits a bit higher in my Mystery Ranch Bottle Pocket – and I will wait and see if that means it’s going to get caught more Bush bashing, however, feels good in the hand and well, is easy enough to drink through? I don’t really know how you rate drinkability…
So, a cost comparison –
The 1 Litre bottle is currently $39.90, with replacement filters being $17.95
A Nalgene costs $29.95, and the Steripen Classic is $139.90 – with the Steripen you are going to need to replace the batteries – which can be rechargeable, though I tend to prefer to use Lithium for things I have to rely on – call it $28 dollars for a pack of four.
Well, the OKO bottle definitely wins there – ease of use, costs less. All around win.
Any downsides?
Well, being blunt, the carabiner that comes with the bottle is rubbish. Cheap inclusion, shouldn’t have bothered, would never use the one on it anyhow and, if you don’t get the top on right, it can leak a little bit – but unscrewing the top then re-screwing it is generally enough to fix the issue.
Other than that, not a lot to fault the bottle on really.
On the whole, it’s a lightweight, simple solution to safe water.
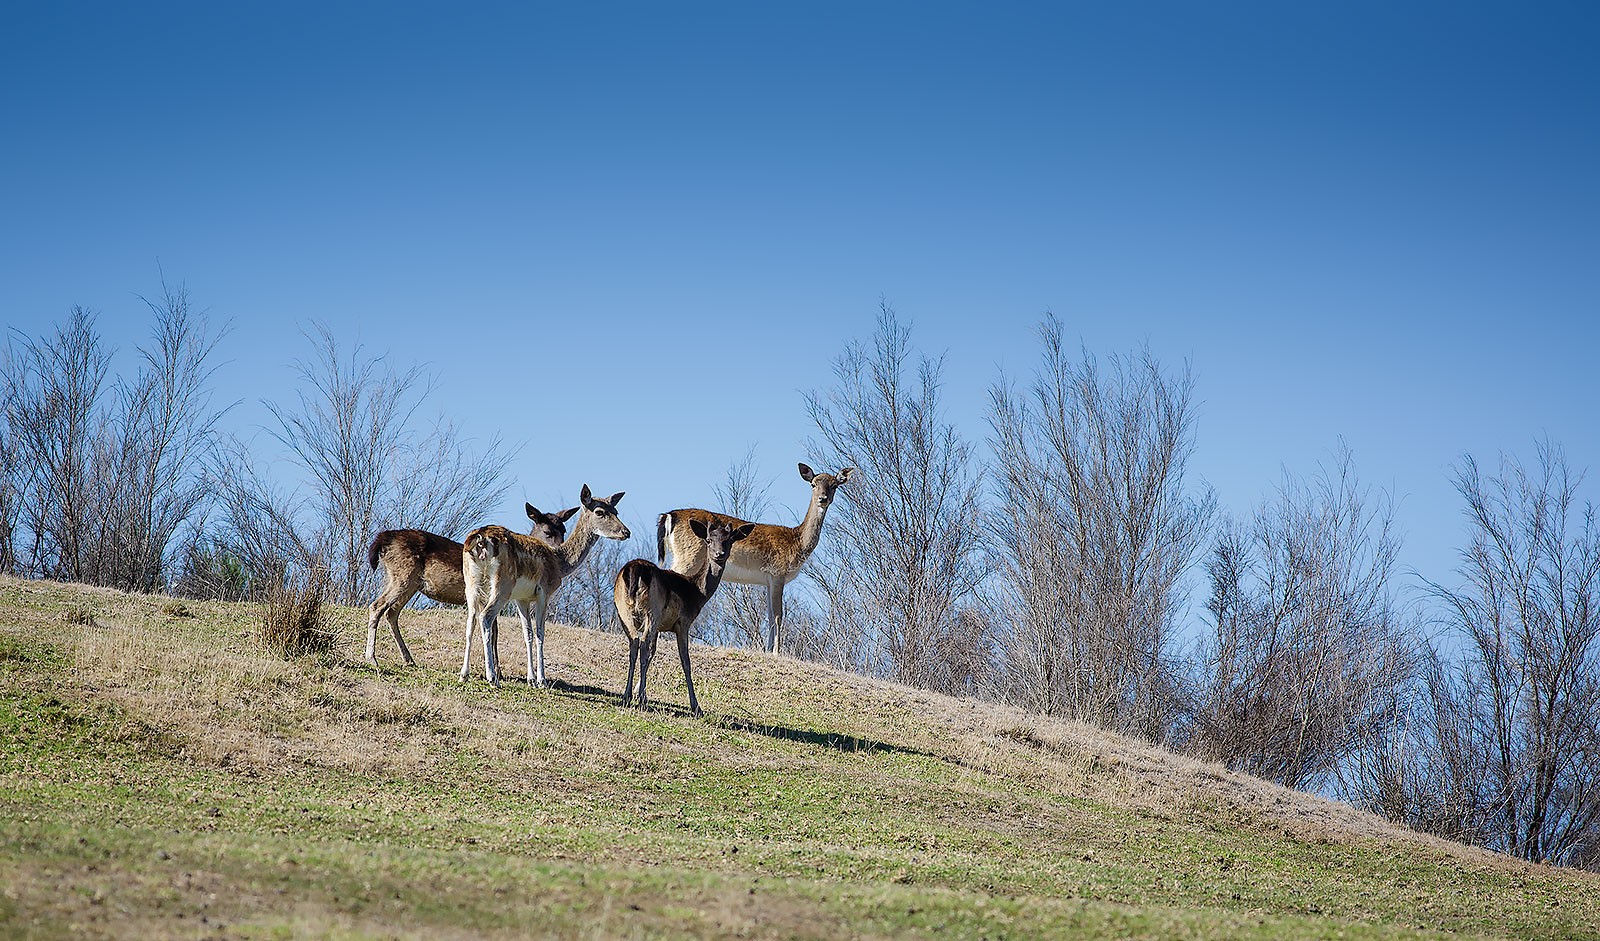
Richard and Stephanie Ross have been running Balnagown for over 20 years, fuelled by Richard’s desire to create a safe and fun hunting experience. Balnagown features a range of environments – native bush and pine forests, streams gullies and hills. There is plenty of room to stalk around in.
I originally met Richard when we headed there as part of the North Auckland Deerstalkers HUNTS Course. You can check out the footage from that day here. What initially impressed me was his passion for what he was doing. It was obvious that he was enjoying showing us around, telling us about what he did up there and of course sharing his knowledge.
The Balnagown Hunting experience is a result of years of Richards work. Taking over a rugged and run-down property ( I believe his mother in law wouldn’t allow Stephanie to move in until he had done a bit of work to the house), he started transforming it into his vision of a place for people to go and experience the thrill of a Deer Hunt in a safe and rewarding way.
Safety
Safety is a big feature of Balnagown. If you are hunting on his 300 acres, you can be comfortable in the knowledge that you are the only people anywhere near the block you are in. The rules are laid down up front. Only a single person hunting at any one time, small, close groups, firearm safety and awareness maintained at all times. Richard lost a good friend in a hunting incident years ago (public land, shot, shooters never came forward) – so rightly so, he is going to ensure that something similar never happens again. His regard for the safety of people on his property shines through. You know that he has your best interests at heart.
The Roar
The Roar was recently described to me as ‘A large group of testosterone-fueled Bucks, being chased around by a large group of testosterone-fuelled men with guns’.
It’s not the regular hunters that make me nervous. They generally know the area, know the rules and often decide to just totally avoid going out in public land at this time of year.
What makes me nervous is the guys who dust of their rifle once a year and only have one week(end) to score that trophy deer for the year. It’s a dangerous combination of eagerness and buck fever.
For this reason, I think the idea of heading up to Richards Private Block is even more appealing. By going there, you significantly (to zero) reduce the risk of accidentally roaring in another hunter and you can pretty much guarantee that you will walk away with the deer you want.
It’s not easy
Privately managed blocks sometimes get a bad rap by seasoned hunters who view it as too easy. Sure, if you decided to shoot the first animal you saw out there, it would be. Richard essentially has two areas to the land. The front area, which you pass through on the way out, is paddock. That’s where the deer spend their time growing up until they are ready to head out into the hunting area and once they are out there, well, you are going to have to work for it. To be fair, you aren’t going to get tangled up in Supplejack out there, or Bush Lawyer, or really have to suffer any more than you want to (though be careful of Richard, I think he likes to make sure you work for your reward).
Wandering through the hunting block(s) – it gets dense enough that you can have a deer within meters of you – and not know it. Many a time I was trying to get a good photo, only to be surprised (and sometimes surprise) another animal I hadn’t spotted just off to my side. Have no doubt – your stalking skills will get tested – and a couple will get away from you.
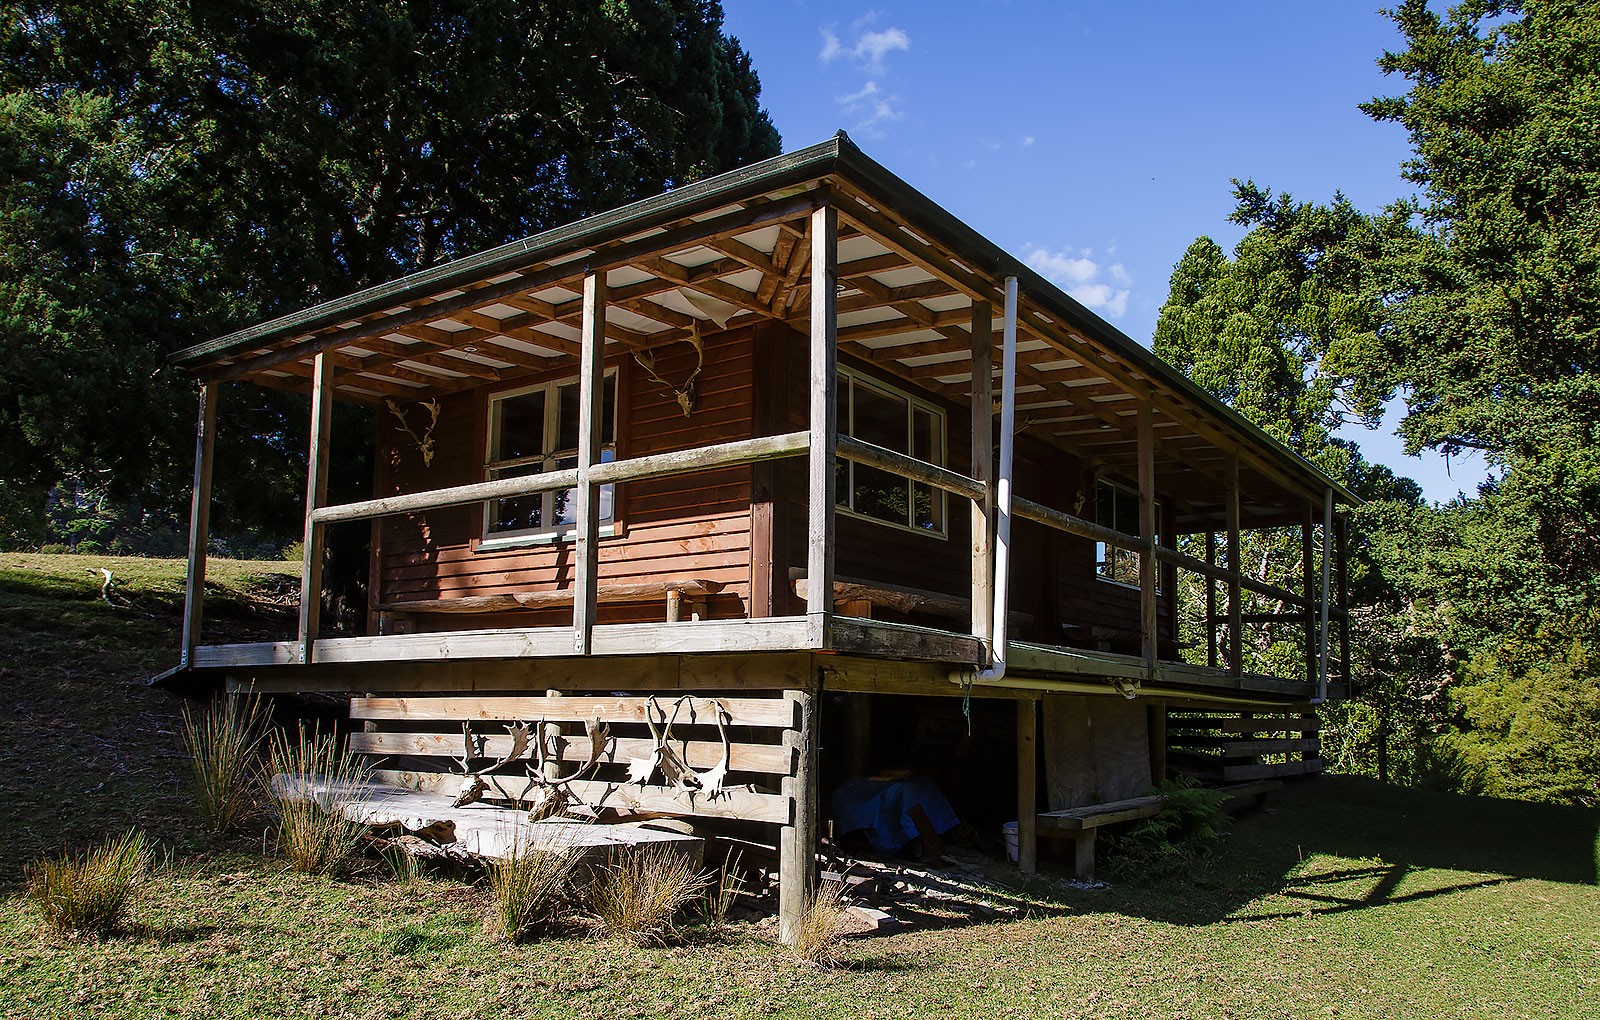
The Hunting Lodge
Often, a day/weekend hunting will start with Richard making you a cup of coffee, clearly explaining what is going to happen that day, the safety rules, tell you some great stories and then head off with you to the Hunting Lodge.
Think of the lodge as base-camp for your trip. For example, people will stay overnight at the lodge, enabling them to get up and get out at the crack of dawn, hunt for a bit, then head back to the lodge for a cuppa and a BBQ before heading back out at dusk.
The lodge has everything you need to be comfortable and also provides a well-sorted area for cleaning up and processing your deer. If it’s your first time out, Richard will take you through the process of skinning, gutting and separating out the meat – and then whisk it off to the chiller so it’s ready to go when you head out. This makes Balnagown equally suitable for beginners or experts. All nationalities are welcome. Richard can guide and show you whatever is needed to ensure your hunt is successful. He has had people head out who have never shot a gun before and people who are regular hunters that enjoy the environment he provides. If you need, he can supply the firearm, or you can bring your own.
Rifle, Bow or Camera
I took my camera and a 400mm lens out. I quickly realised that it was really, really difficult to get a good photo of an animal that didn’t want to hang around and pose for me. It forced me to try and get close as quietly as possible, then observe and wait for the right moment for that shot. Several times this meant me watching an animal, it getting a whiff of me or hearing me take a step and then bolting before I could get a good photo. It’s a great challenge.
Richard also has dedicated Bow Hunting areas. Pine Forests that are ideally suited to the long stalk and plenty of native bush to get tangled up in as well.
I think this is one of the great strengths of the service Richard is running. You just need to get in touch with him, telling him what you are after and he will make it happen for you. Meat animal? Easy. Trophy Hunter? Sure. The first-time shooter, Father and Son Groups, Company Client Hosting, he can make it happen. I am planning on heading up again soon with my partner to spend a night in the lodge and listen to the roaring (ok, so I might also take the rifle up with me).
Plug plug plug
This article might sound like it’s really just one big advert for Balnagown and in some ways it is. I have really enjoyed the time I have spent up there. Richard is so welcoming and knowledgeable and I could happily just drive around with him all day listening to his stories and knowledge about deer. You can learn so much from the man. Add to that the beautiful land he has up there, the broad range of animals and you have a great day/weekend out.
For the hardened veterans who have decided it’s not real hunting unless it’s in public land, well, fair enough. It’s not going to be for you.
For those who may have limited time in their lives for hunting and don’t want to head away for a weekend without even seeing an animal, I strongly suggest you get in touch with Richard and go and see what he has to offer.
Considering you have sole access to the 300 acres, the lodge and Richard right there to guide and help out, it becomes a cheap weekend experience and you are guaranteed to walk away successful.
Winter is coming and during the really cold nights, I enjoy taking a little tipple of my favourite whiskey out with me when I go bush. Many people do. However, it’s important to understand the actual effects that ingesting alcohol is going to have on the body. It’s not necessarily what you think.
The myth
Partially propagated by the image of the Saint Bernard and it’s life-saving cask of brandy, the suggestion has long been that a nip of some strong alcohol will warm the cockles and can potentially save your life when hypothermia threatens. Interestingly, the exact opposite is likely the case.
The reality is, the Bernard is most likely to keep you alive by snuggling up to you; by transferring some of its body heat to you.
The reality
What actually happens when you have a nip or two of a strong alcohol is that your blood vessels dilate (your blood doesn’t thin – another myth) and this causes your warm blood to move closer the surface of your skin, causing you to feel warmer temporarily.
However, what this is also doing is transferring your core heat to the surface of your body – dumping that heat to the outside world in the process. The result? You initially feel like you are getting warmer, but that heat is then going to be gone, leaving you even colder, and most dangerously colder at the core.
So. The takeaway.
If it’s cold out, but you are already wrapped up in a nice snug sleeping bag, undercover and not needing to conserve heat – feel free to indulge. But if you are looking at methods to increase or store your limited heat, potentially in a survival situation – avoid the booze. You will find that eating some food is going to be a better option for you. Or snuggling up to a warm dog (or person).
For those who have read my Ridgeline Monsoon review – you will know, that while I like the jacket, I did want something lighter and more suitable for a layer based clothing system.
Ideally, I was after a hard-shell that was going to be light, easily packable, and obviously waterproof.
Again, like the Monsoon – I was keen on a smock design – as I would generally be wearing either my full pack or my front-pack over it, so didn’t need pockets down low.
I had liked the look of the Hunters Element products – they looked like a progressive company that were pushing technical garments rather than just creating more products to fit into the market.
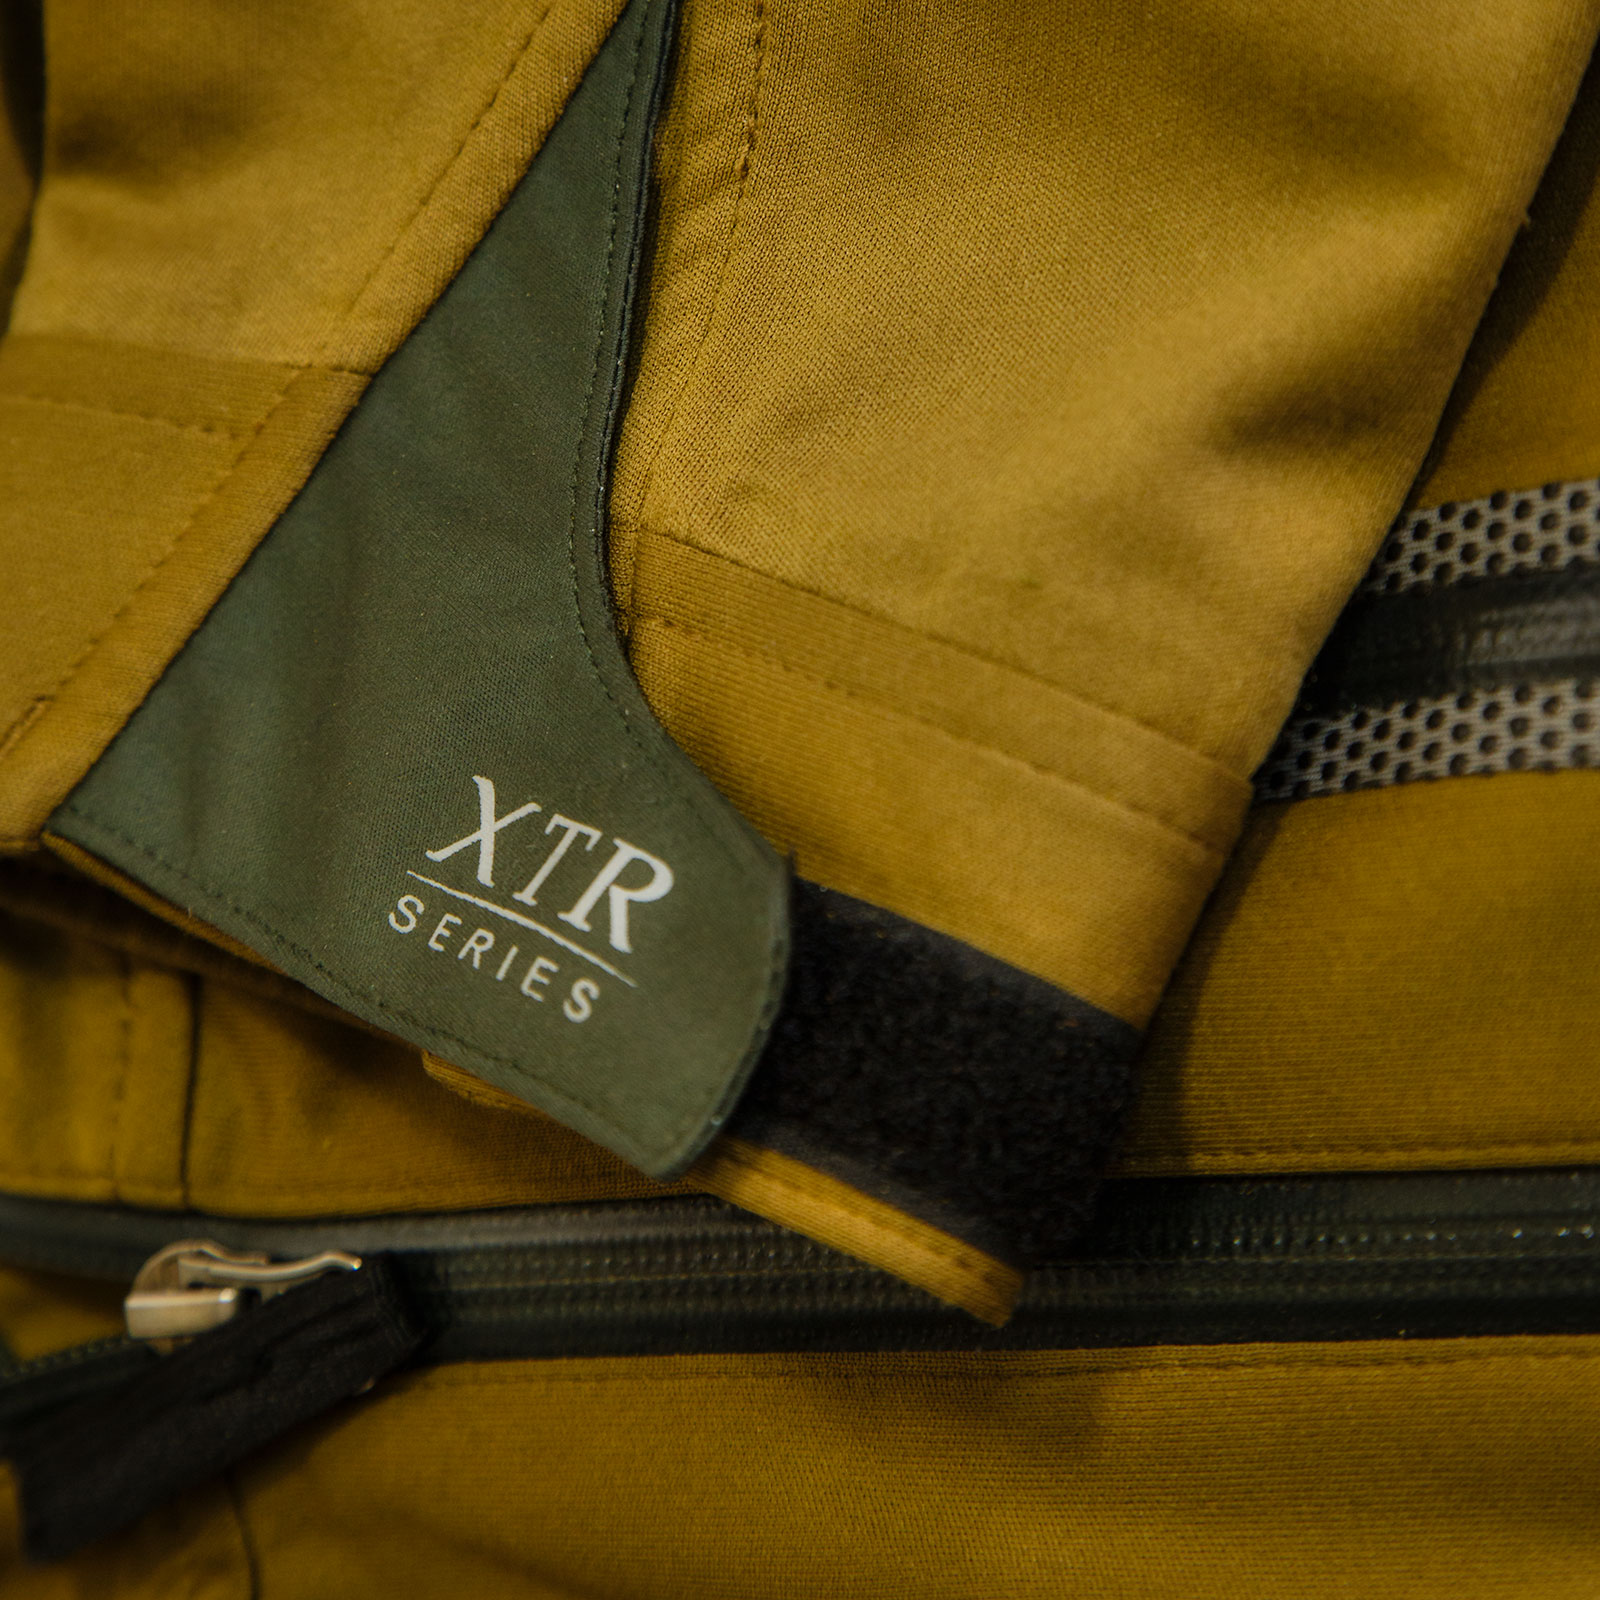
Light Weight and Packable
Because I was looking at a system that would ultimately spend most it’s time in my pack (weather permitting) – light and packable was important to me. The XTR Extreme Hunter Jacket is certainly both. At 690 grams it’s light – and can roll down into about half the size of my Monsoon. This basically means it’s a no-brainer to include in everything from overnights to day walks – just-in-case things get a bit wet.
Waterproof and Quick Drying
Obviously, a hard shell jacket is fairly pointless if it doesn’t keep the water out. This jacket does.
The XTR Extreme Hunter Jacket is made of Hydrafuse PacSTEALH material. This material has a soft to the touch outer, not as soft as Brushed Tricot, but not as slick as GoreTex or Event. It means it’s a lot quieter than the Gore/Event fabrics, though not quite as quiet as the Tricot or Fleece would be. I don’t really view this as an issue – if I am wearing the jacket, it’s raining, so a little more sound is going to be covered by the rain coming down anyhow. Additionally, single layer fabric system that means the jacket can be lighter (no multiple layers).
I had been wearing it a lot, and the DWR (water repentance) has been worn in a few places – so I recently re-coated the jacket. Good as new!
Design and Functionality
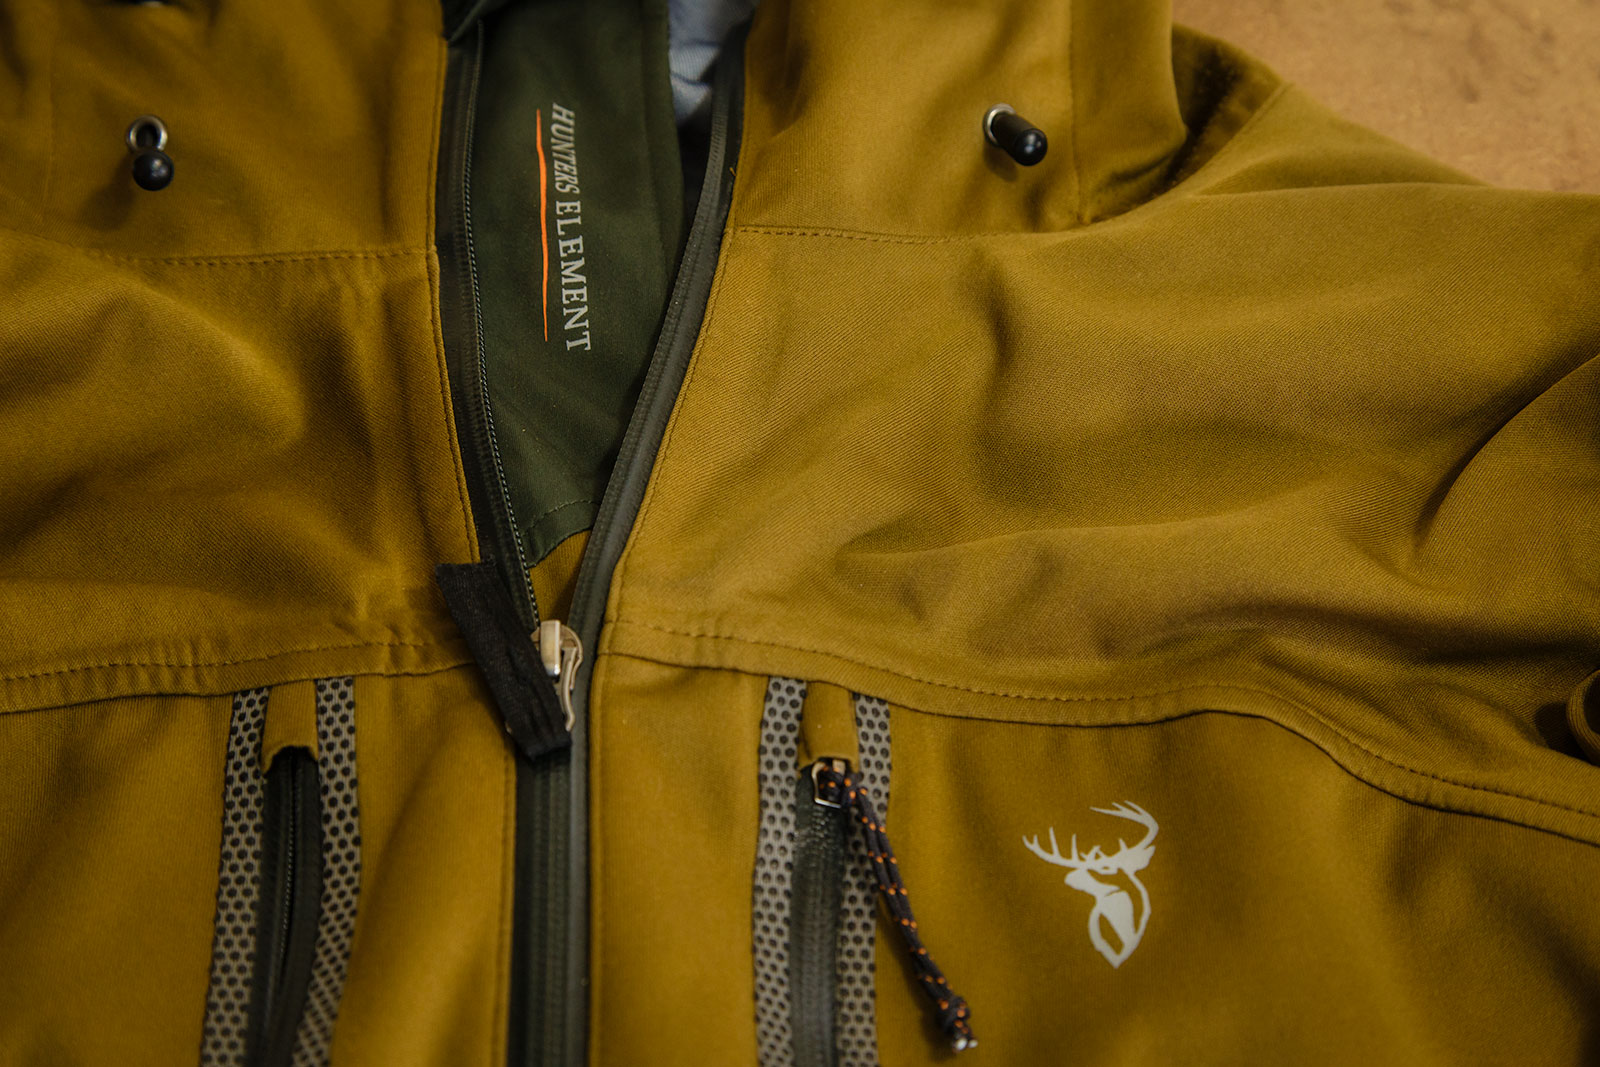
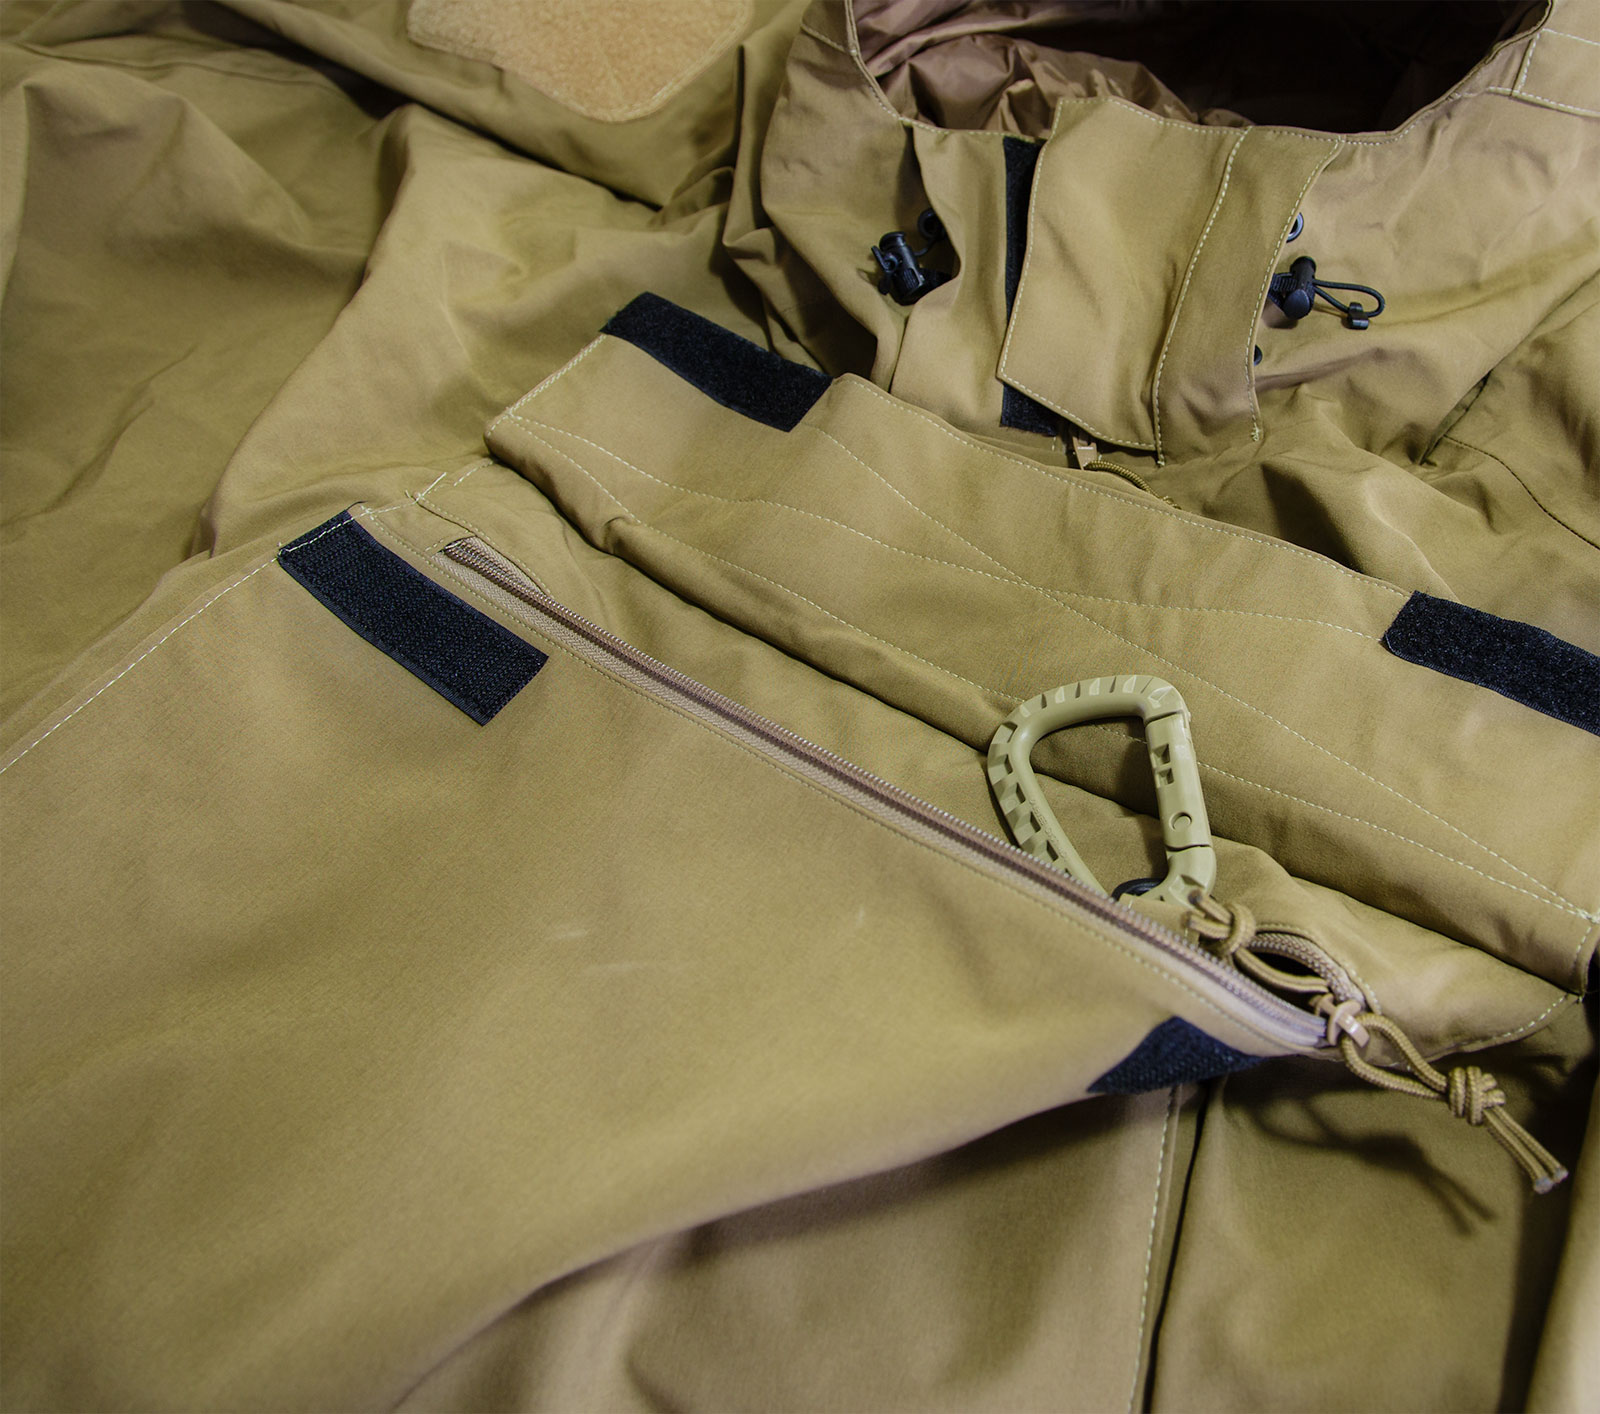
As I mentioned, I like the idea of smock jacket designs – less opening for water to get into, less zips to rub against pack straps – so the design of the jacket appeals to me – 2 large pockets are big enough to store maps or binoculars without any issue, and are waterproof as well. The hood fit’s well and is adjustable depending on how tight a fit you like, and the cuffs and waist can be cinched down nice and snug if the wind gets up. Overall, I like the look of the jacket as well – I have it in the High Country Brown – which means I can just as easily wear it around town as I can in the bush without it looking out of place. This means the jacket is also ideal for trampers and backpackers that want a jacket that is technical, but not in the bright colours that many of the local manufacturers like to produce ‘outdoors’ clothing in. Not everyone wants’s to stand out.
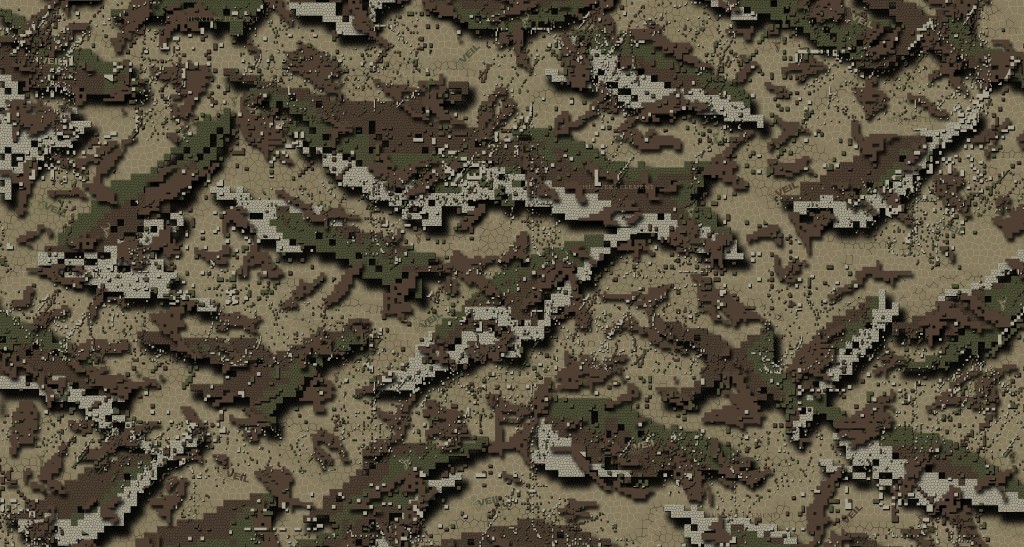
Veil Camo
While I have mine in brown – Hunters Element recently also released the jacket in their new Veil Camo – a disruptive, high contrast pattern that heads away from the traditional hunters ‘photo realistic’ camo, and into the realm of digitally generated camo. I had been a fan of the camo’s coming through like ATACS FG, Kryptex Mandrake and Pencott GreenZone camos – soana NZ version was welcomed – the NZ army has recently transitioned from their tradition DPM to a disruptive pattern – so it’s certainly looking like the way camo is going to develop.
In summary
I really like this jacket. I gave it a bit of grief recently by trying to push through some Bush-Lawyer – which has caused a few marks on it – but that’s my fault – a future article is going to discuss more about appropriate clothing for bush bashing – a technical jacket is not it.
Regardless, this jacket is coming with me whenever I head out – when the sky starts to open up, it’s going on!
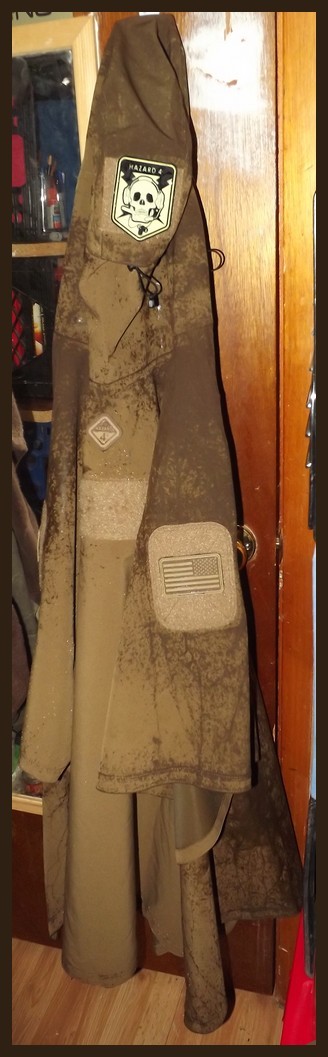
The idea of a poncho for outdoor use has long fascinated me. The ability to cover everything, pack & pouches becomes important when you have a pile of electronic equipment (Cameras) attached to the outside of the pack. In my case, I carry my 5d mk III in a Hazard 4 Camera Pouch – which sits on my hip – outside any waterproofing I might have in my pack, and while the camera is weather resistant, when it starts pouring down, I generally have to take it off my hip and pack it deep down somewhere inside my drybags in the pack – meaning I can’t get it out quick if I spot something I want to photograph. Having something over the top of all of this gear, enabling quick access to the camera appealed immensely.
A tale of two ponchos
I already had purchased a Poncho – one from the Pathfinder School – and I haven’t gotten around to review that yet (coming, coming), but I had my eye on the Hazard 4 Poncho Villa as well… and you know… more gear! I will also get a comparison video of the two up at some point – as they are both good items – with slight different advantages.
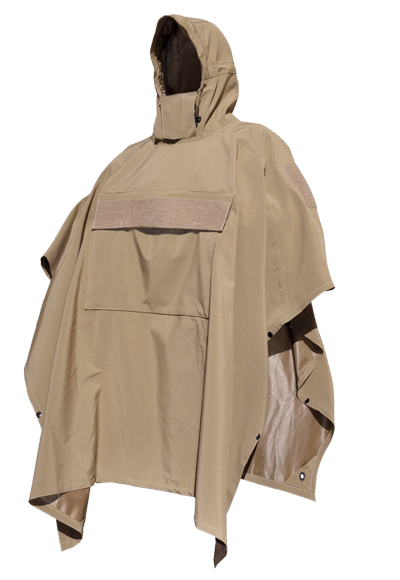
Features
water-resistant/breathable soft-shell fabric
generous size to fit over packs/bags/chest-packs
large front & back velcro panels for agency i.d.
ample hood with brim section fits over head-wear
hood-sinchers for front and back-of-head adjust
zipper front to chin for full rain-coverage of throat
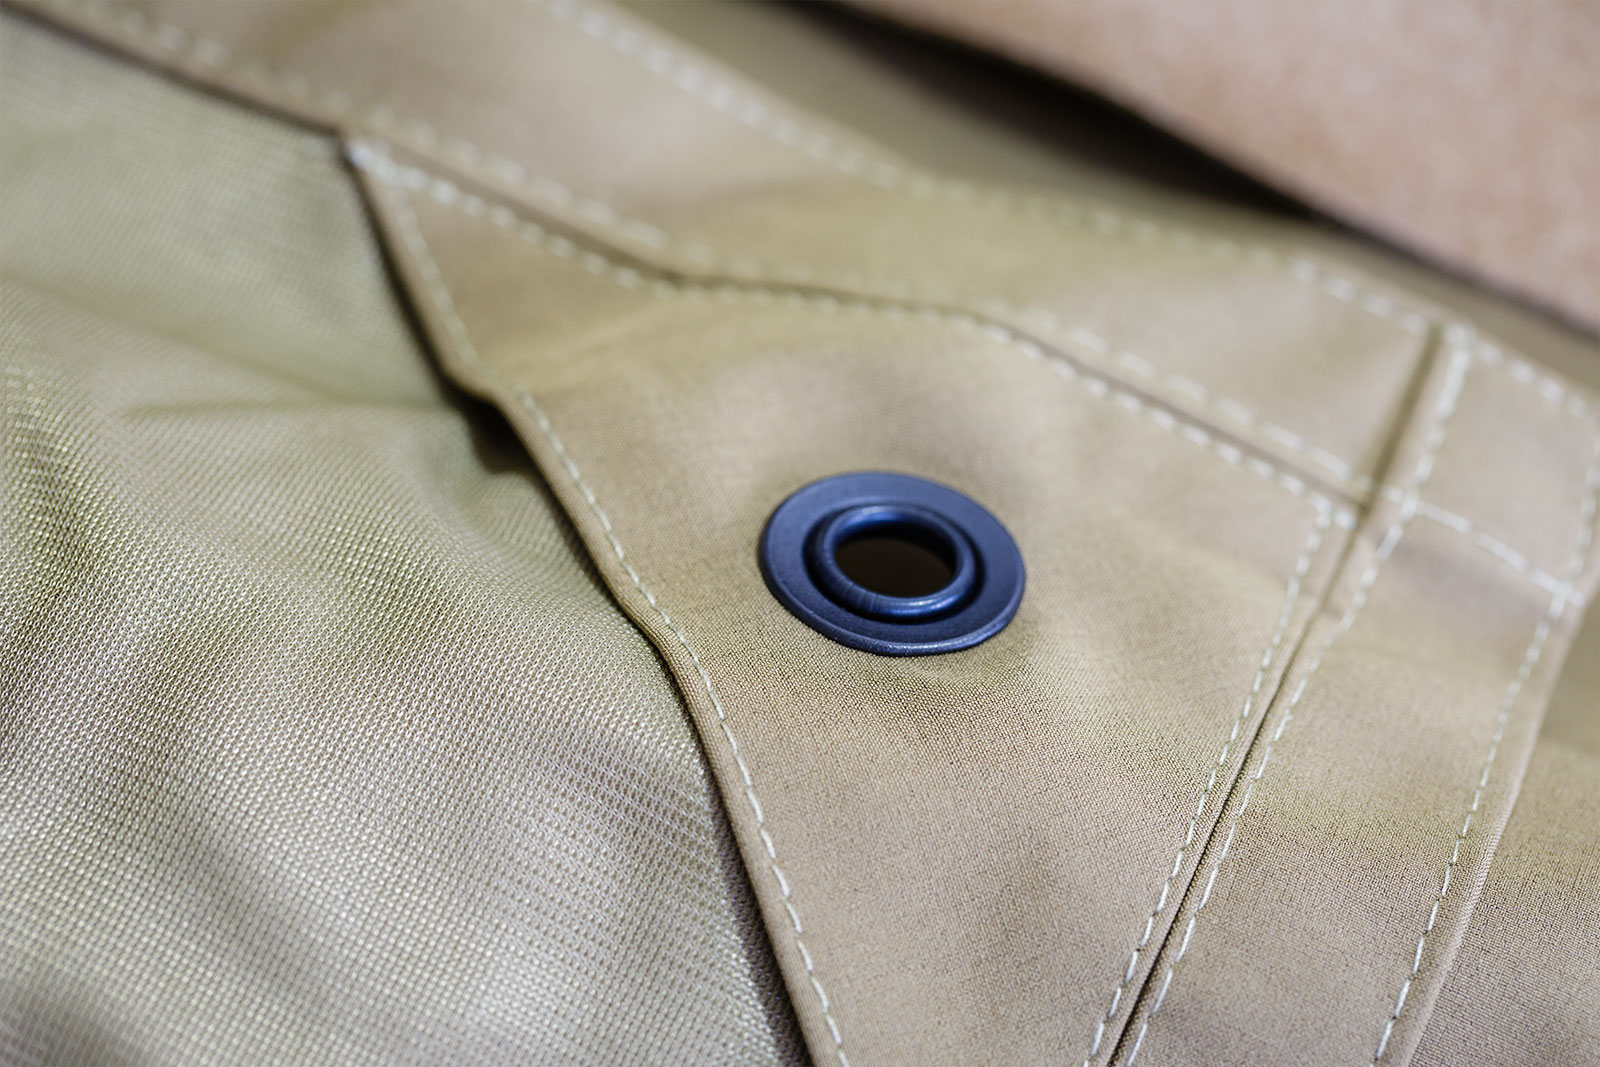
large perimeter grommets for hanging as tent/tarp
side snaps for closing edges in severe weather
I am going to give the poncho a re-treatment with a NikWax wash through – mainly because I have become converted to the idea that nearly any waterproof product can be improved by doing so. But I have already had it out in the wet – and yes, it beads water.
I like the fit of this jacket – as wanky as this sounds – it looks good – much better than most the totally shapeless options out there. They have taken the idea of a poncho and thoroughly modernised it.
Little features – like the front pocket / storage bag, with it’s little attachment point for items, just indicate the amount of thought that has actually gone into the Hazard 4 Poncho Villa. I could consider it a little on the heavy side, but considering it doubles as a tarp, I can live with it. Talking of tarp use – it’s a little small for the hammock – my feet will pop out the end – but if I am going minimal, this and a bedroll will work just fine.
Update – another opinion
I was contacted today by a gentleman from Northern Ontario who has sadly had a very different experience with the poncho – his one isn’t particularly waterproof. Seems to wets up really, really quick.
I really do have to wonder if sometimes something quite drastic happens to these technical garments while in transit, as I have had a jacket that was similar – fixed it with a retreatment, but I don’t really think it’s something you should have to do with a brand new garment.